The post ///Metamorphosis: 135i to 1M, and Beyond appeared first on BimmerLife.
]]>
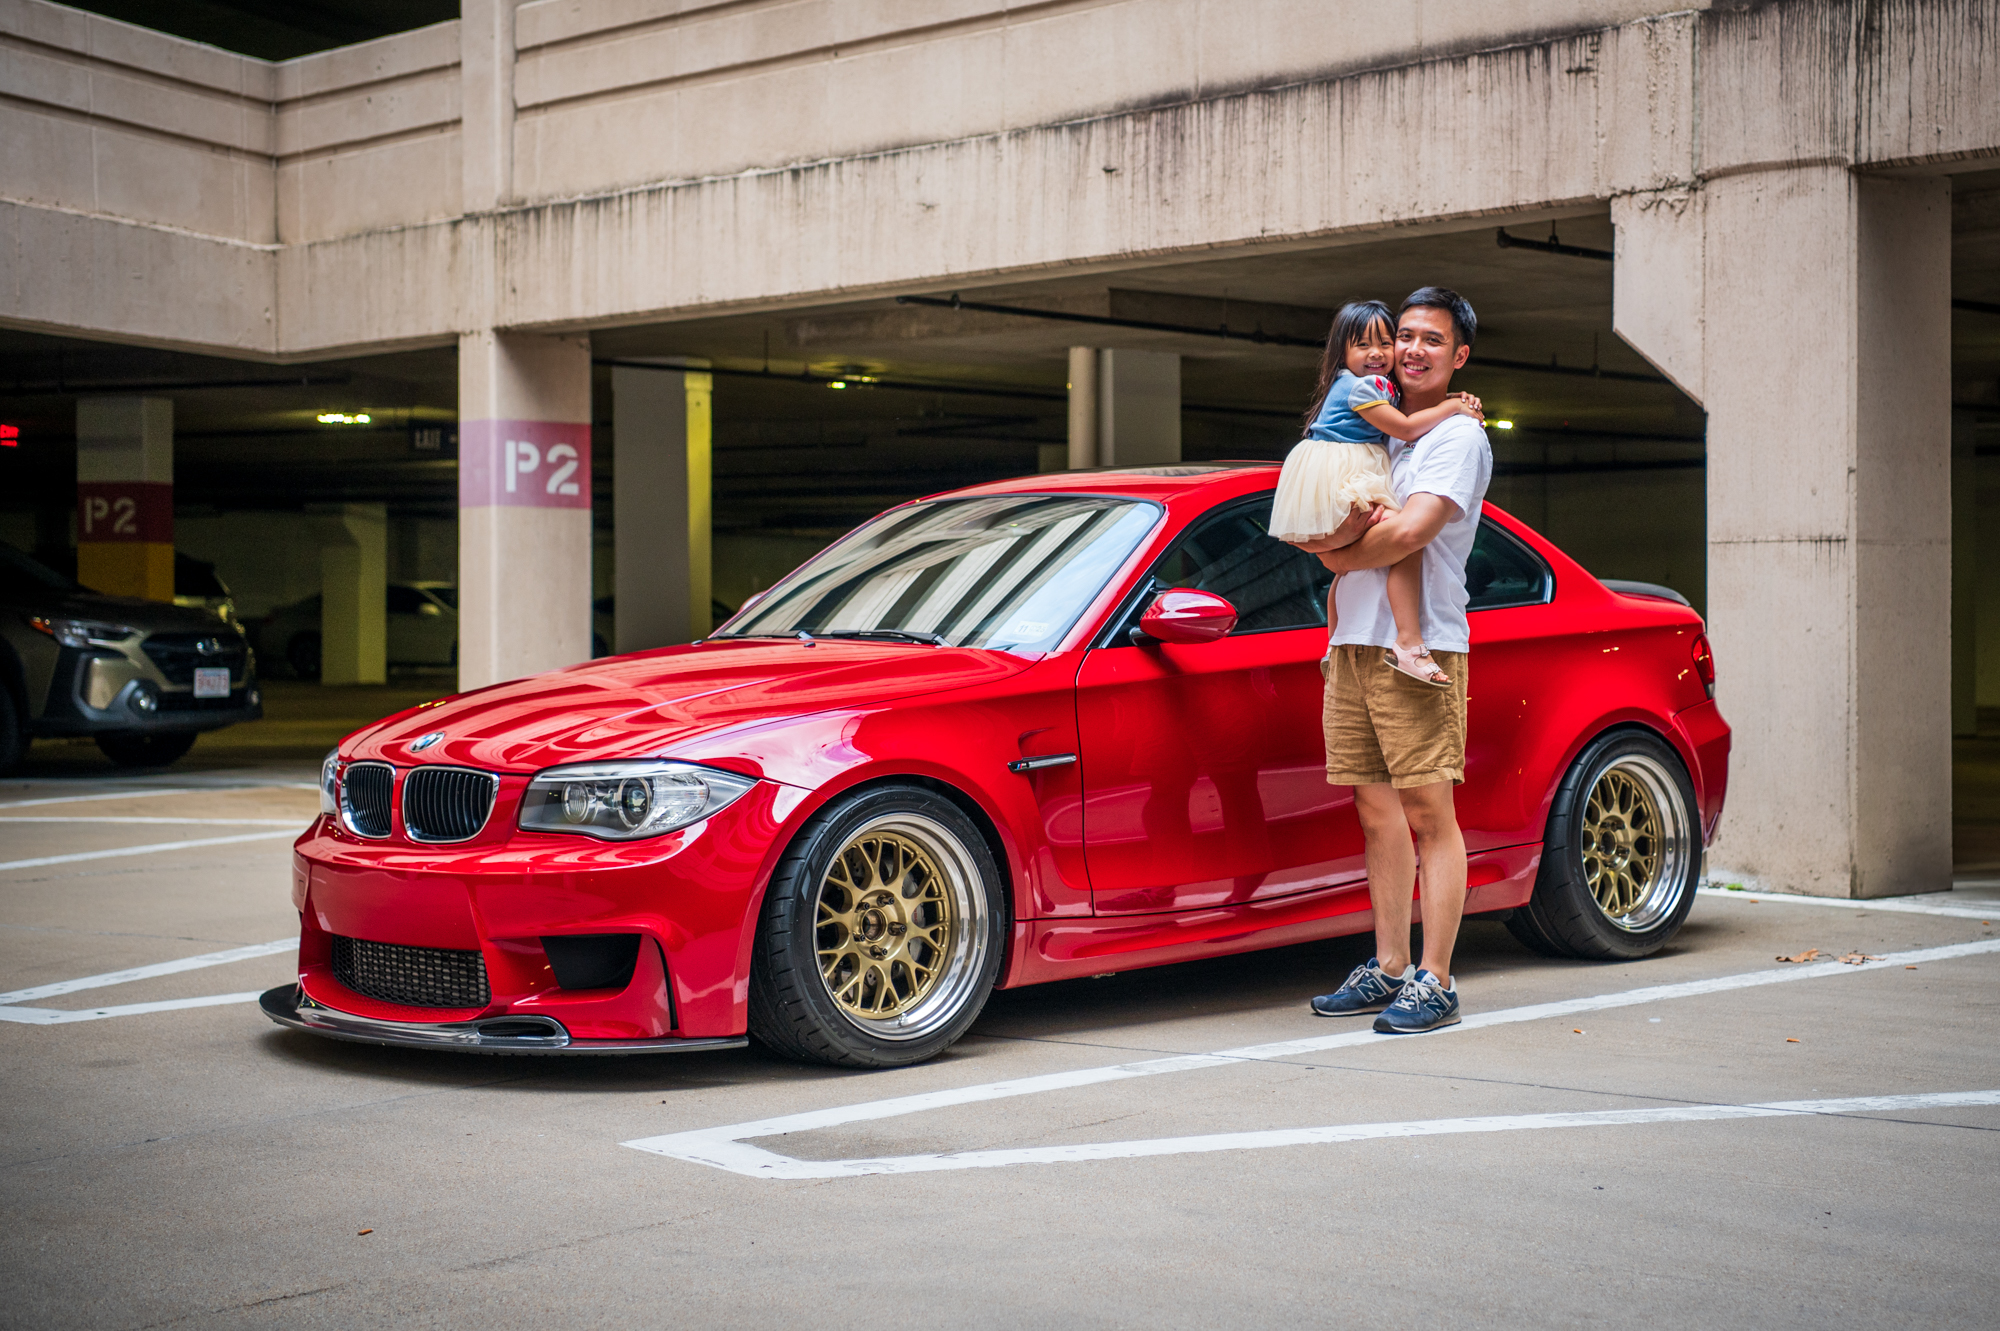
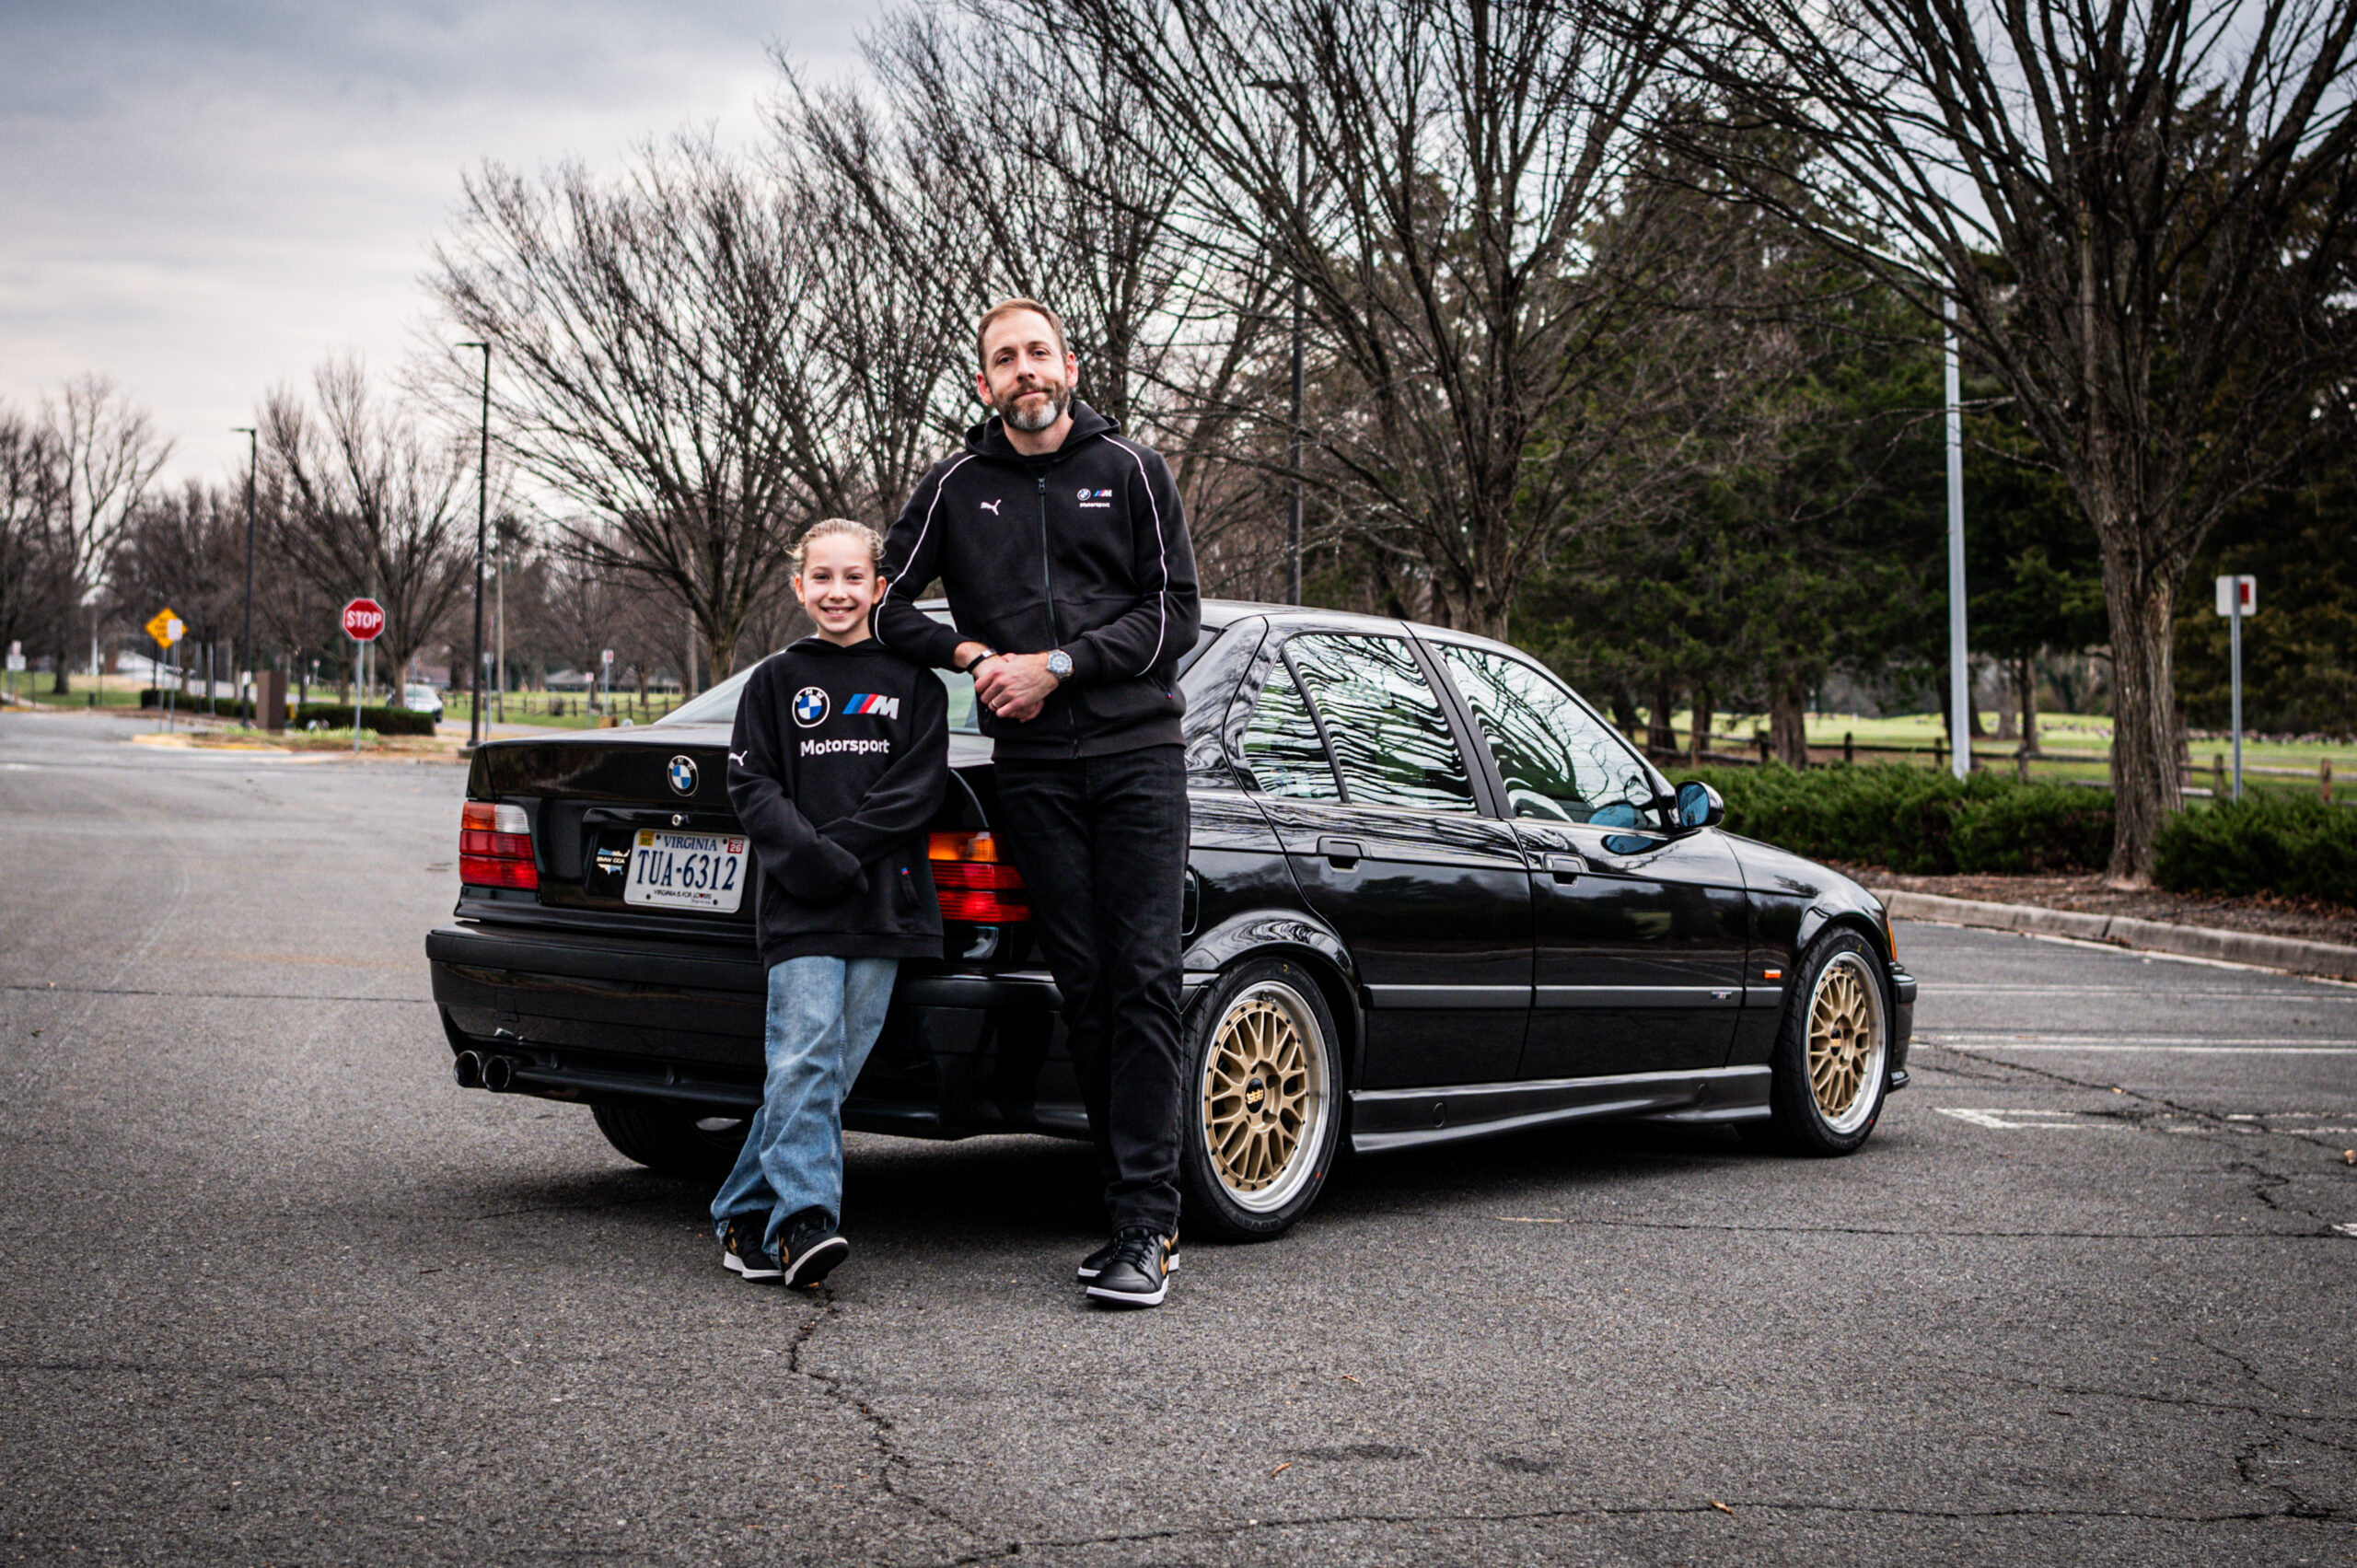
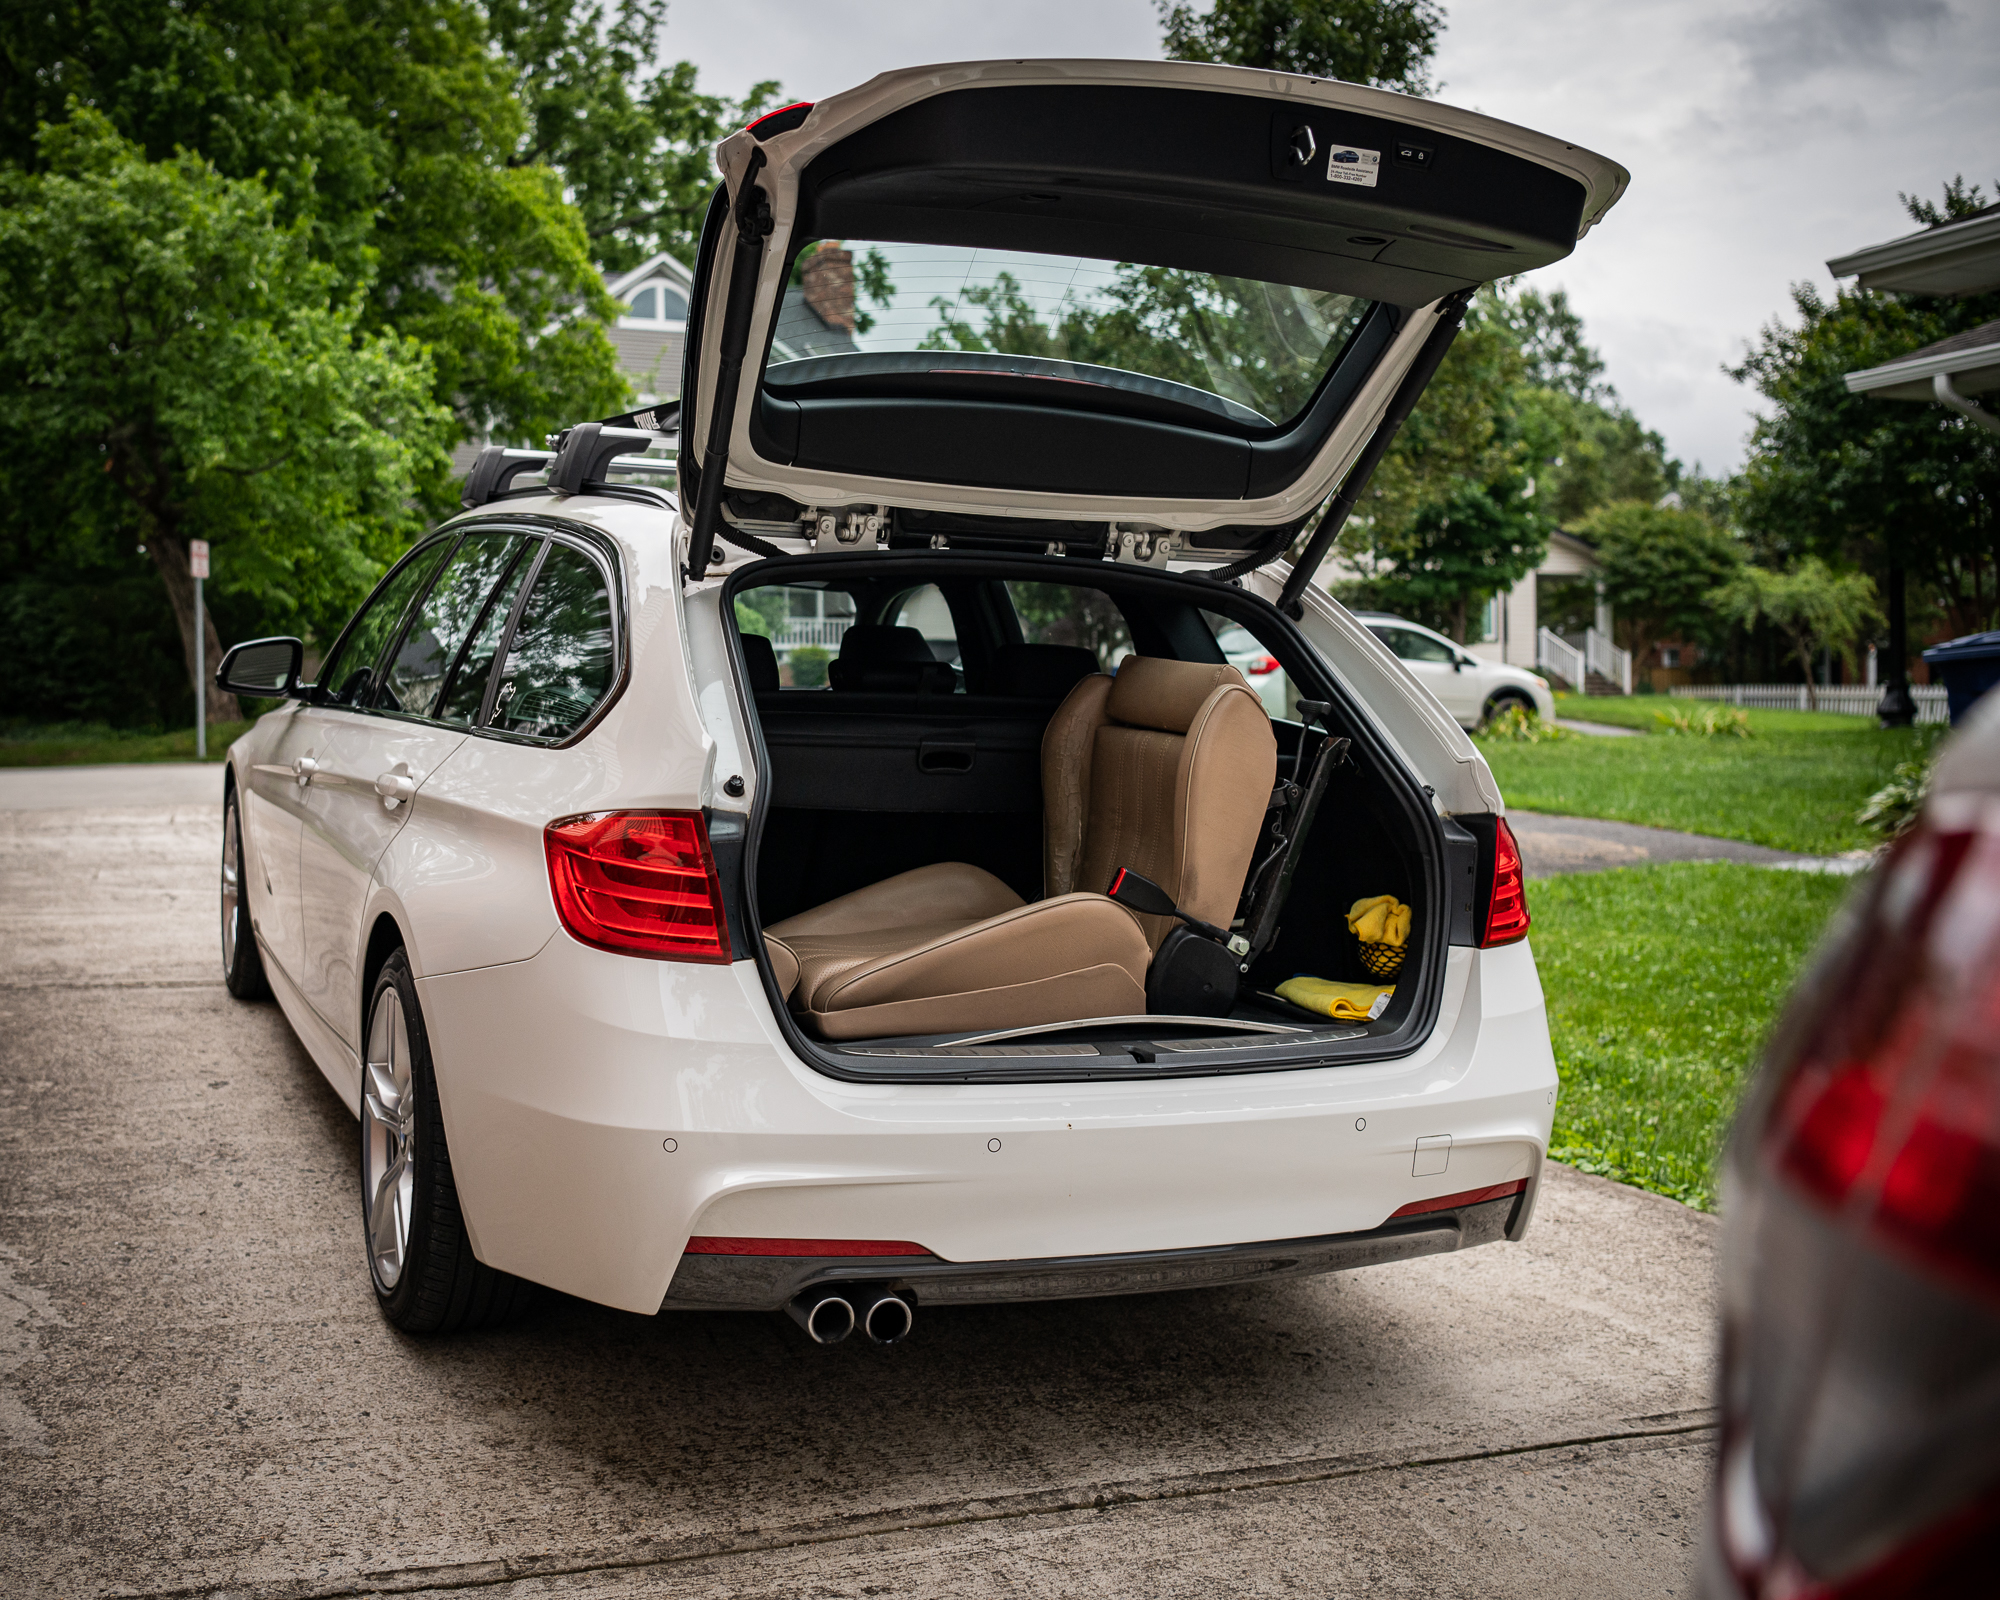
Mila was more than willing to be part of our photoshoot!
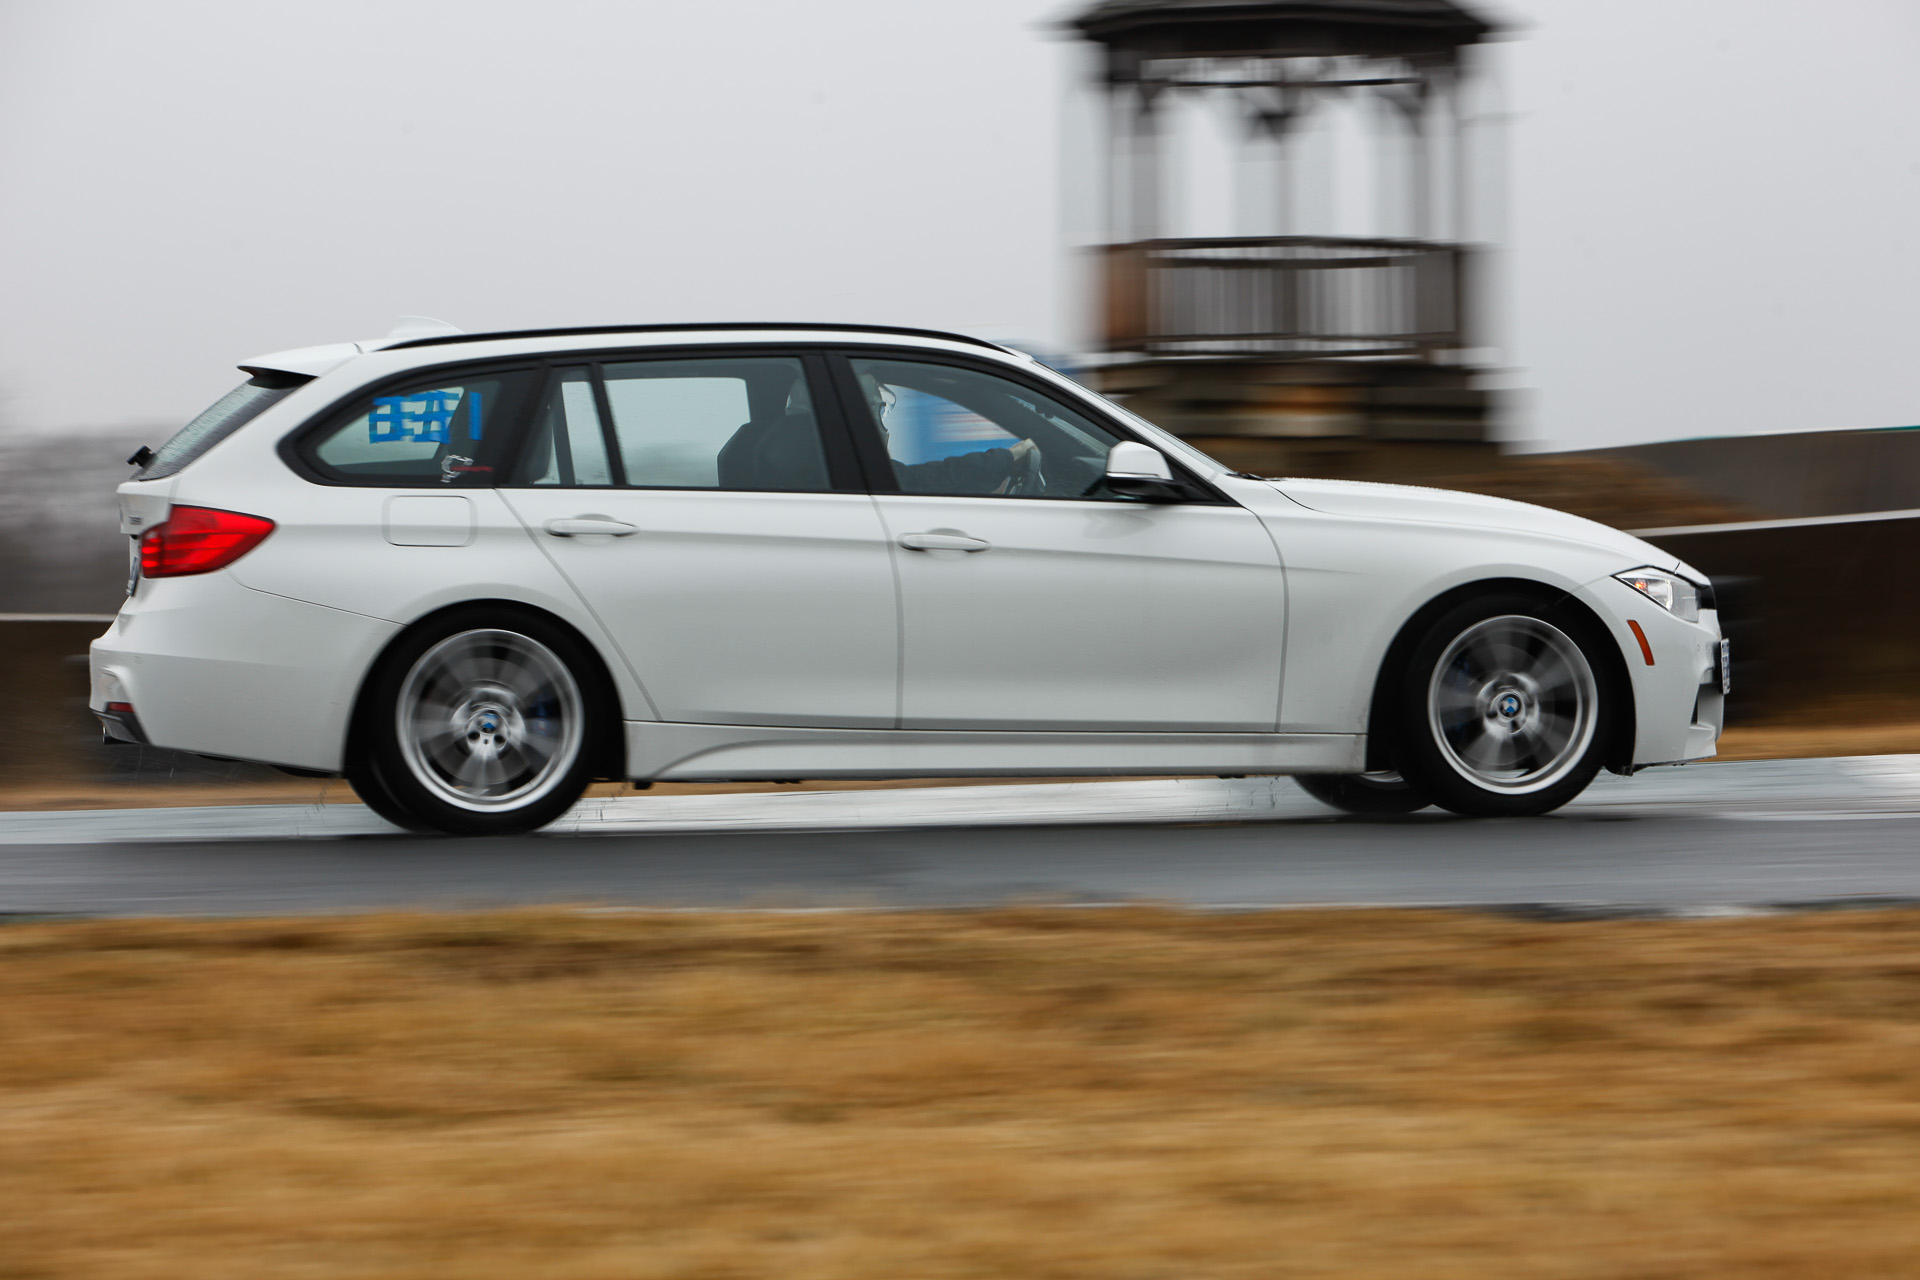
The E8x 1 Series chassis was introduced in 2007, coming in a variety of flavors across the globe. The U.S. market initially received two variants, the E82 coupe and E88 convertible, powered by 3.0-liter inline sixes: the 128i’s normally aspirated N52 and the 135i’s twin-turbocharged N54 (which was replaced with the N55 in late 2010).
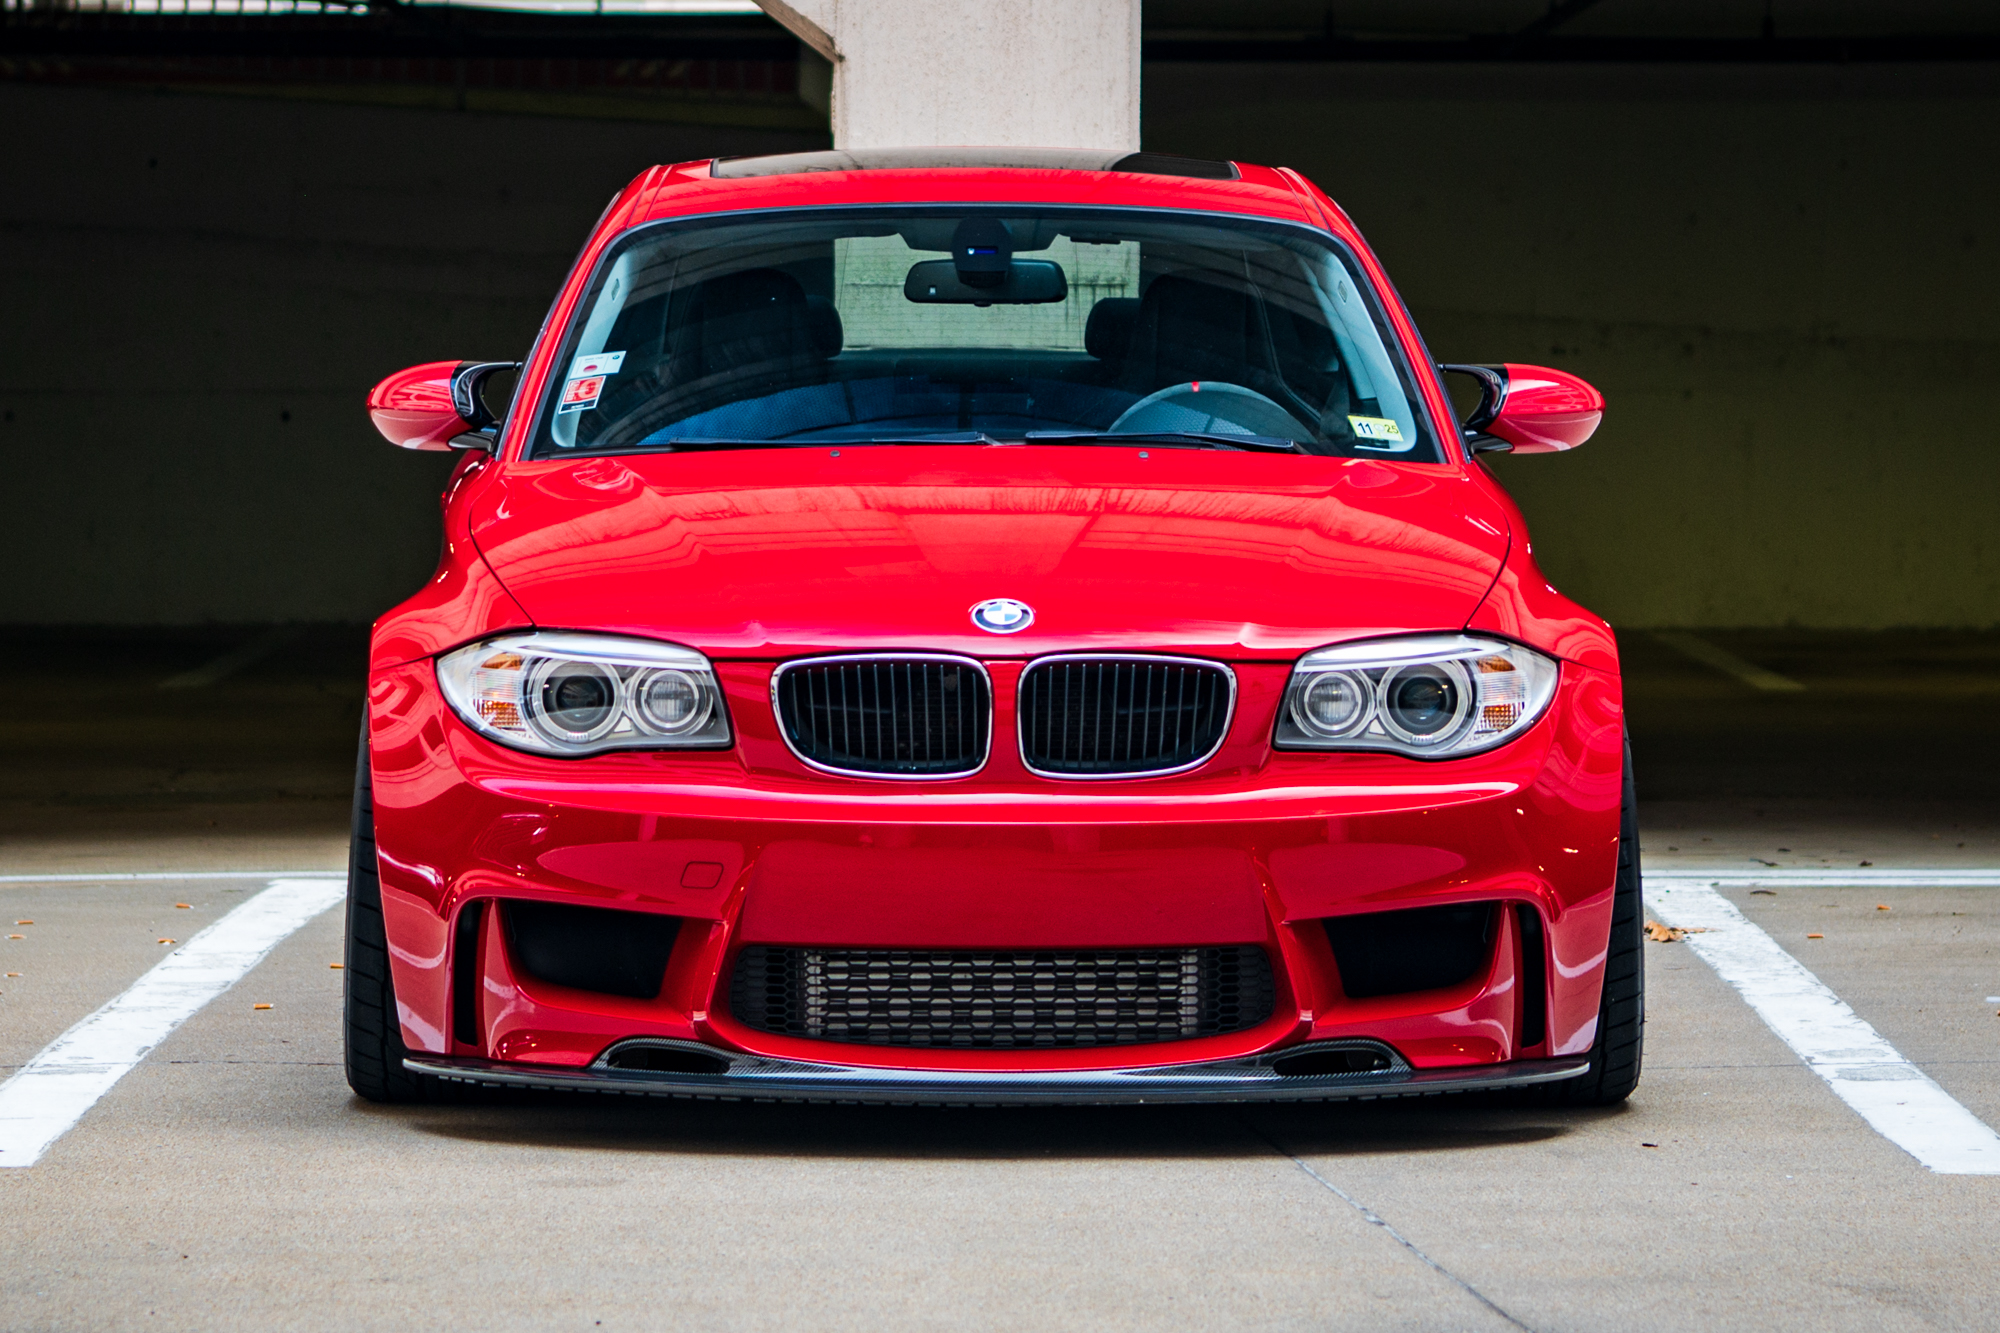
The 1M came onto the scene for the 2011 and 2012 model years, thanks to a small skunkworks team within BMW M that raided the M parts bin to build this beastly 1 Series. The E9x M3 donated brakes, the rear subframe, the rear differential and axles, various suspension components, as well as the Competition wheels and side mirrors. The N54 3.0-liter twin-turbocharged straight six came from the Z4 sDrive 35is, producing 335 horsepower and 370 pound-feet, and propelling this 1 Series rocketship to 60 in under five seconds.
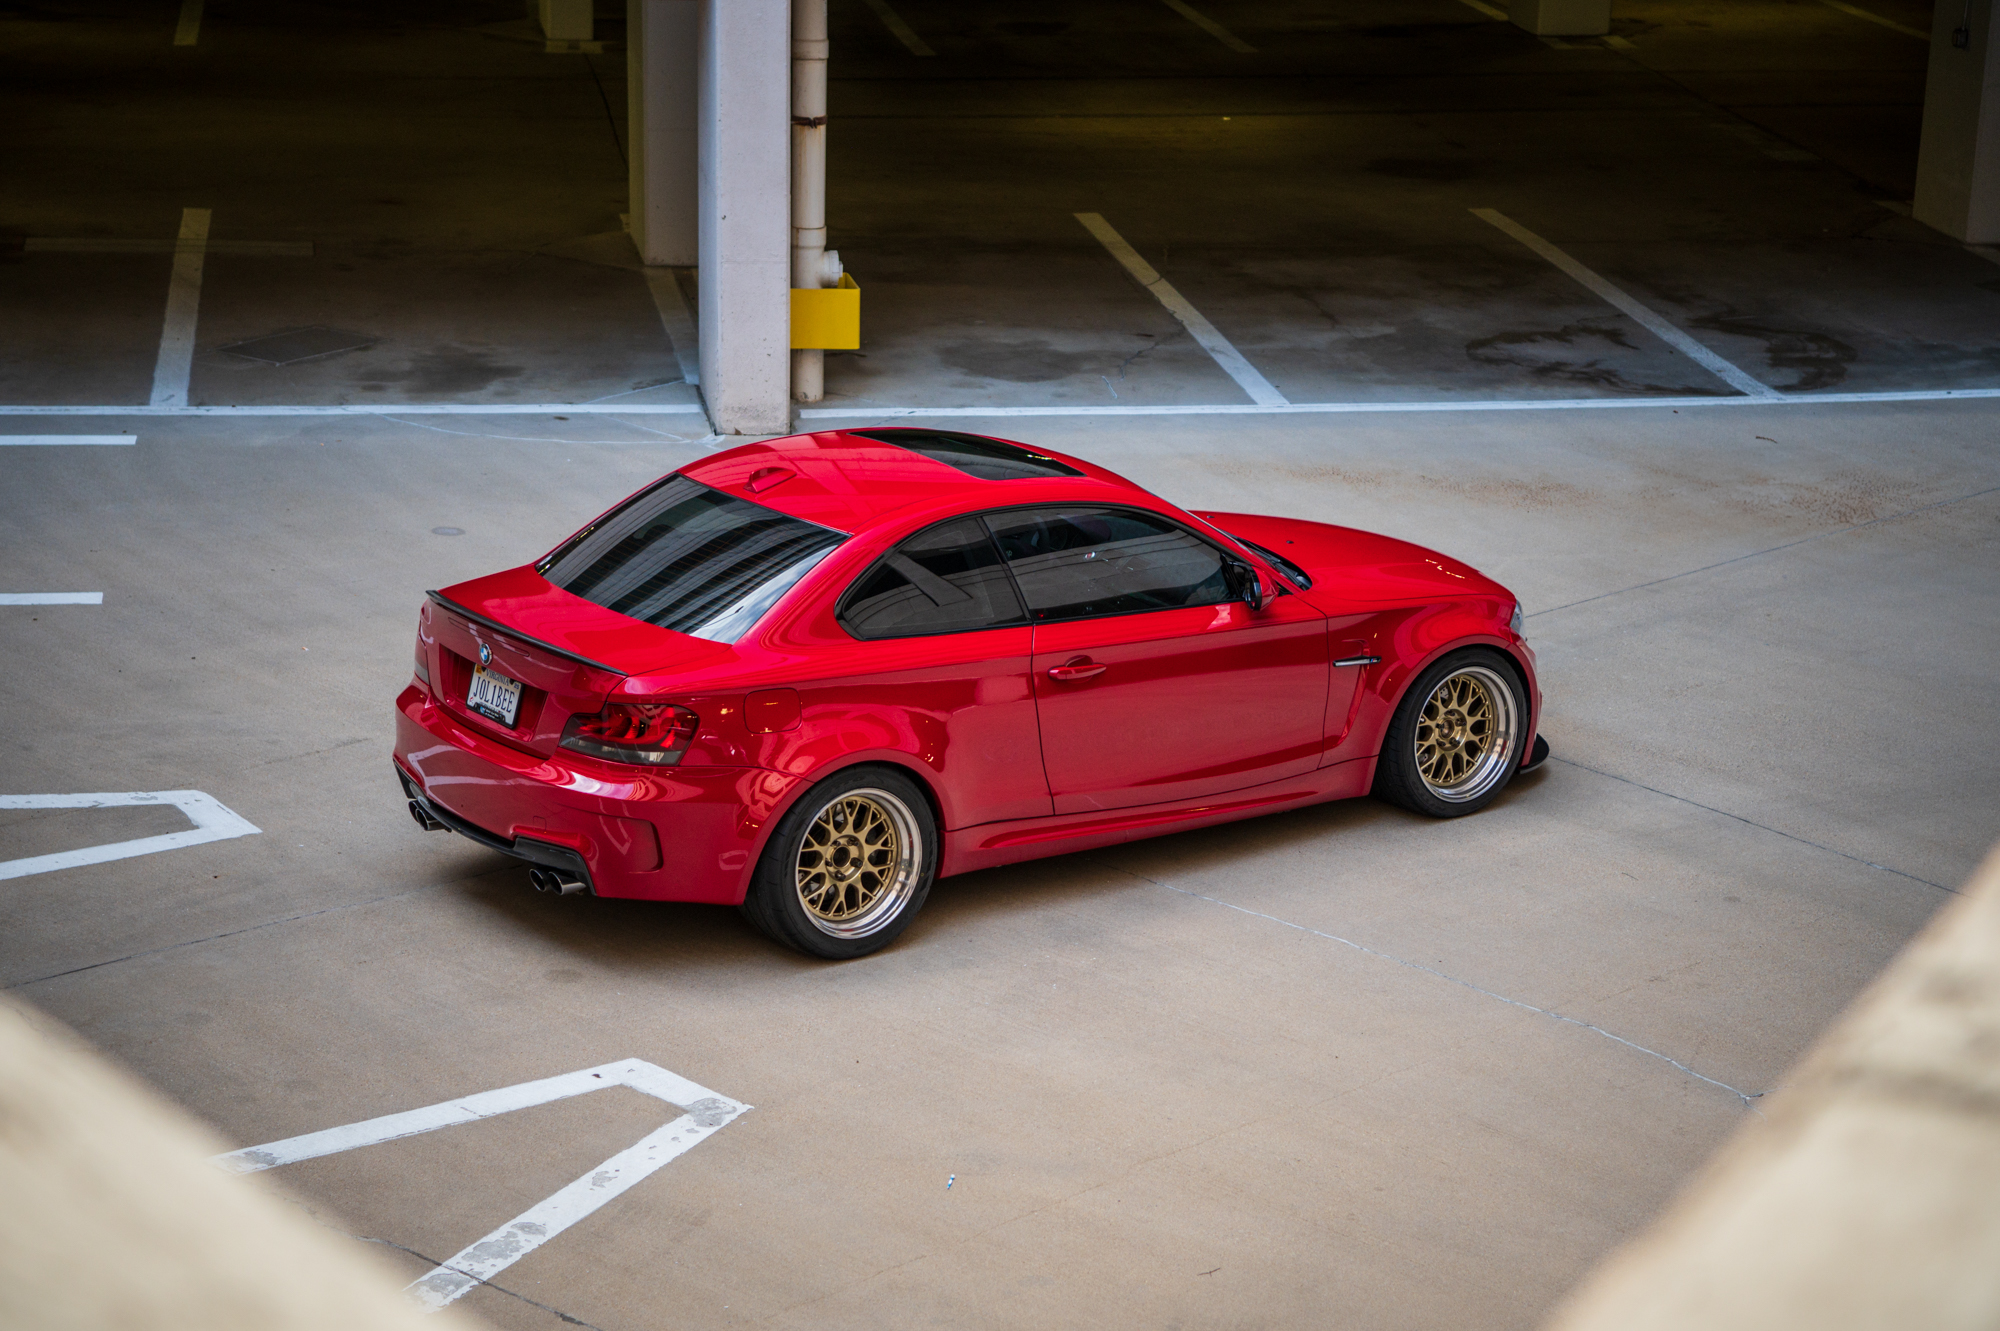
Beautiful at any angle.
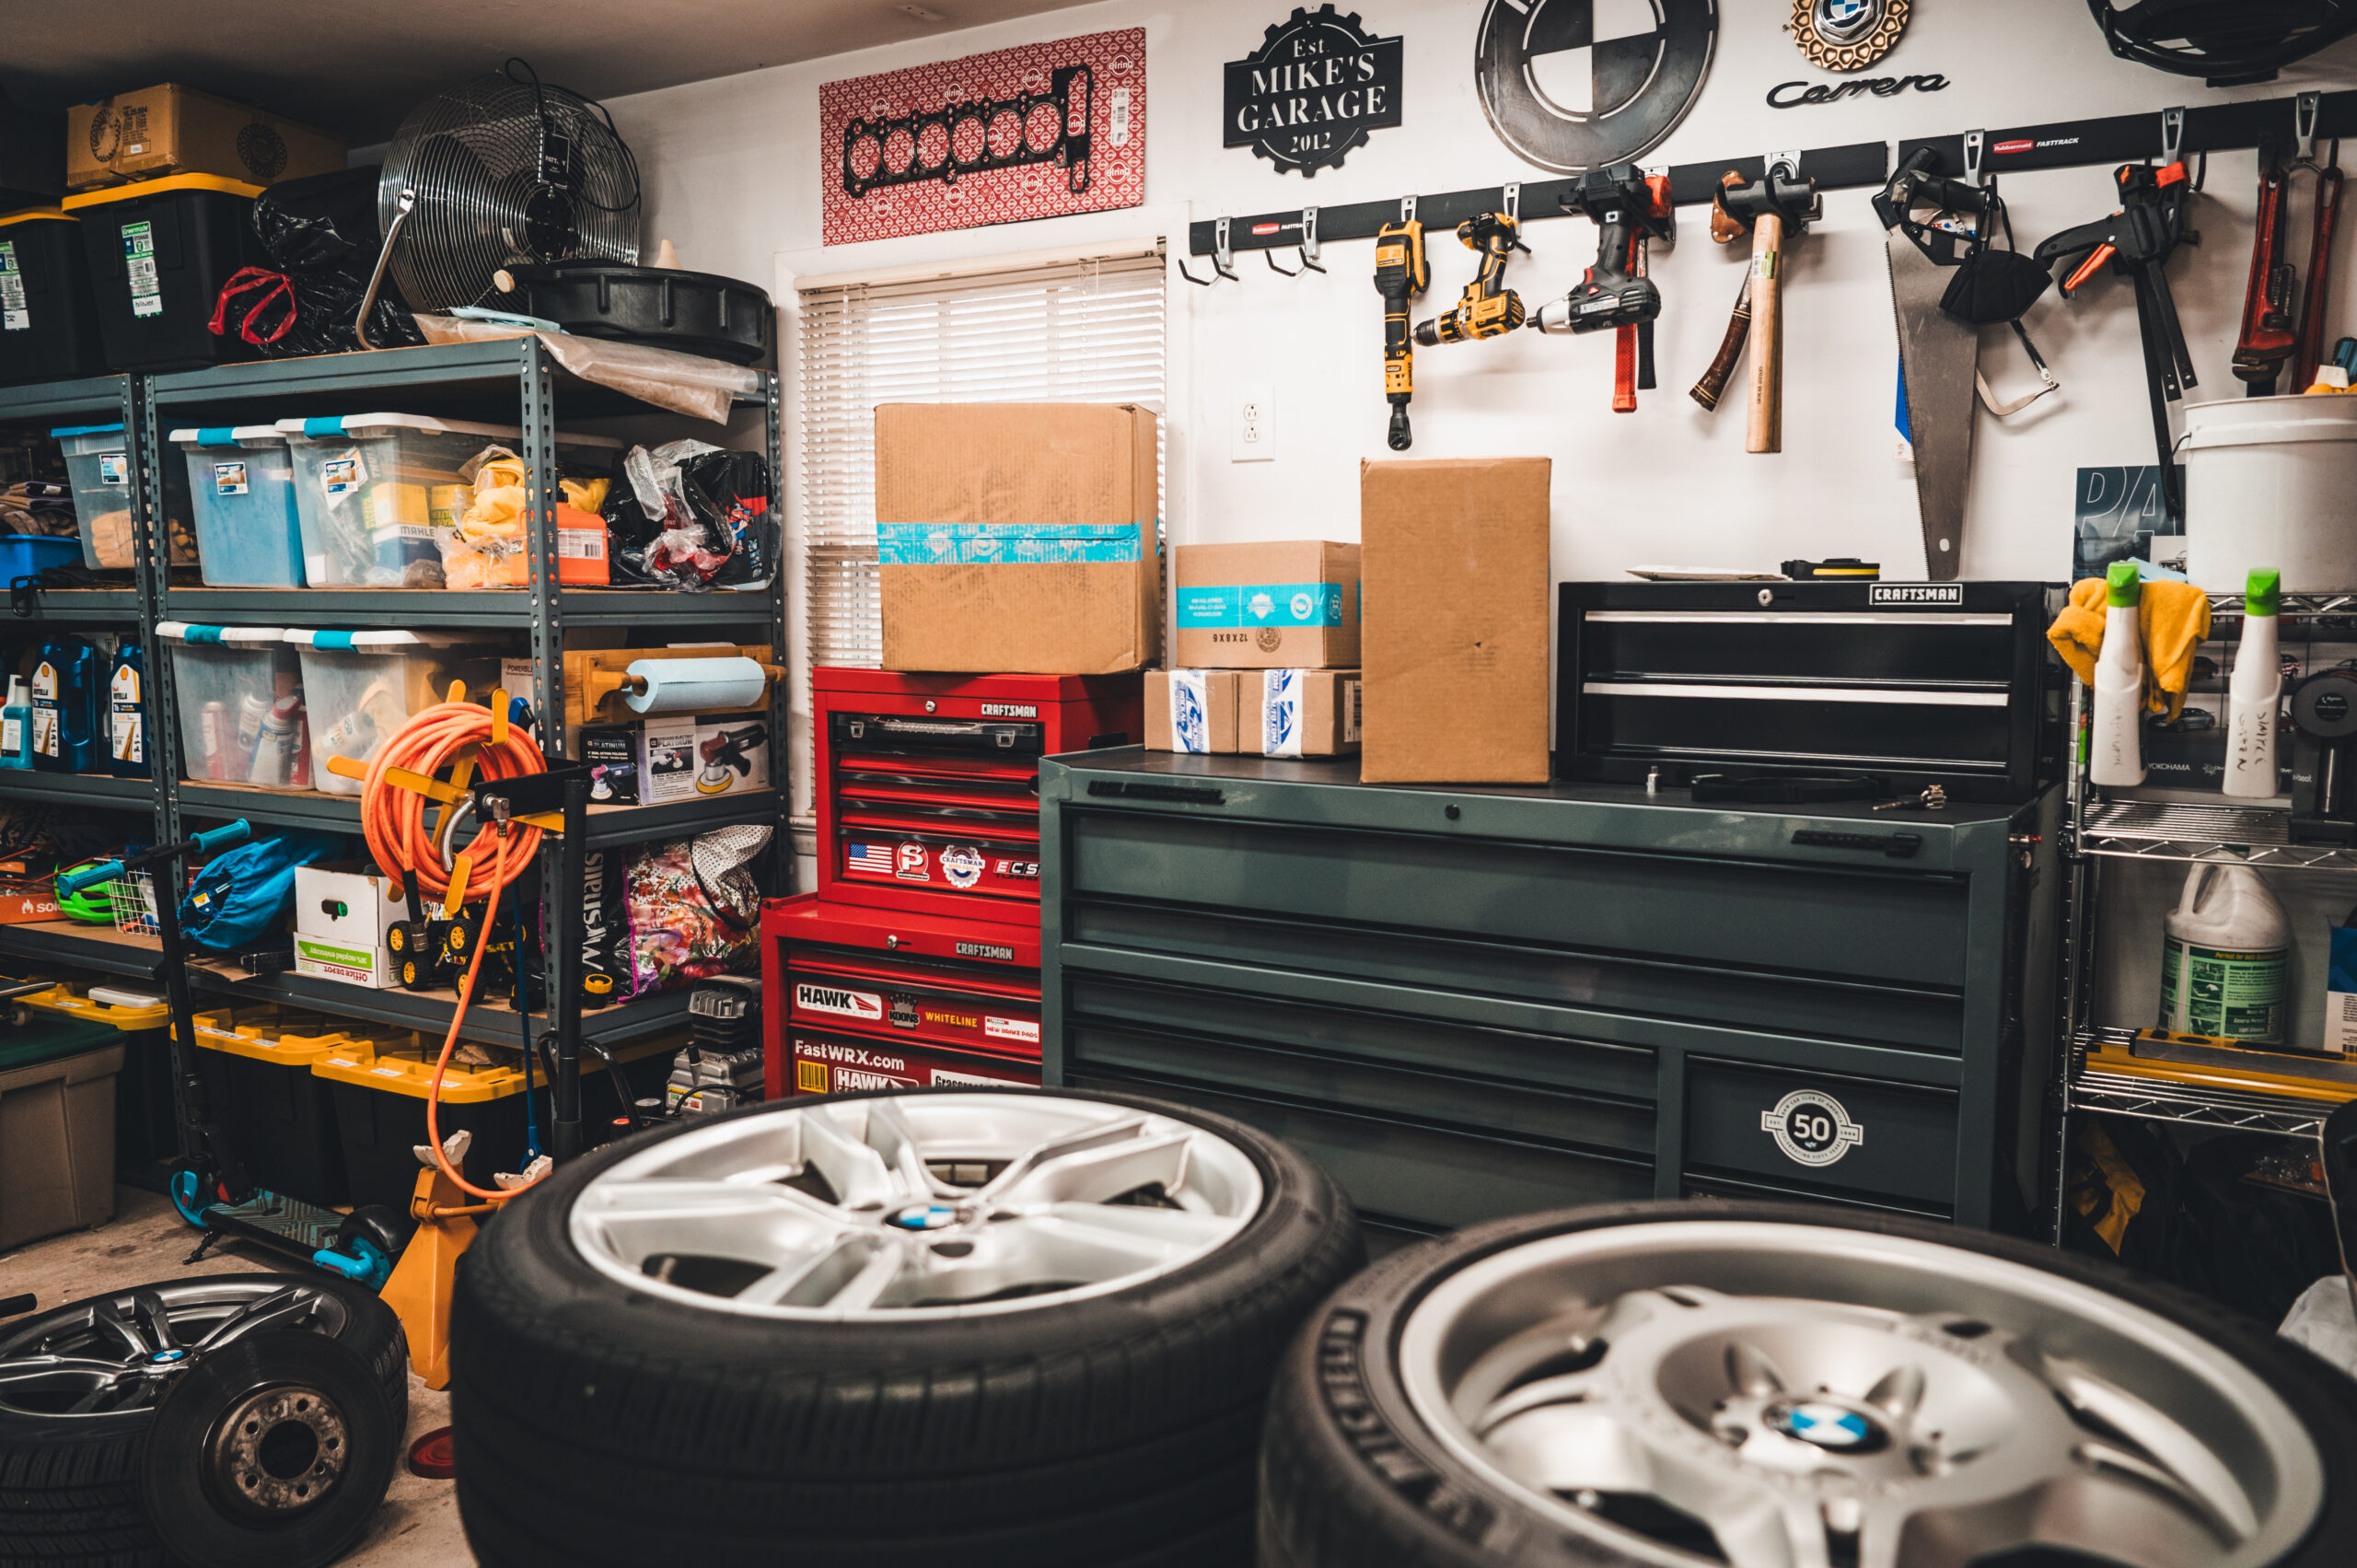
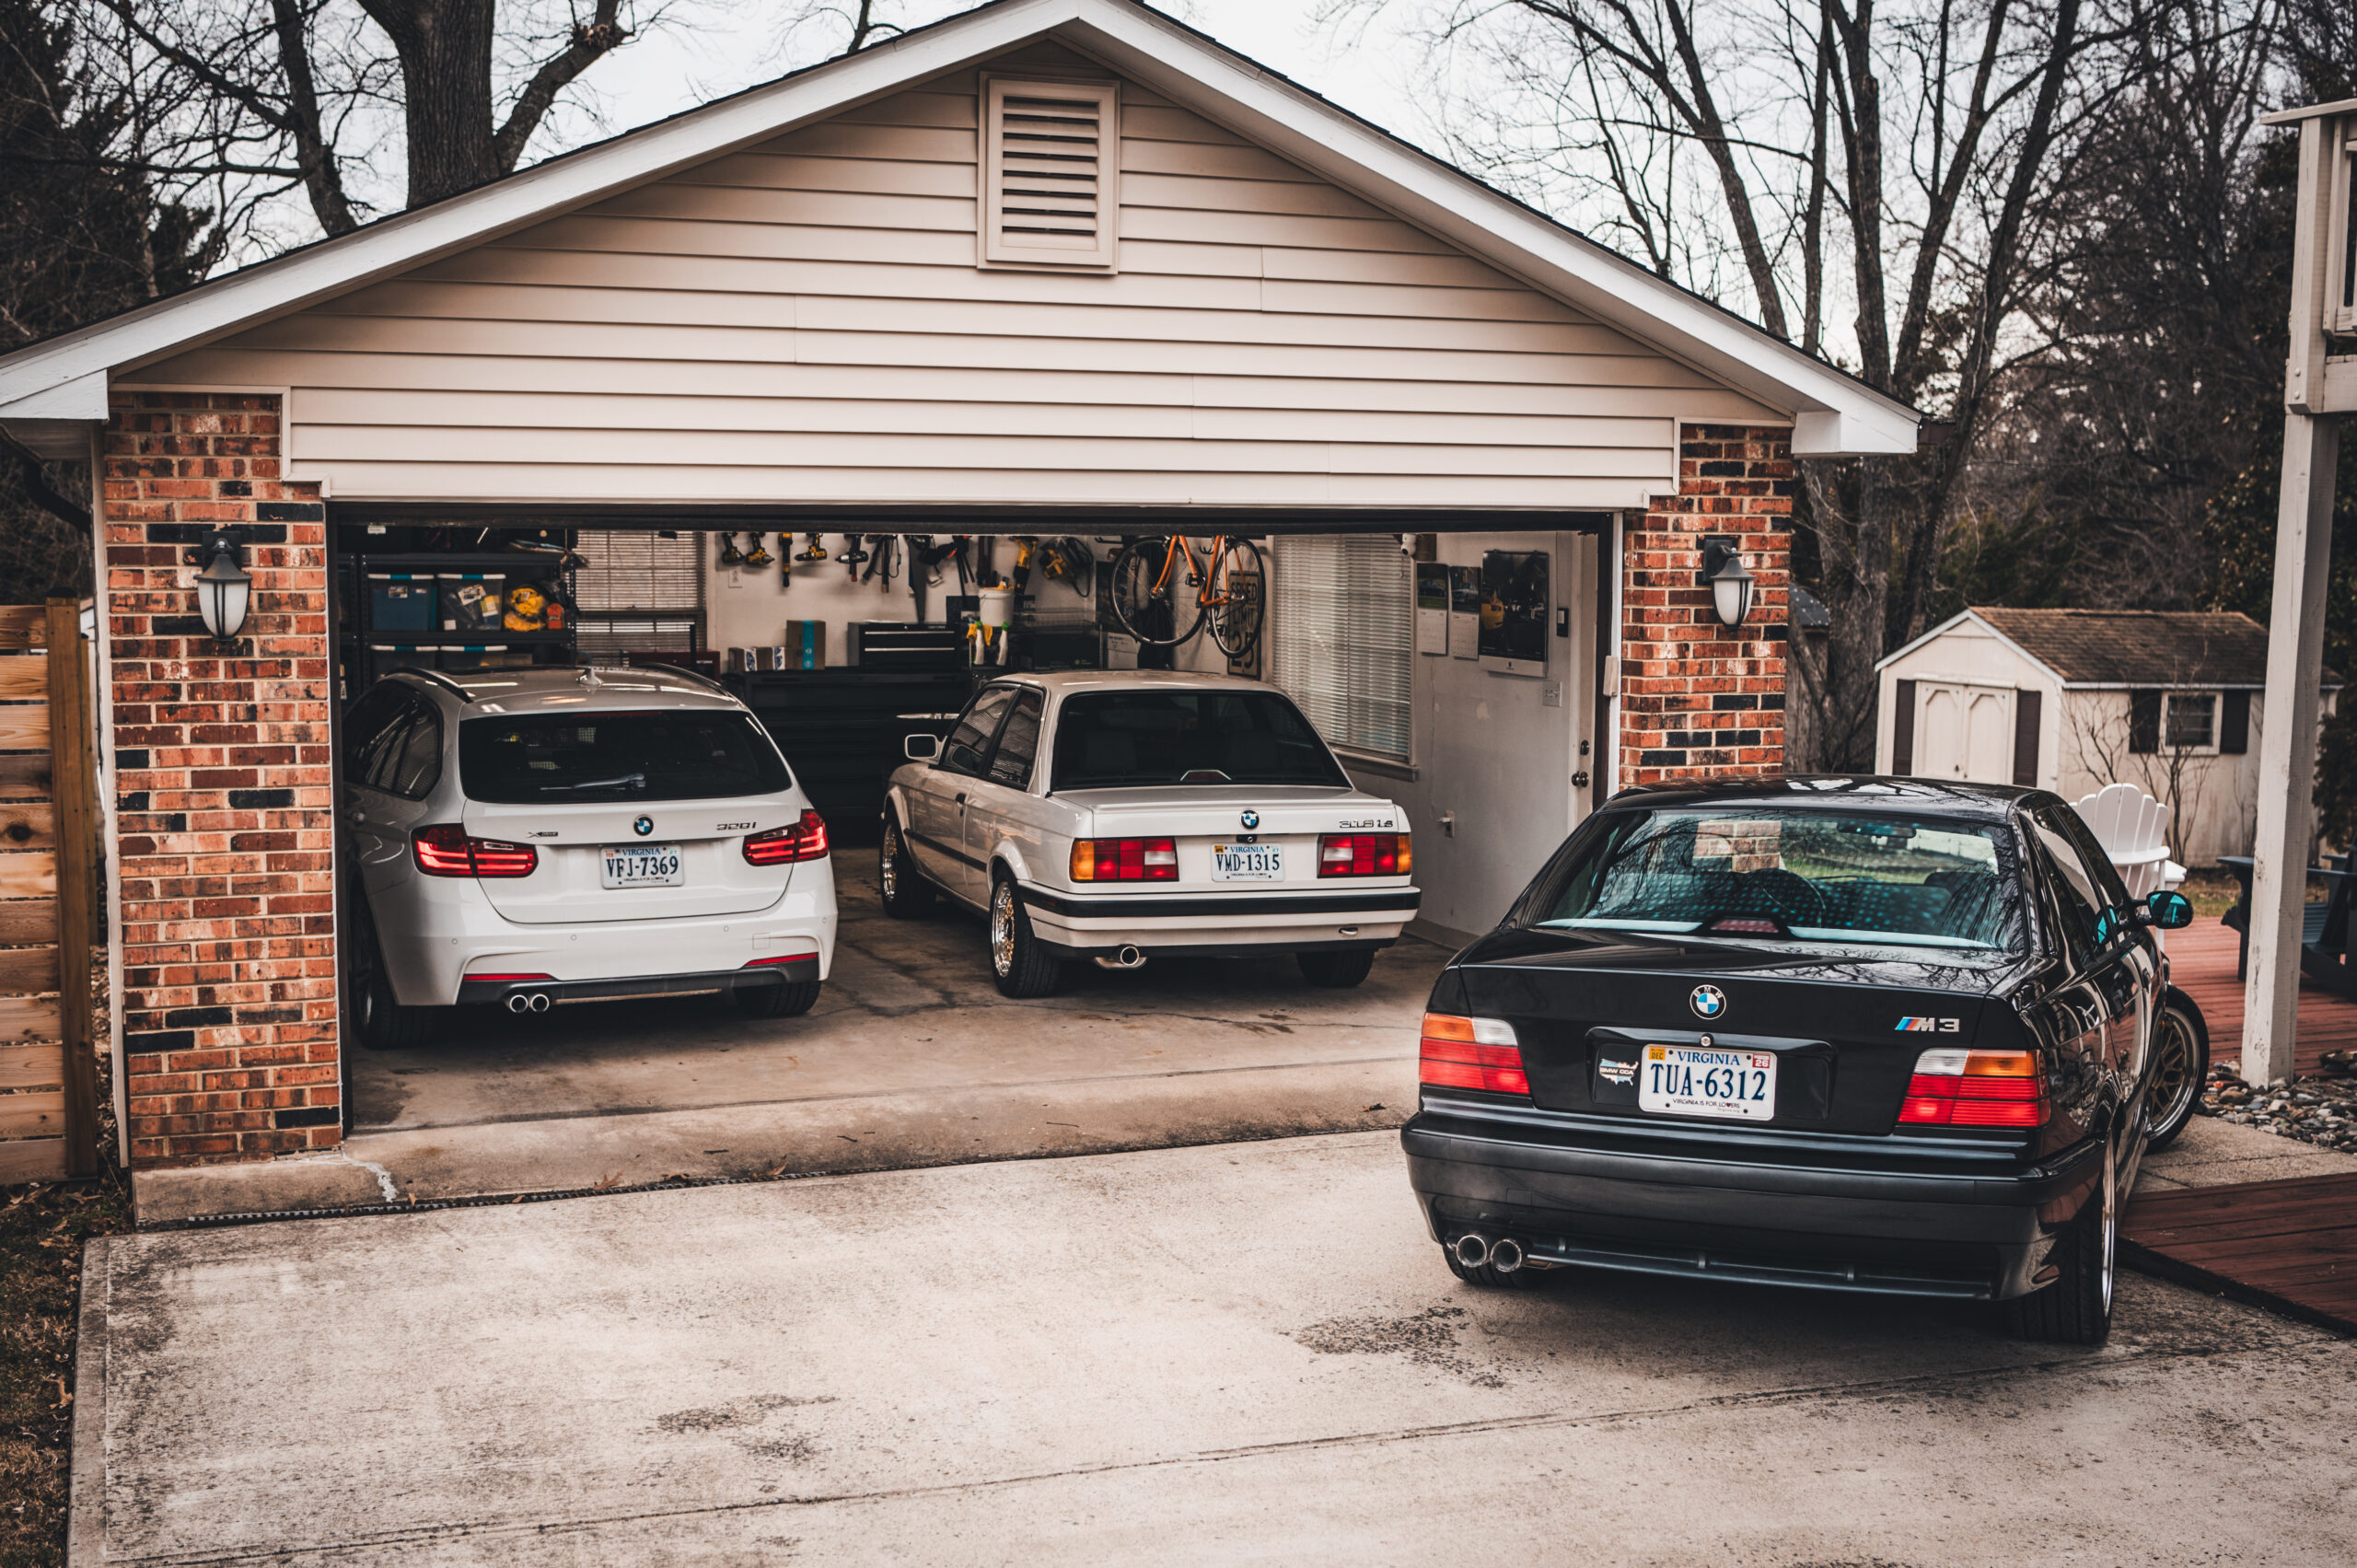
As an avid 1 Series enthusiast, the 1M has always been Raphy’s goal. Raphy lives in Northern Virginia with his wife Pia, daughter Mila, and newborn son Mateo—just three weeks old as of when these photos were taken! In addition to a full-time government contracting job, he operates TouringWerks, a small shop to help friends and give back to the automotive community, out of his garage. As a former Audi technician, he knows his way around a wrench. While he’s owned a number of cool BMWs over the years, with a 1999 five-speed-manual M3 convertible and 2010 328i Touring currently in the stable, his 2010 135i 1M clone has been his long-term project.
“I’ve had this car for seven years now. It’s actually my second 135i. The first was black and had an automatic—and I just wanted a manual. When I found this one in Fairfax, Virginia, it was just going to be a daily with a few simple mods as I wanted to save up for a 1M. As 1M prices went up, I started researching costs of the conversion. That’s kind of how it snowballed, to say the least,” he says.
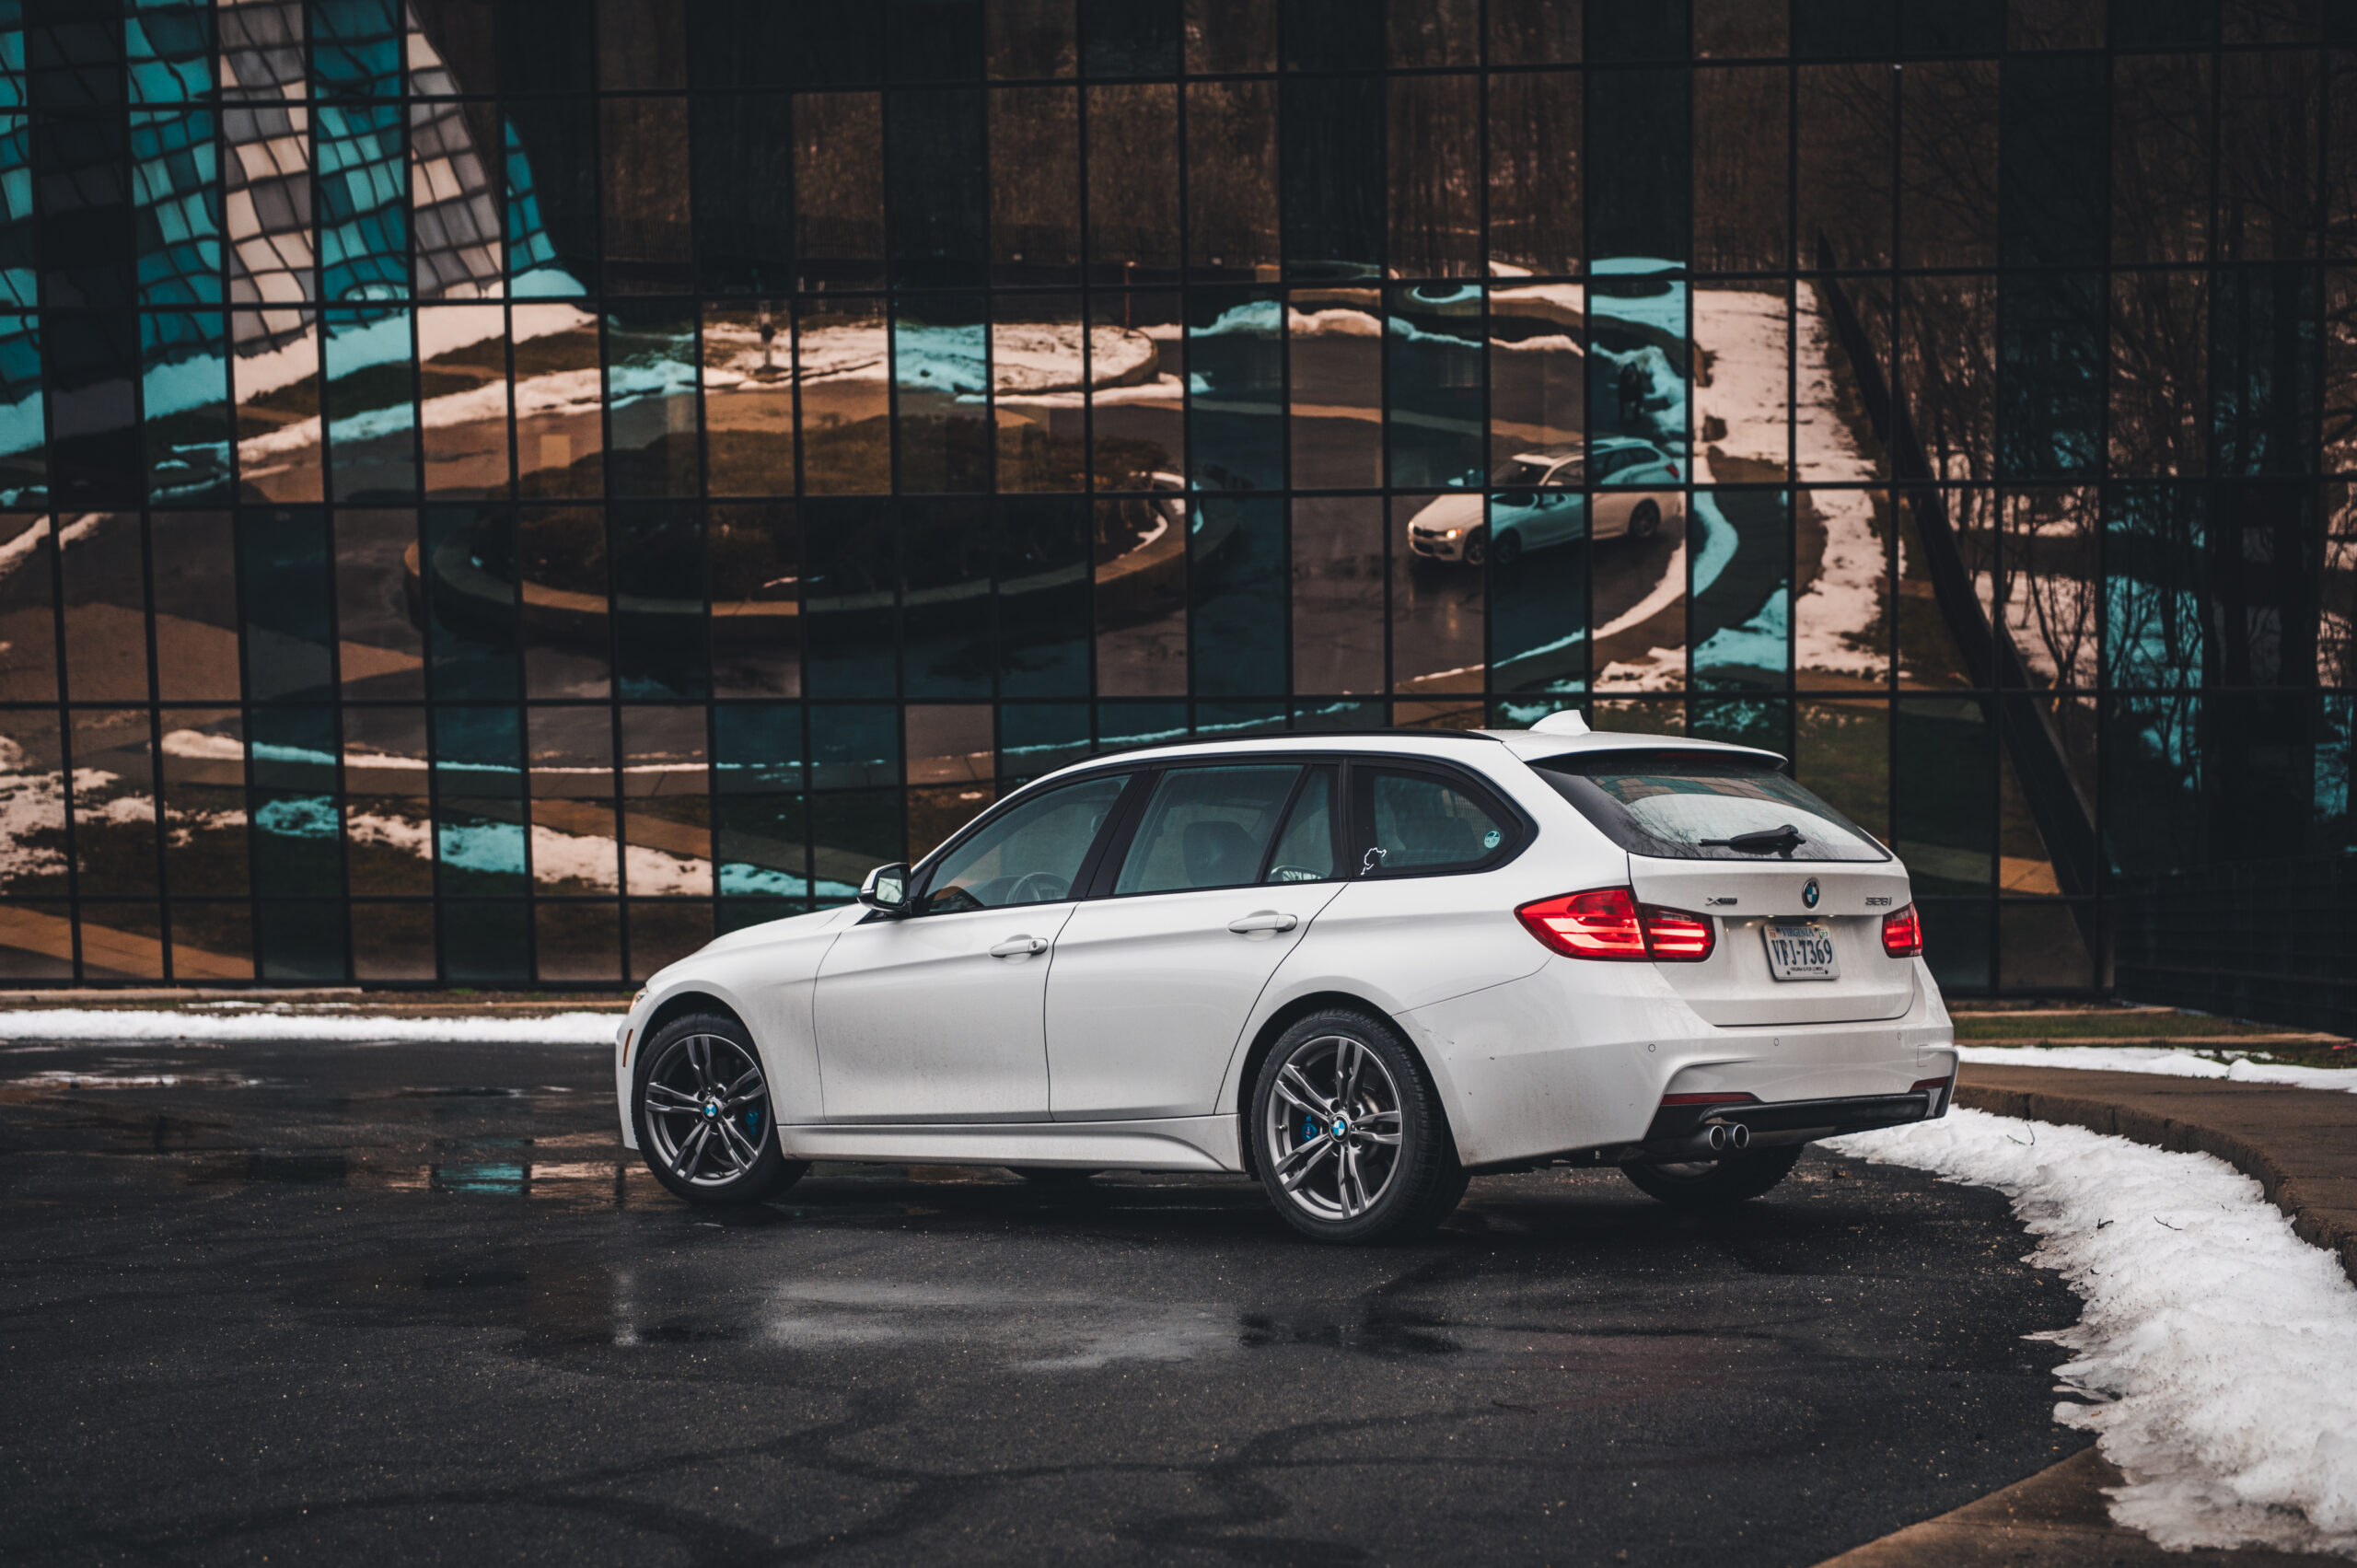
Raphy’s inspiration came from Marco Svizzero’s S65-swapped 1M. Raphy recalls, “Jay Leno featured Marco’s car—a 1M clone with an S65 swap. That’s kind of where my inspiration started. I wanted to build my rendition of a 1M clone—especially since these never came out in red, which is one of my favorite colors.” The 1M was only available in three colors—Alpine White, Sapphire Black, or Valencia Orange—so Raphy’s Crimson Red N54-equipped 135i was the perfect foundation for this impressive project.

While the majority of OEM 1M parts will bolt right up to the 135i, Raphy says, “the hardest part of the conversion was the rear fenders, because those had to be custom.” After purchasing a set of rear Jays 1M replica fenders, Raphy began collecting OEM 1M parts. He recalls, “I just wanted to make sure I did everything, minus the rear quarter panels, as OEM as possible.”
An OEM 1M rear bumper, among a sea of other OEM 1M parts.
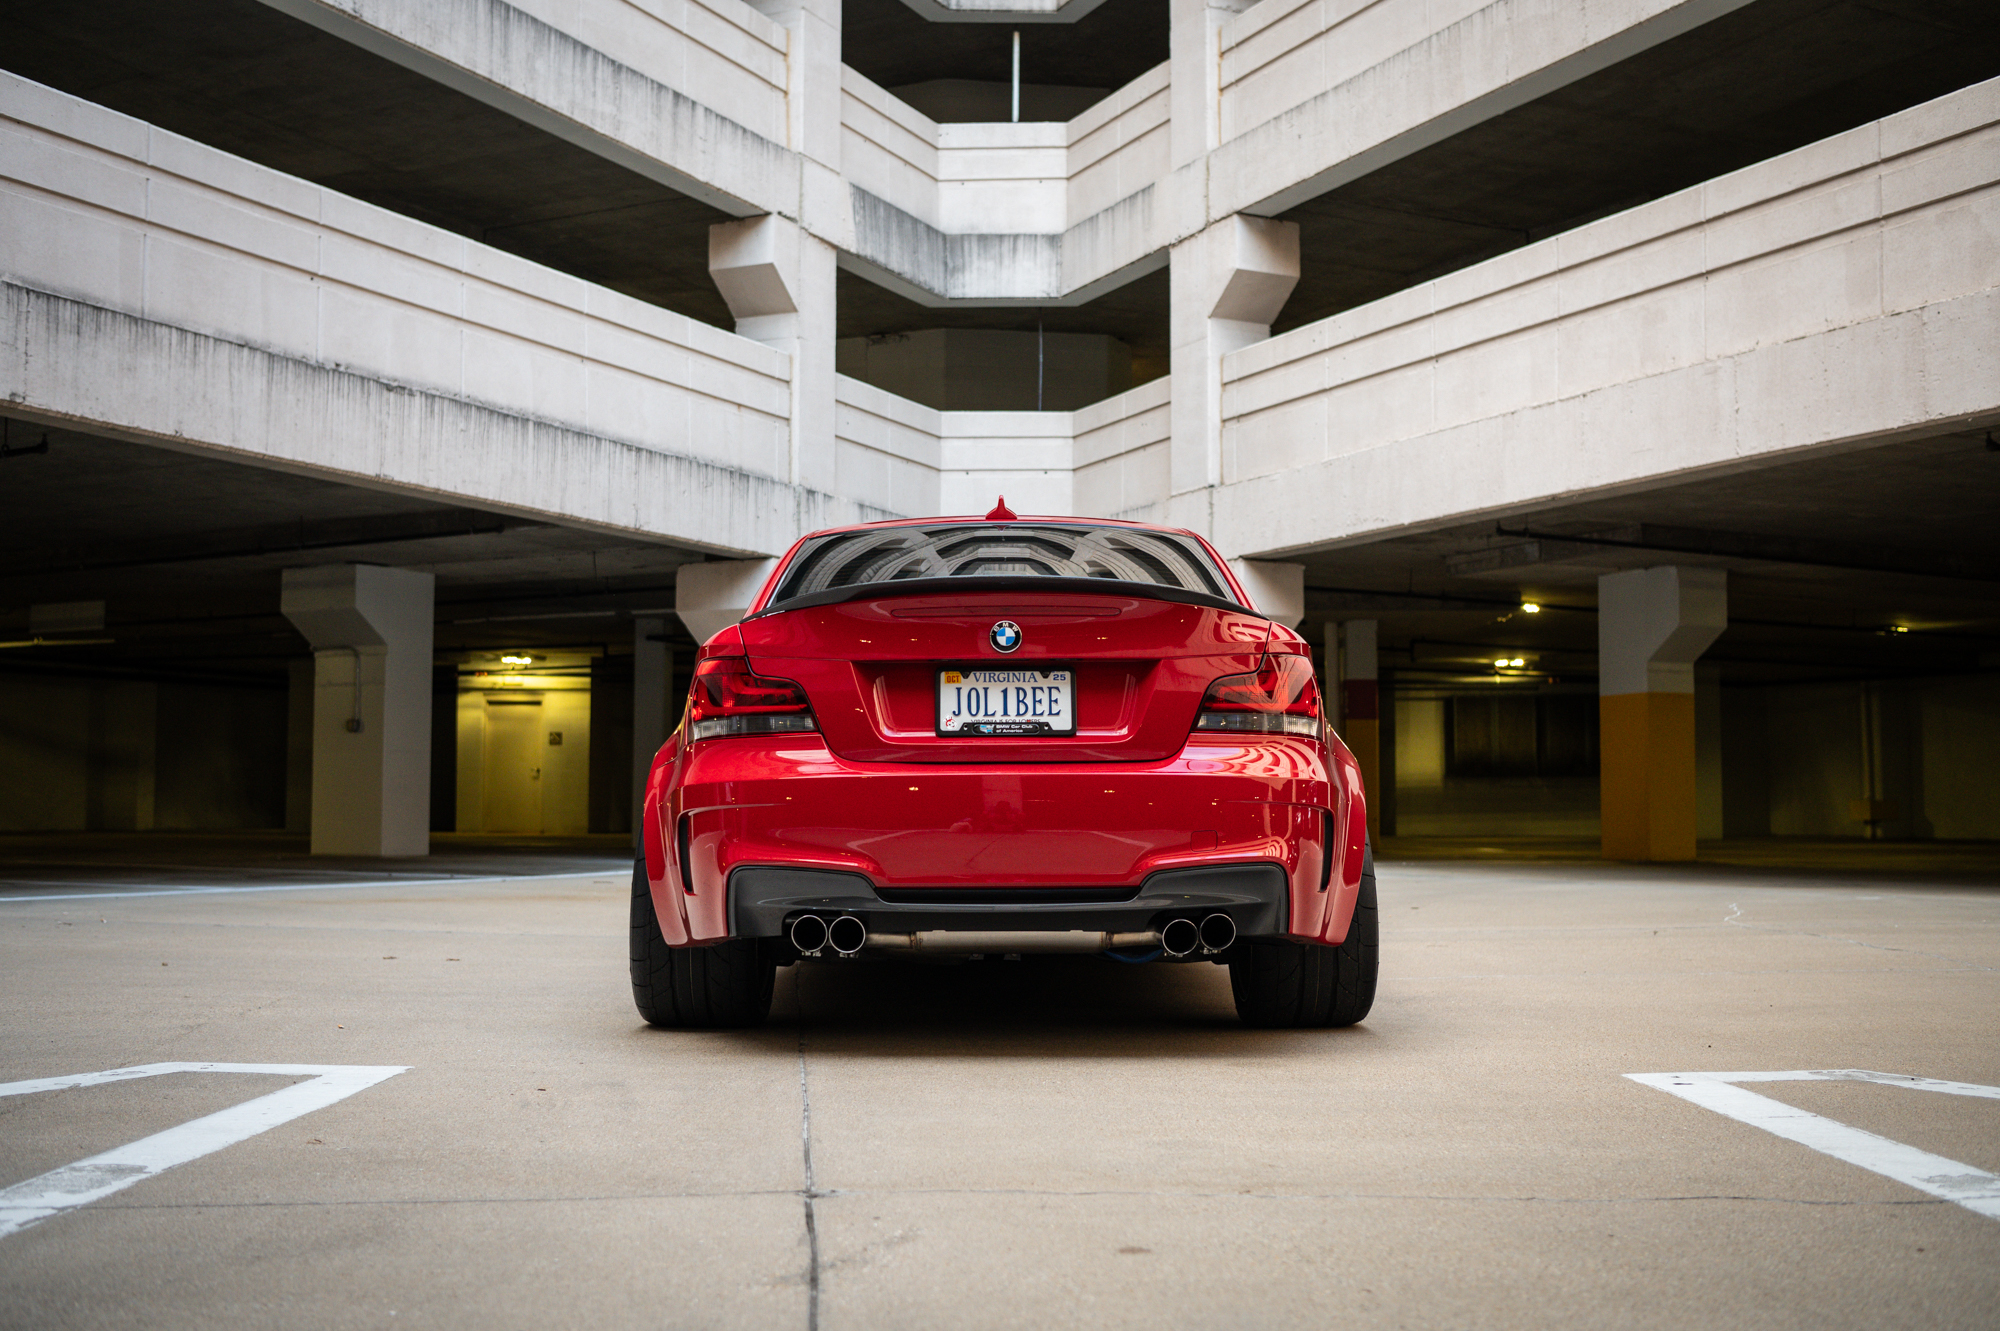
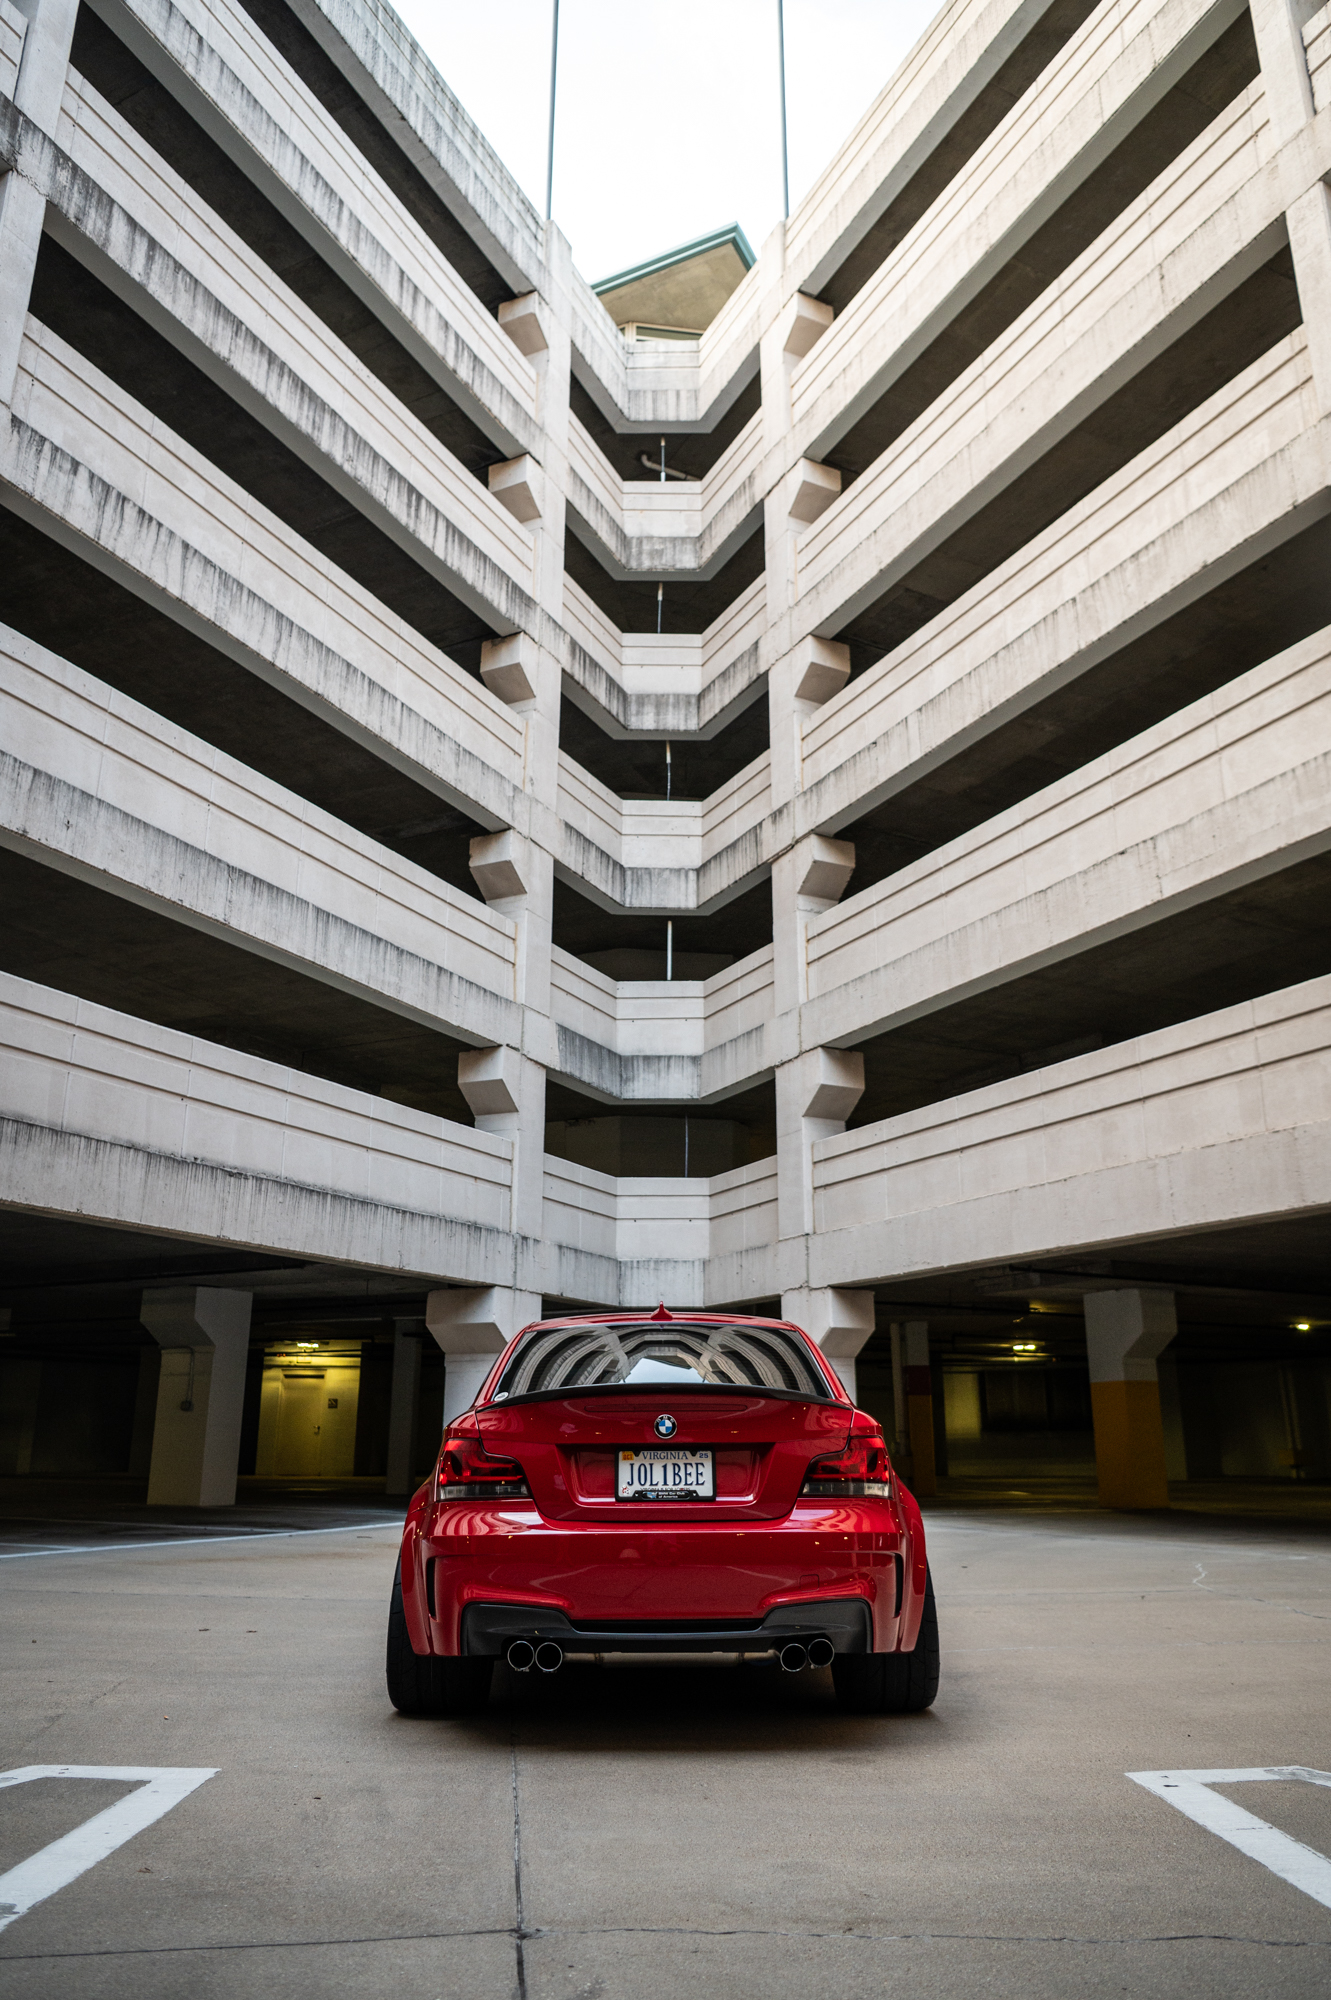
How much actually bolts up? “From a 1M perspective—the front bumper, the headlights, the side mirrors, side skirts, and rear bumper. Then it’s small things, like the undertrays, the fender liners, the splash shields.” The bodywork didn’t stop there. Raphy continues, “The quad exhaust conversion, including the battery tray, are all OEM 1M parts.”
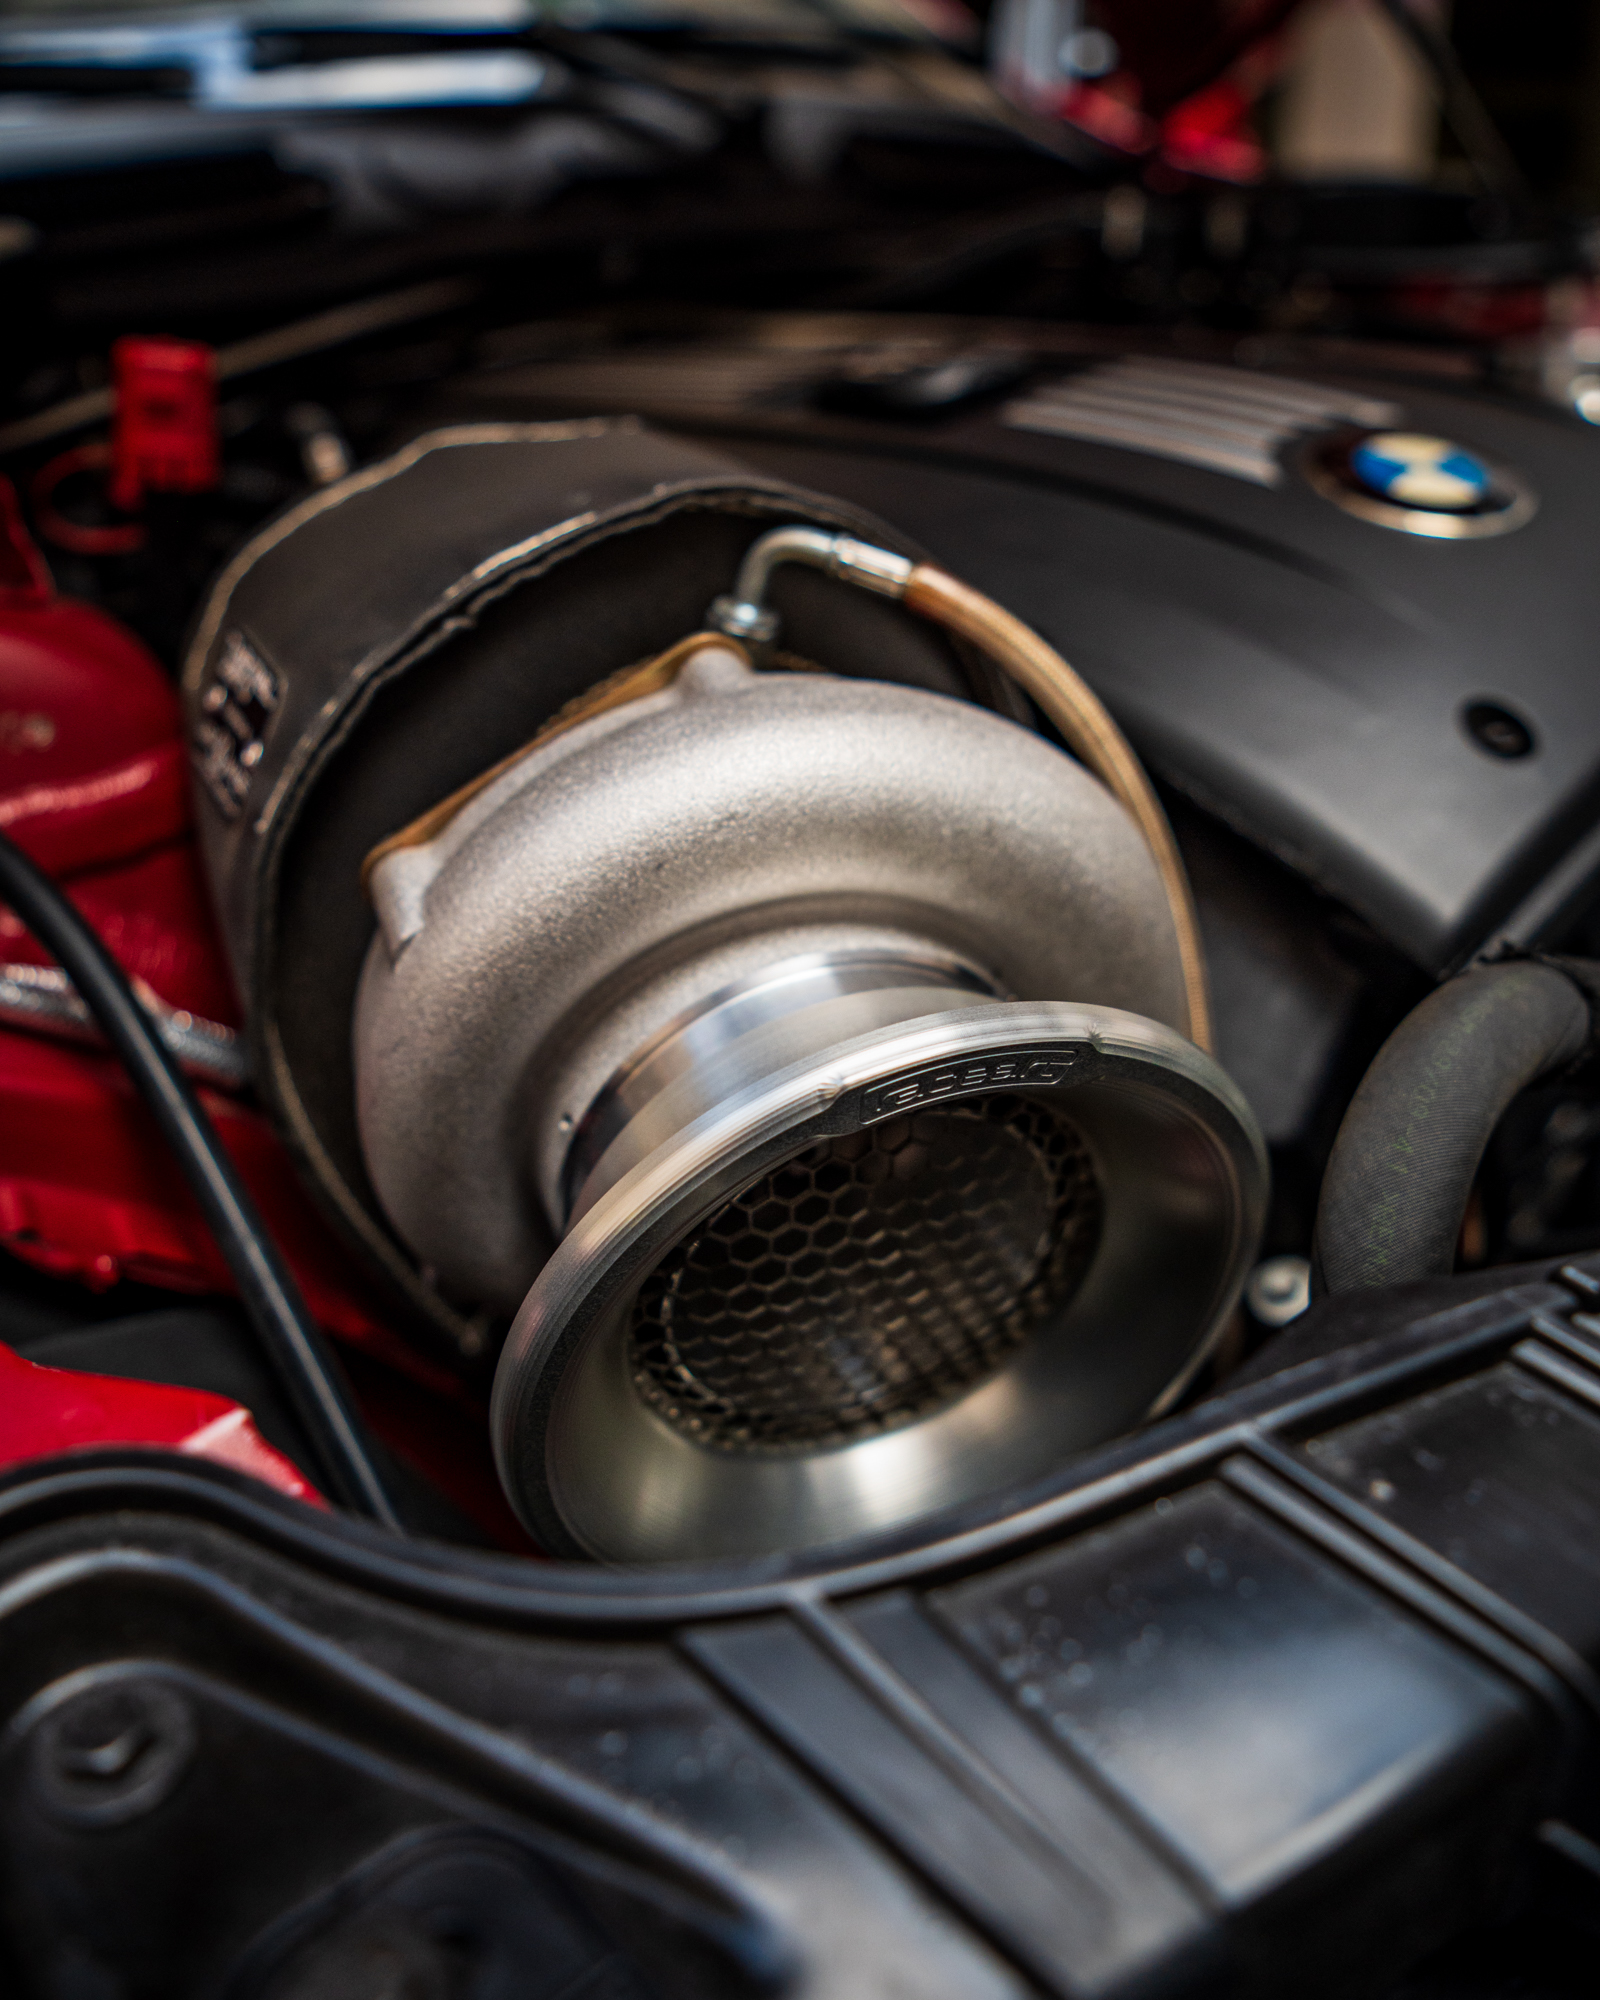
Biiiiiiig turbo.
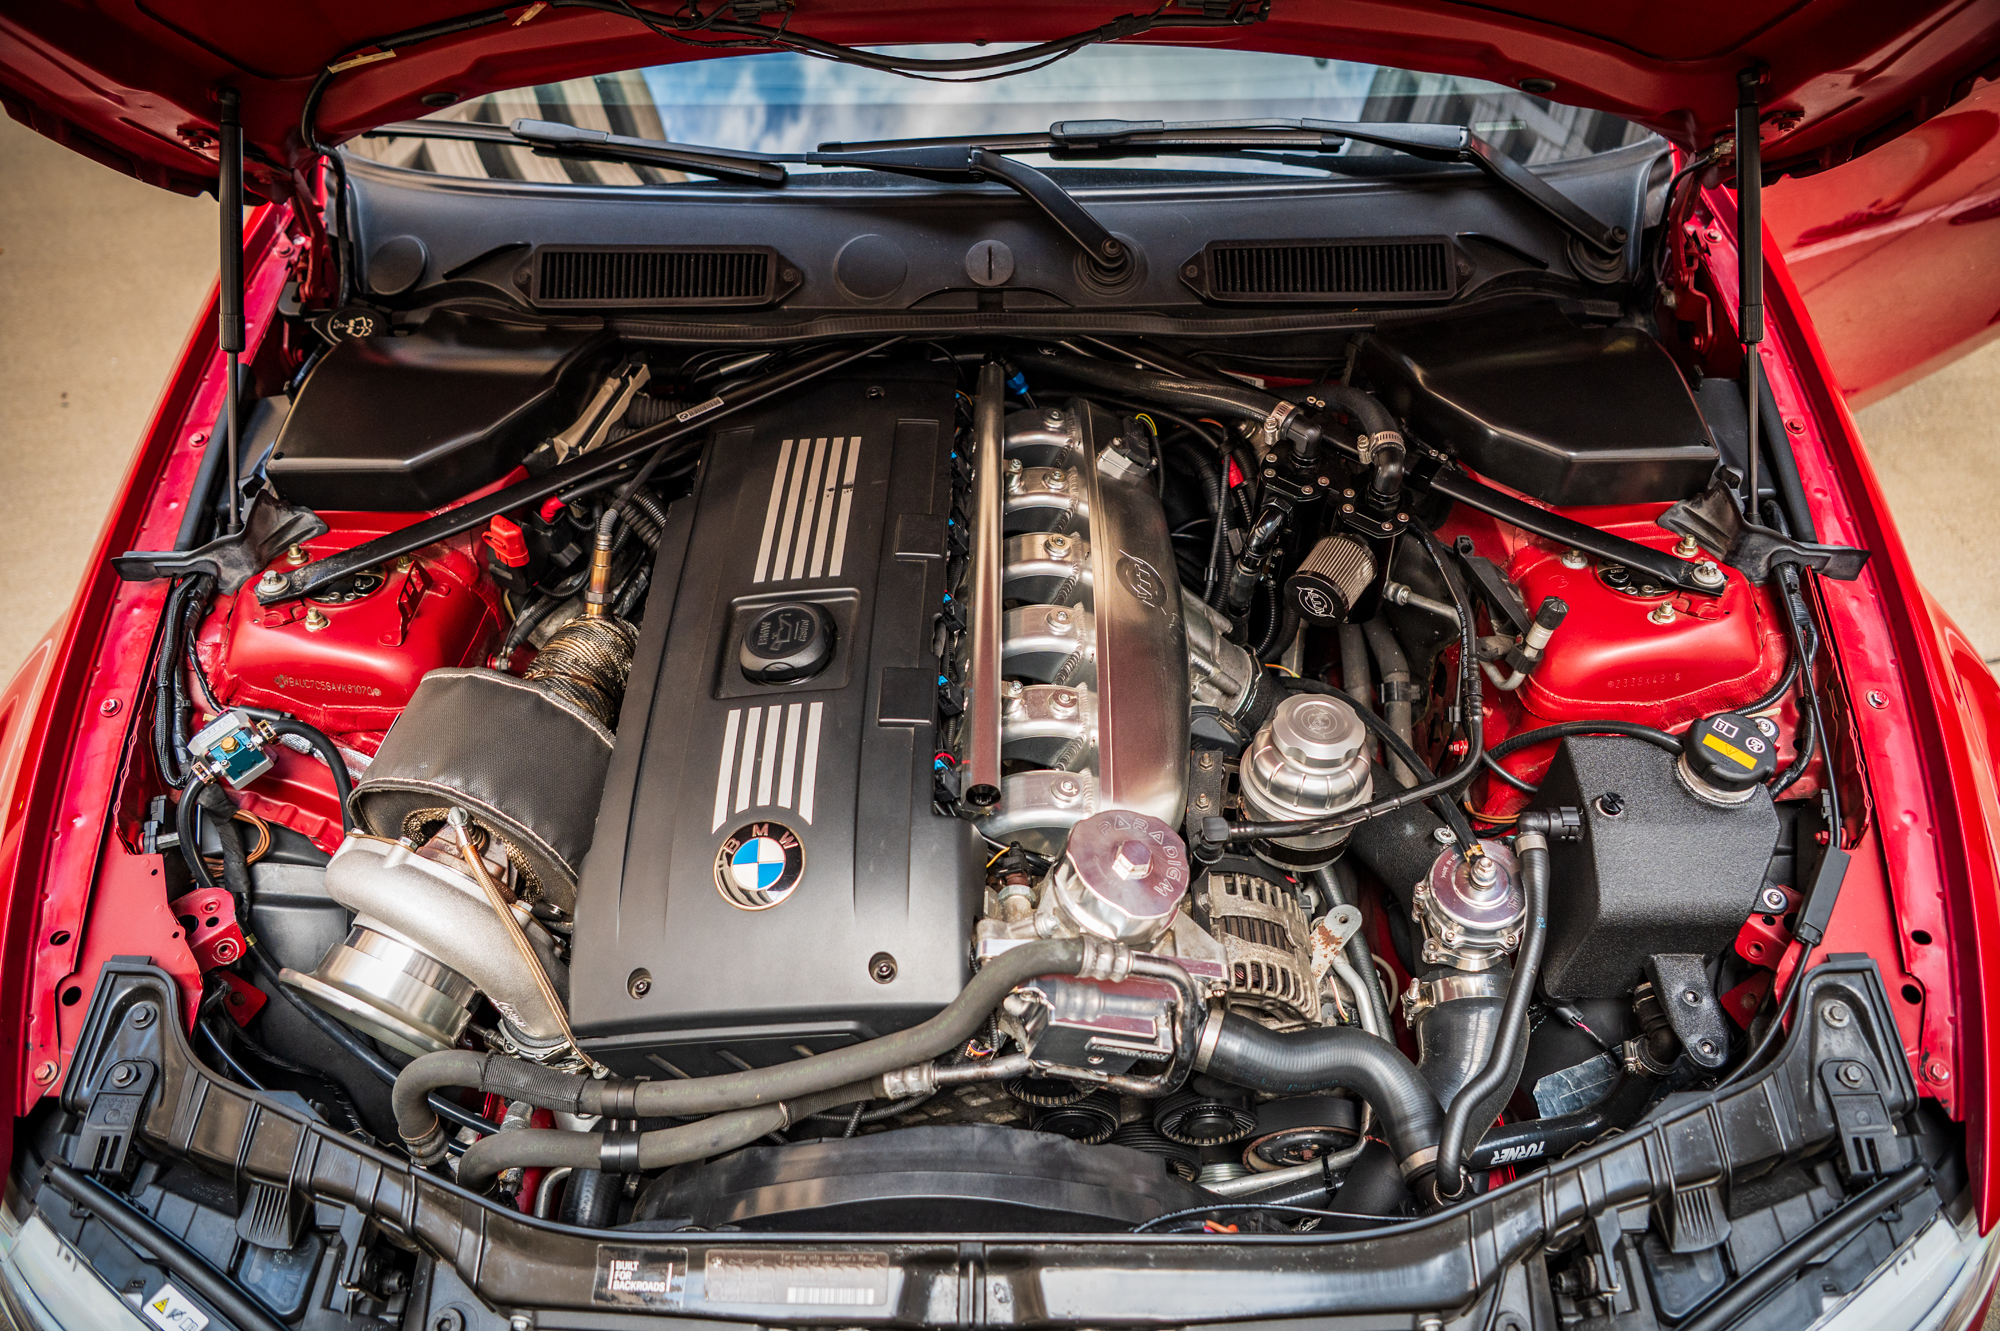
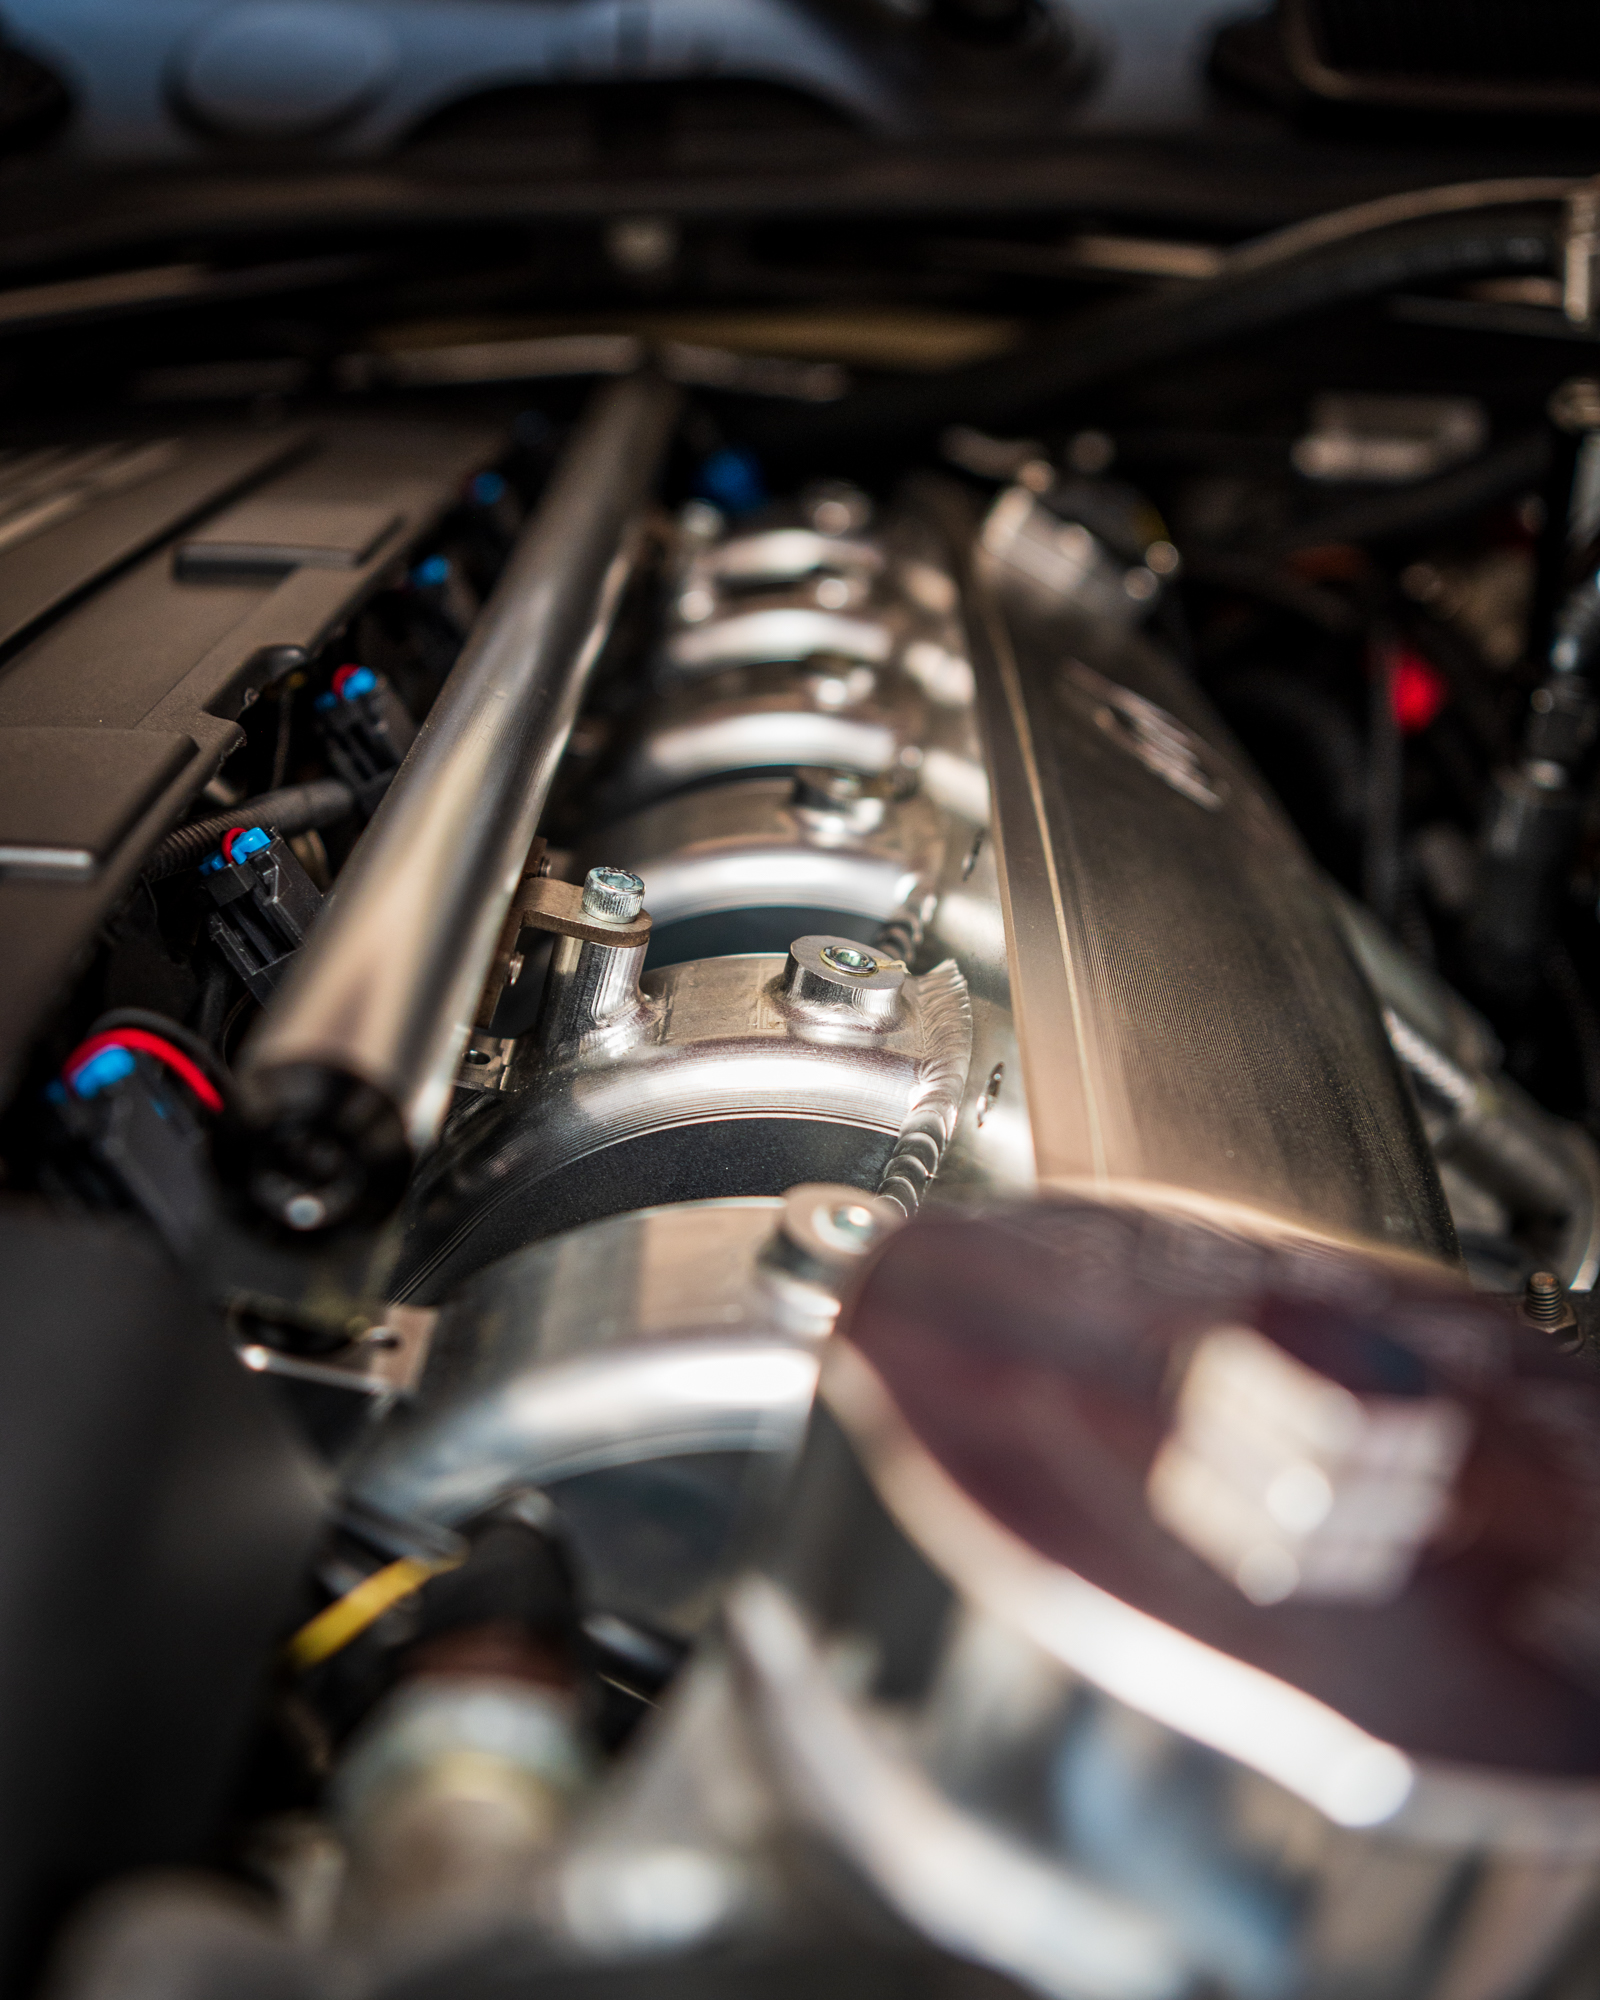
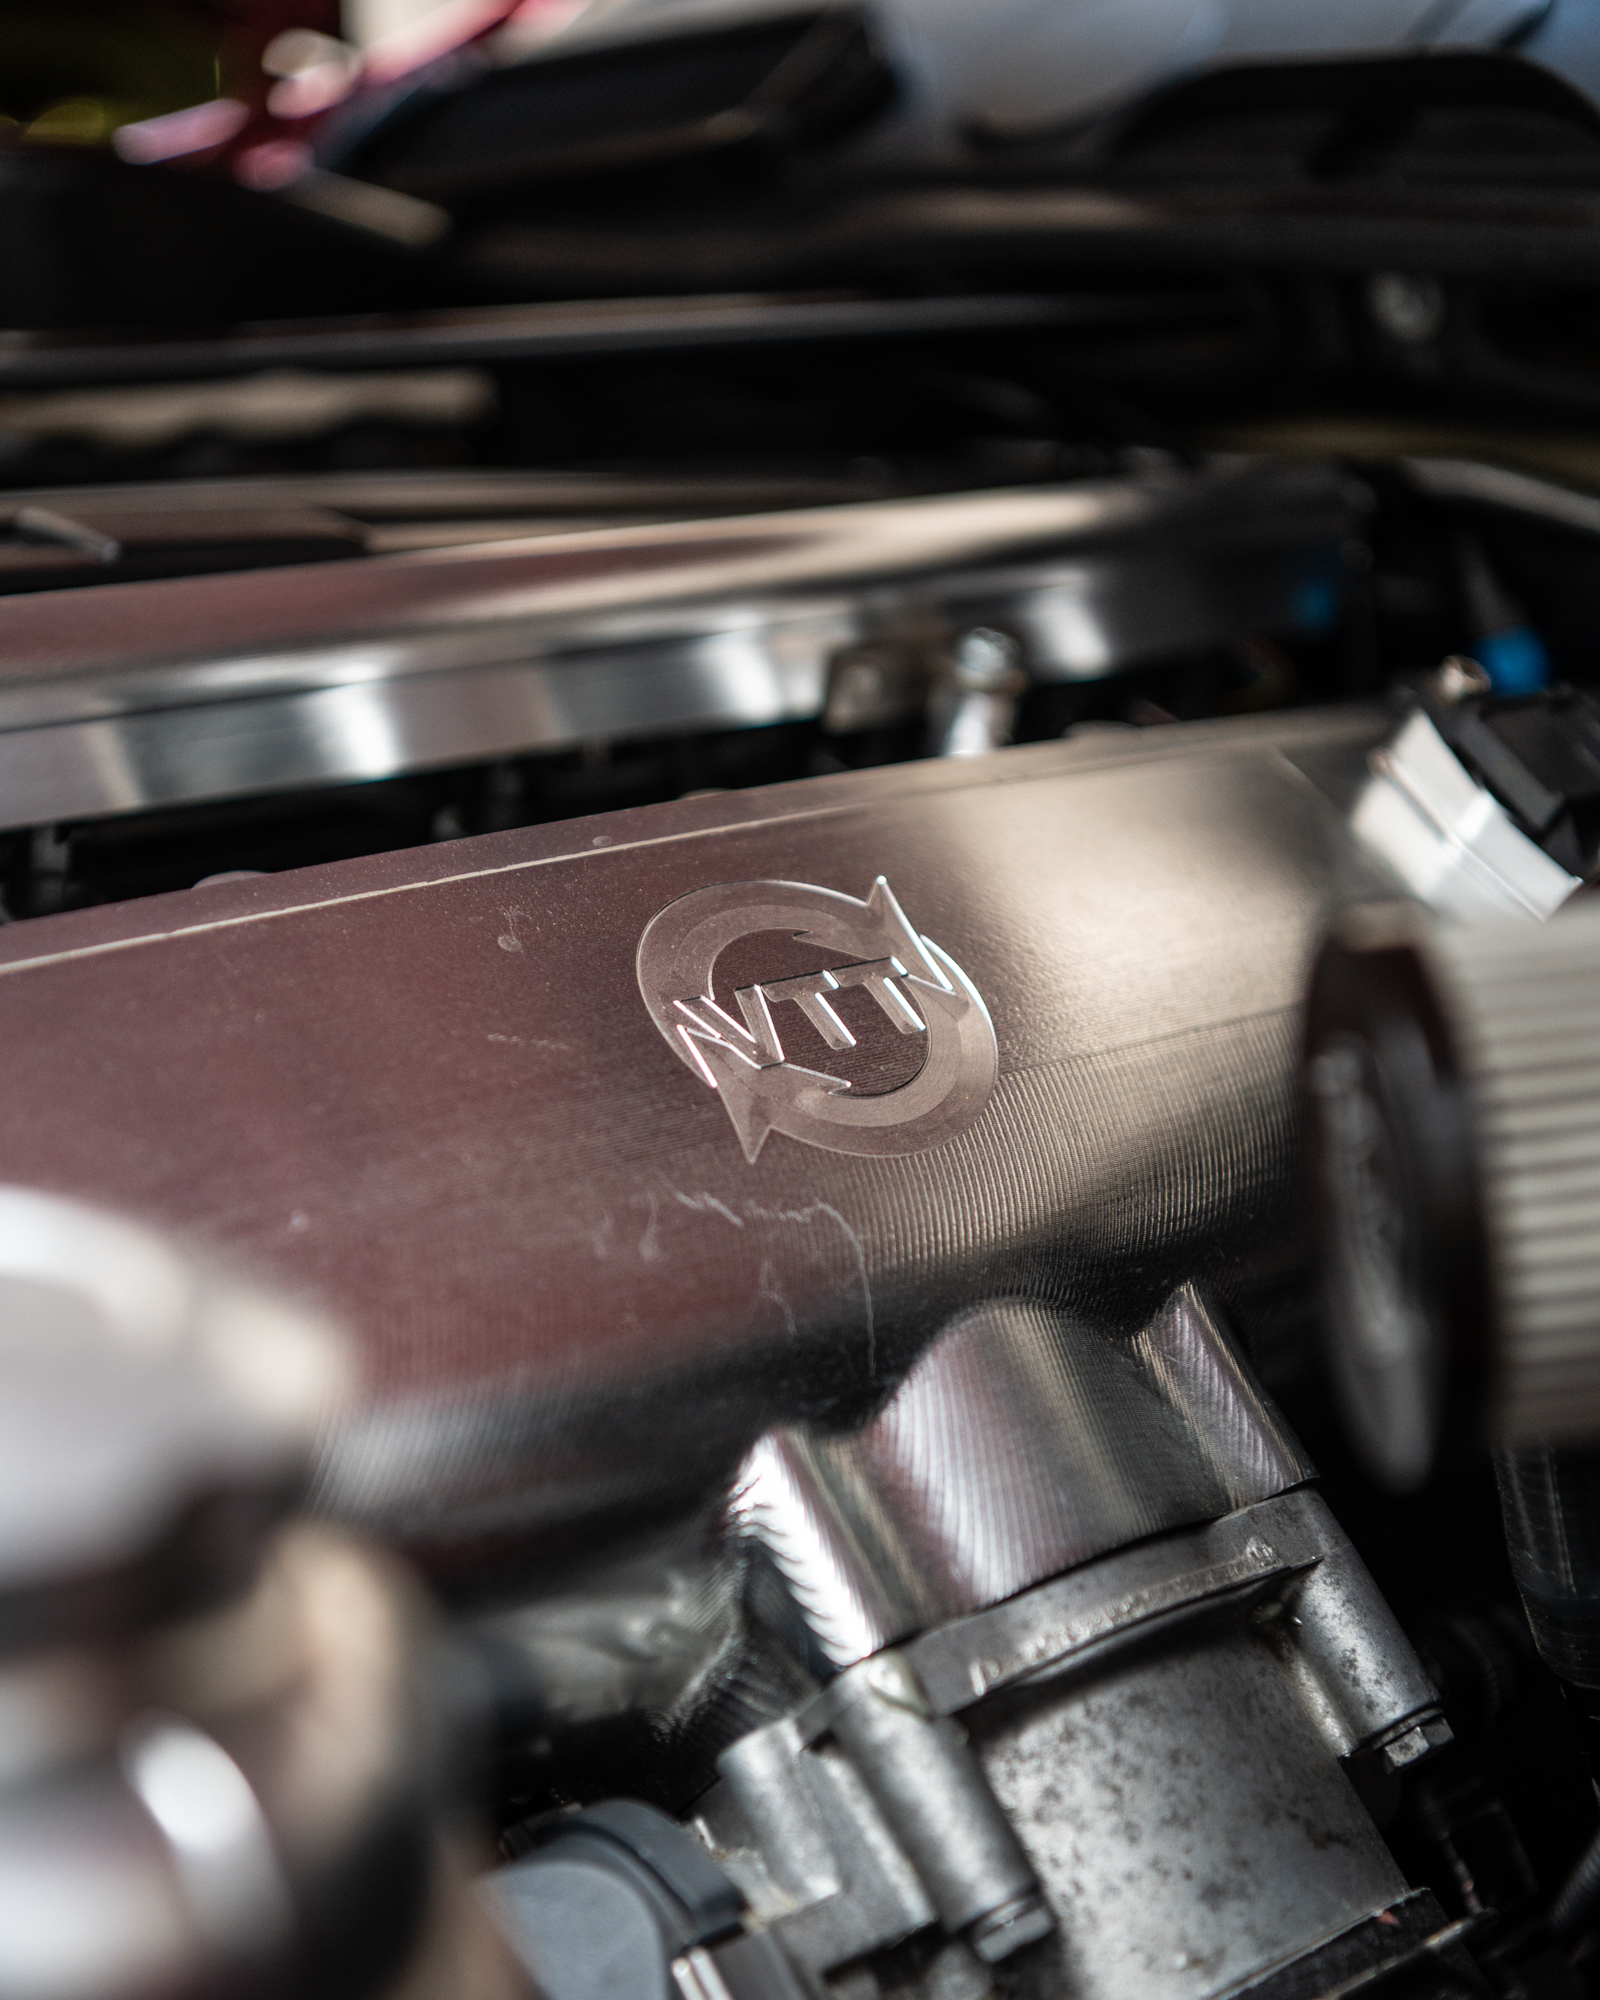
This build is far from just exterior modifications as there has been extensive work done to the powertrain, suspension, and interior. Raphy’s 135i shares the same N54 engine platform found in the 1M, so it provided a great starting point for making big power. “It’s converted to a big single turbo—a PTE Gen2 6266 turbo from SpeedTech. It’s their whole bolt-on kit. It’s on Flex Fuel so I can run anything from 93 octane, making like 500 wheel horsepower, to up to E85, which is supposed to make almost 700 wheel horsepower,” Raphy says. In addition to the SpeedTech turbo kit, the engine modification list includes an upgraded cooling system, upgraded oil cooling, upgraded fuel system, a VTT billet aluminum intake manifold with VTT port injection using DW 550cc fuel injectors, a DocVu custom flex fuel tune (26psi), and a lengthy list of other supporting modifications.
Raphy laughs, “The [current 335is] clutch is slipping because I need to upgrade the clutch to a twin disc. The tuner said we’re around 650 wheel horsepower on the current setup, so we’re just keeping it there until we upgrade the clutch. And then we can turn it up a little bit more to make that 700. That’ll pretty much be the stopping point.” To put that in perspective, Raphy is putting down over double the power of a factory 135i and nearly double that of a 1M. Whoosh!
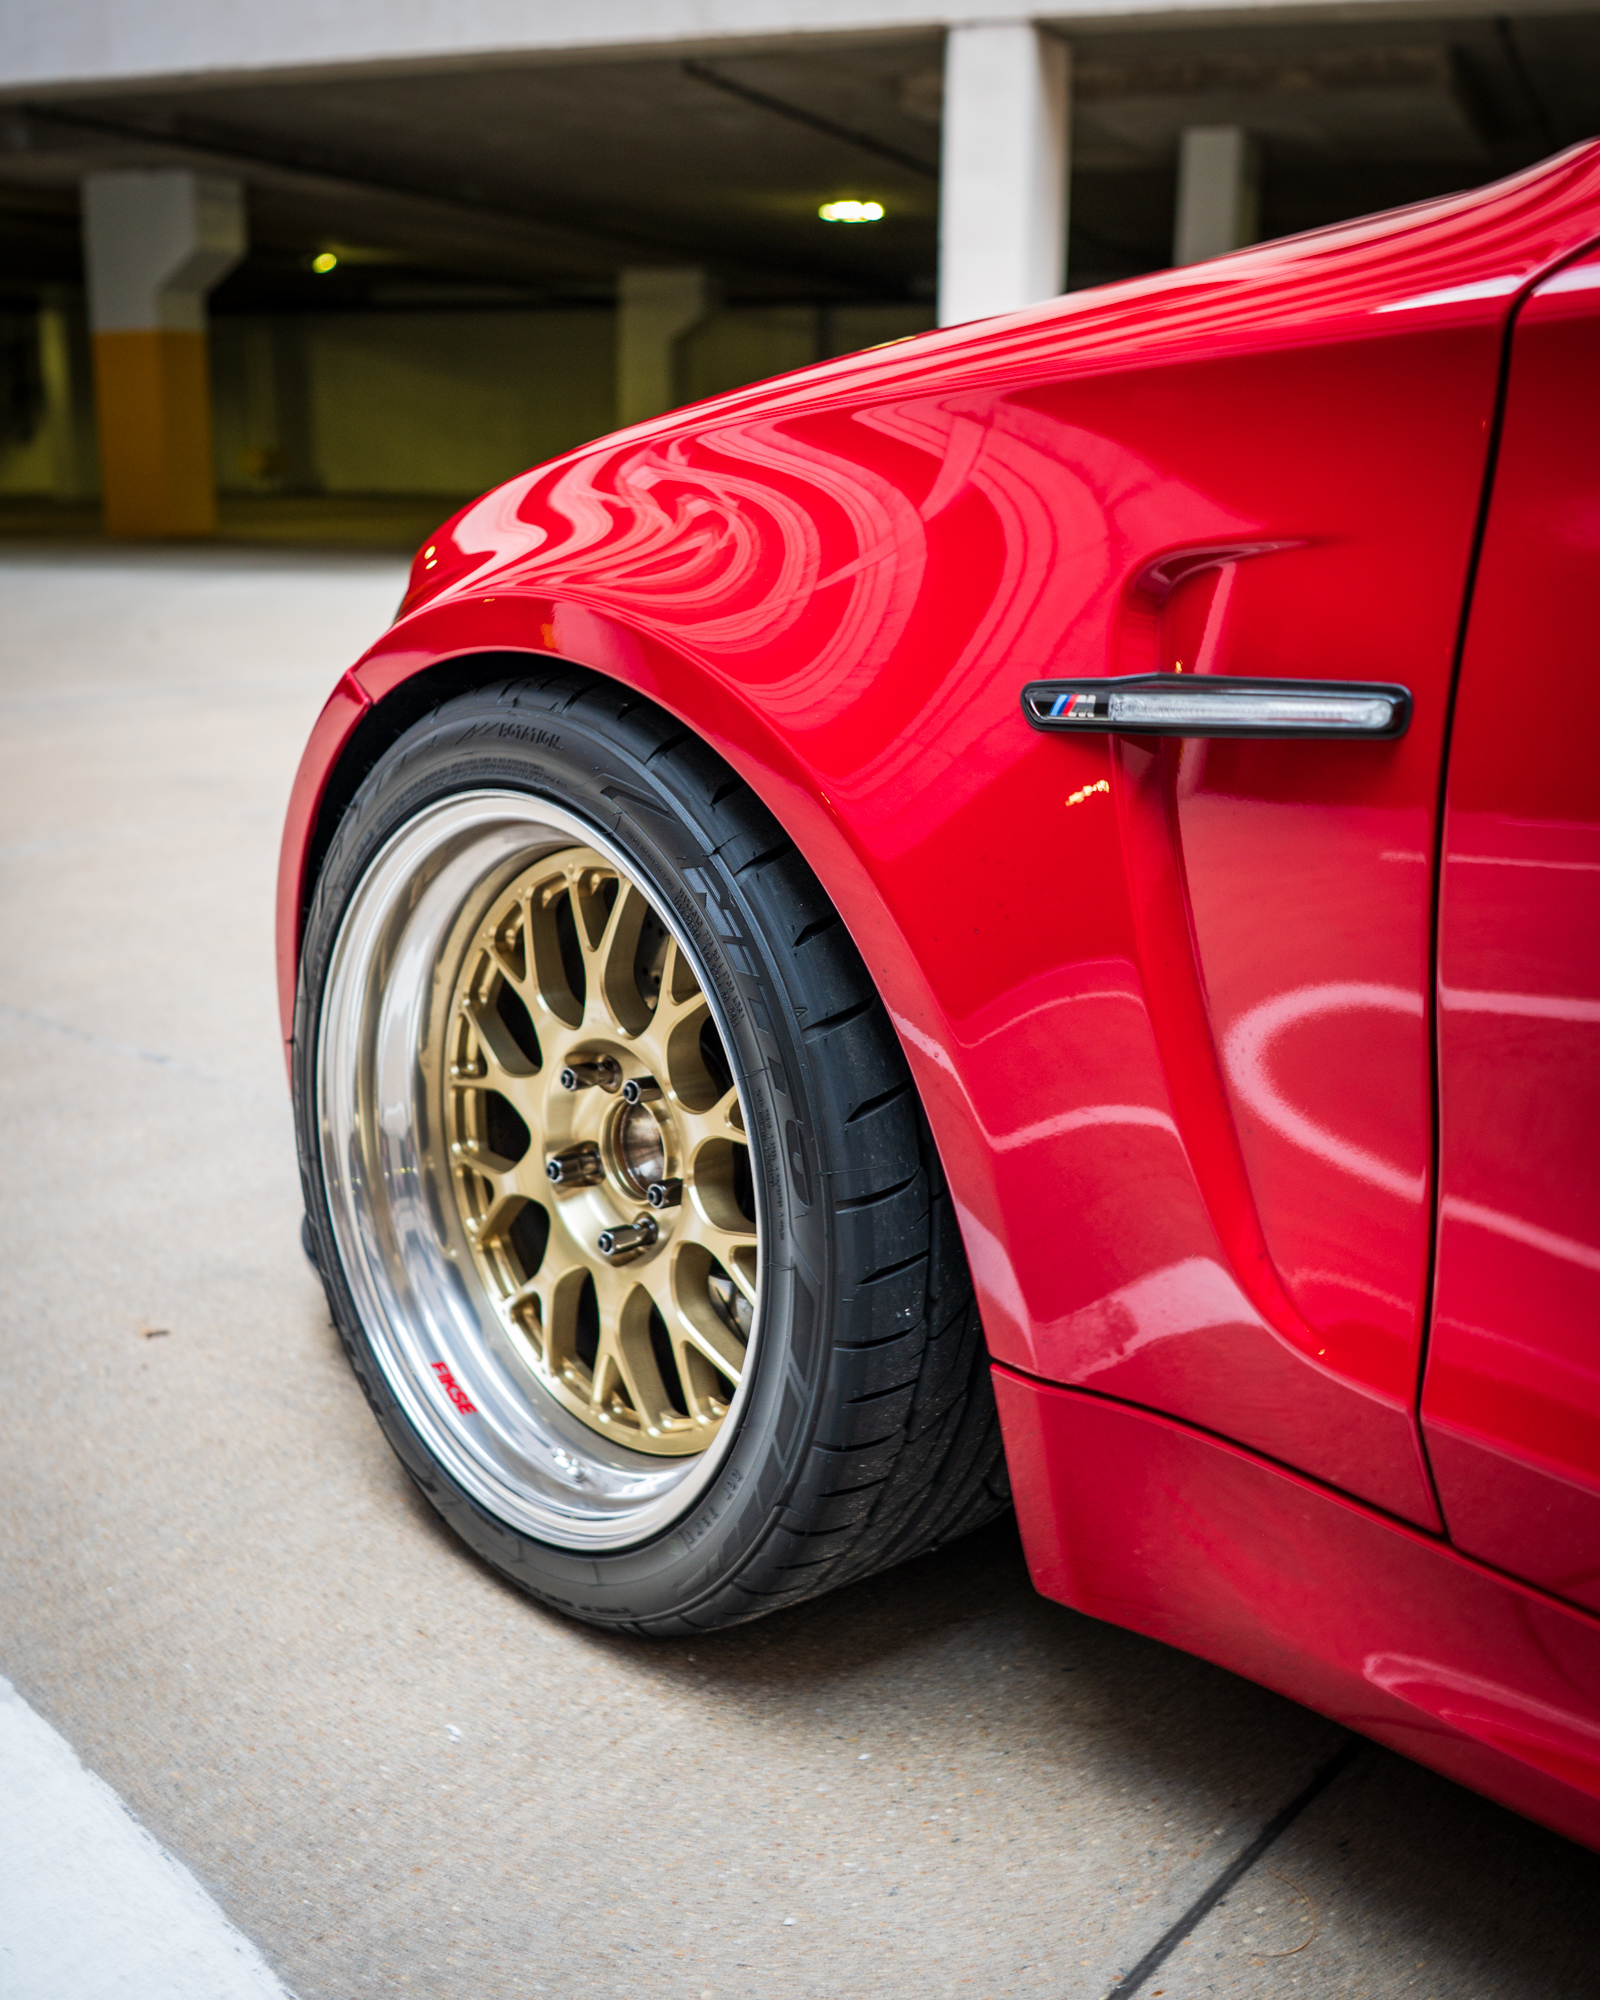
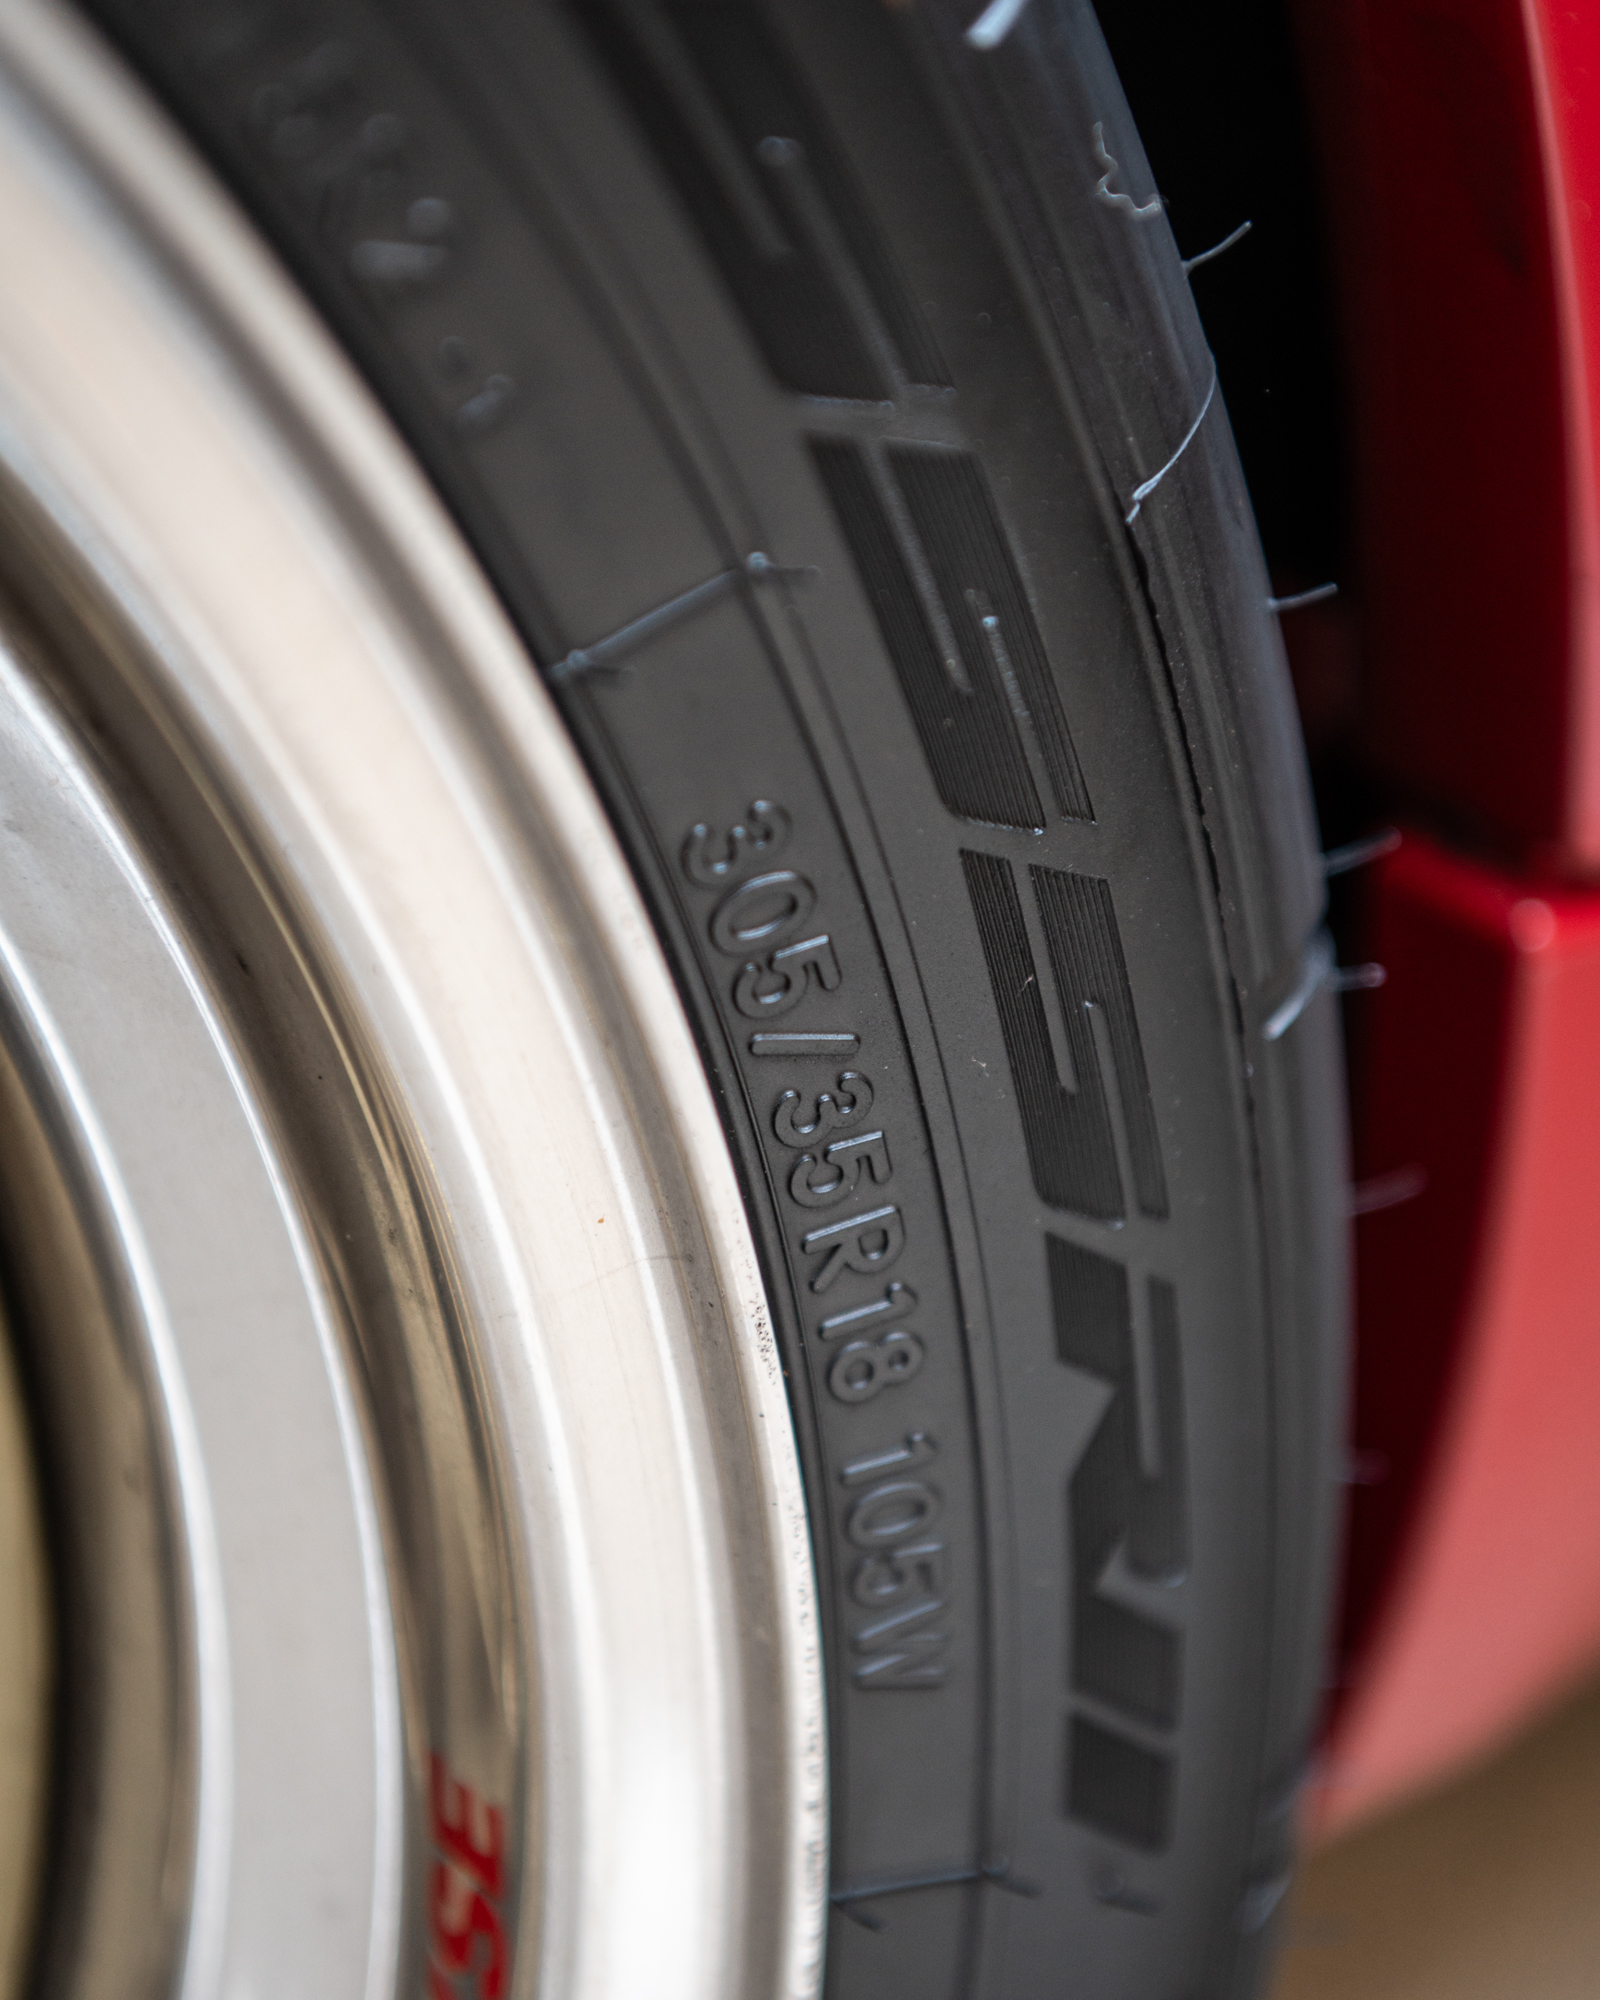
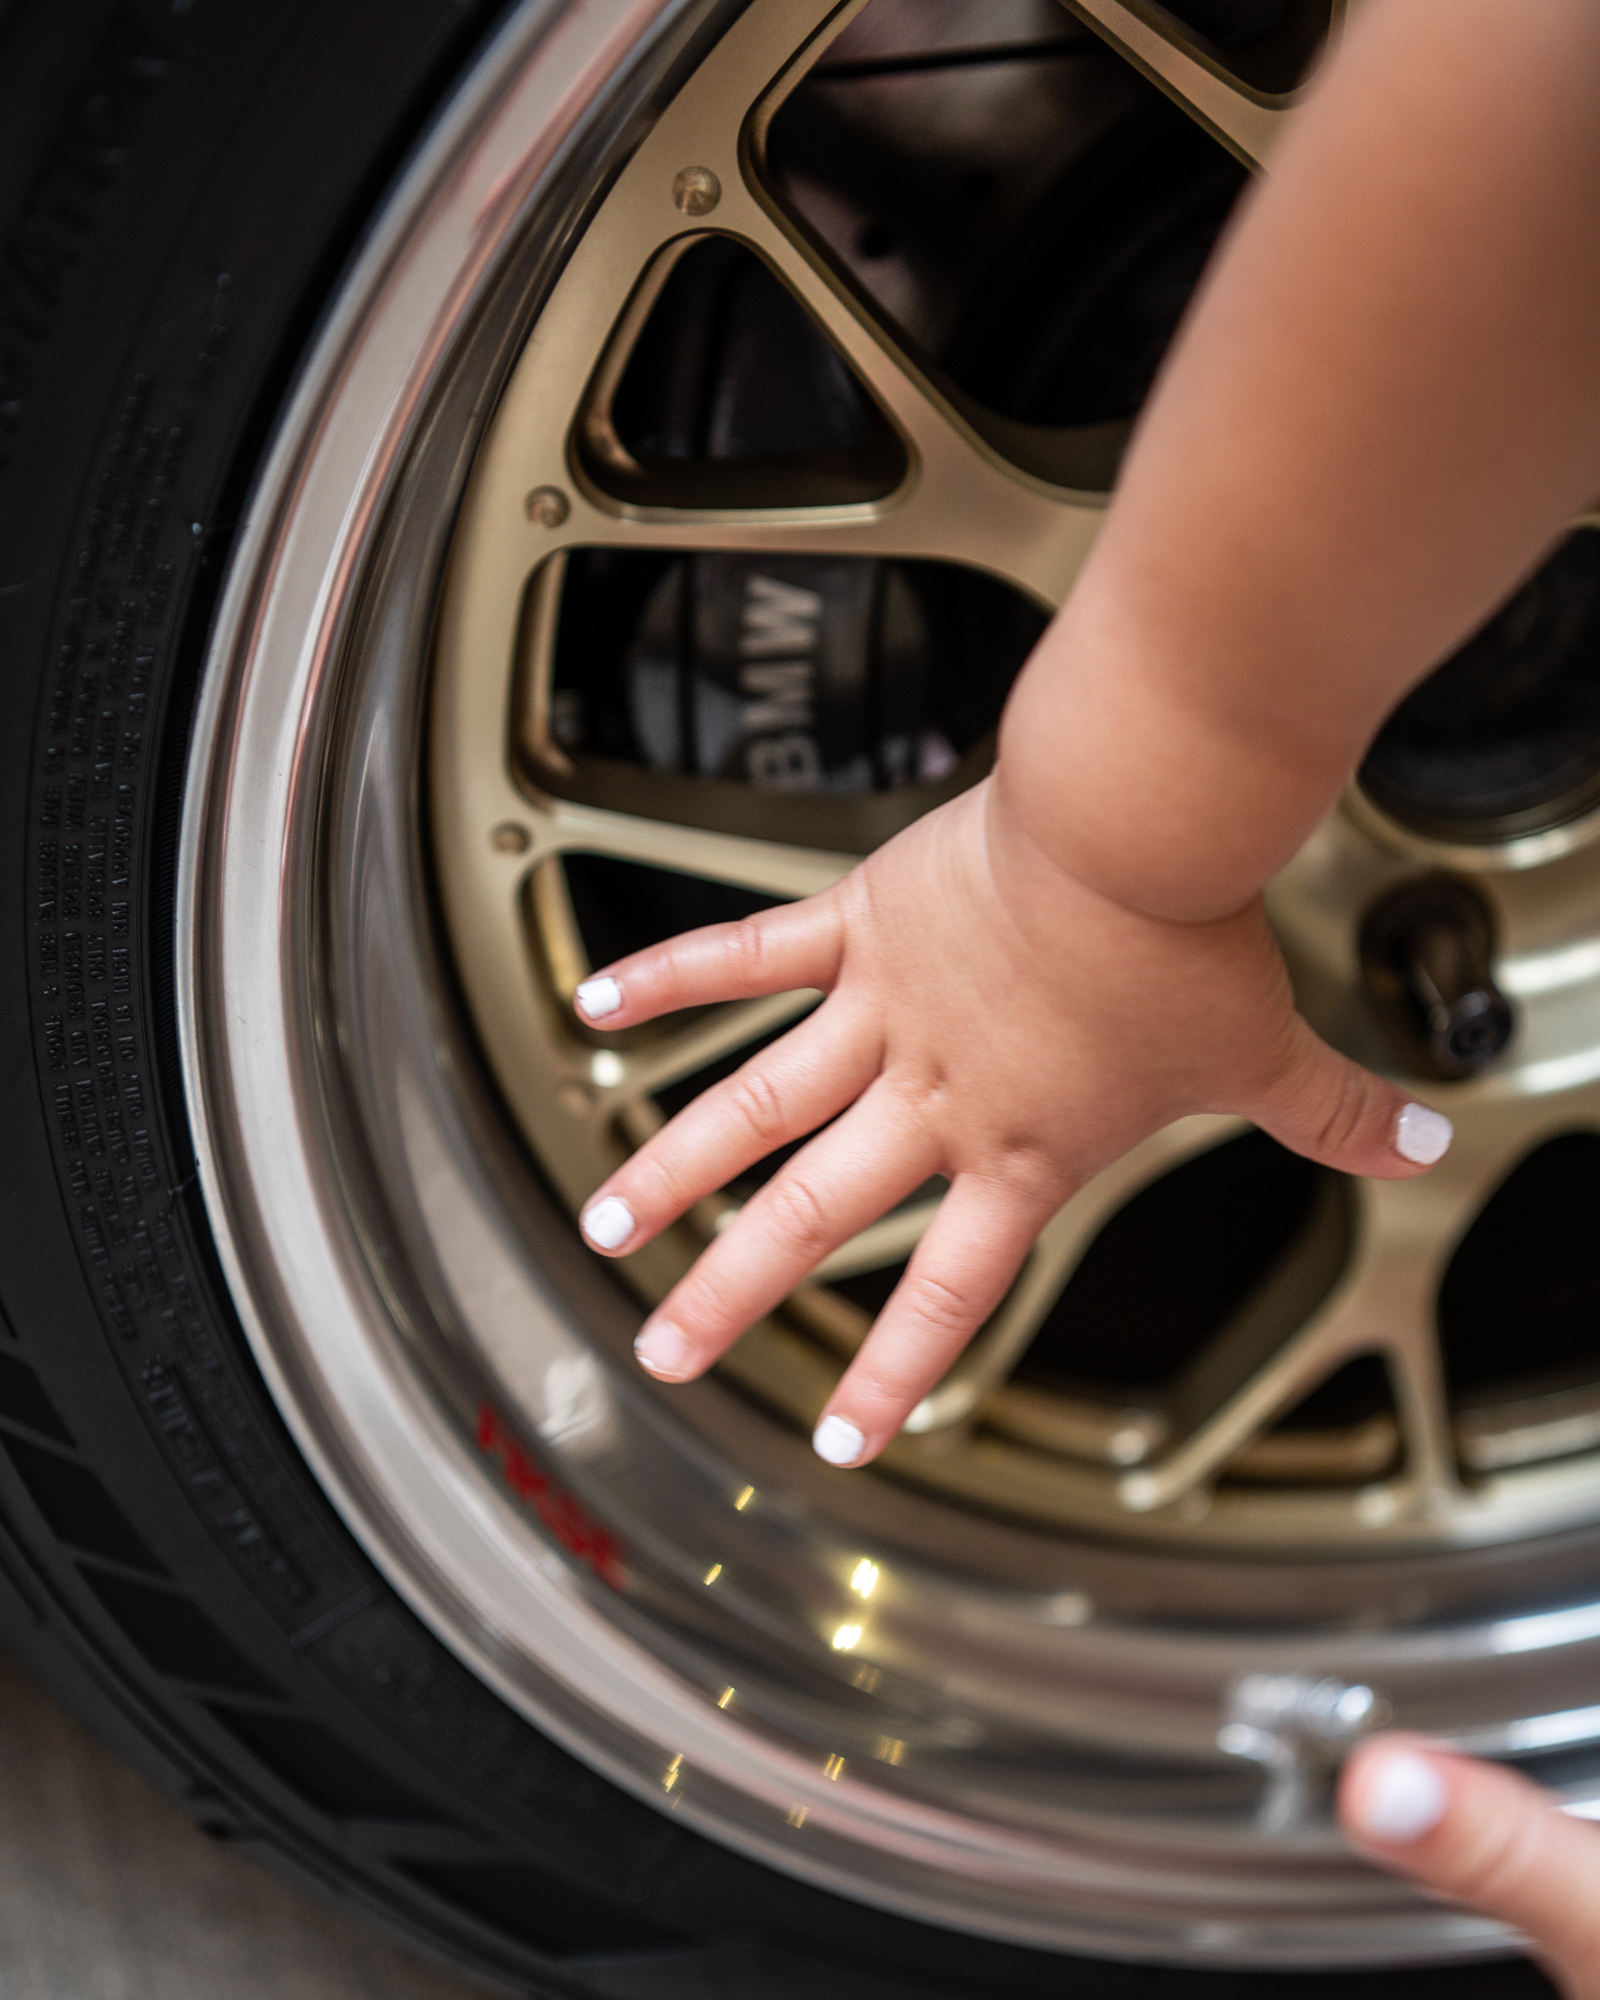
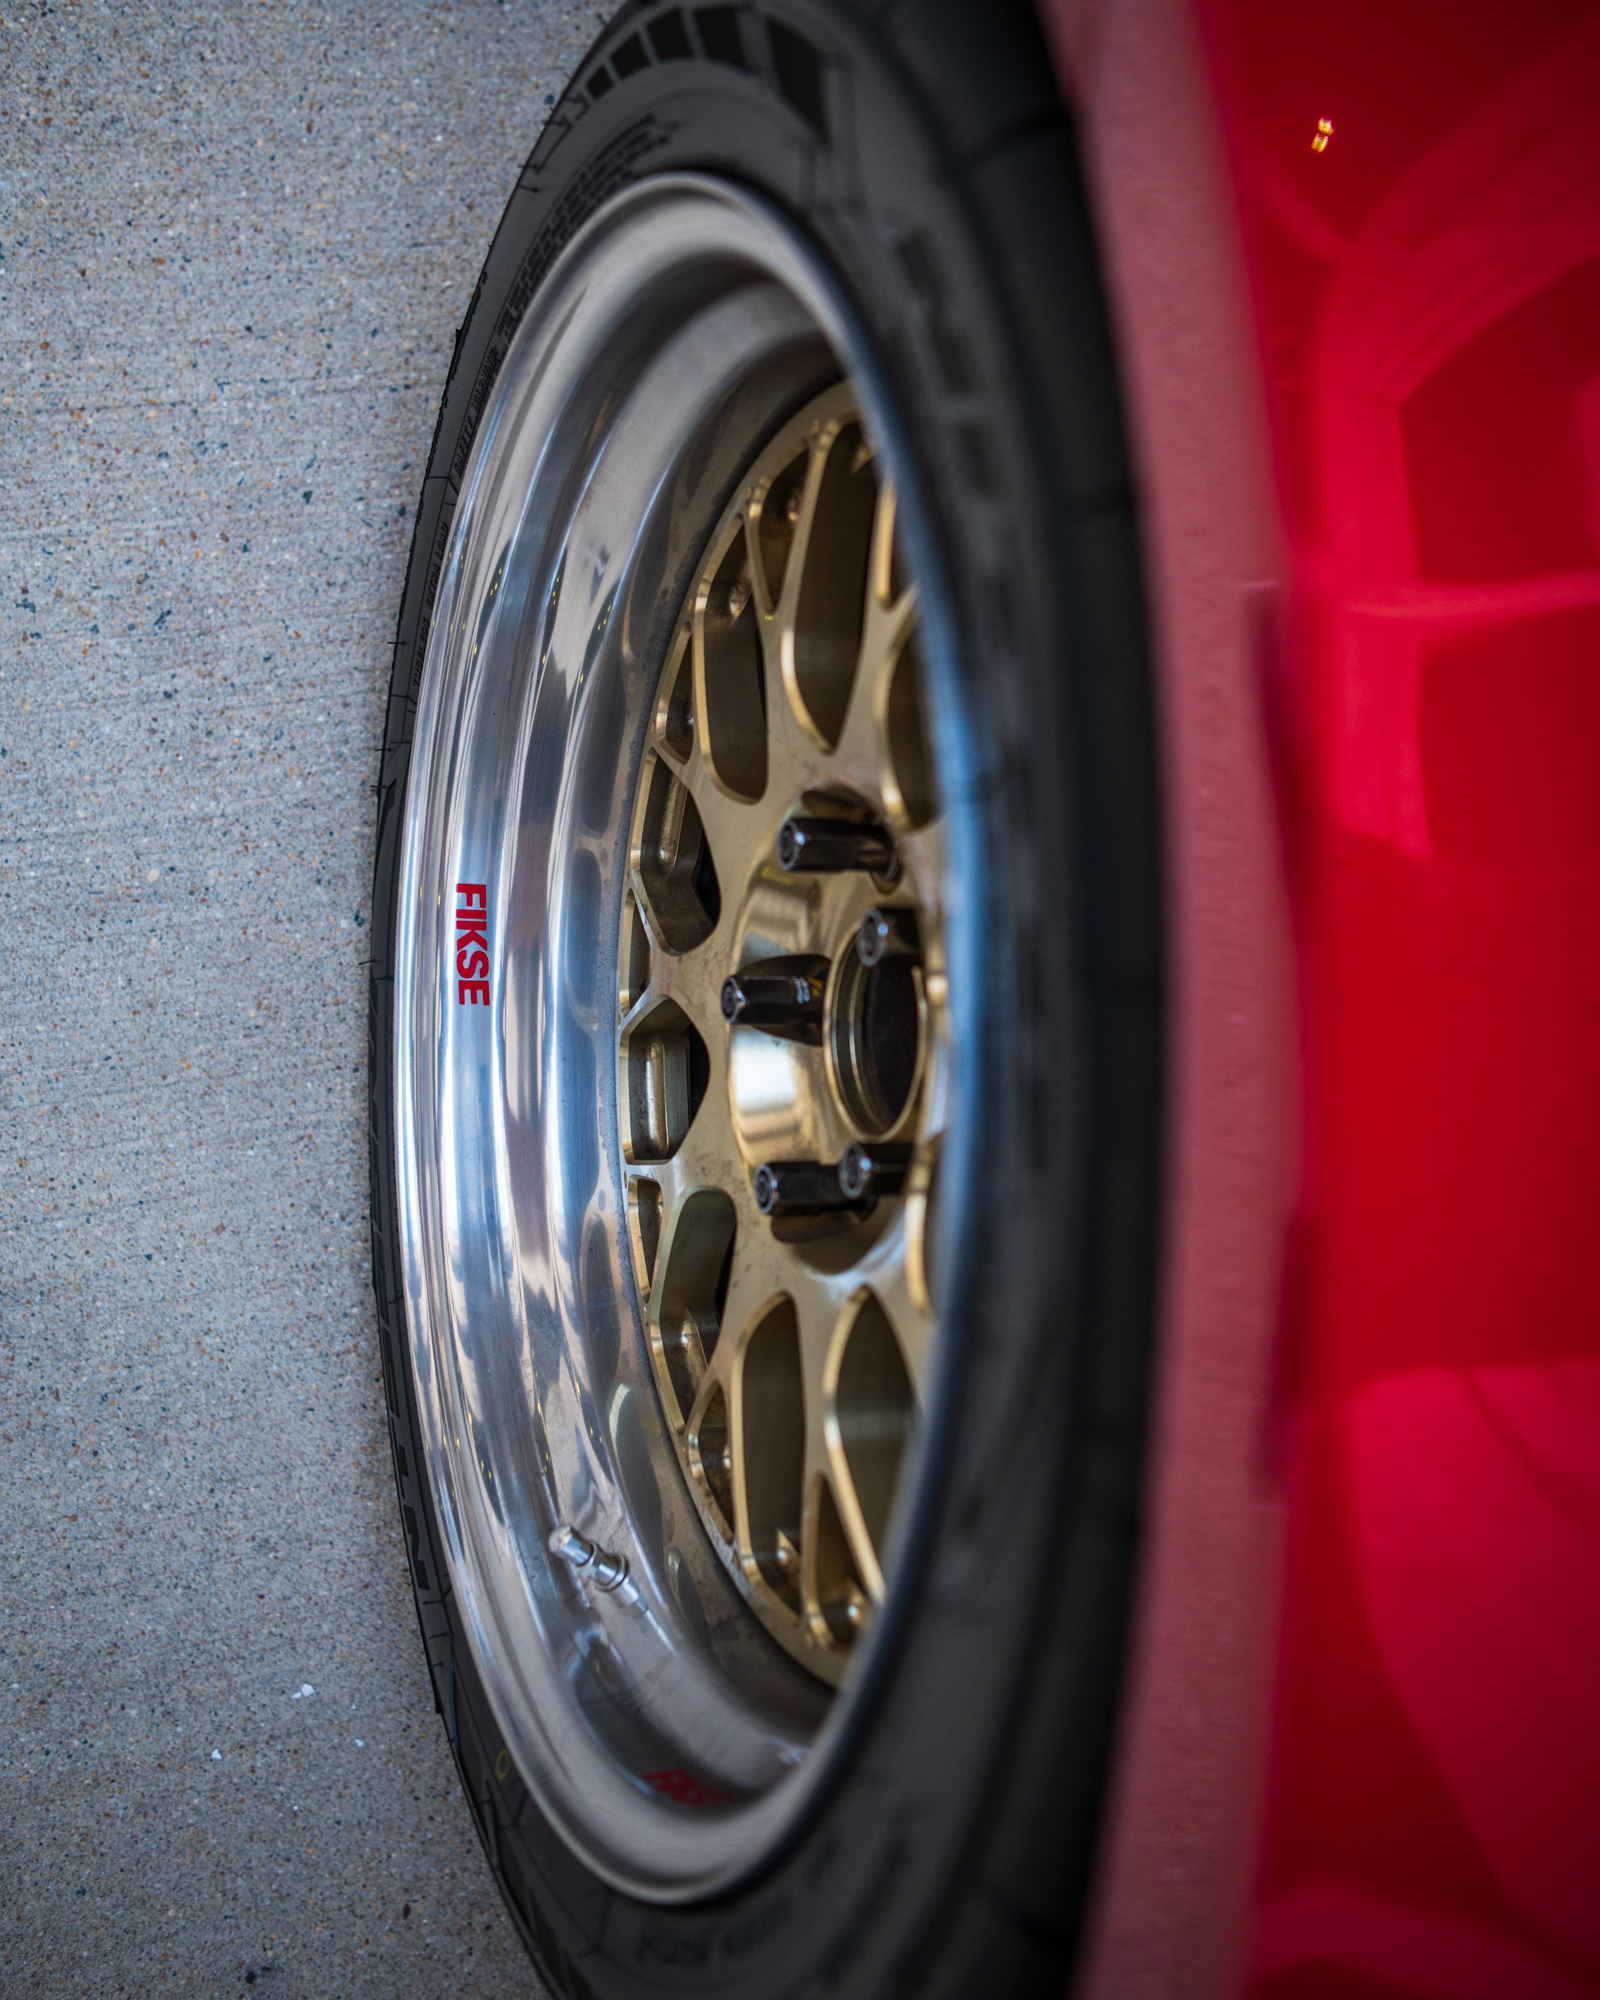
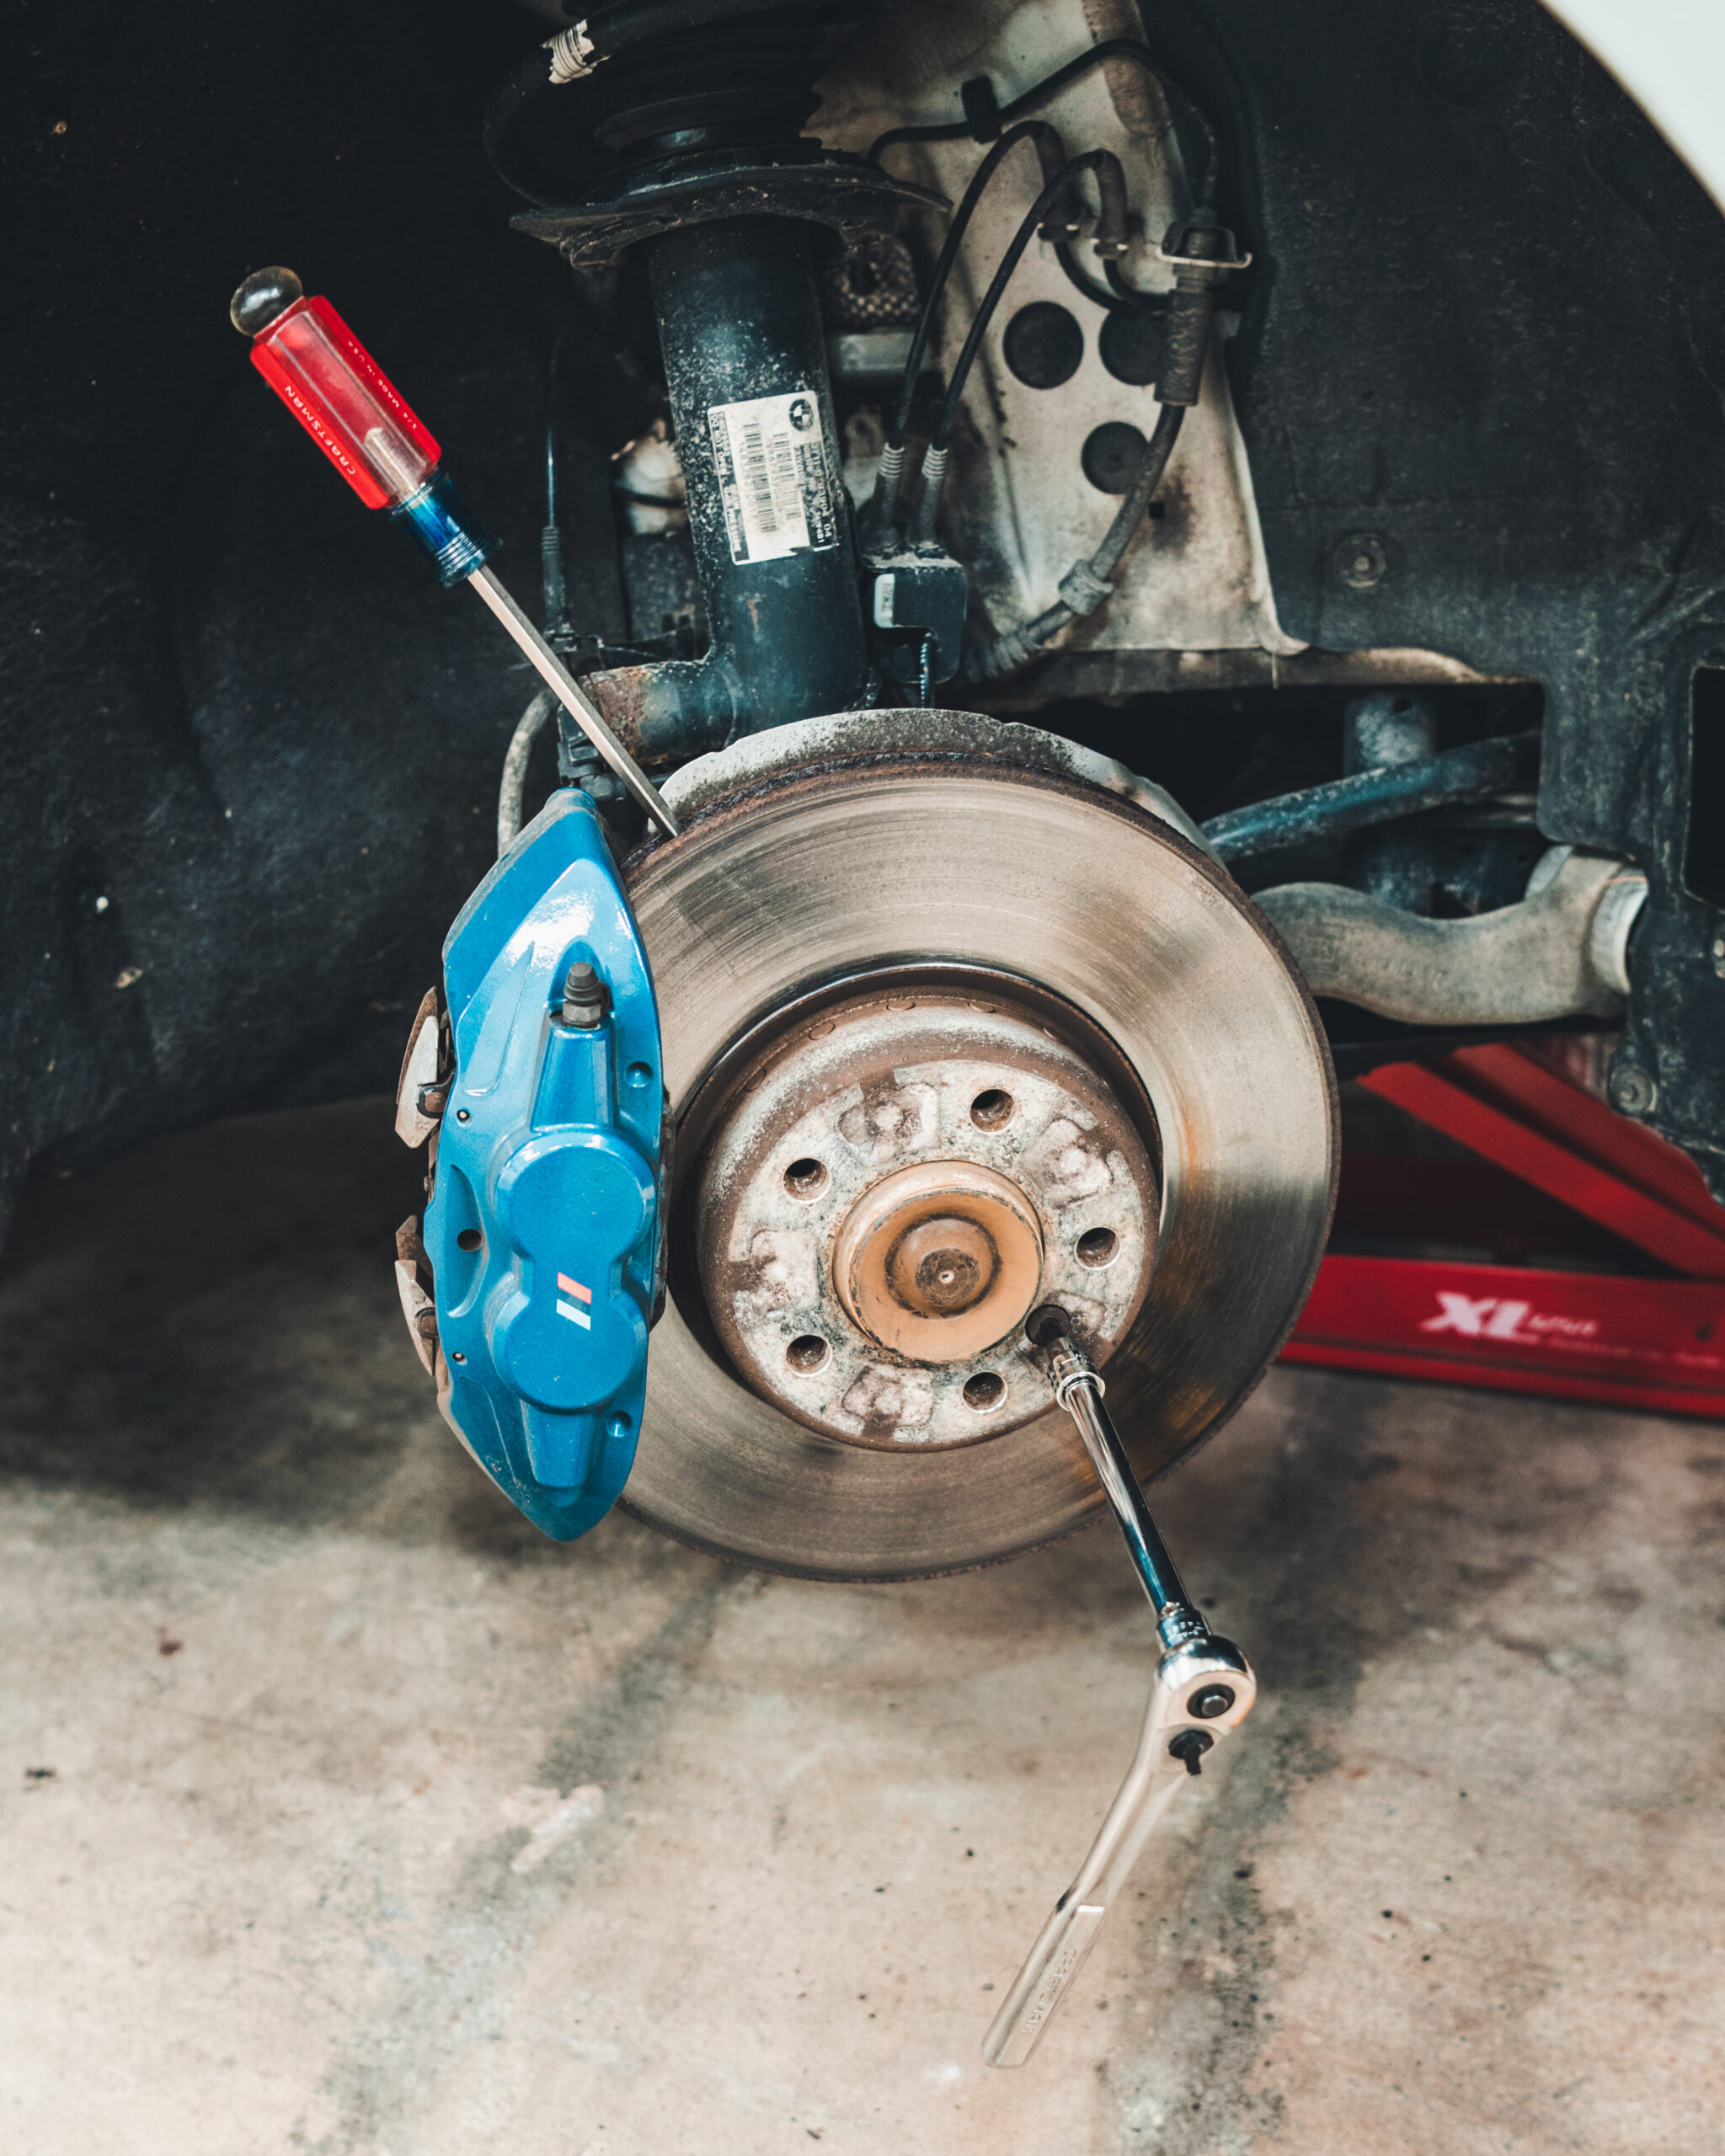
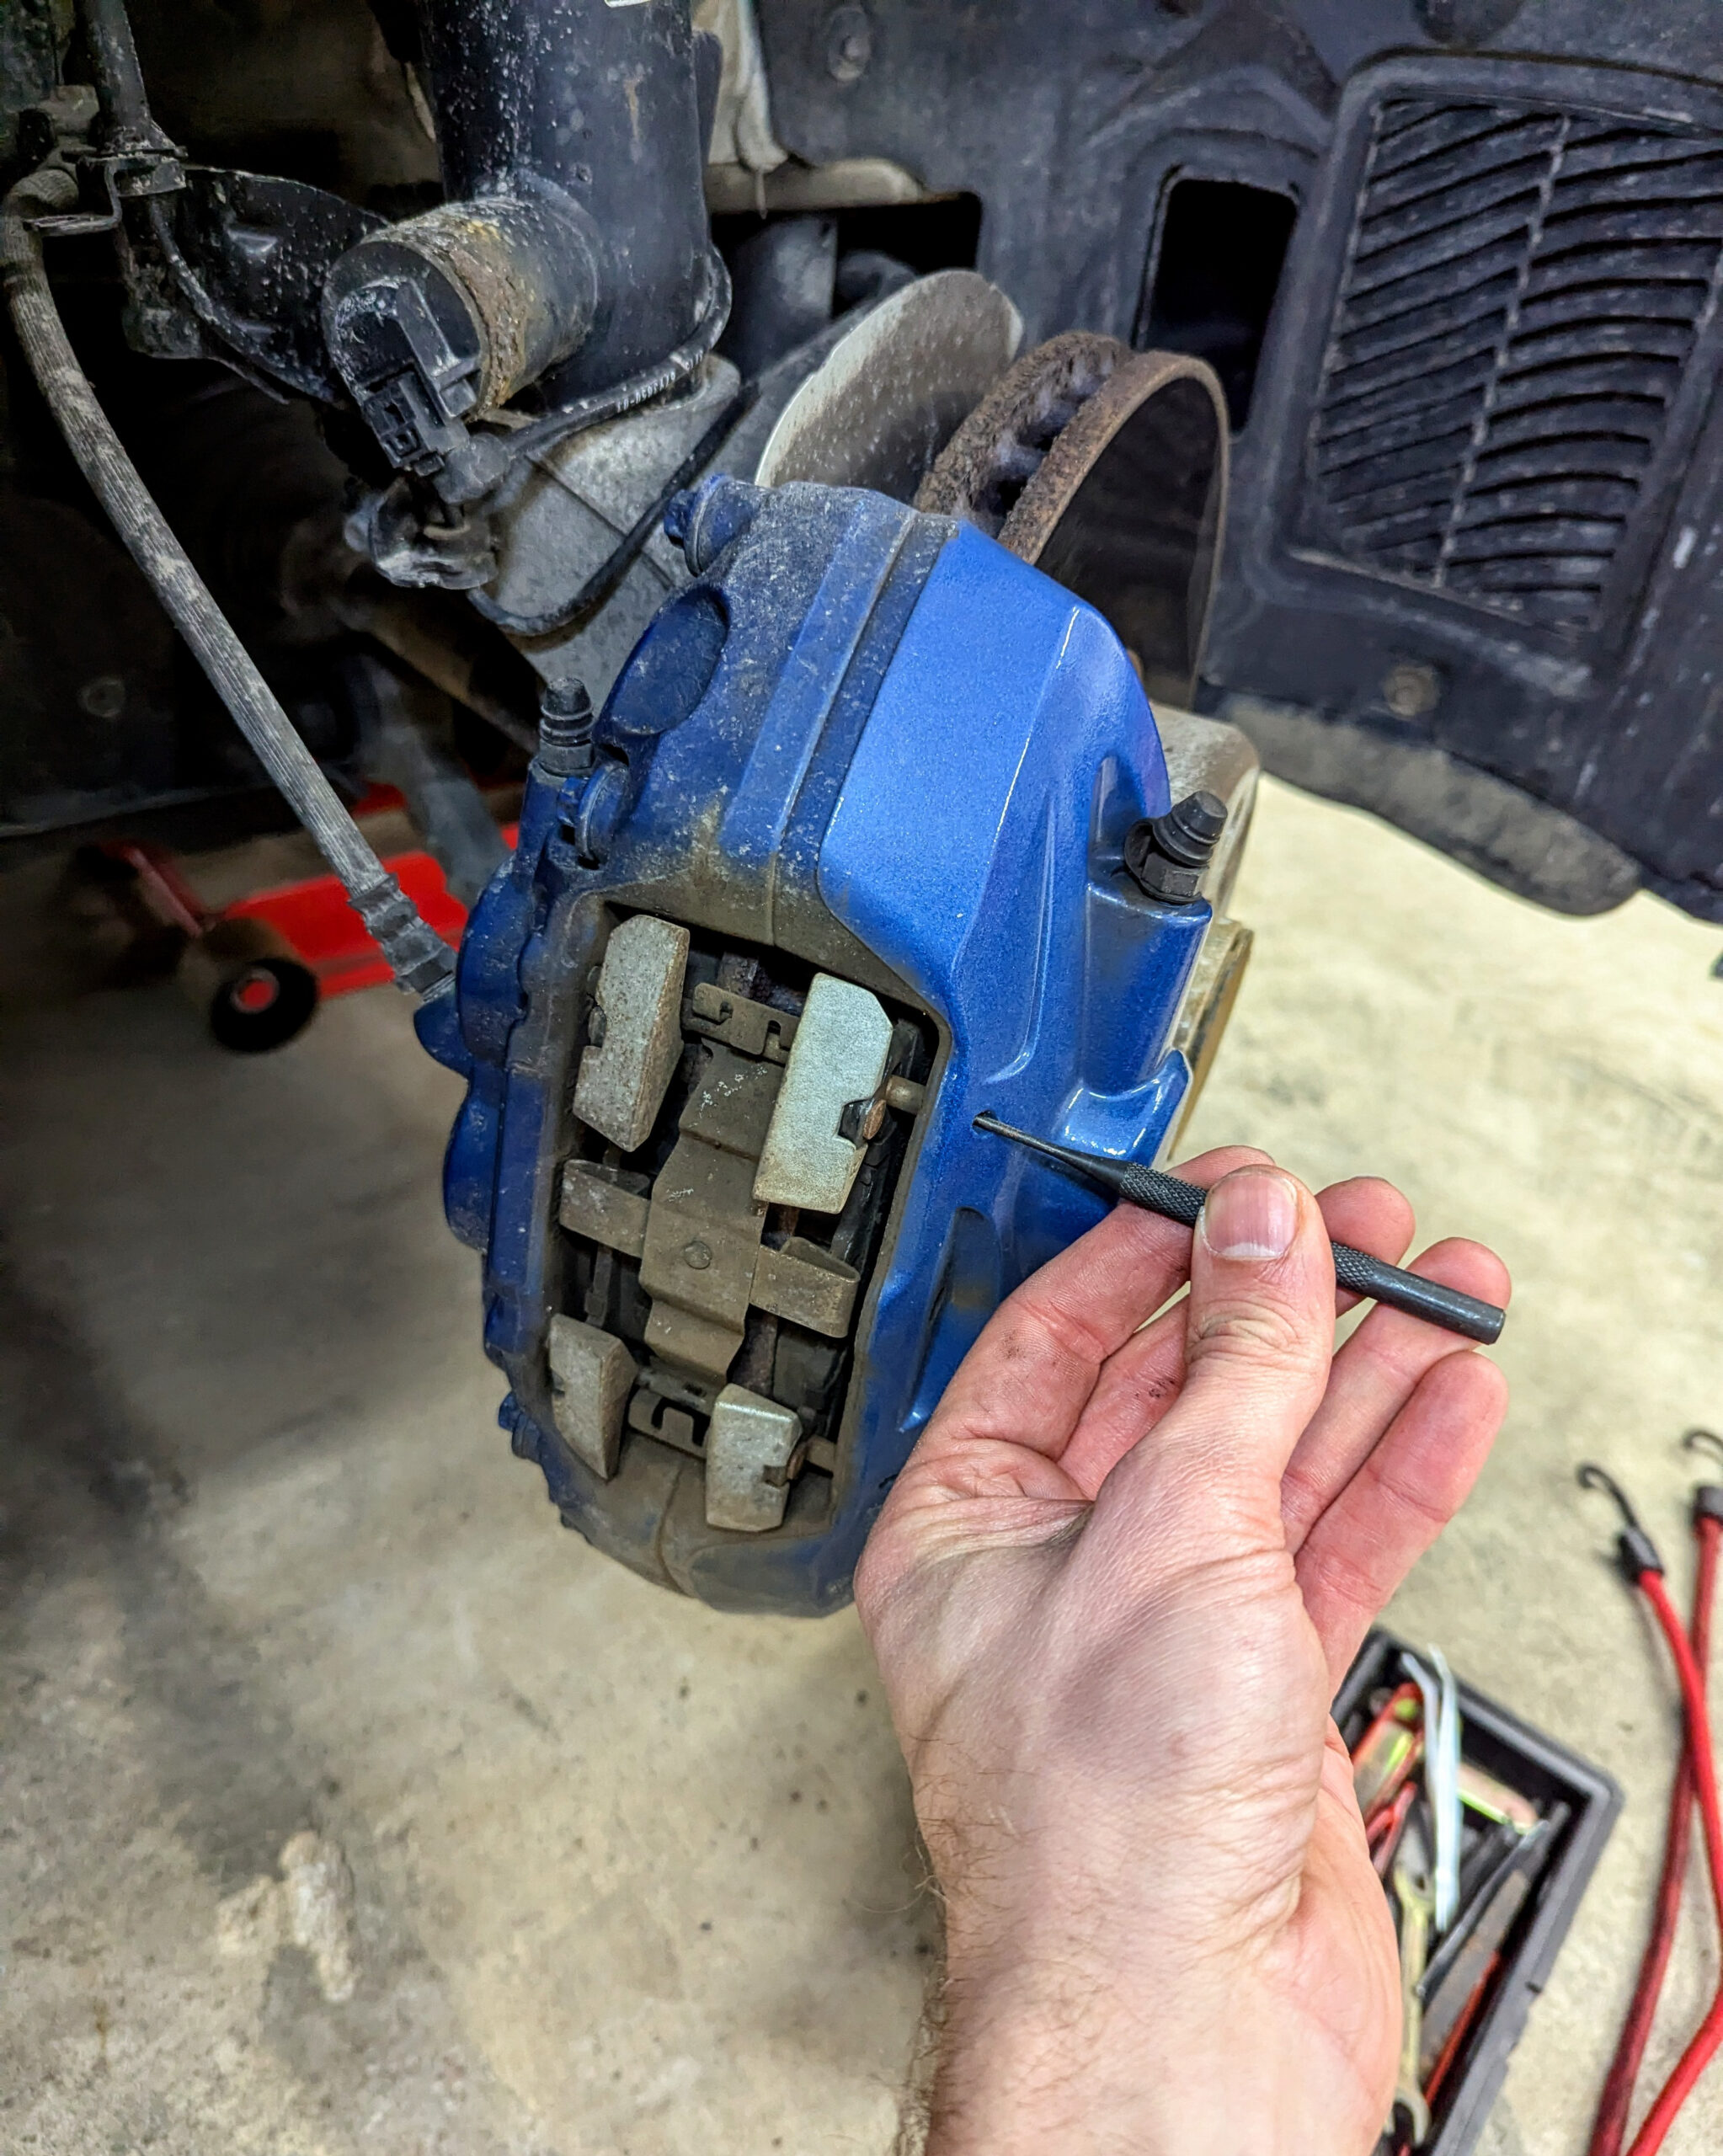
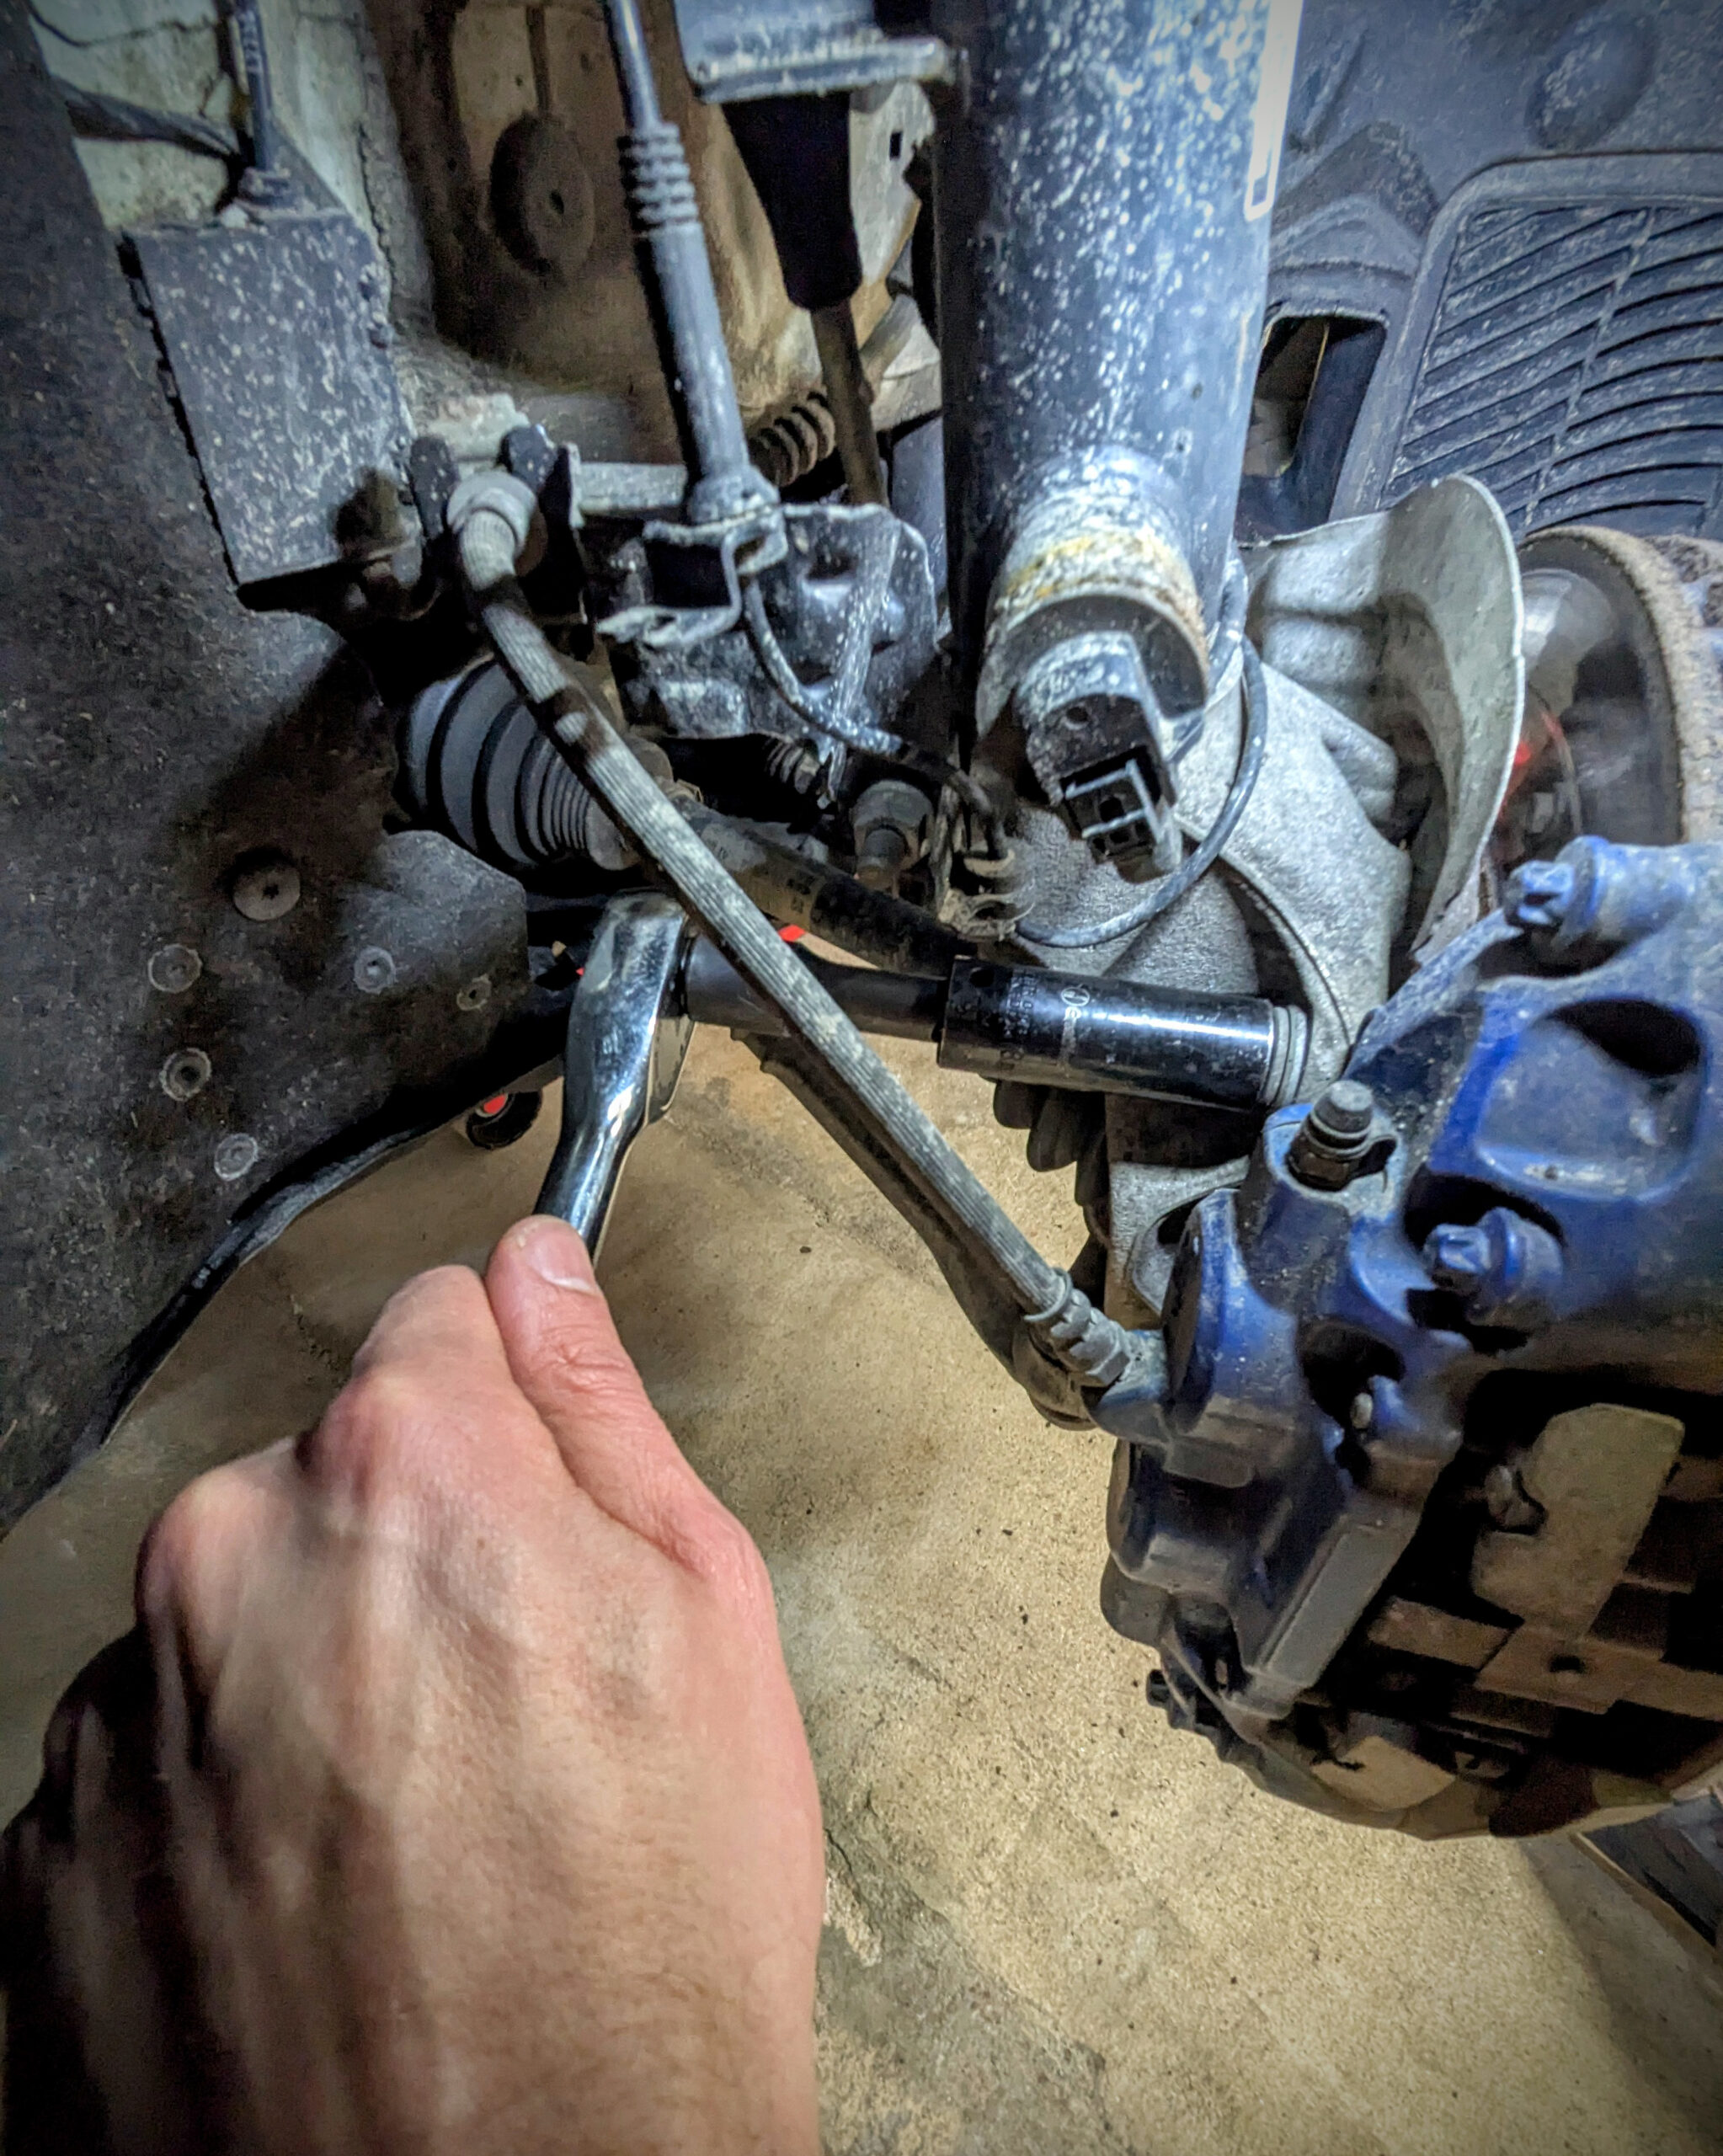
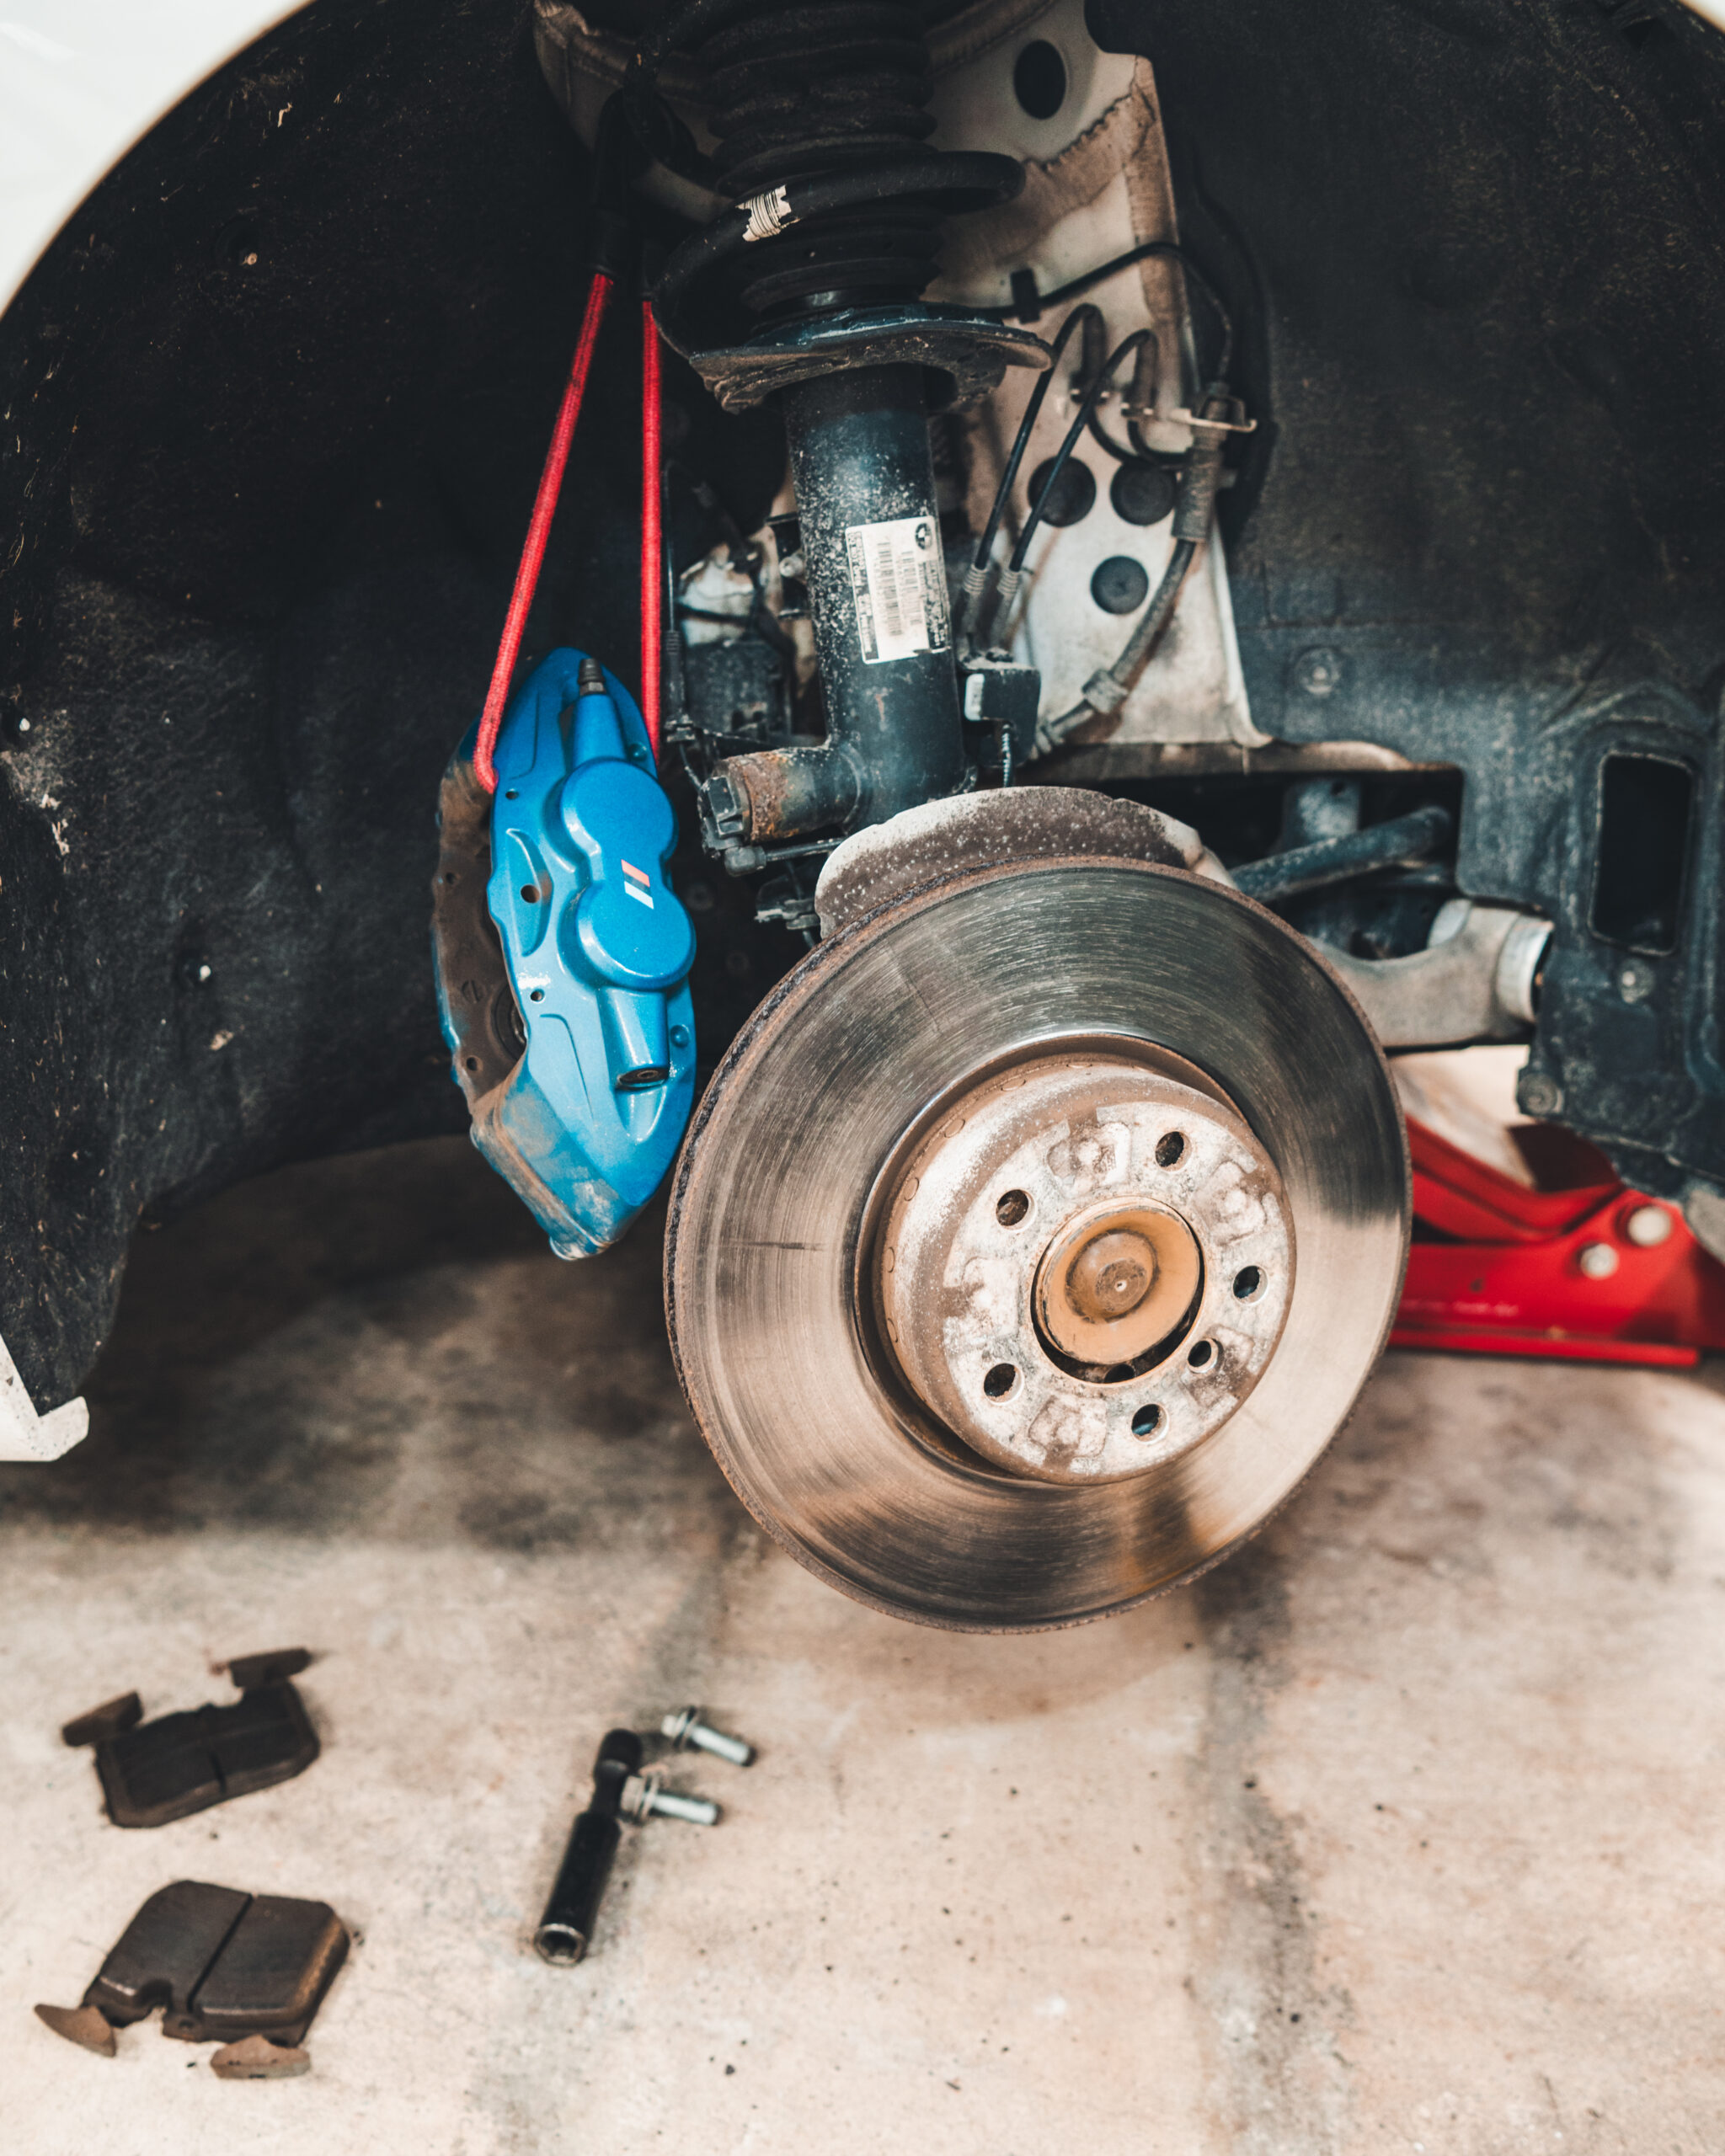
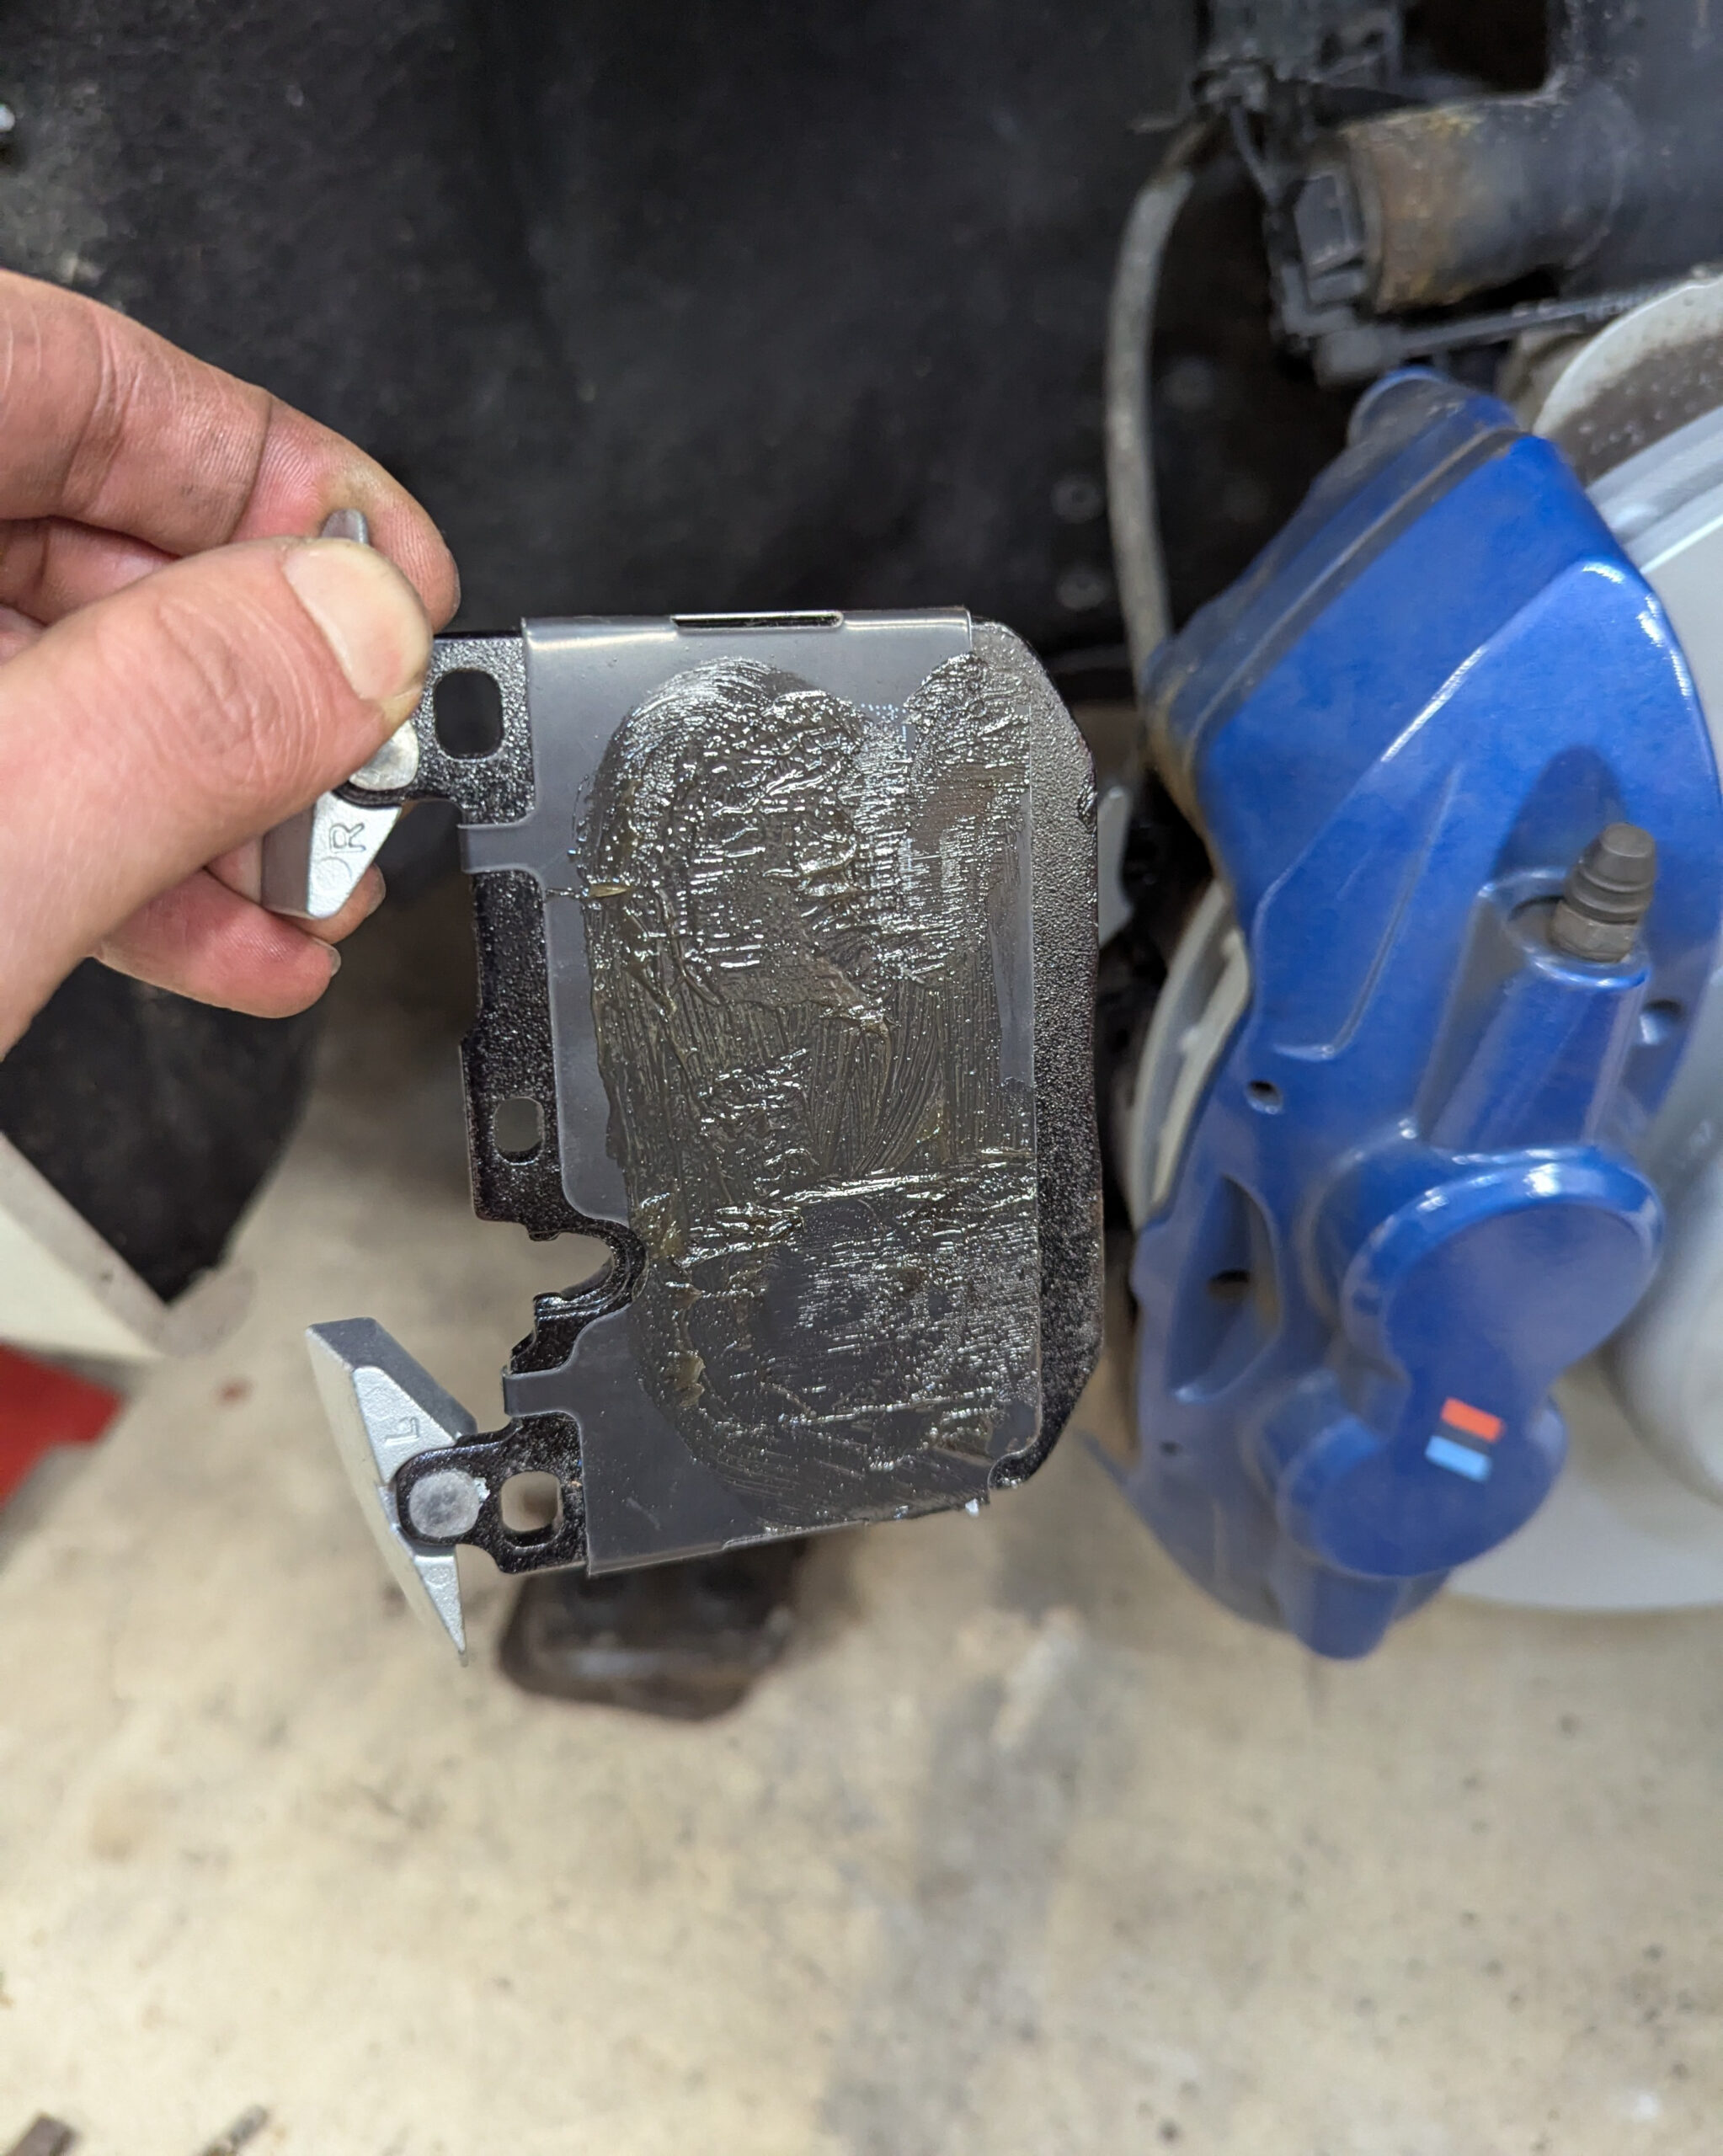
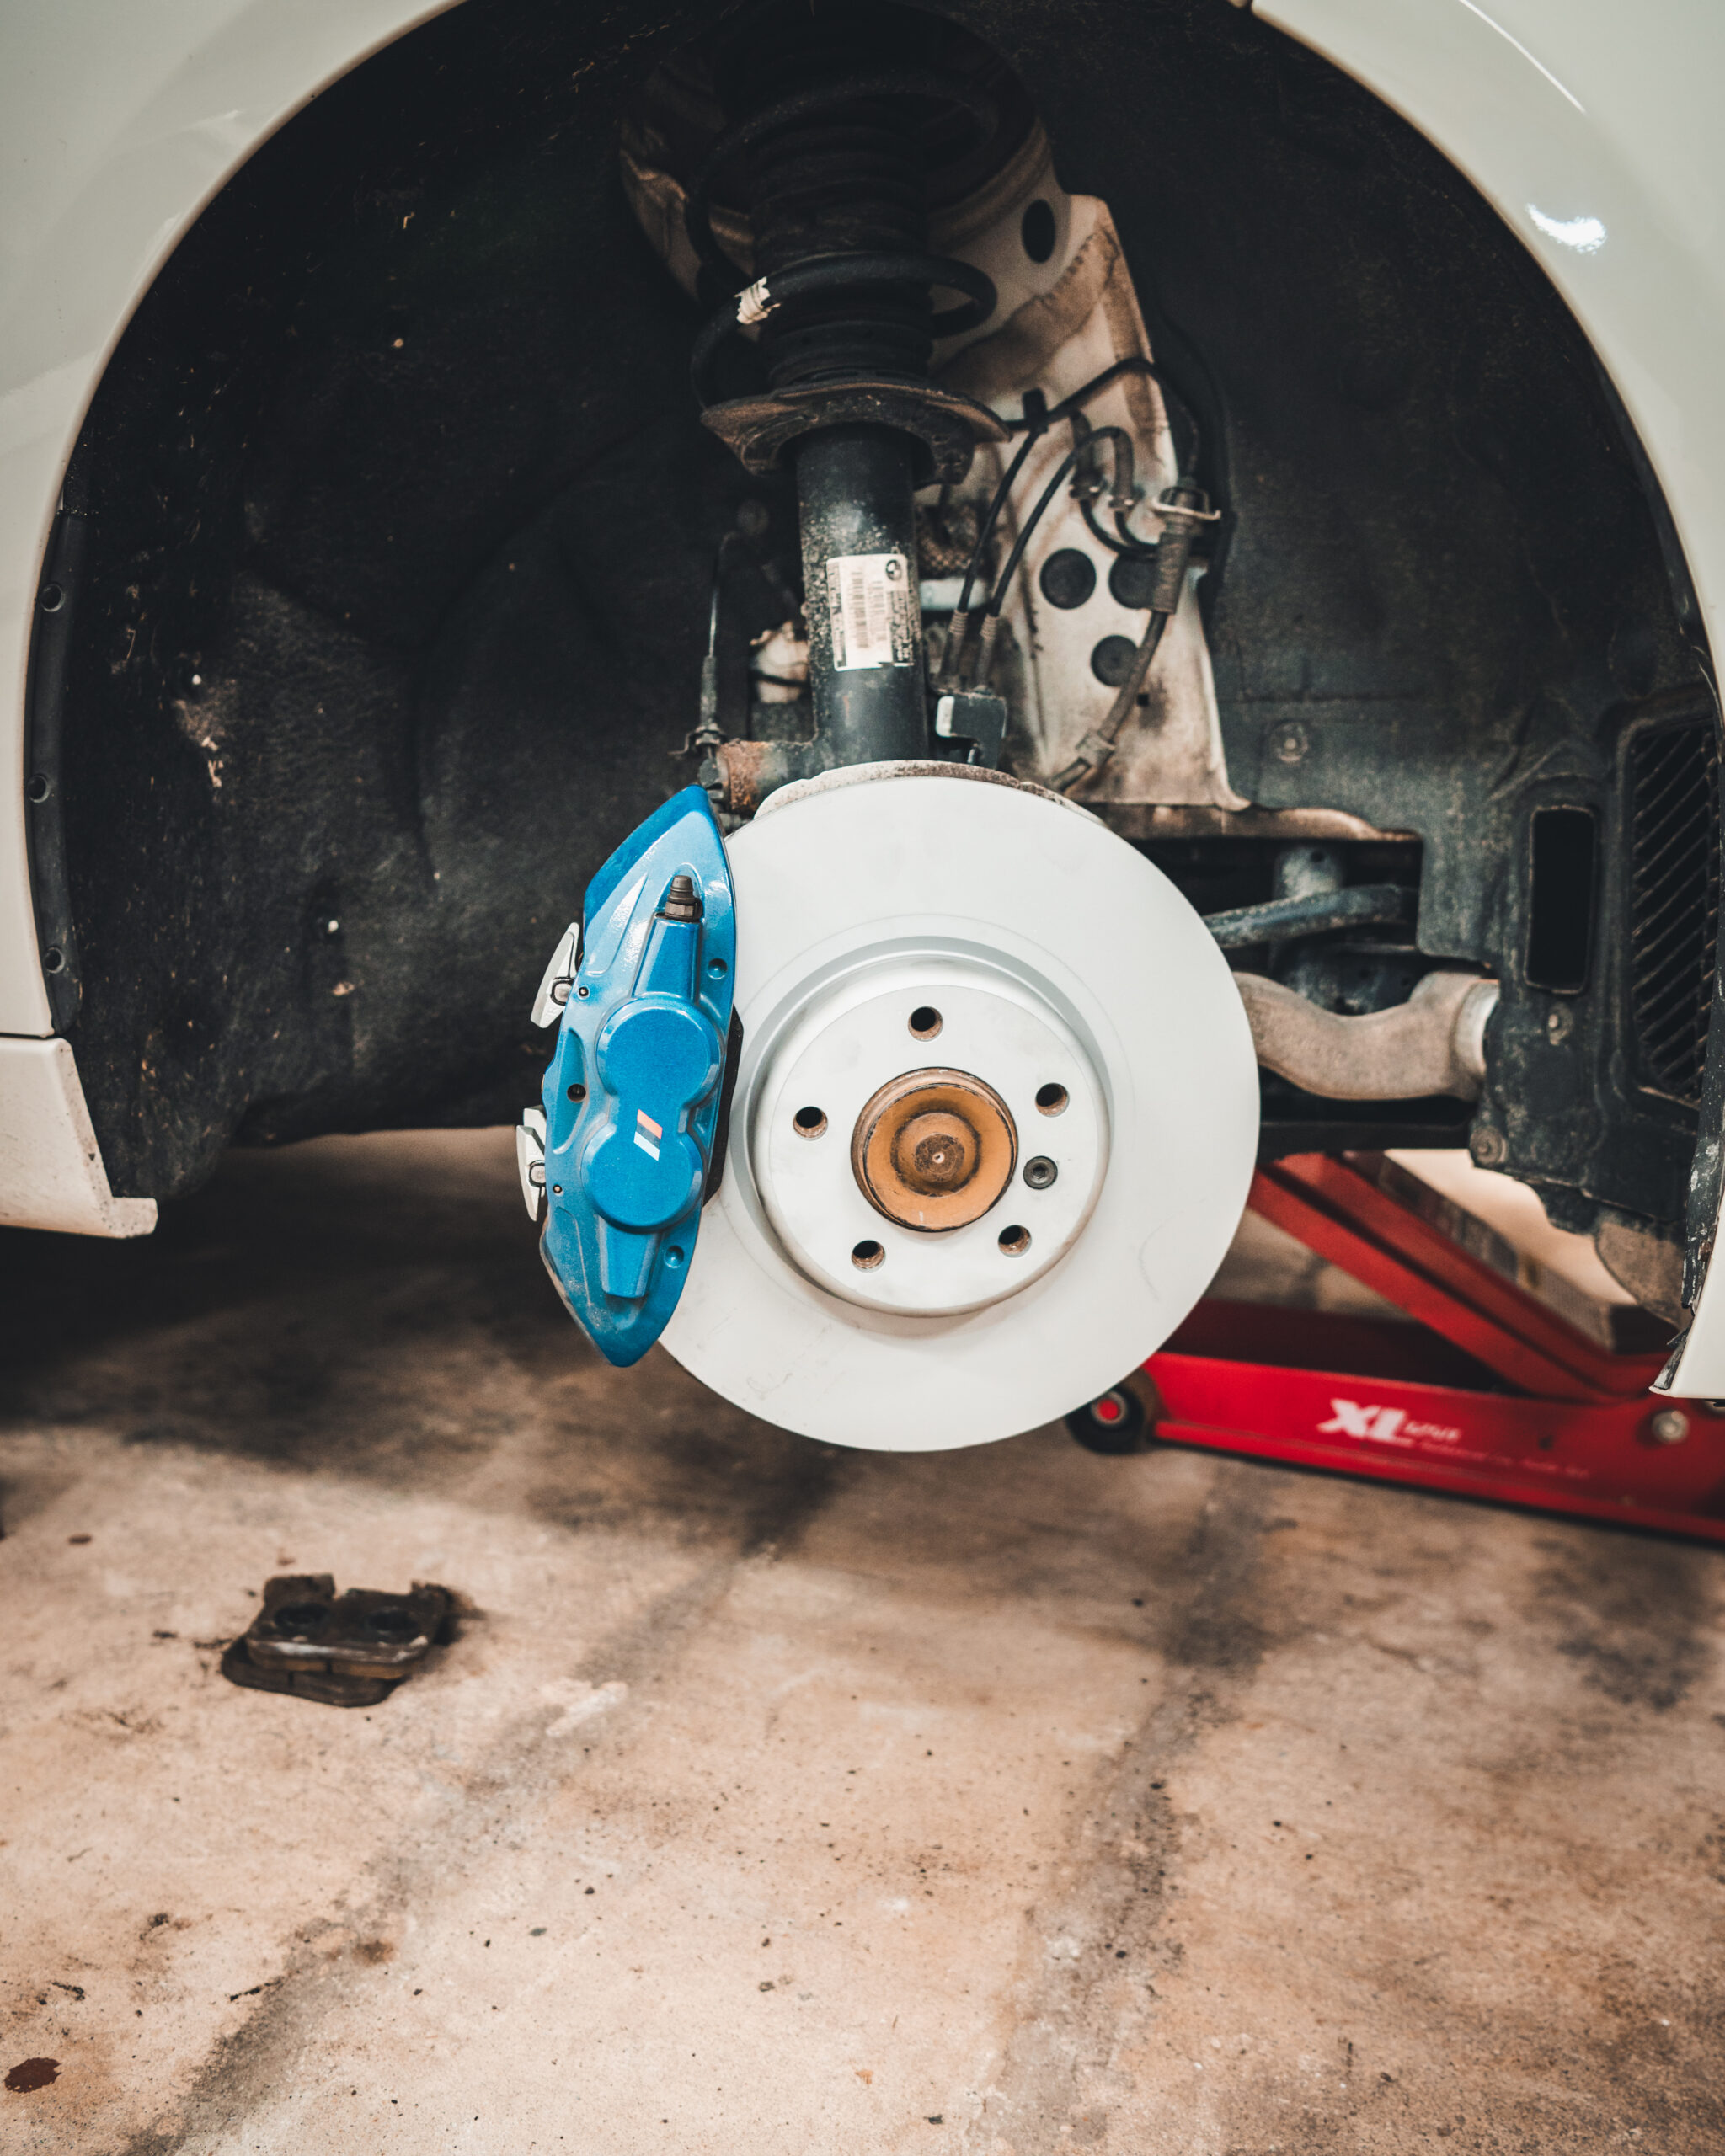
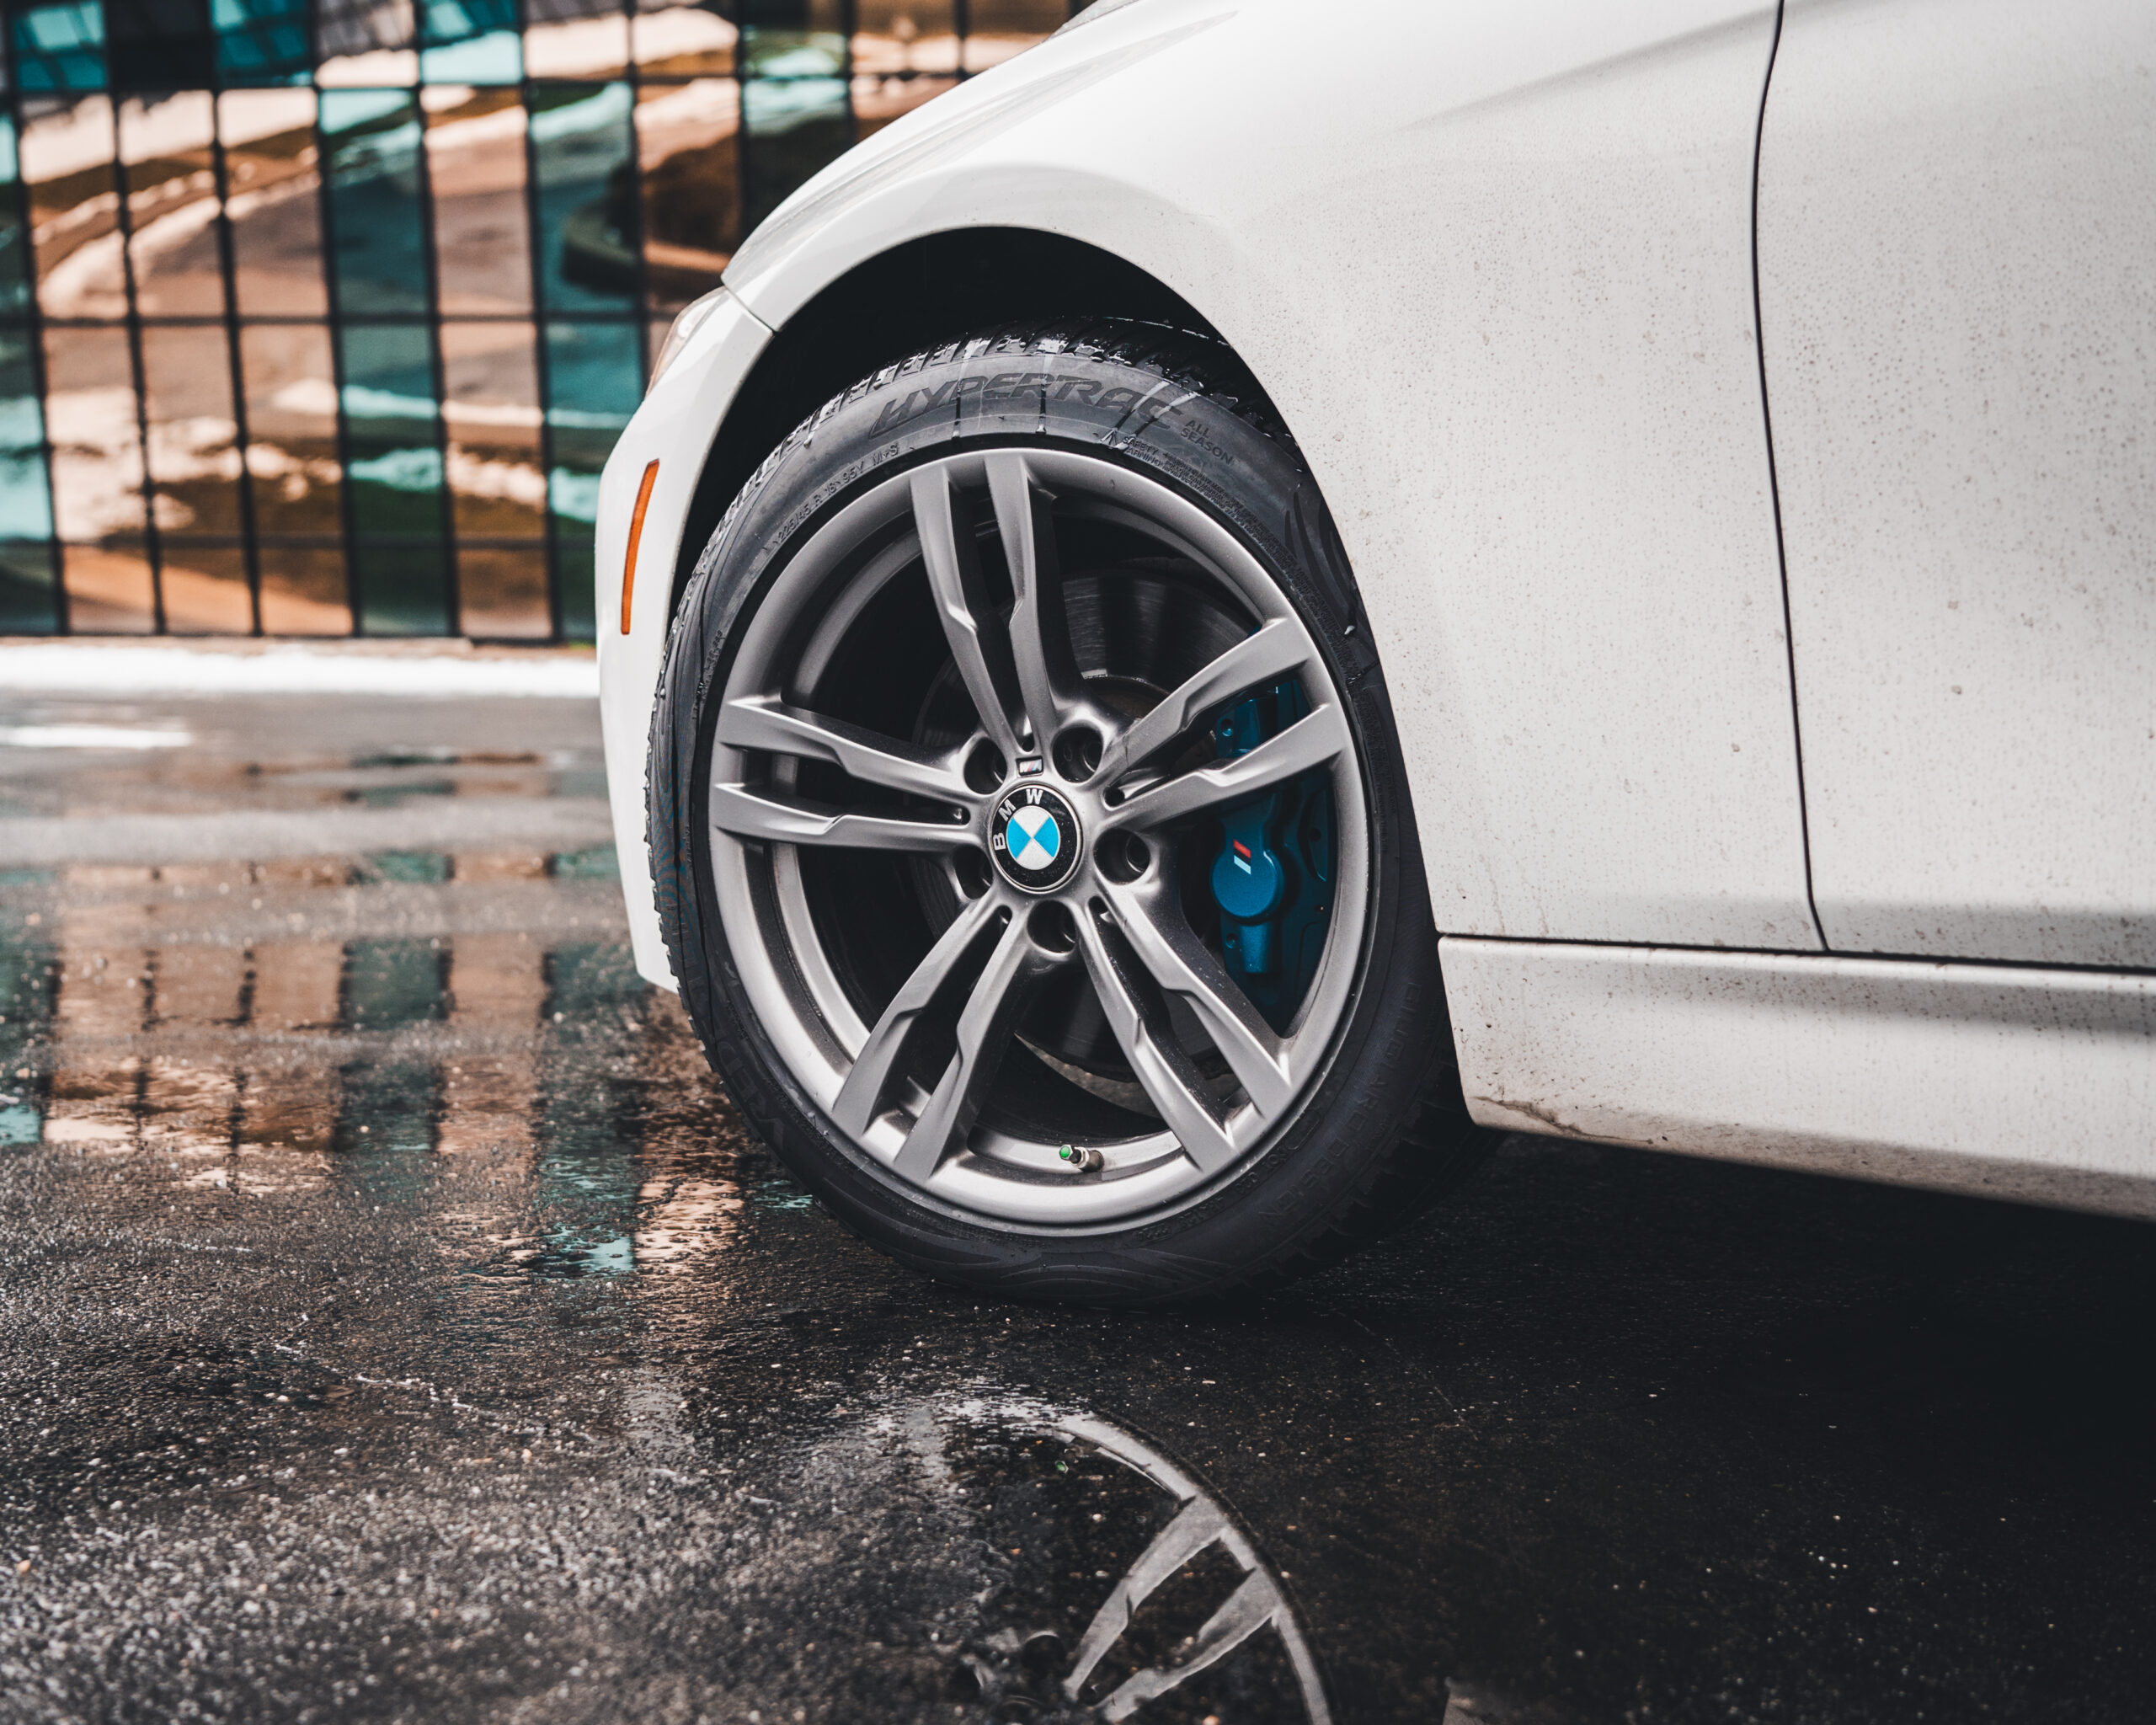
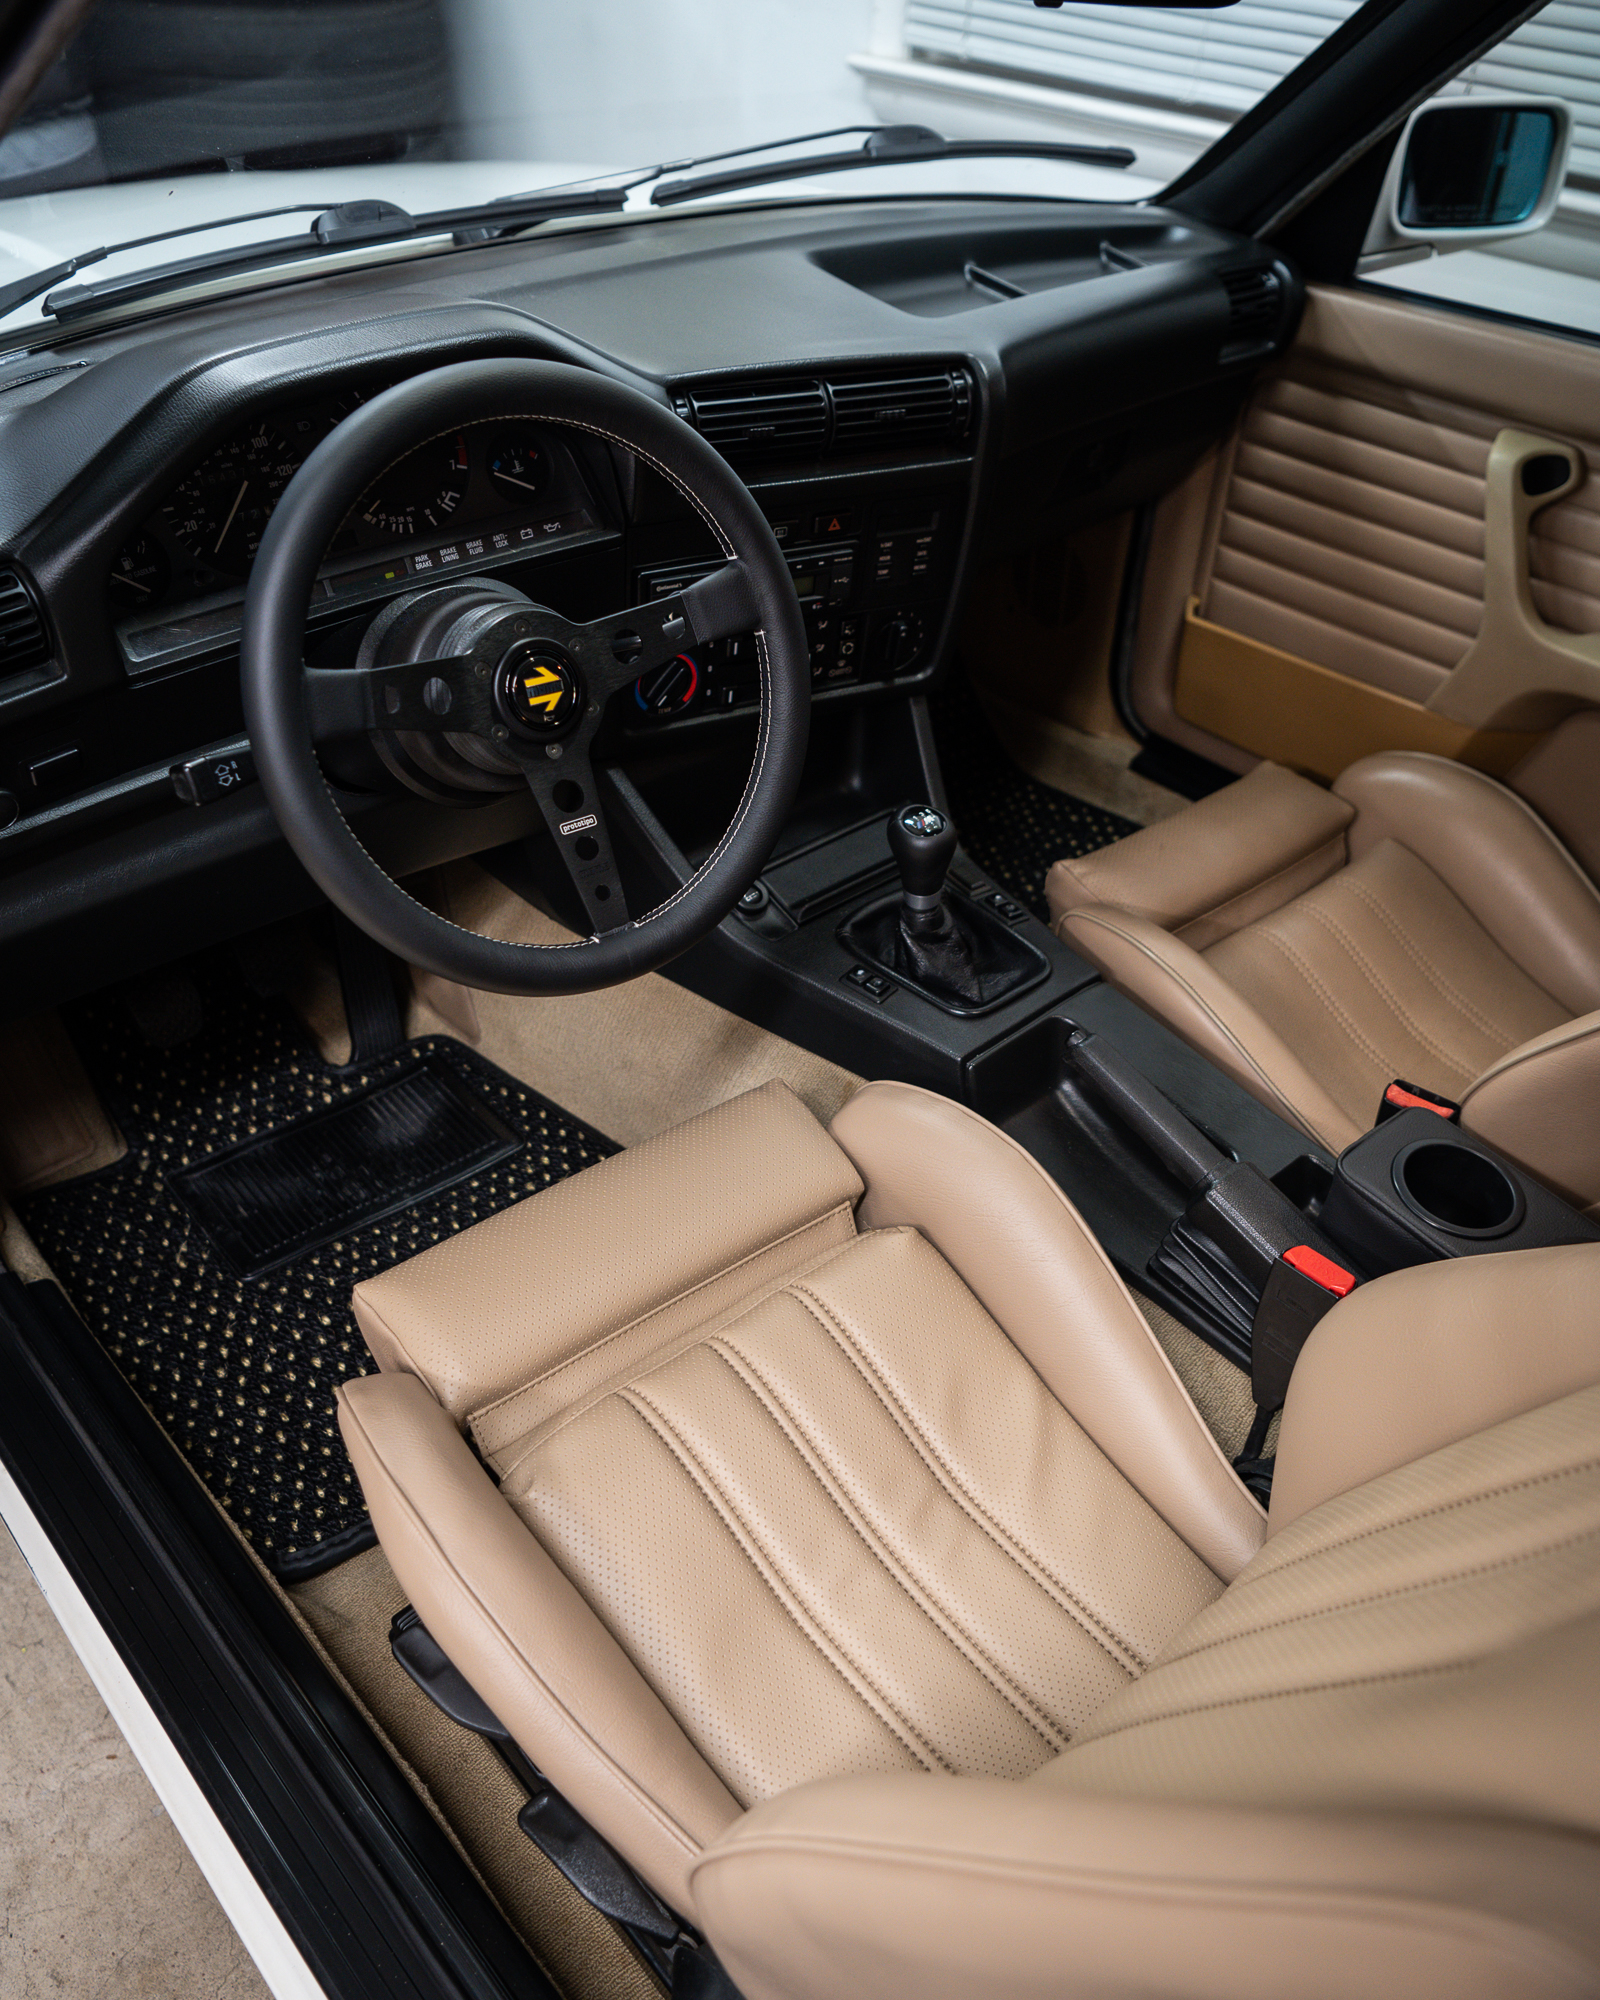
All of that power meets the pavement via a beautifly beefy set of wheels and tires. A set of gold-centered Fikse Profil-10s (18×10 front, 18×11 rear) are wrapped in Nitto NT555s, measuring in at a staggering 275/35 up front and 305/35 out back. The suspension consists of BC Racing coilovers, wearing 8kg front and 18kg rear Swift springs, along with a number of upgraded front and rear arms and bushings. Mila’s painted nails go well with gold centers, polished lips, and meaty 135i brakes, don’t you think?
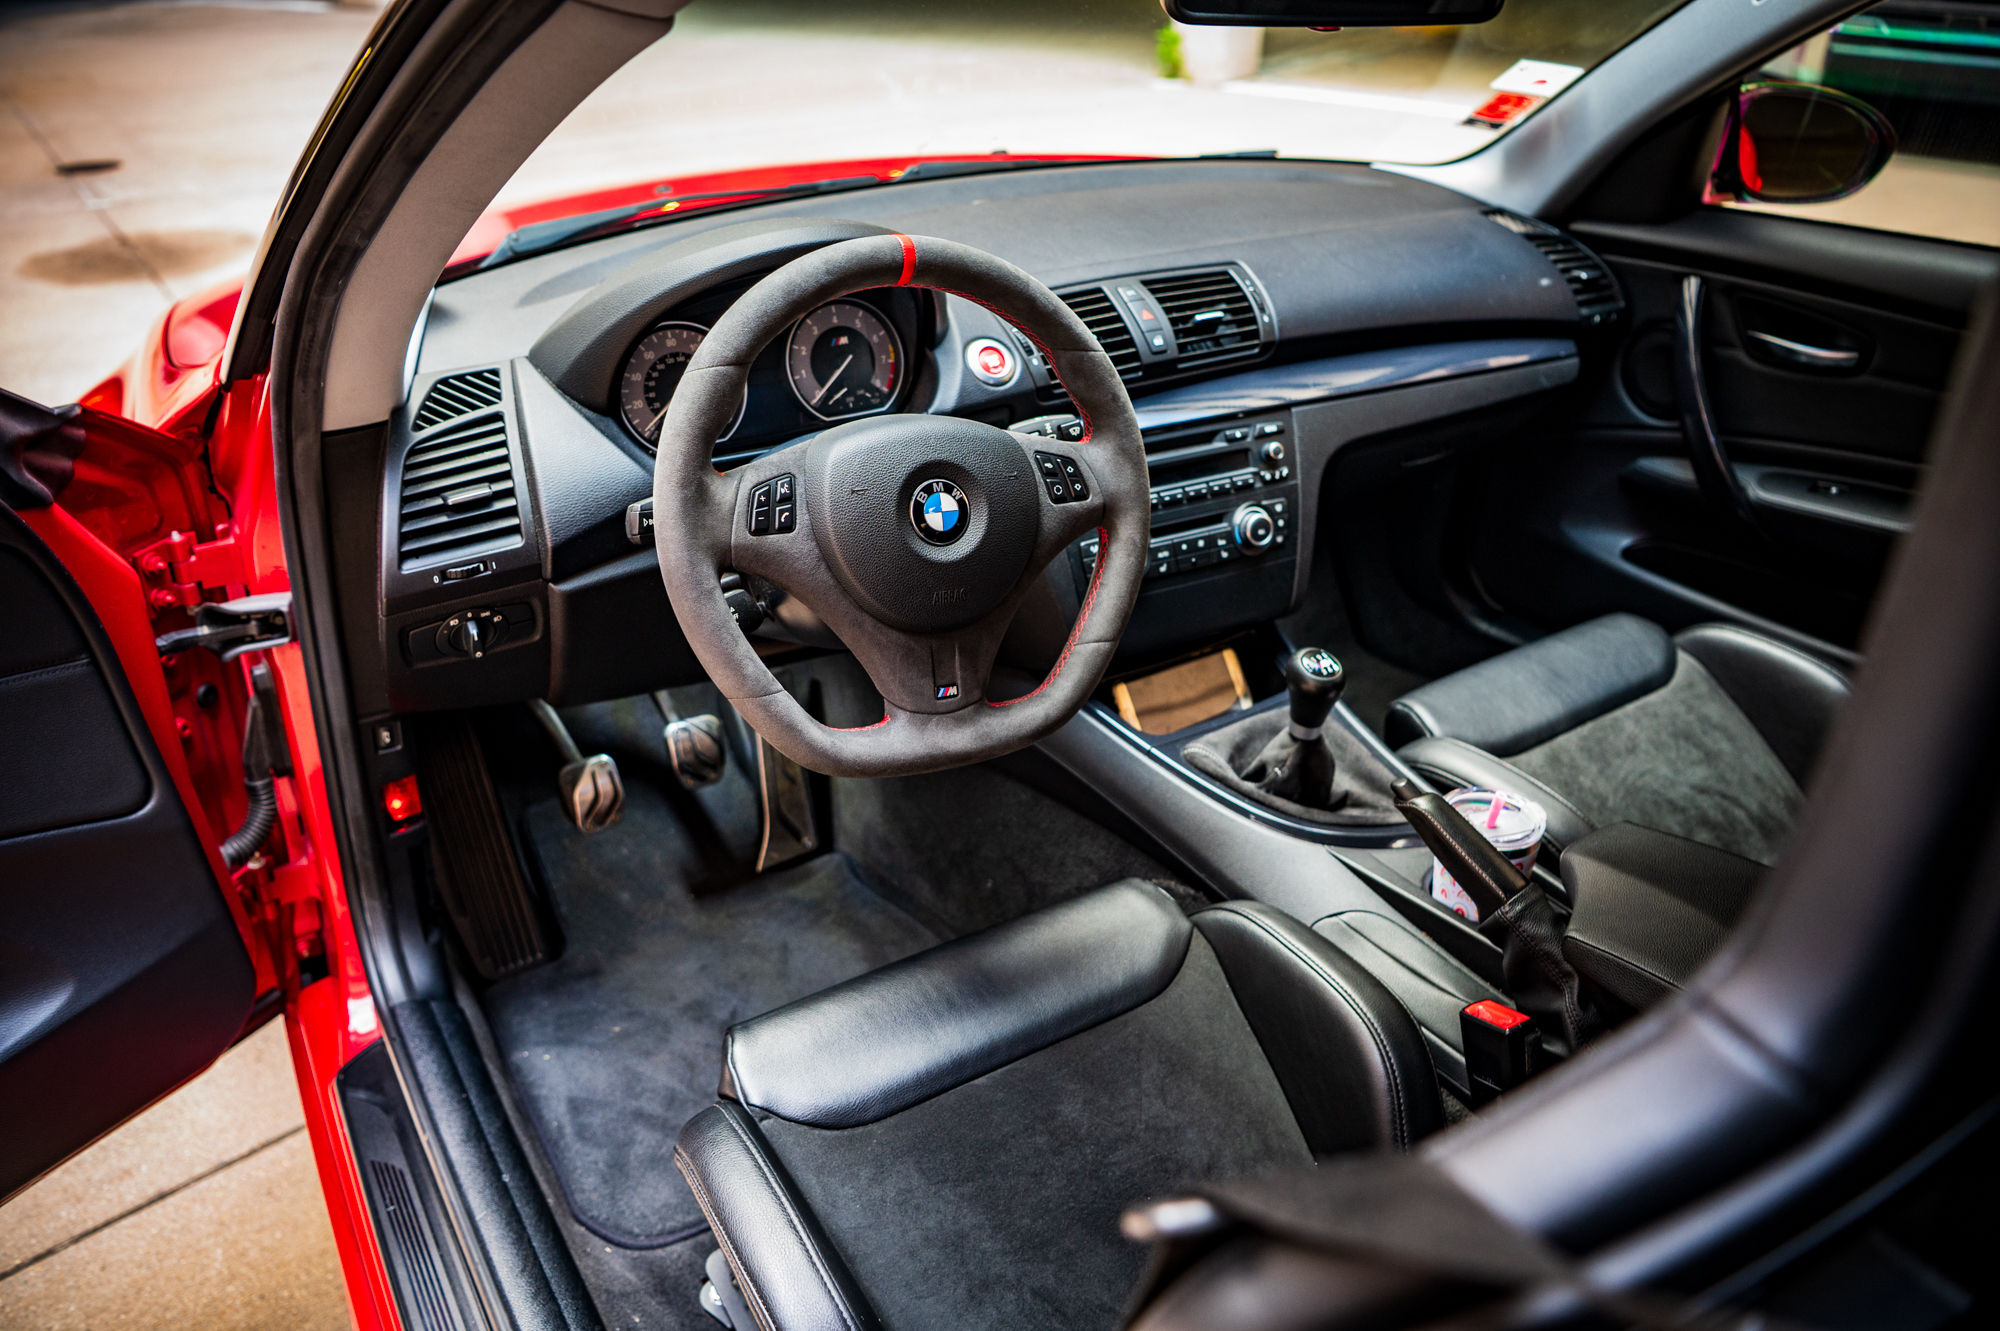

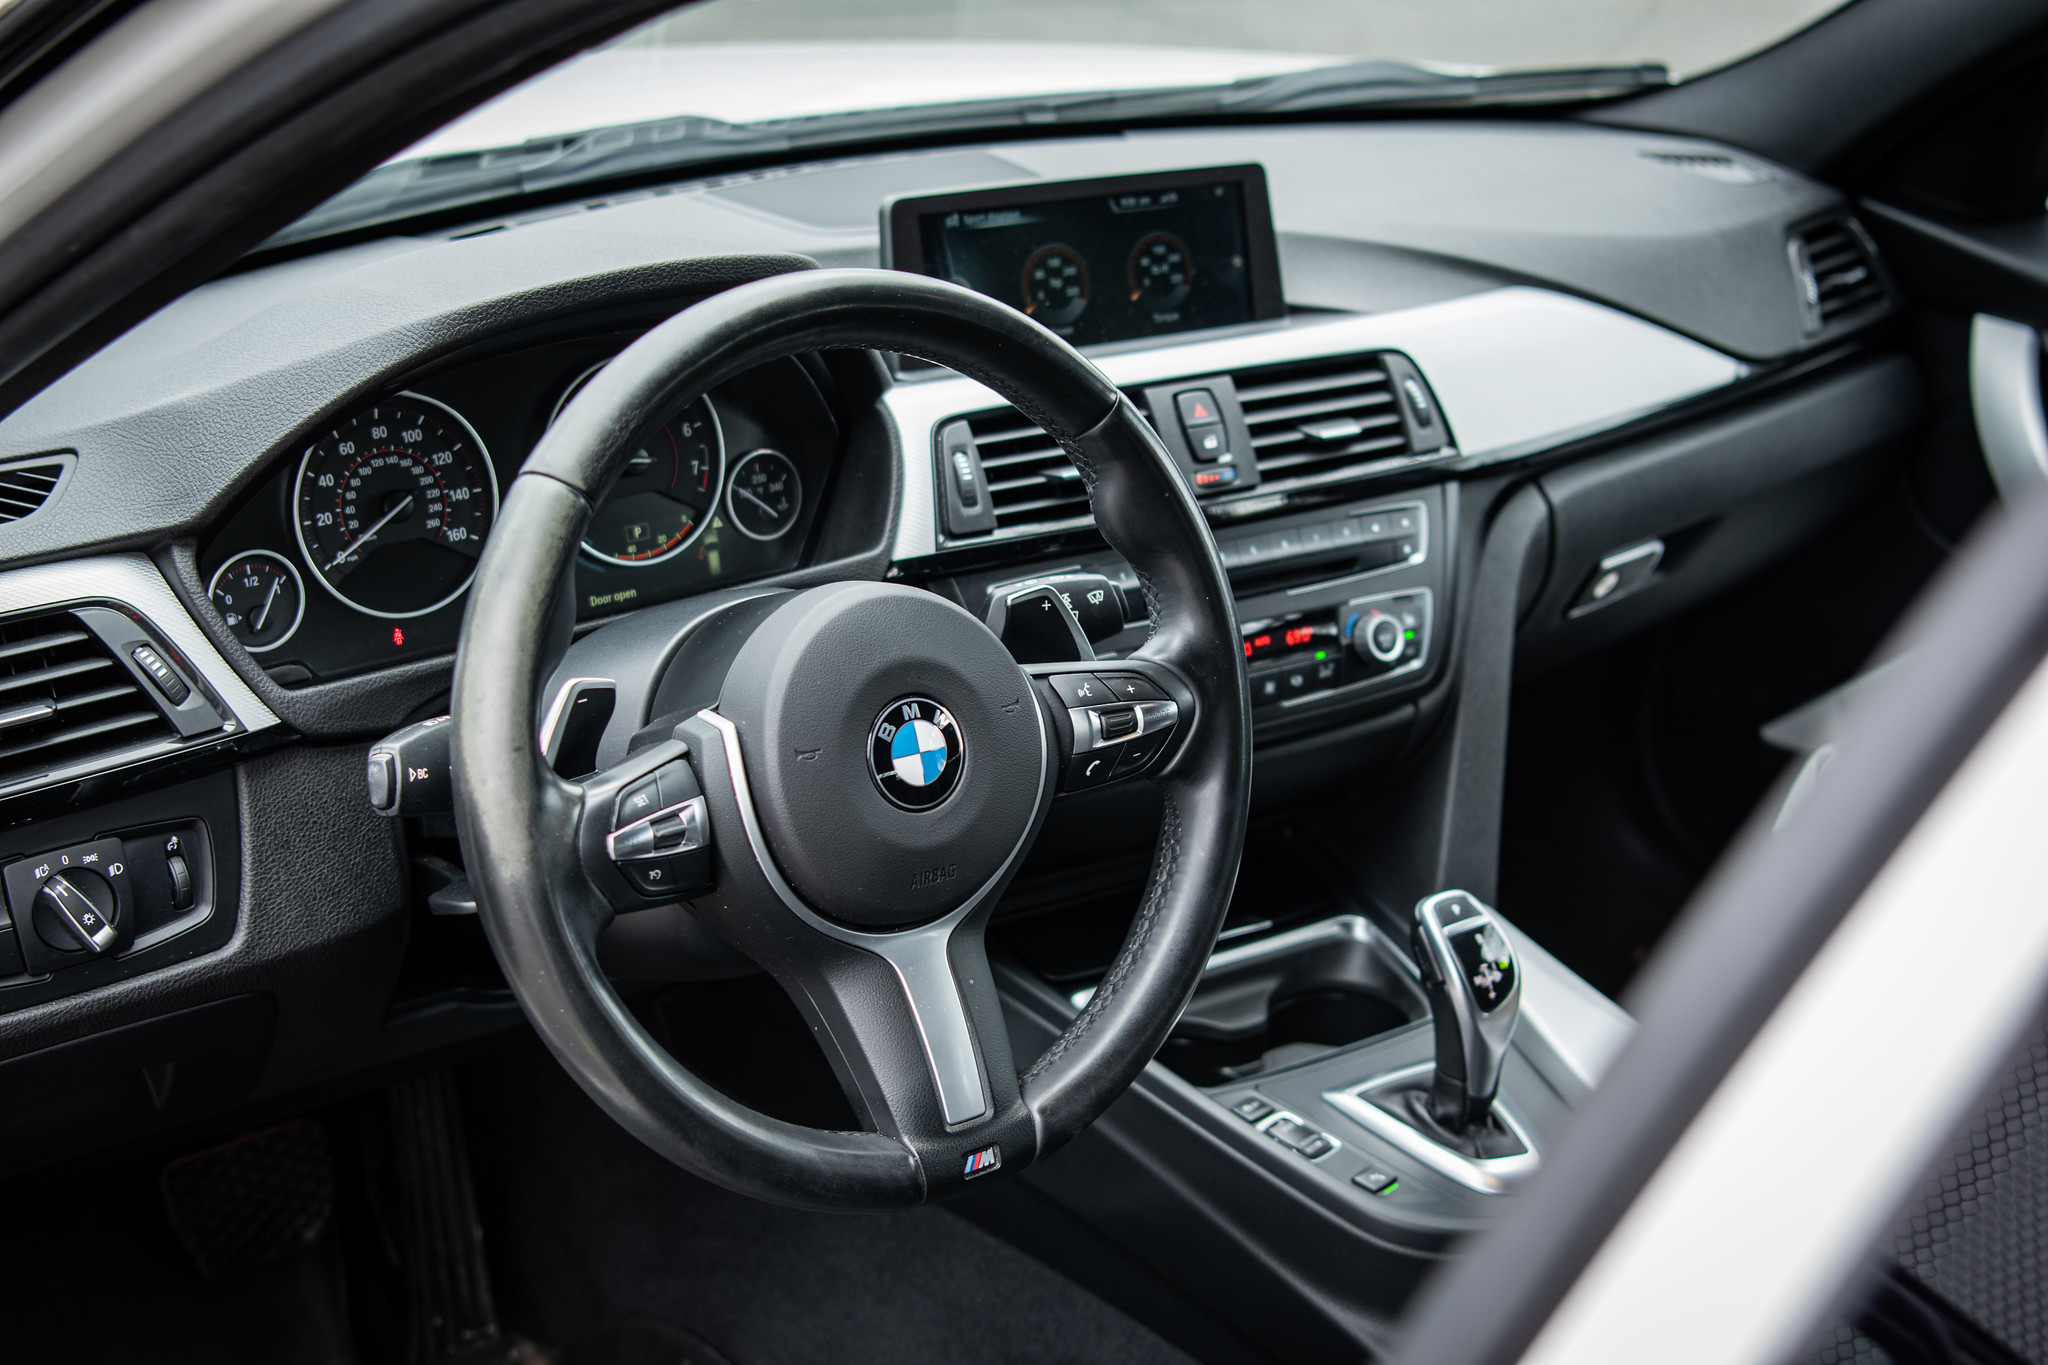
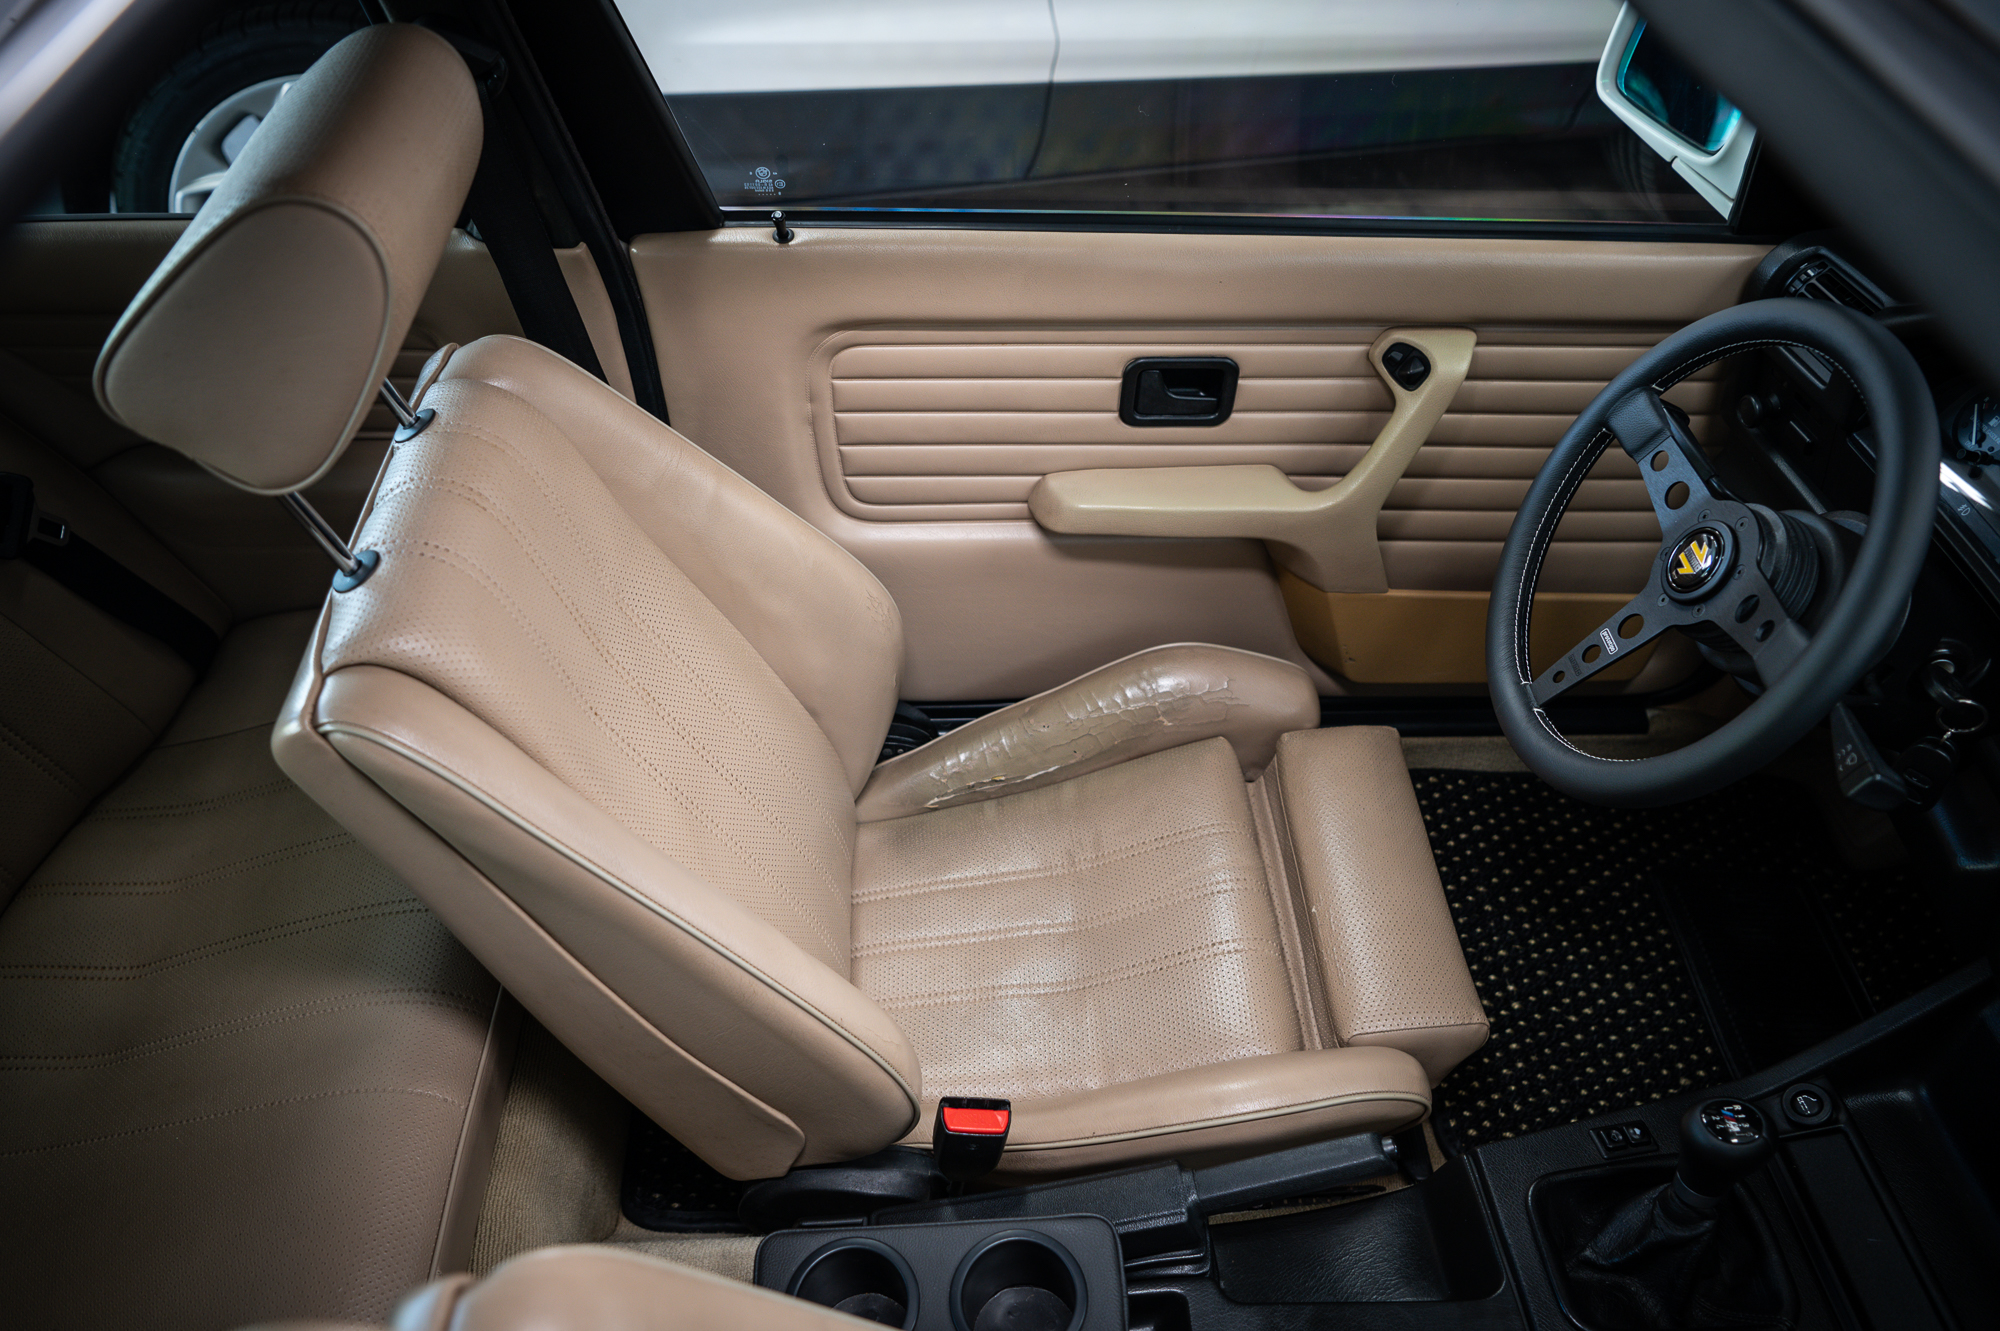
The interior matches the exterior’s theme of performance, while still being a family-friendly space. An M Sport alcantara flat-bottom steering wheel looks right at home in front of the 1M-faced instrument cluster. A set of Recaro Sportster CS seats, with Recaro sliders and Planted floor mounts, allow easy access to the back seat for three-year-old Mila and newborn Mateo, while providing stability and comfort for the driver and front-seat passenger. Per Mila’s request of “Let’s take the red car”, the Valdezes recently just took this 1M clone on a family-of-four dinner outing. Isn’t taking the whole family out in the project car priceless?
Euro LCI headlights are a nice touch and Raphy’s favorite thing about his 1M clone.
With the majority of this 1M clone project complete, Raphy does have a couple of favorite things about this build. In regard to modifications, he laughs and says, “It’s going to sound funny, but it’s actually the headlights. To the normal eye, they look like regular LCI headlights, but they’re actually Euro LCI headlights. I know it’s something really small, but it doesn’t have the ambers, and it has the little eyebrow. It just changed the front end of the car and I love it—even though it was stupid expensive.” In regard to a favorite experience with the car, he reflects, “Converting it to single turbo. I learned a lot about the N54 platform going through that stage. I’ve never had a big-single-turbo car before. So, learning how everything works and putting all the pieces together was probably one of my favorite experiences.”
If you know, you know.
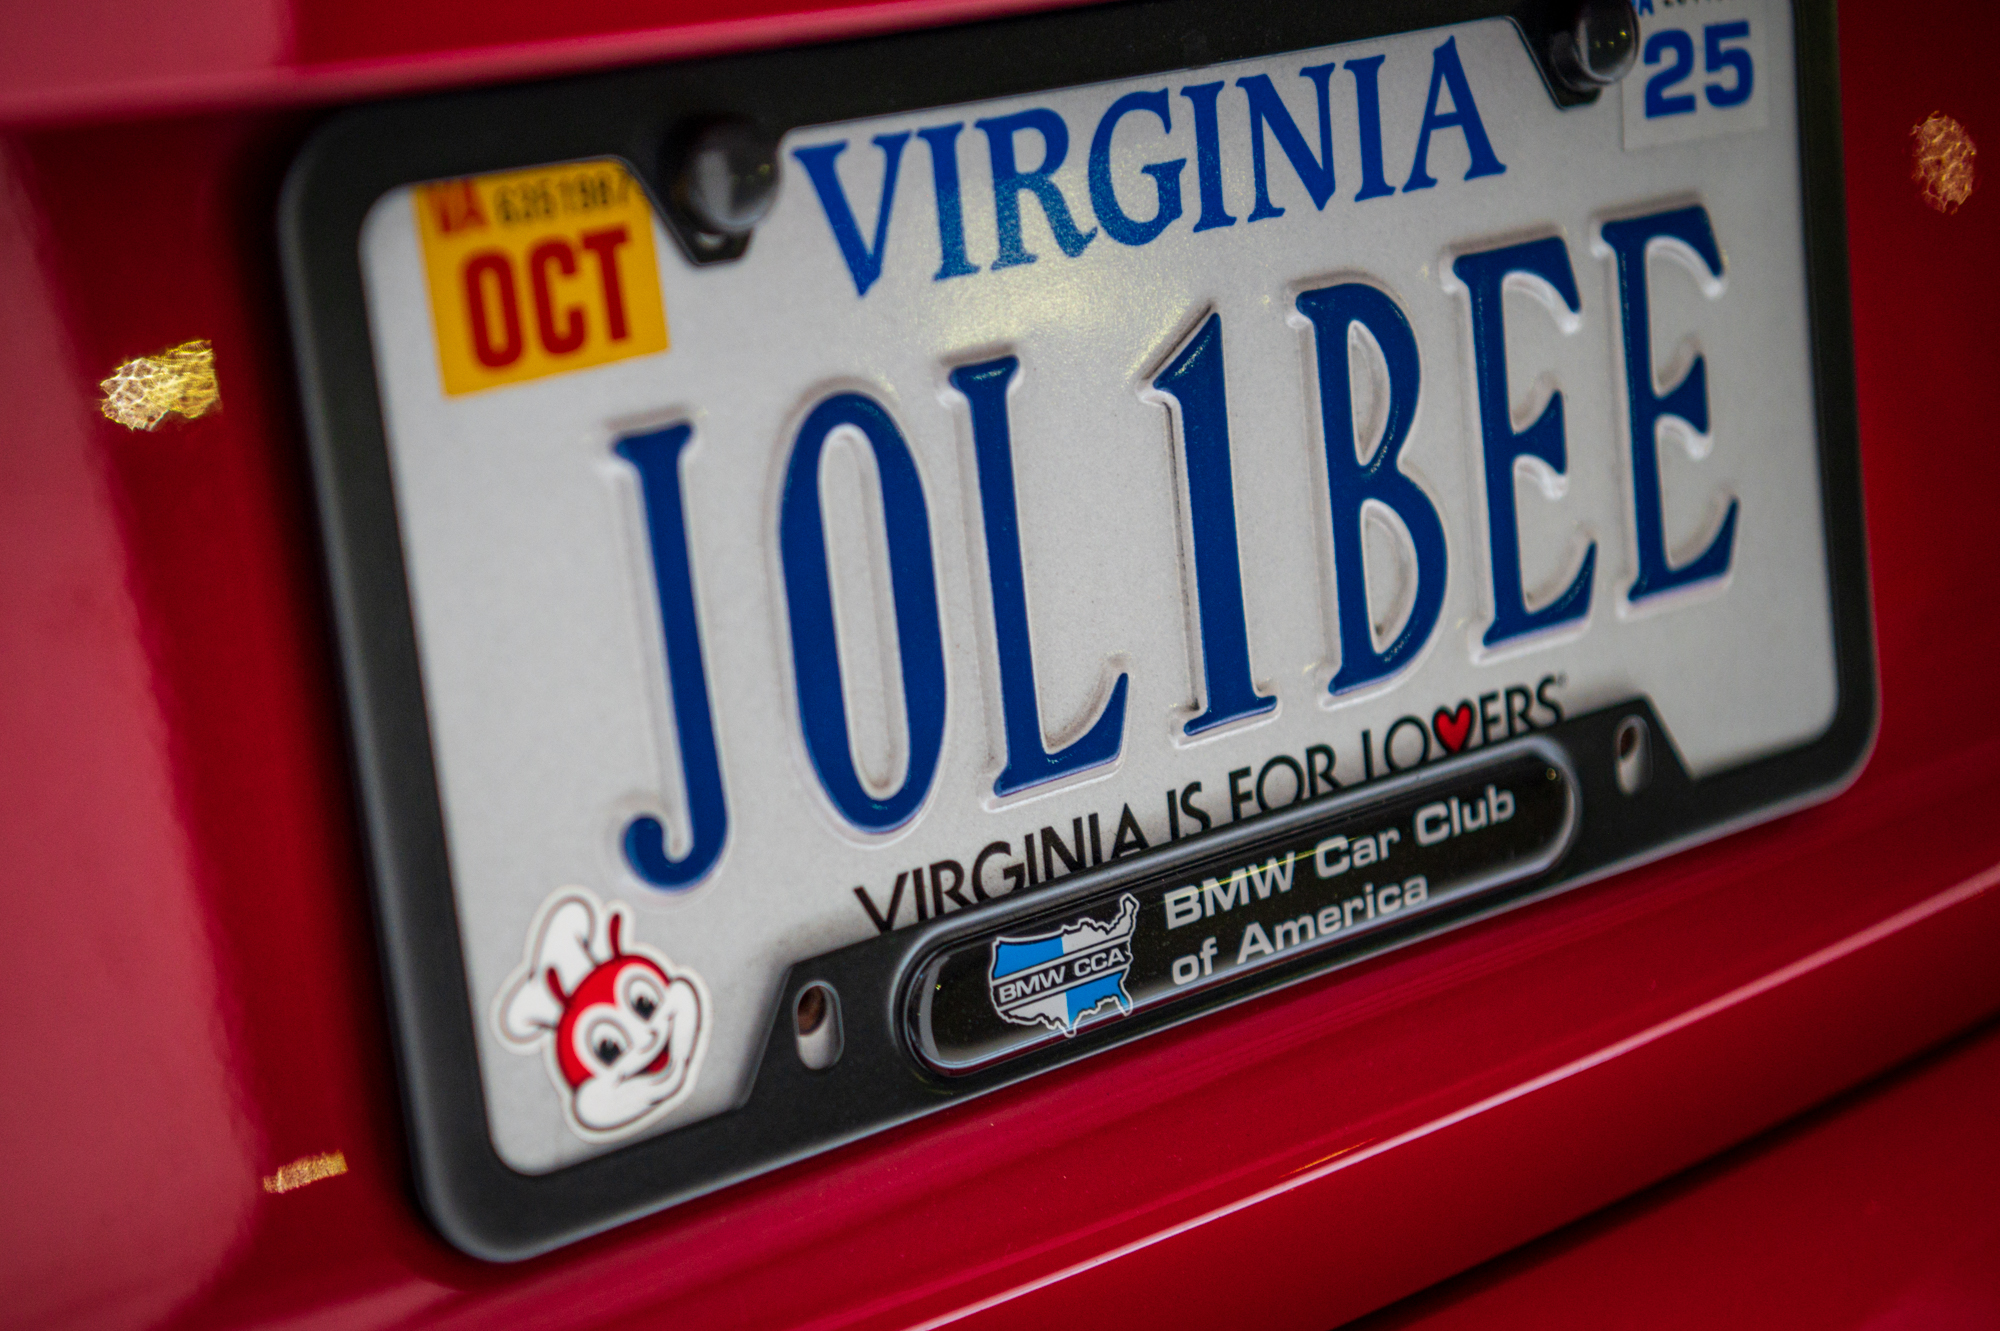
As this project has gone through a number of phases over time, it has also gone through a number of custom license plates. He started with “1M CLONE”, changed it to “1M-1SH”, and finally landed on “JOL1BEE.” Raphy explains, “For those who know, Jollibee is a Filipino fast food place. It has always been one of our favorite fast food staples, and it kind of matches the car’s color scheme. Let’s do Jollibee, and then put a ‘1’ for the ‘i’ instead. And so we’ve stuck with ‘Jollibee.’”

While Raphy performed the majority, if not all, of the mechanical work on his E82, he credits Gary at Royal Auto Body for the body work. Raphy appreciates the fellowship and friendship the car has brought, saying, “The whole community has been really interested [in this car]. It really showed love, appreciating the time, money, and heartache that went into it. It really got a lot of positive attention, and I really appreciate that. I’m definitely thankful for the community here, and across the U.S as well.” Speaking as a fellow parent, I can say that love from the car community is a truly wonderful thing, but nothing beats having your three-year-old request “the red car” with a huge smile on her face. — Mike Bevels
The post ///Metamorphosis: 135i to 1M, and Beyond appeared first on BimmerLife.
]]>The post Vintage Prep Bingo appeared first on BimmerLife.
]]>For the past five years, I’ve been making the 500-mile trek from Northern Virginia to Asheville, North Carolina for one of the largest and best classic BMW gatherings in the world: The Vintage. And every year, during the months leading up to this classic car pilgrimage, I play a little game that I like to call Vintage Prep Bingo. Imagine a Bingo card with rows and columns of potential automotive problems. Of all the possible mechanical failures that could happen, what do I think should be addressed for a successful road trip?
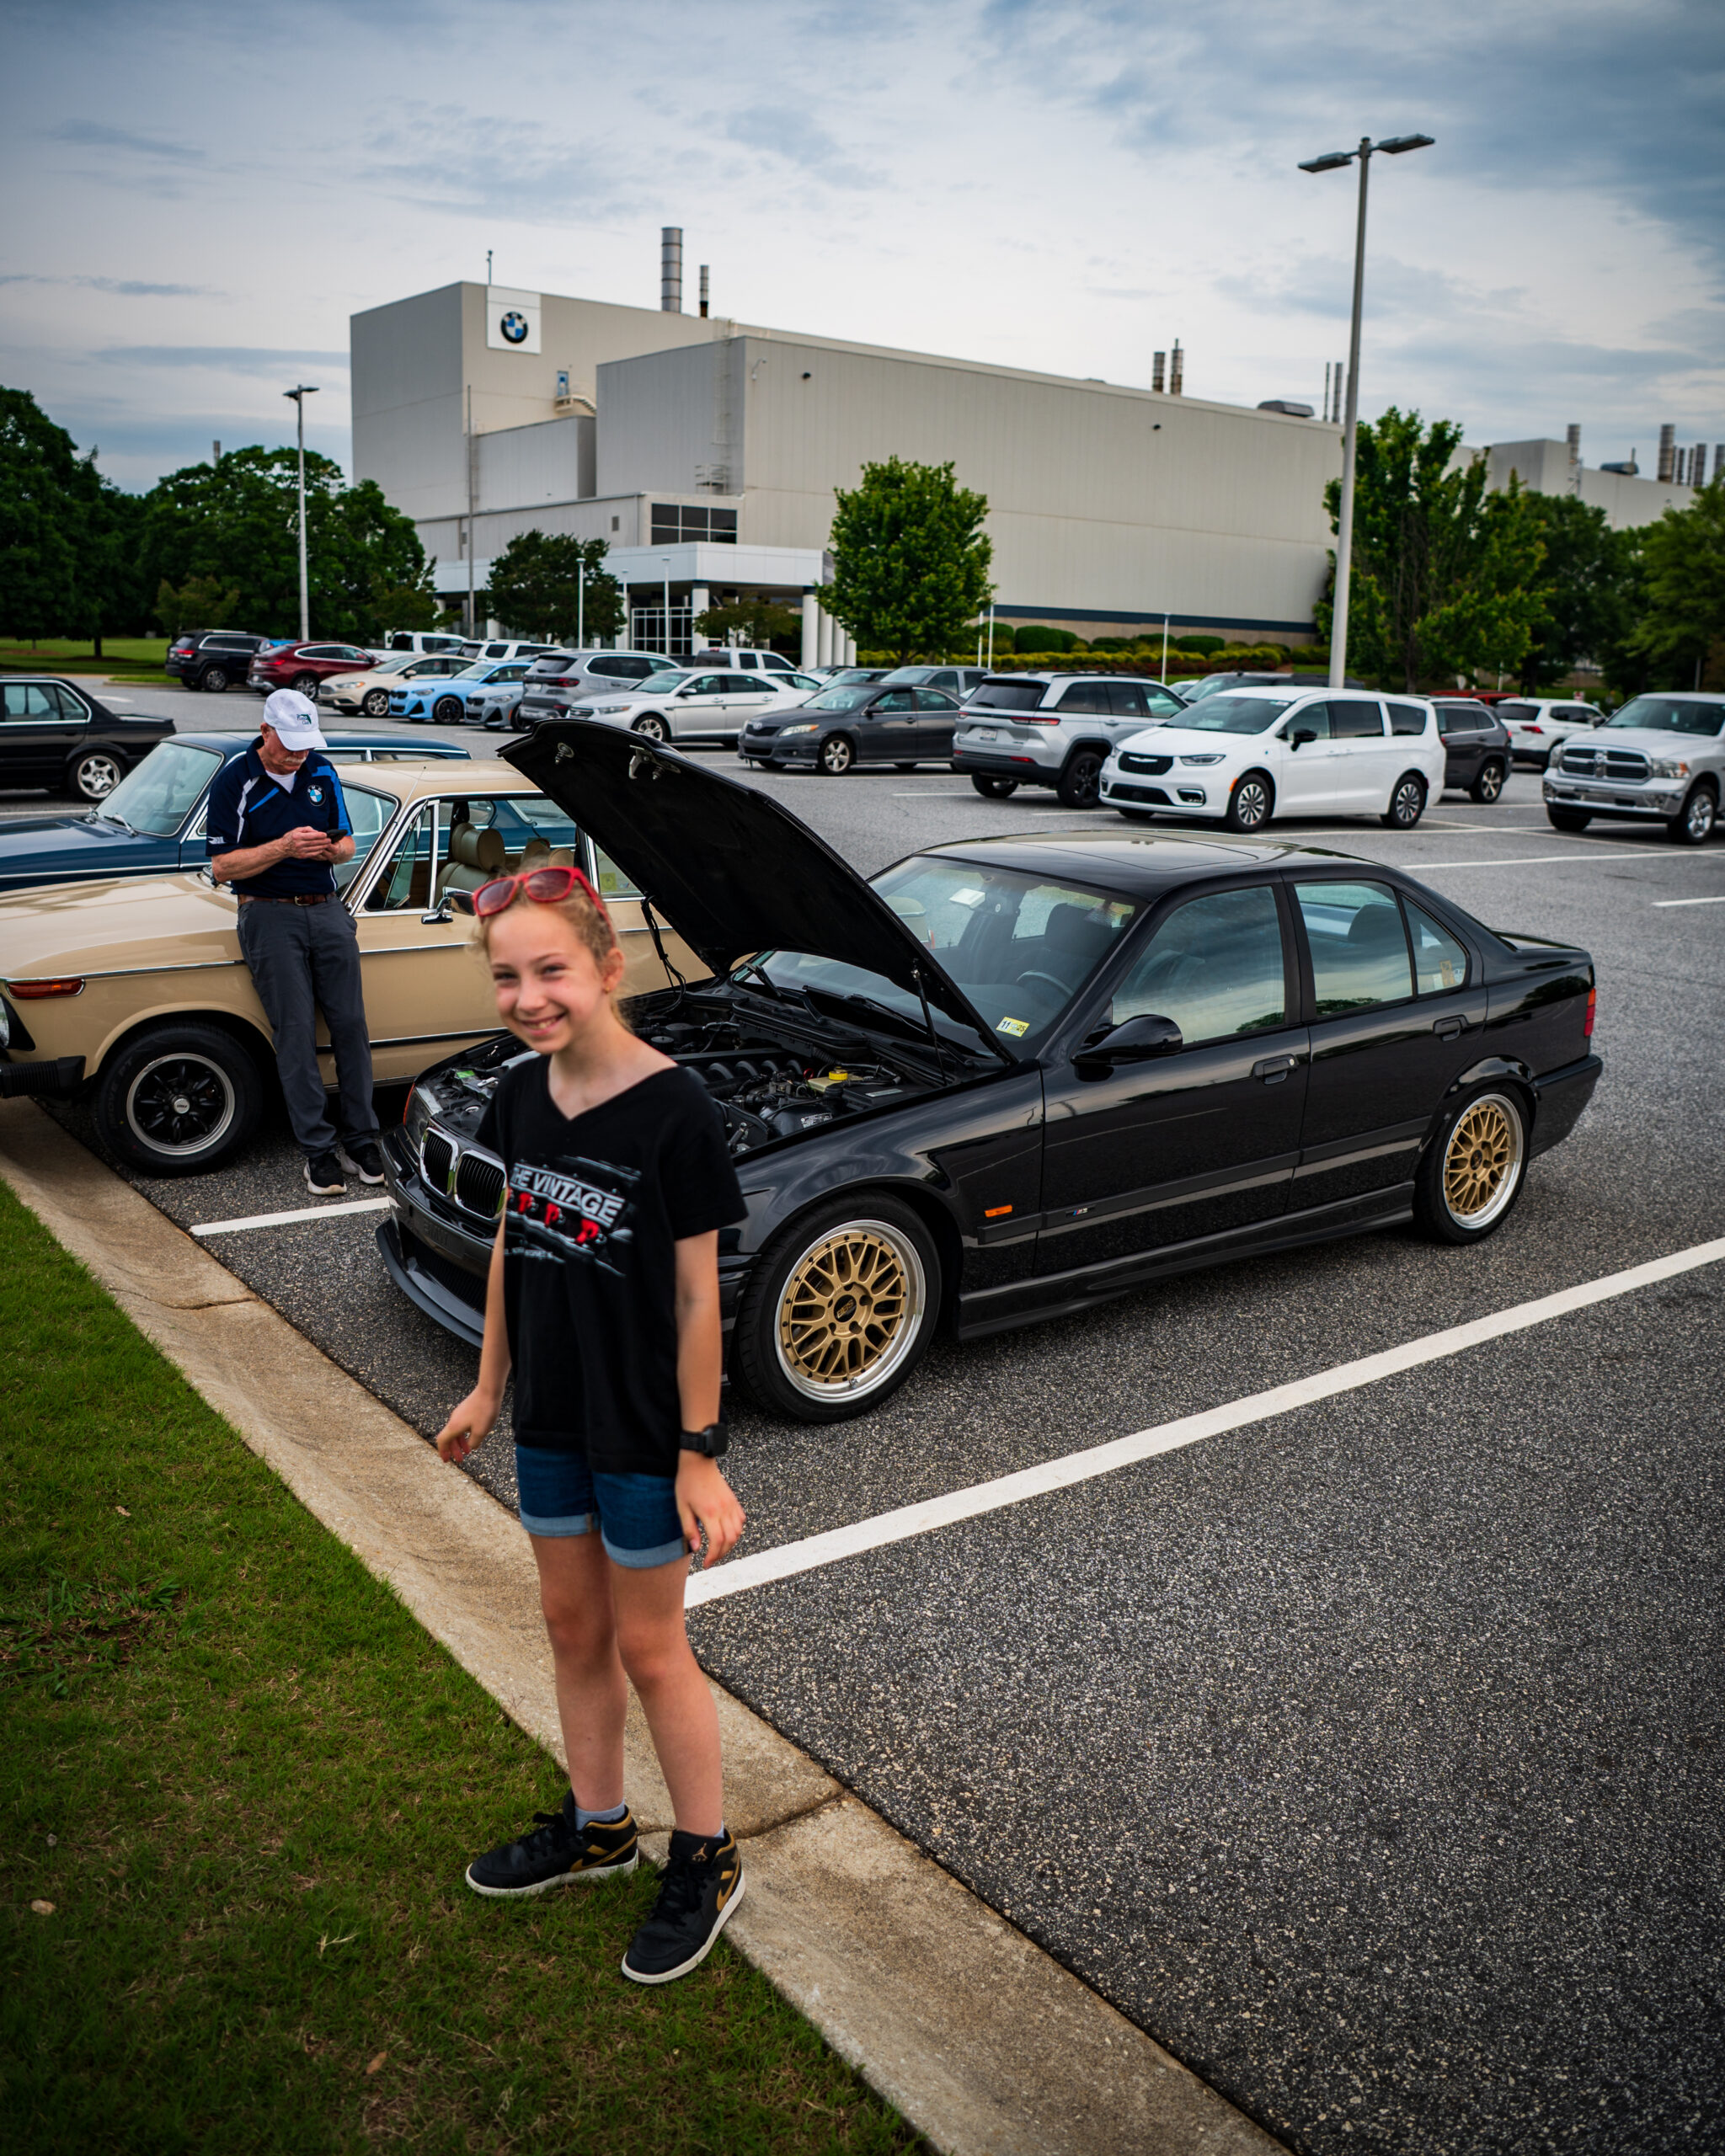
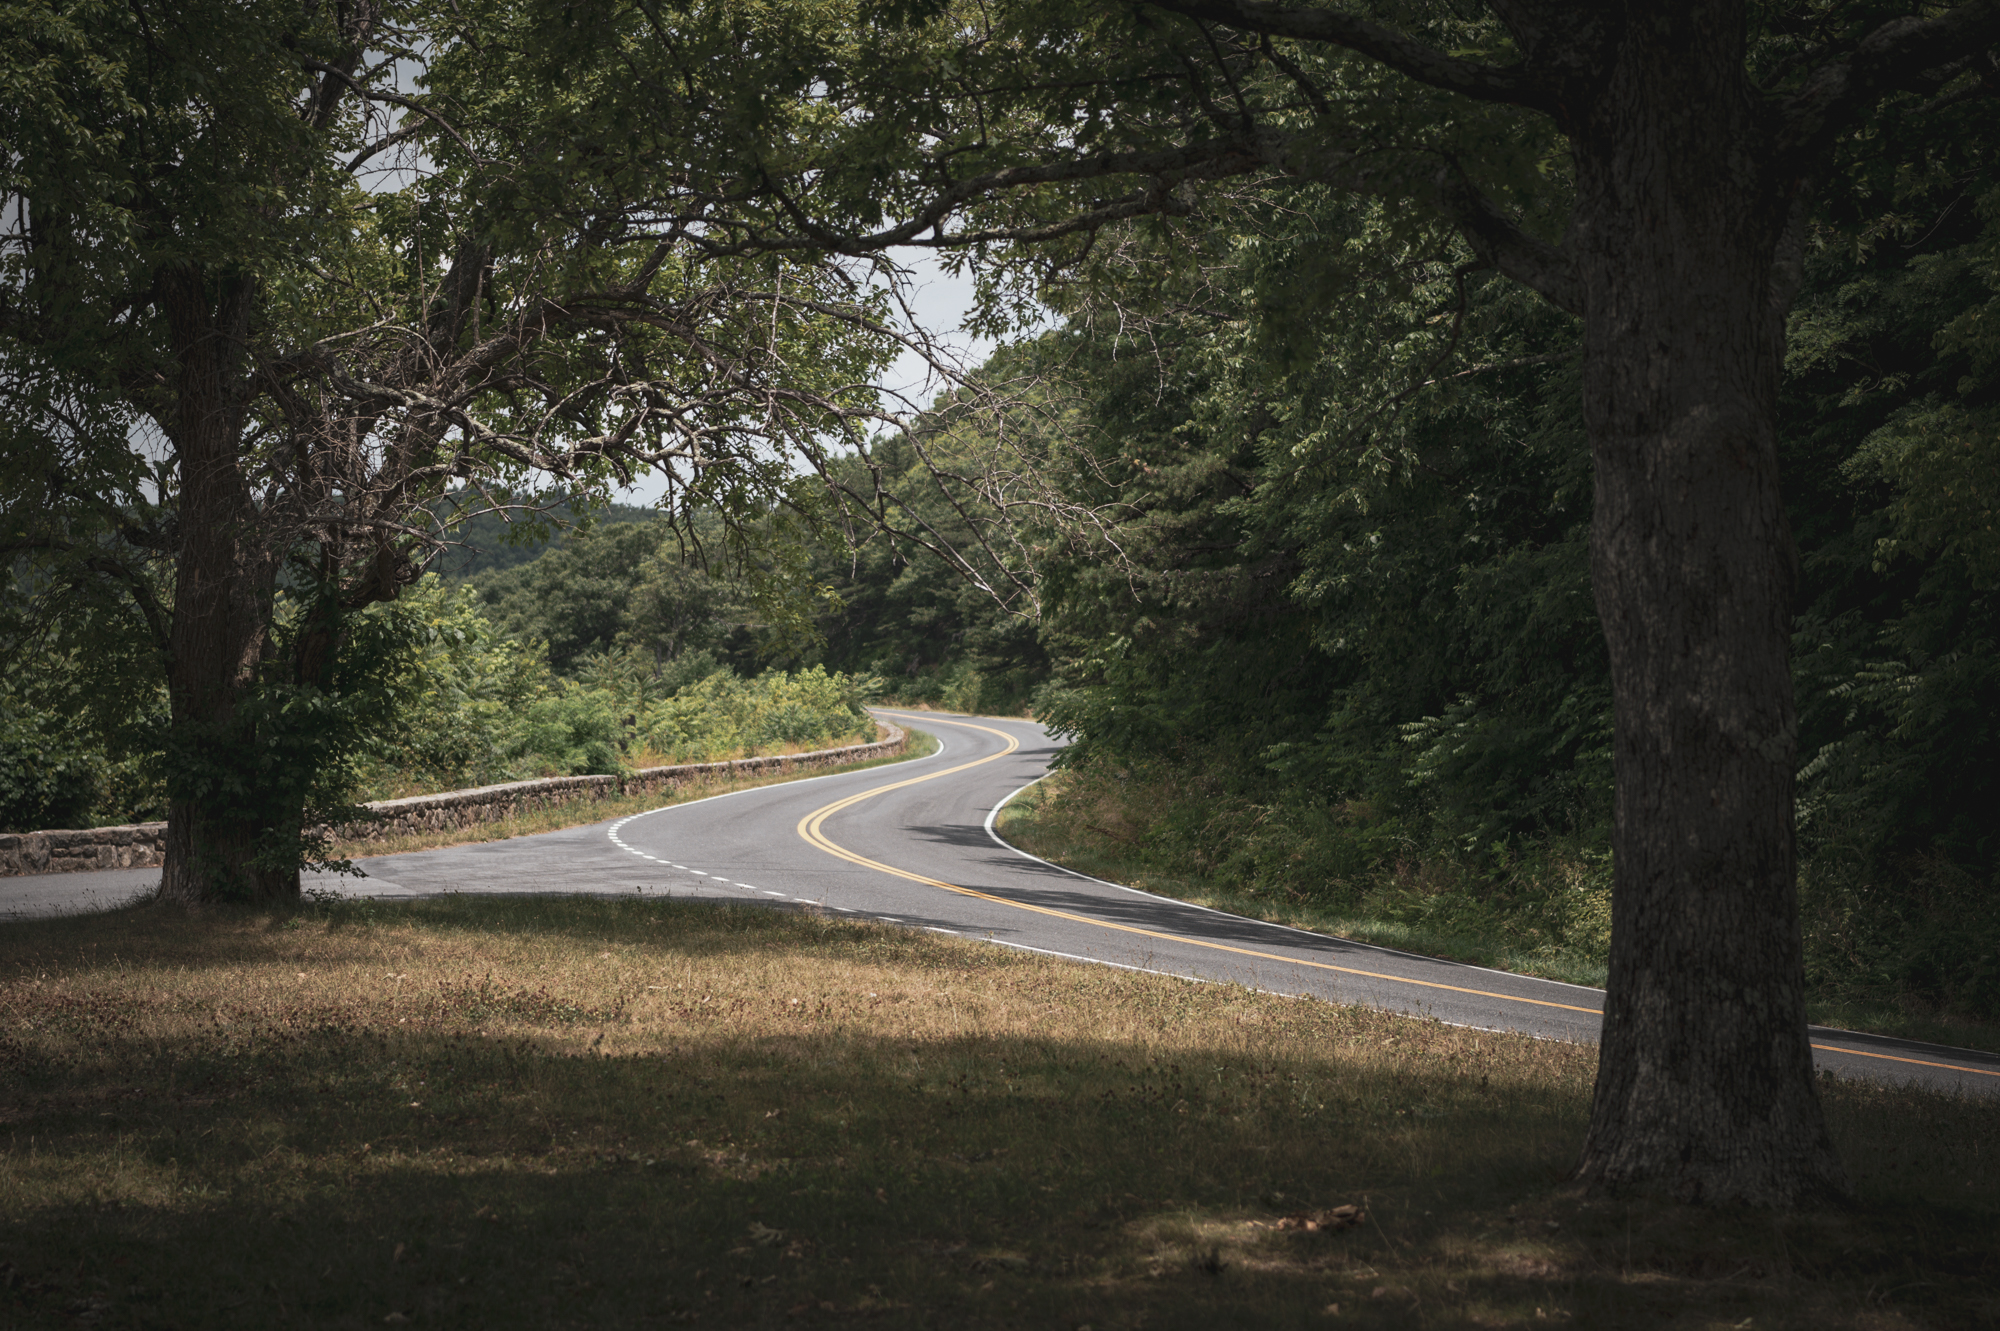
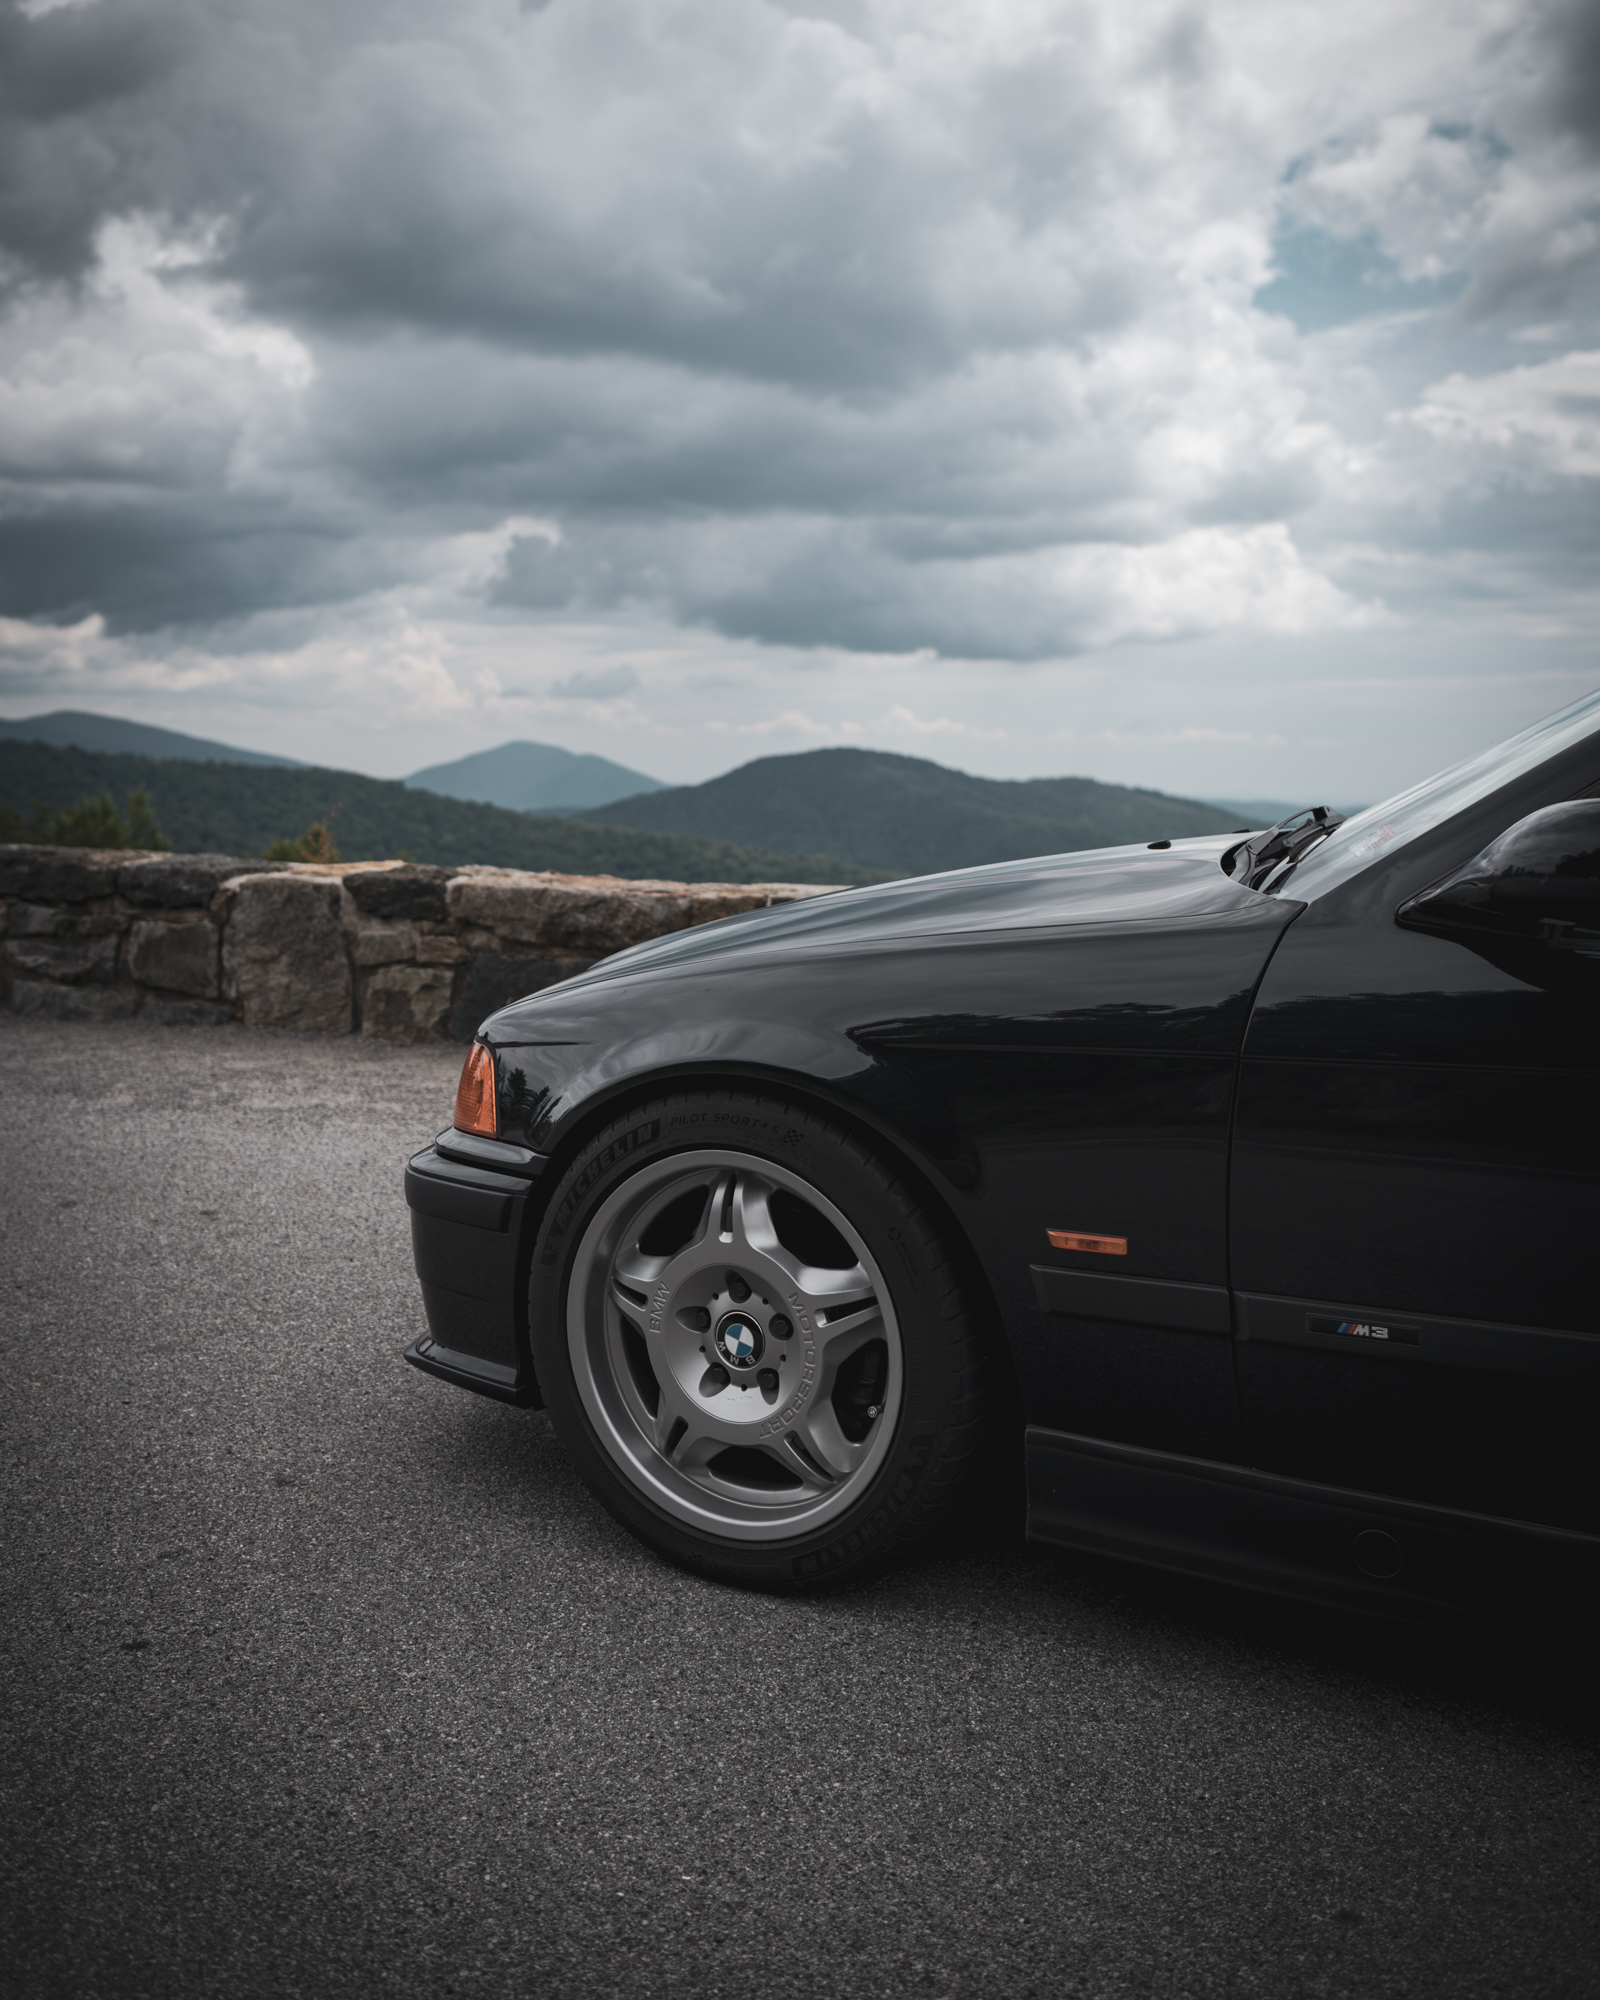
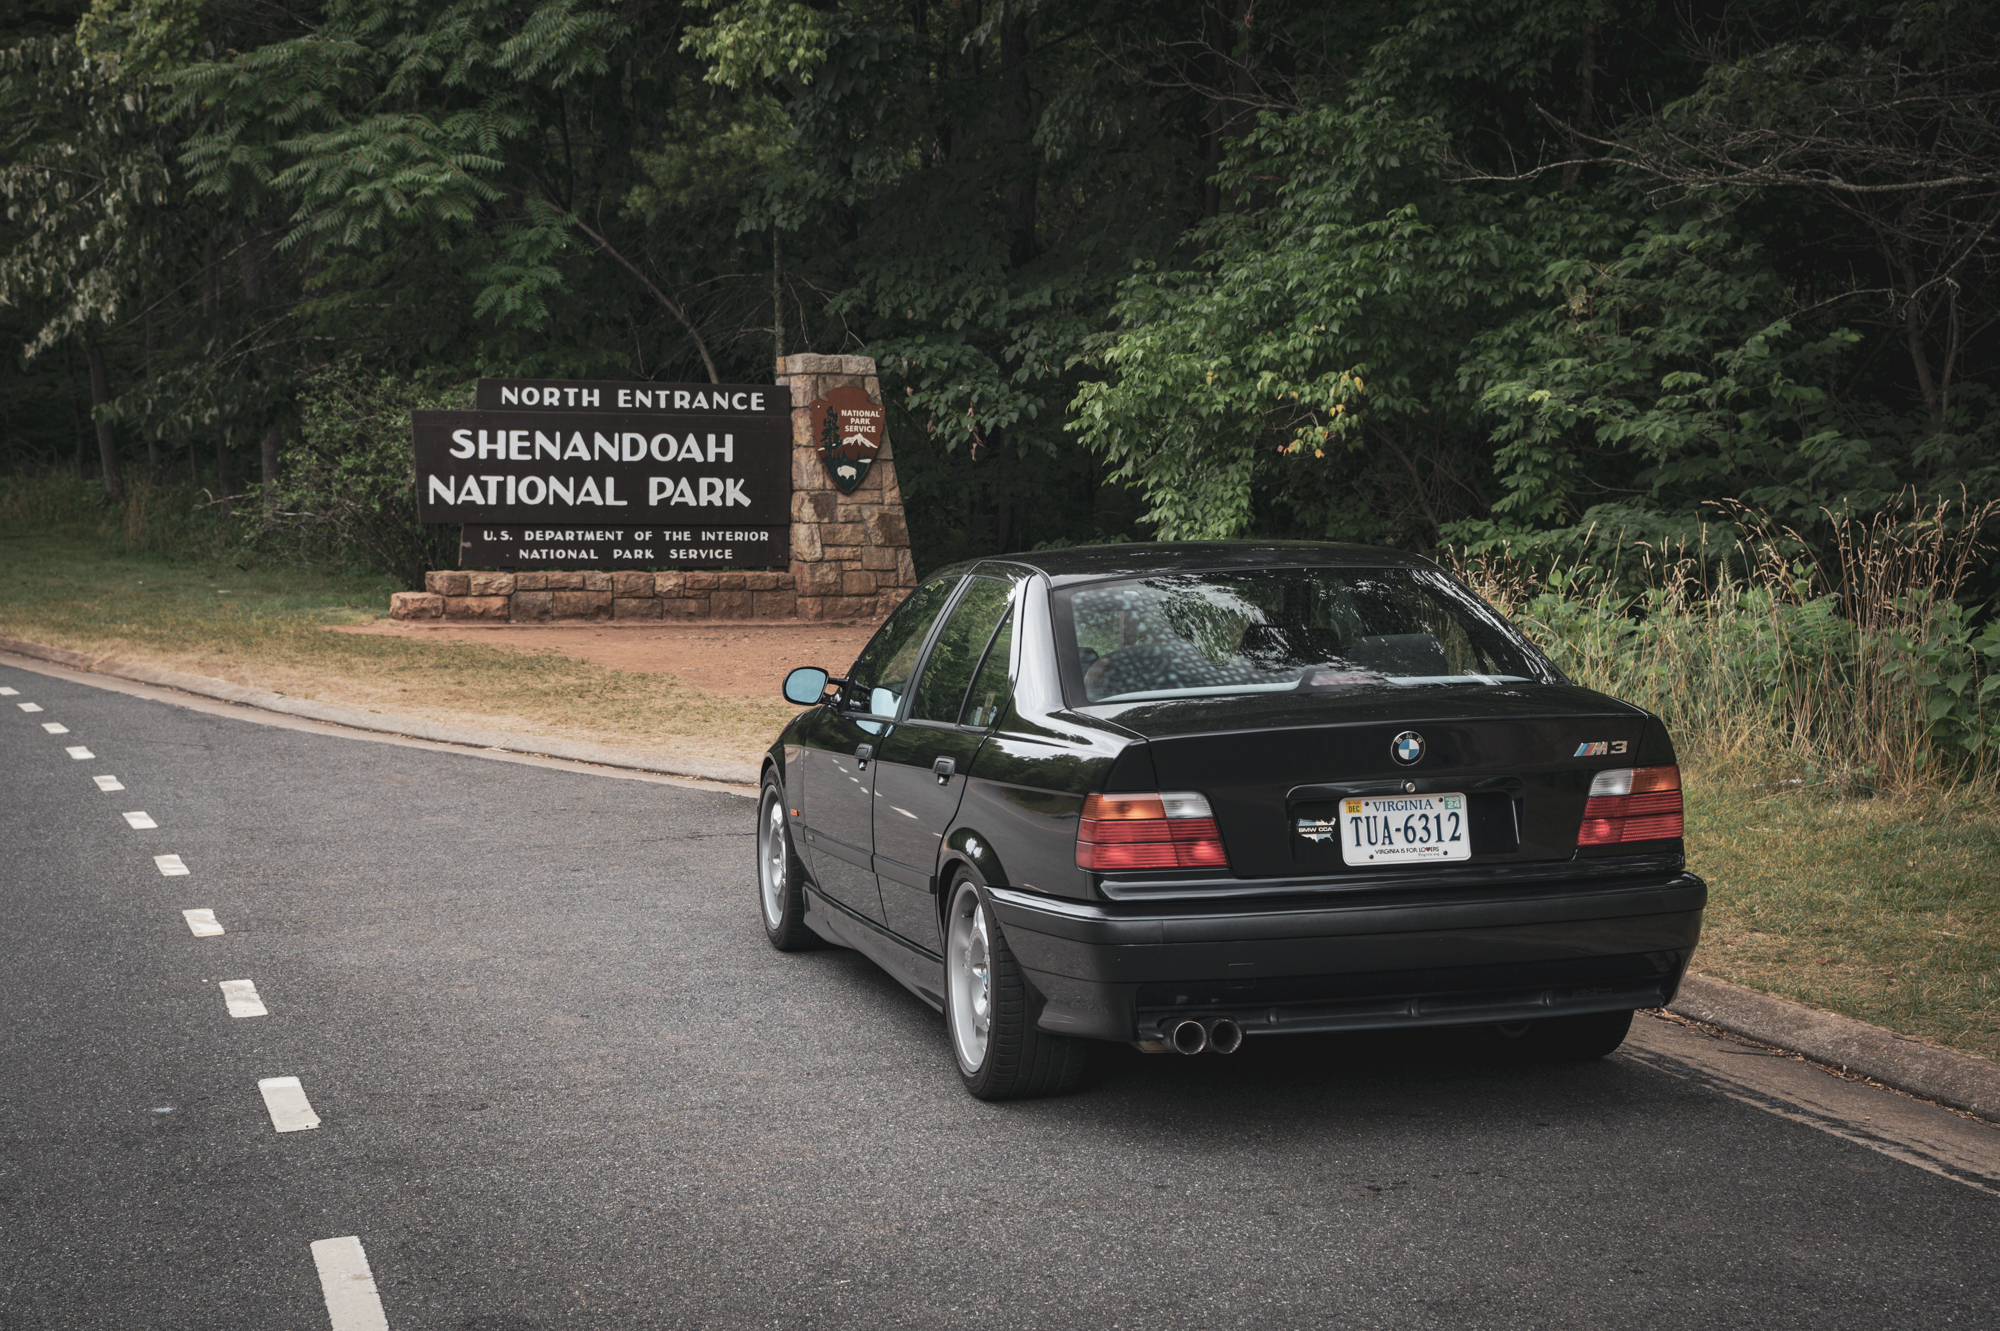
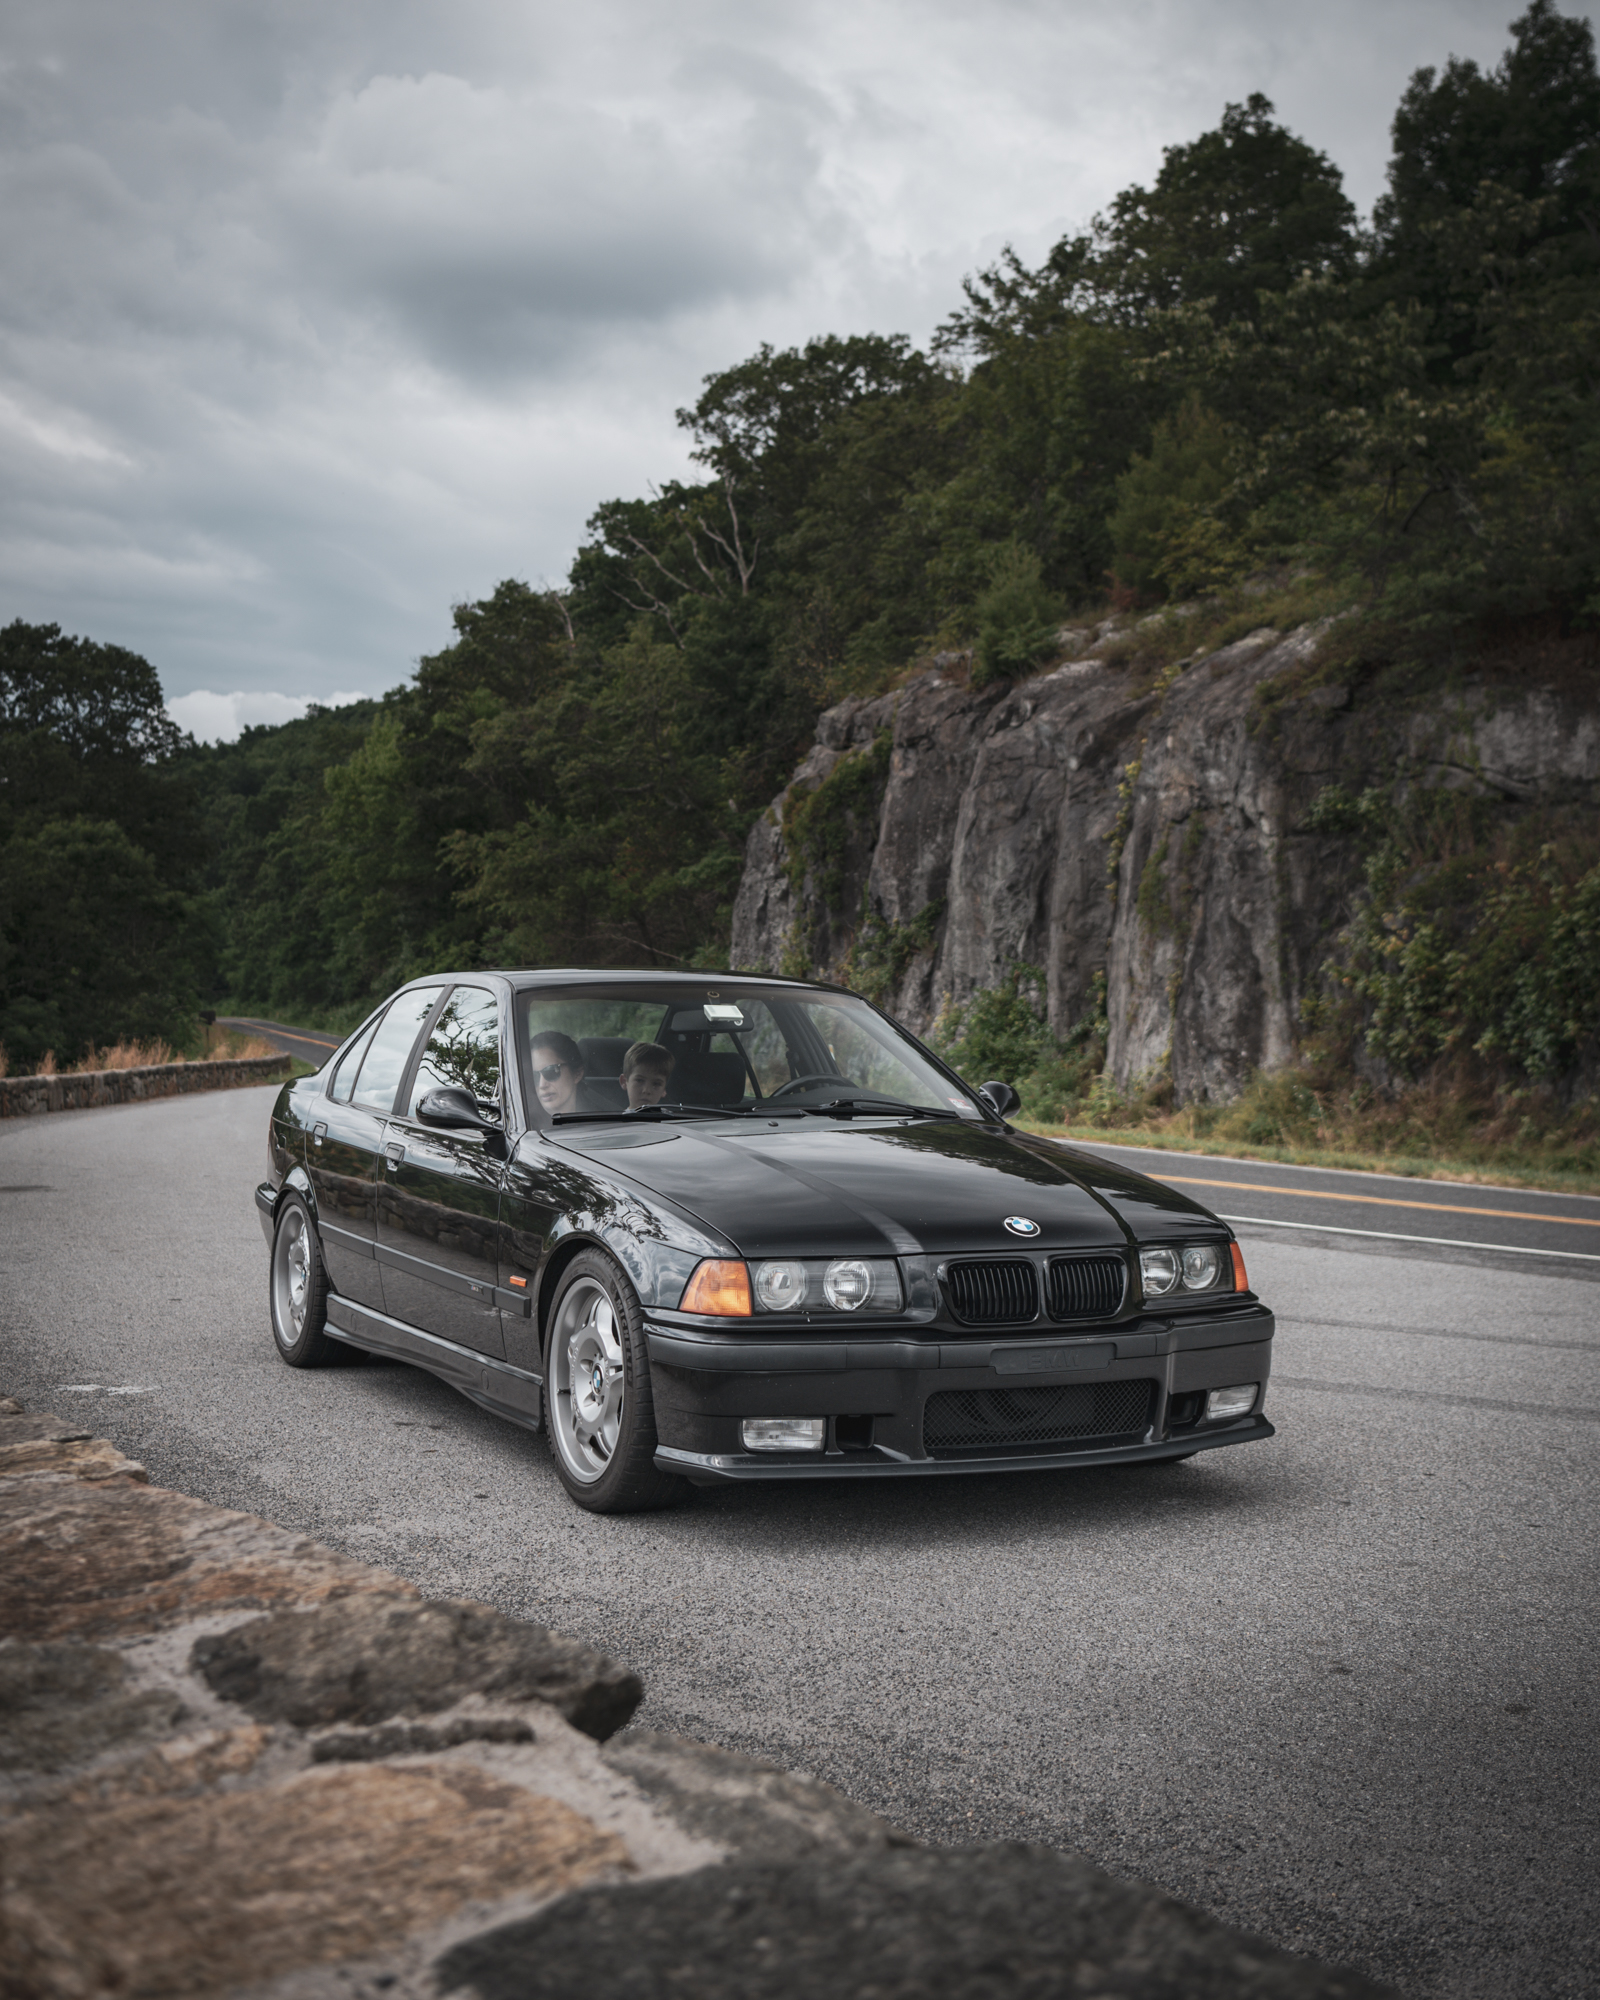
Given that 2025 was the first—and possibly only—year the third-generation 3 Series (E36) chassis would be allowed to register and be parked alongside other classic BMWs on the Vintage showfield, my eleven-year-old-daughter Avery and I opted to take our high-mileage 1998 BMW M3 sedan. While this E36 was running relatively well, I decided to address a number of items on my Vintage Prep Bingo card to ensure a smooth 1,200-mile round trip.
This included things like a full M Sport Parts instrument cluster refurbishment to resolve the random and increasingly frequent cluster resets while driving. The leaky steering rack and power steering hoses were replaced. New tires—and wheels!—replaced the plugged and aging set. A Positive Crankcase Ventilation (PCV) system replacement resolved a recent increase in oil consumption. And an oil and filter change completed my Vintage to-do list. Beyond addressing those concerns, I had spent the previous two-and-a-half years going through the rest of the car, addressing everything from seat motors and door lock actuators to a head gasket and cooling system replacement. What could go wrong?

Well, I’m pleased to report the ten-hour journey from Northern Virginia to Asheville went off without a hitch, aside from a couple of minor issues encountered by other cars in our caravan crew. The myriad of tools I packed—a floor jack, jack stands, sockets, extensions, wrenches, an electric impact, screwdrivers…we could be here all day—actually came in handy at a rest stop when an E24’s power steering pump bolt backed itself out. I joked, “As long as I don’t have to use these tools on my own car during this trip, I’ll be happy.”
I shouldn’t have said that. That was a dumb thing to say.
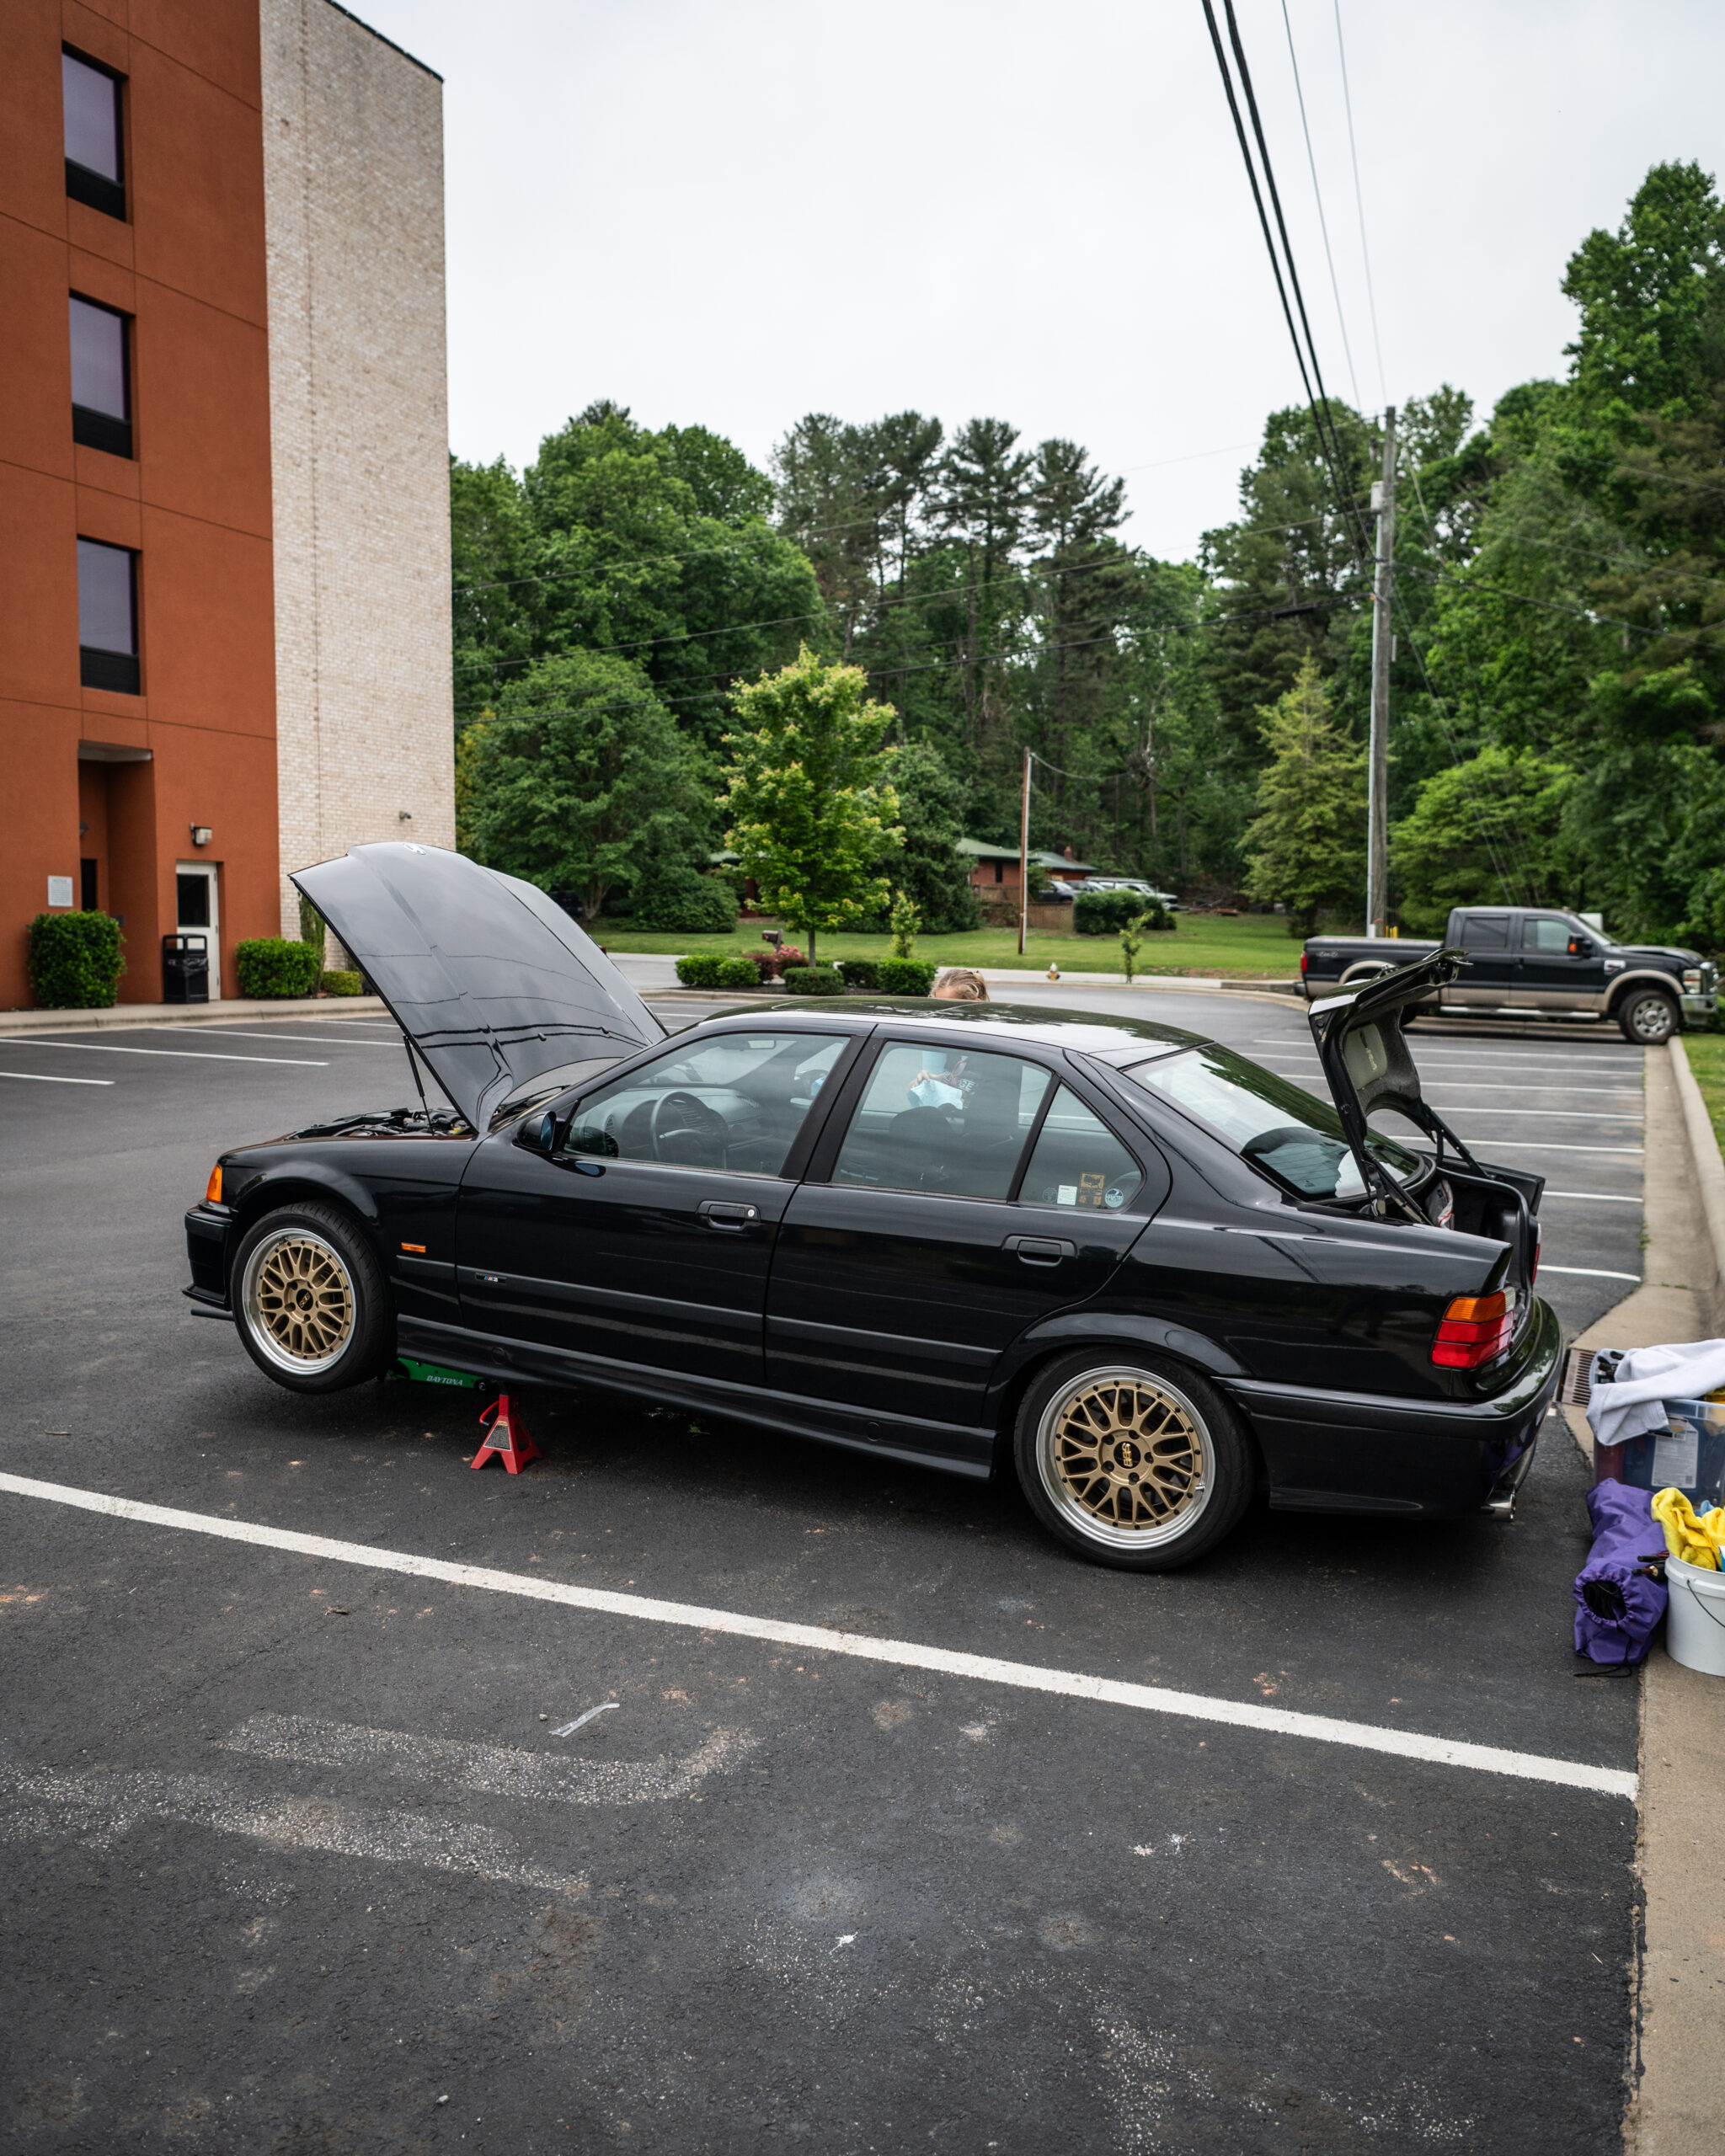
The next day when we were en route to The Ultimate Driving Museum for The Vintage Open House, I started to smell oil as we waited for a traffic light to turn green. More precisely, it was burning oil. My first thought was, “That can’t be my car. Is that my car?”
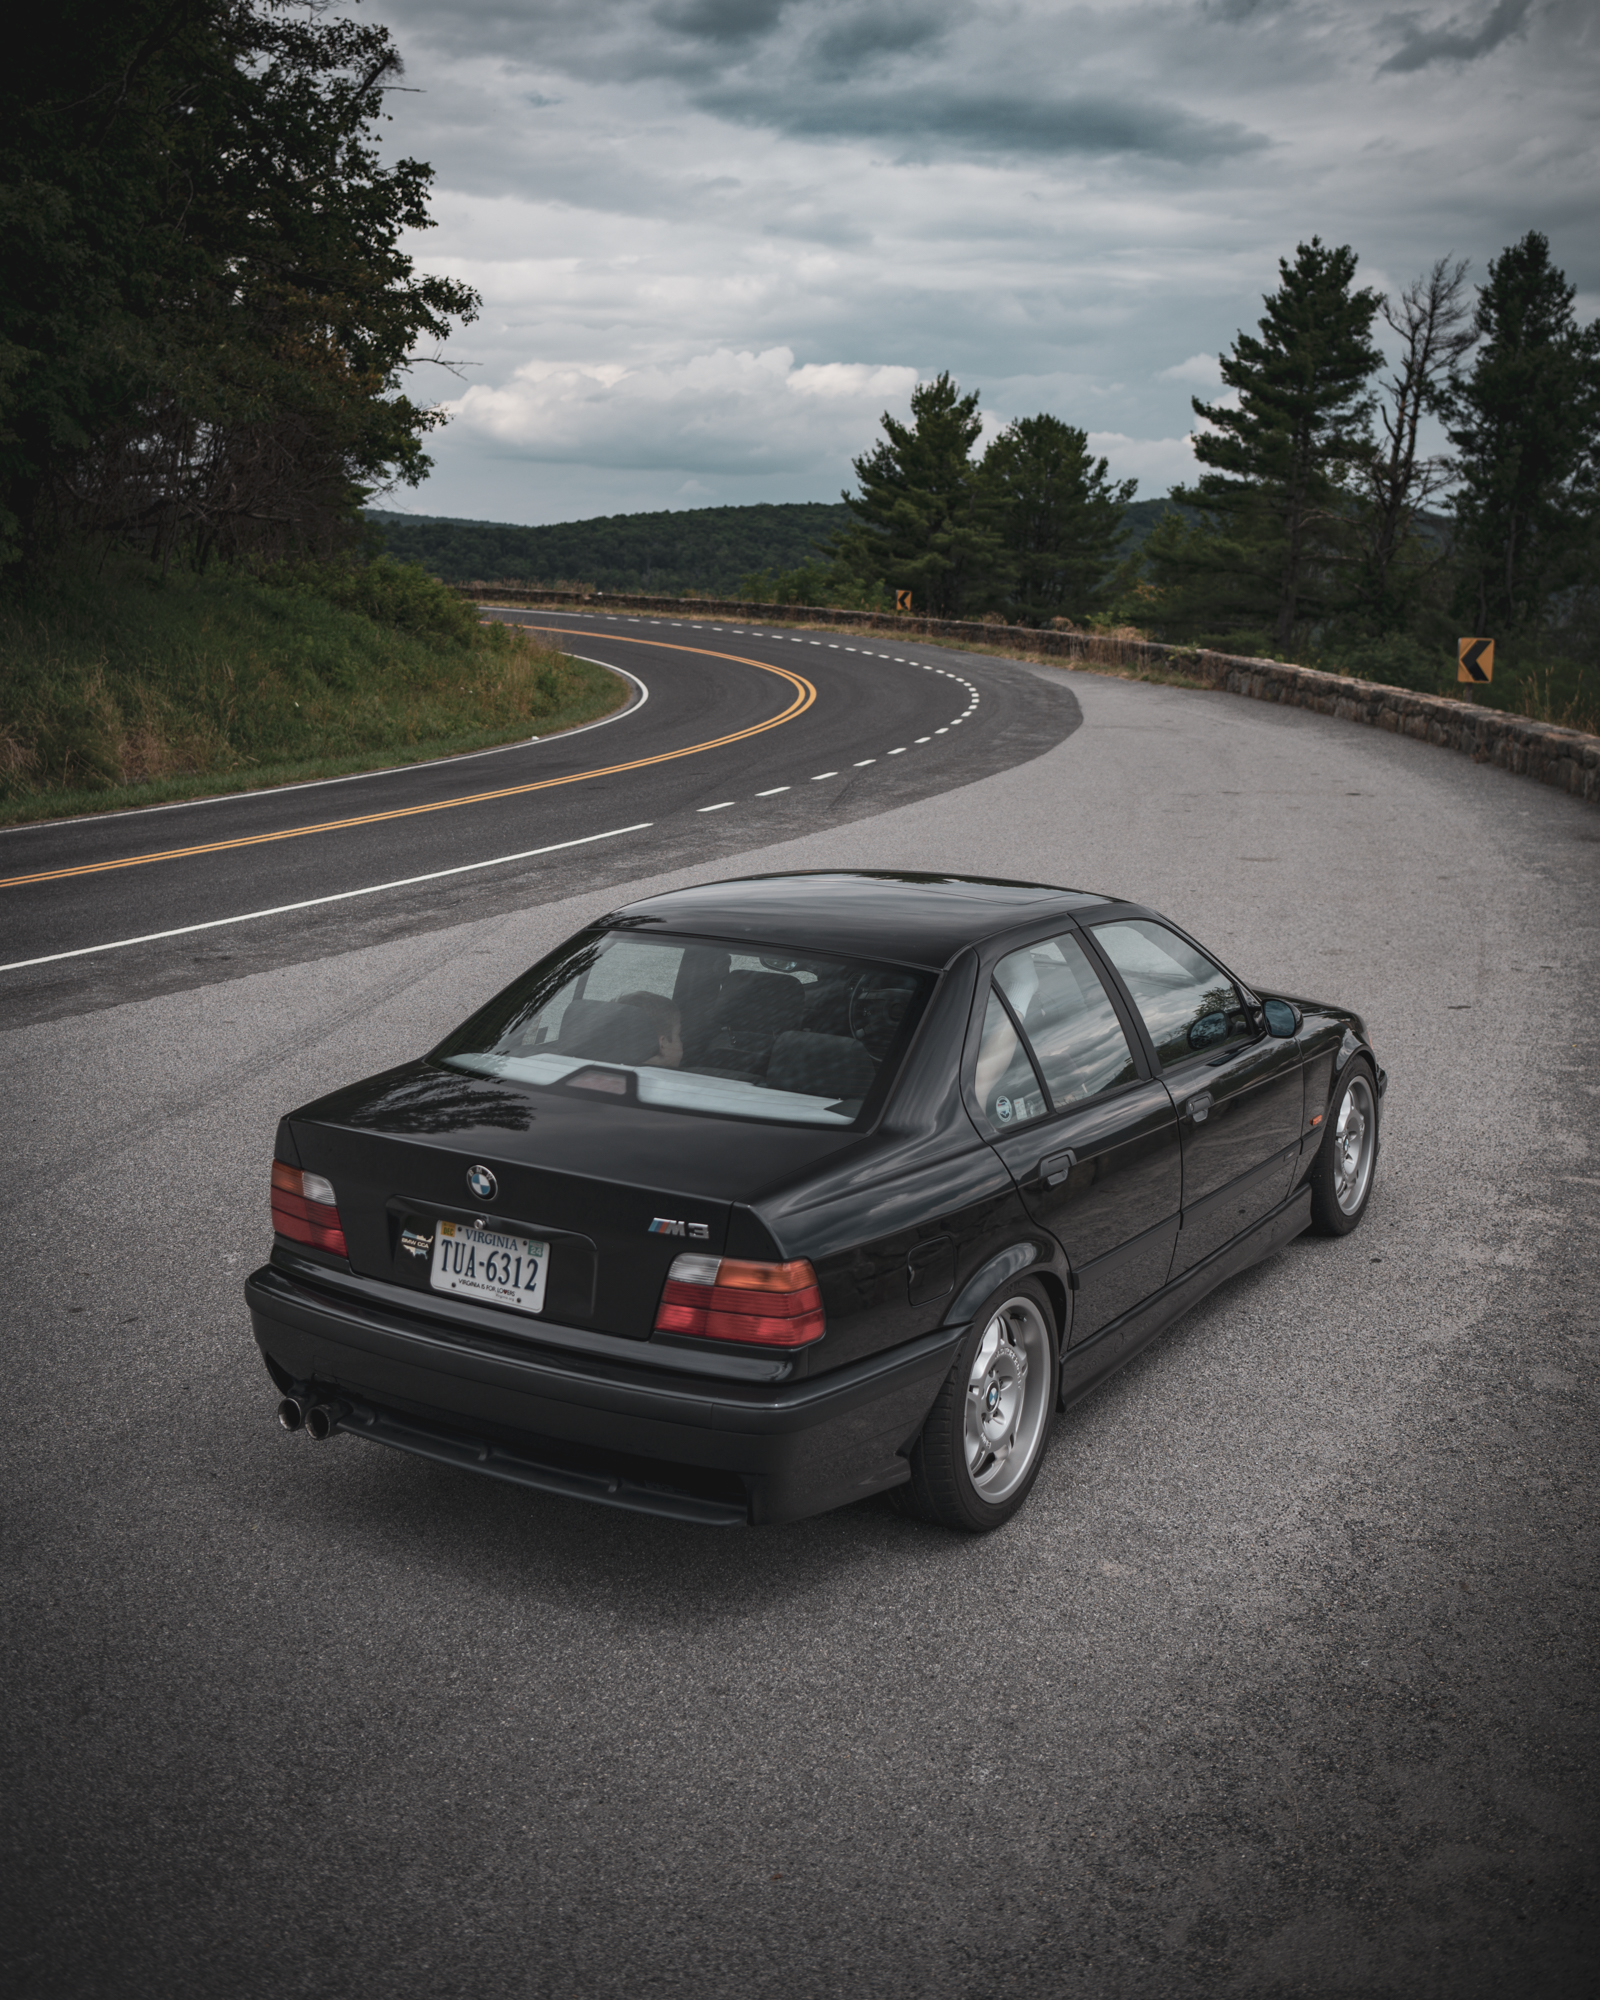
Just to be sure, when we parked I popped the hood to investigate. That’s when I was greeted with a cloud of smoke. Peeking under the car, I could see oil dripping from the bottom of the bell housing of the transmission. Oil had also dripped onto the hot exhaust while driving, which caused the smell and smoke.
The floor jack and jack stands made their second appearance from our E36’s trunk in as many days, this time in the parking lot of Plant Spartanburg, which despite the stressful situation, gave me a chuckle. Fitting, right? Jim Gerock, a BMW CCA member of our caravan, lent a hand and additional tools in diagnosing the issue. It wasn’t a leak from the valve cover gasket, or the back of the head, or the oil pan gasket, or anything else in the vicinity. Our best guess: the rear main seal. I didn’t see that coming and “rear main seal” was not on my Vintage Prep Bingo card.
For those not familiar, an engine’s rear main seal is typically a circular rubber seal that surrounds the end of the crankshaft (where it connects to the flywheel and interfaces with the transmission) and is supposed to keep oil in. While the seal itself is inexpensive, replacing it on an E36 involves removing the exhaust, driveshaft, transmission, and many other ancillary items like the shifter, clutch hydraulic lines, and so on.
Suffice to say, while the spirit of Vintage weekend has fueled many extraordinary mechanical repairs by Vintage attendees in hotel parking lots, this wouldn’t be one of them. Fortunately, it wasn’t leaking enough to stop our father-daughter road trip. With frequent oil-level checking and topping up as necessary, Avery and I were able to enjoy the remainder of Vintage weekend and make it back home safely.
Looking through the M3’s maintenance history, the rear main seal had been replaced about 35,000 miles ago, as part of a clutch and flywheel (and a number of other while-you’re-in-there items) replacement . It should’ve lasted much longer than that, so what would cause the rear main seal to fail so quickly?
Initially, my best guess was that I caught the PCV system failure too late, which can cause increased pressure in the crankcase and result in engine seals being pressed outward and starting to leak. The only symptoms of a PCV system issue that I recognized in this M3 were increased oil consumption—which I mostly chalked up to a 256,000-mile S52 engine—and some erratic oil dipstick readings over the course of a few weeks. There weren’t any odd sounds or leaks, and the E36 had been running well otherwise. While I had replaced the PCV system on our E36 four weeks before The Vintage road trip, which did resolve the oil consumption and erratic dipstick readings, the damage had likely already been done, with the result becoming quite evident after a long day of driving. (If you’re interested in watching a video about replacing the S52’s PCV system, click “Play” below!)
A week after returning from our big road trip, it was time to take our E36 to the professionals at RRT Automotive for a proper diagnosis and repair. As much as I wanted to receive a call and hear, “It just turned out to be the valve cover gasket, and oil was leaking down the back of the head and collecting at the bottom of the transmission’s bell housing” this was not meant to be. It was in fact the rear main seal. Fortunately, the oil leak had not contaminated the clutch and parts costs were kept low. The bulk of the cost of the repair was in labor, due to the aforementioned items that needed to be removed to access and replace the $40 seal.
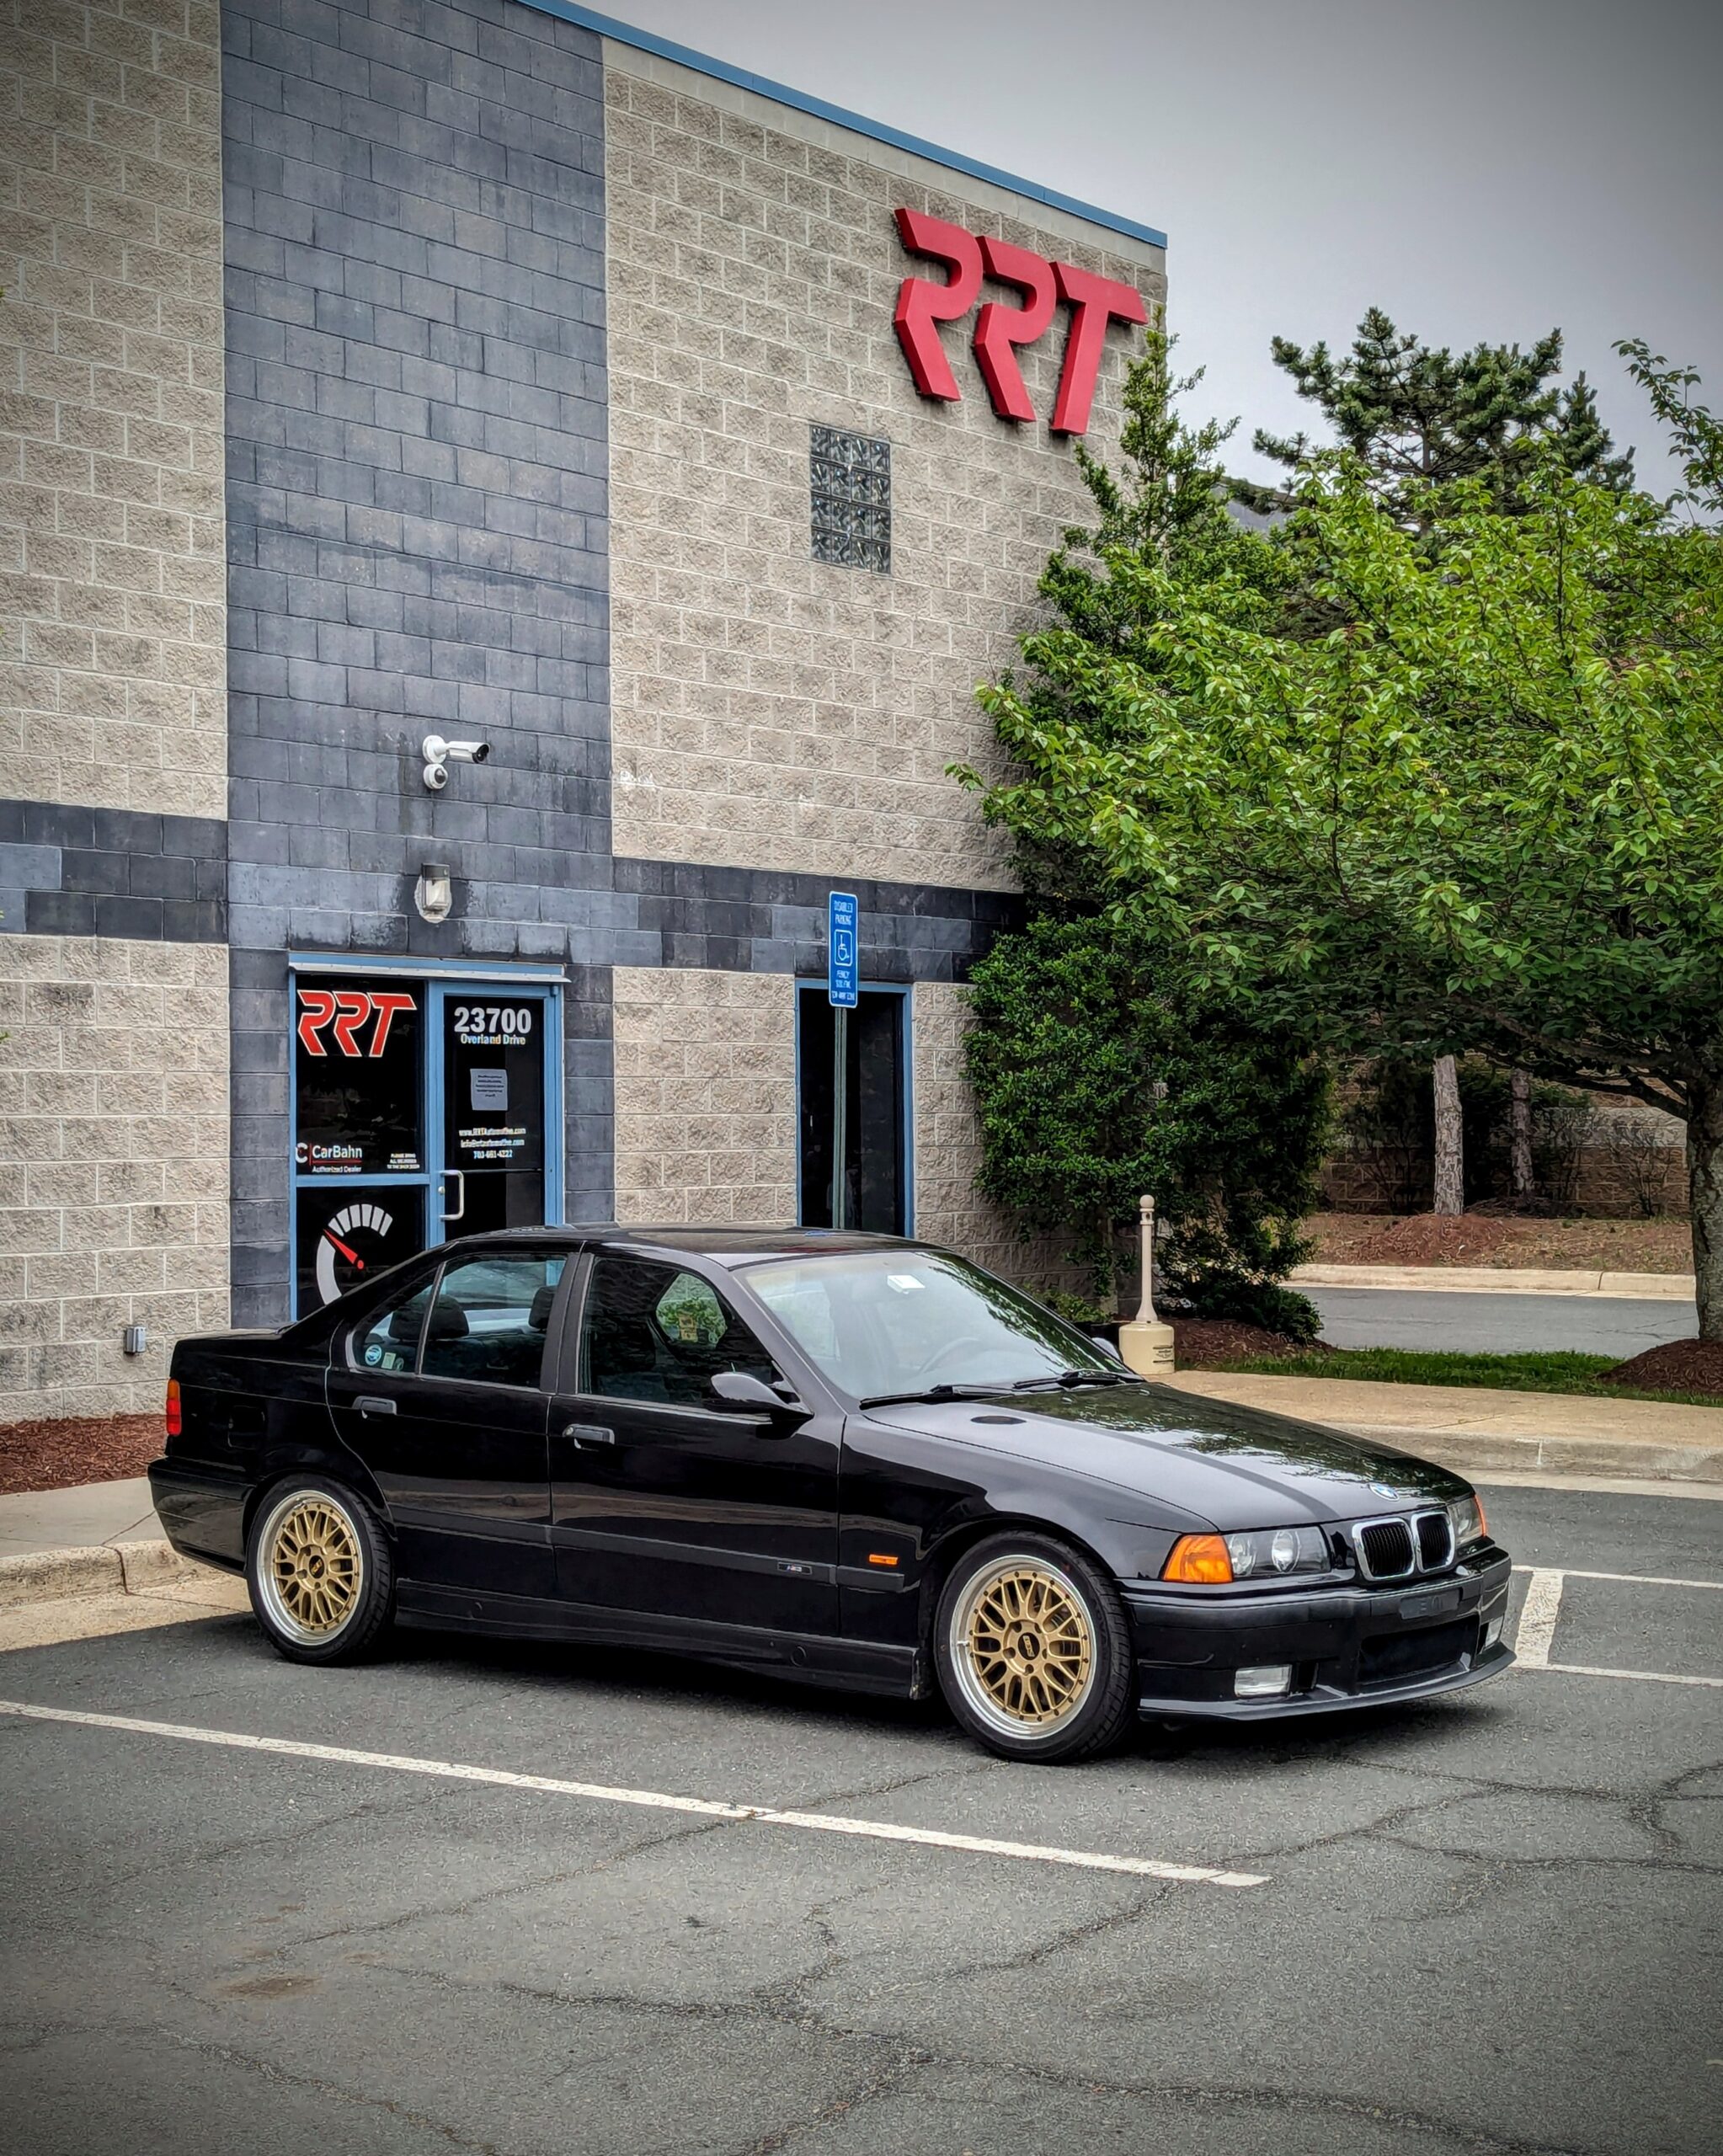
We made it home, now it’s off to the shop!
I spoke with RRT Owner and Lead Technician James Muskopf about the potential cause of the seal failure. It turns out the seal wasn’t pushed out due to crankcase pressure like I had hypothesized. If anything, it was actually pushed in a smidge. So, it’s still somewhat of a mystery at this point, but the PCV system issues still may have contributed to the rear main seal failure. You can be sure that I’ll be keeping a close eye on things.
It feels good to have our E36 back on the road, leak free, and ready for our next road trip. In fact, similar to my father-daughter trip to the Vintage with Avery, my eight-year-old-son Carter and I may take it on our own father-son road trip 250 miles northwest to the Pittsburgh Vintage Grand Prix this summer. I should probably revise my Vintage Prep Bingo card beforehand. —Mike Bevels
The post Vintage Prep Bingo appeared first on BimmerLife.
]]>The post Heading North For Spring Break appeared first on BimmerLife.
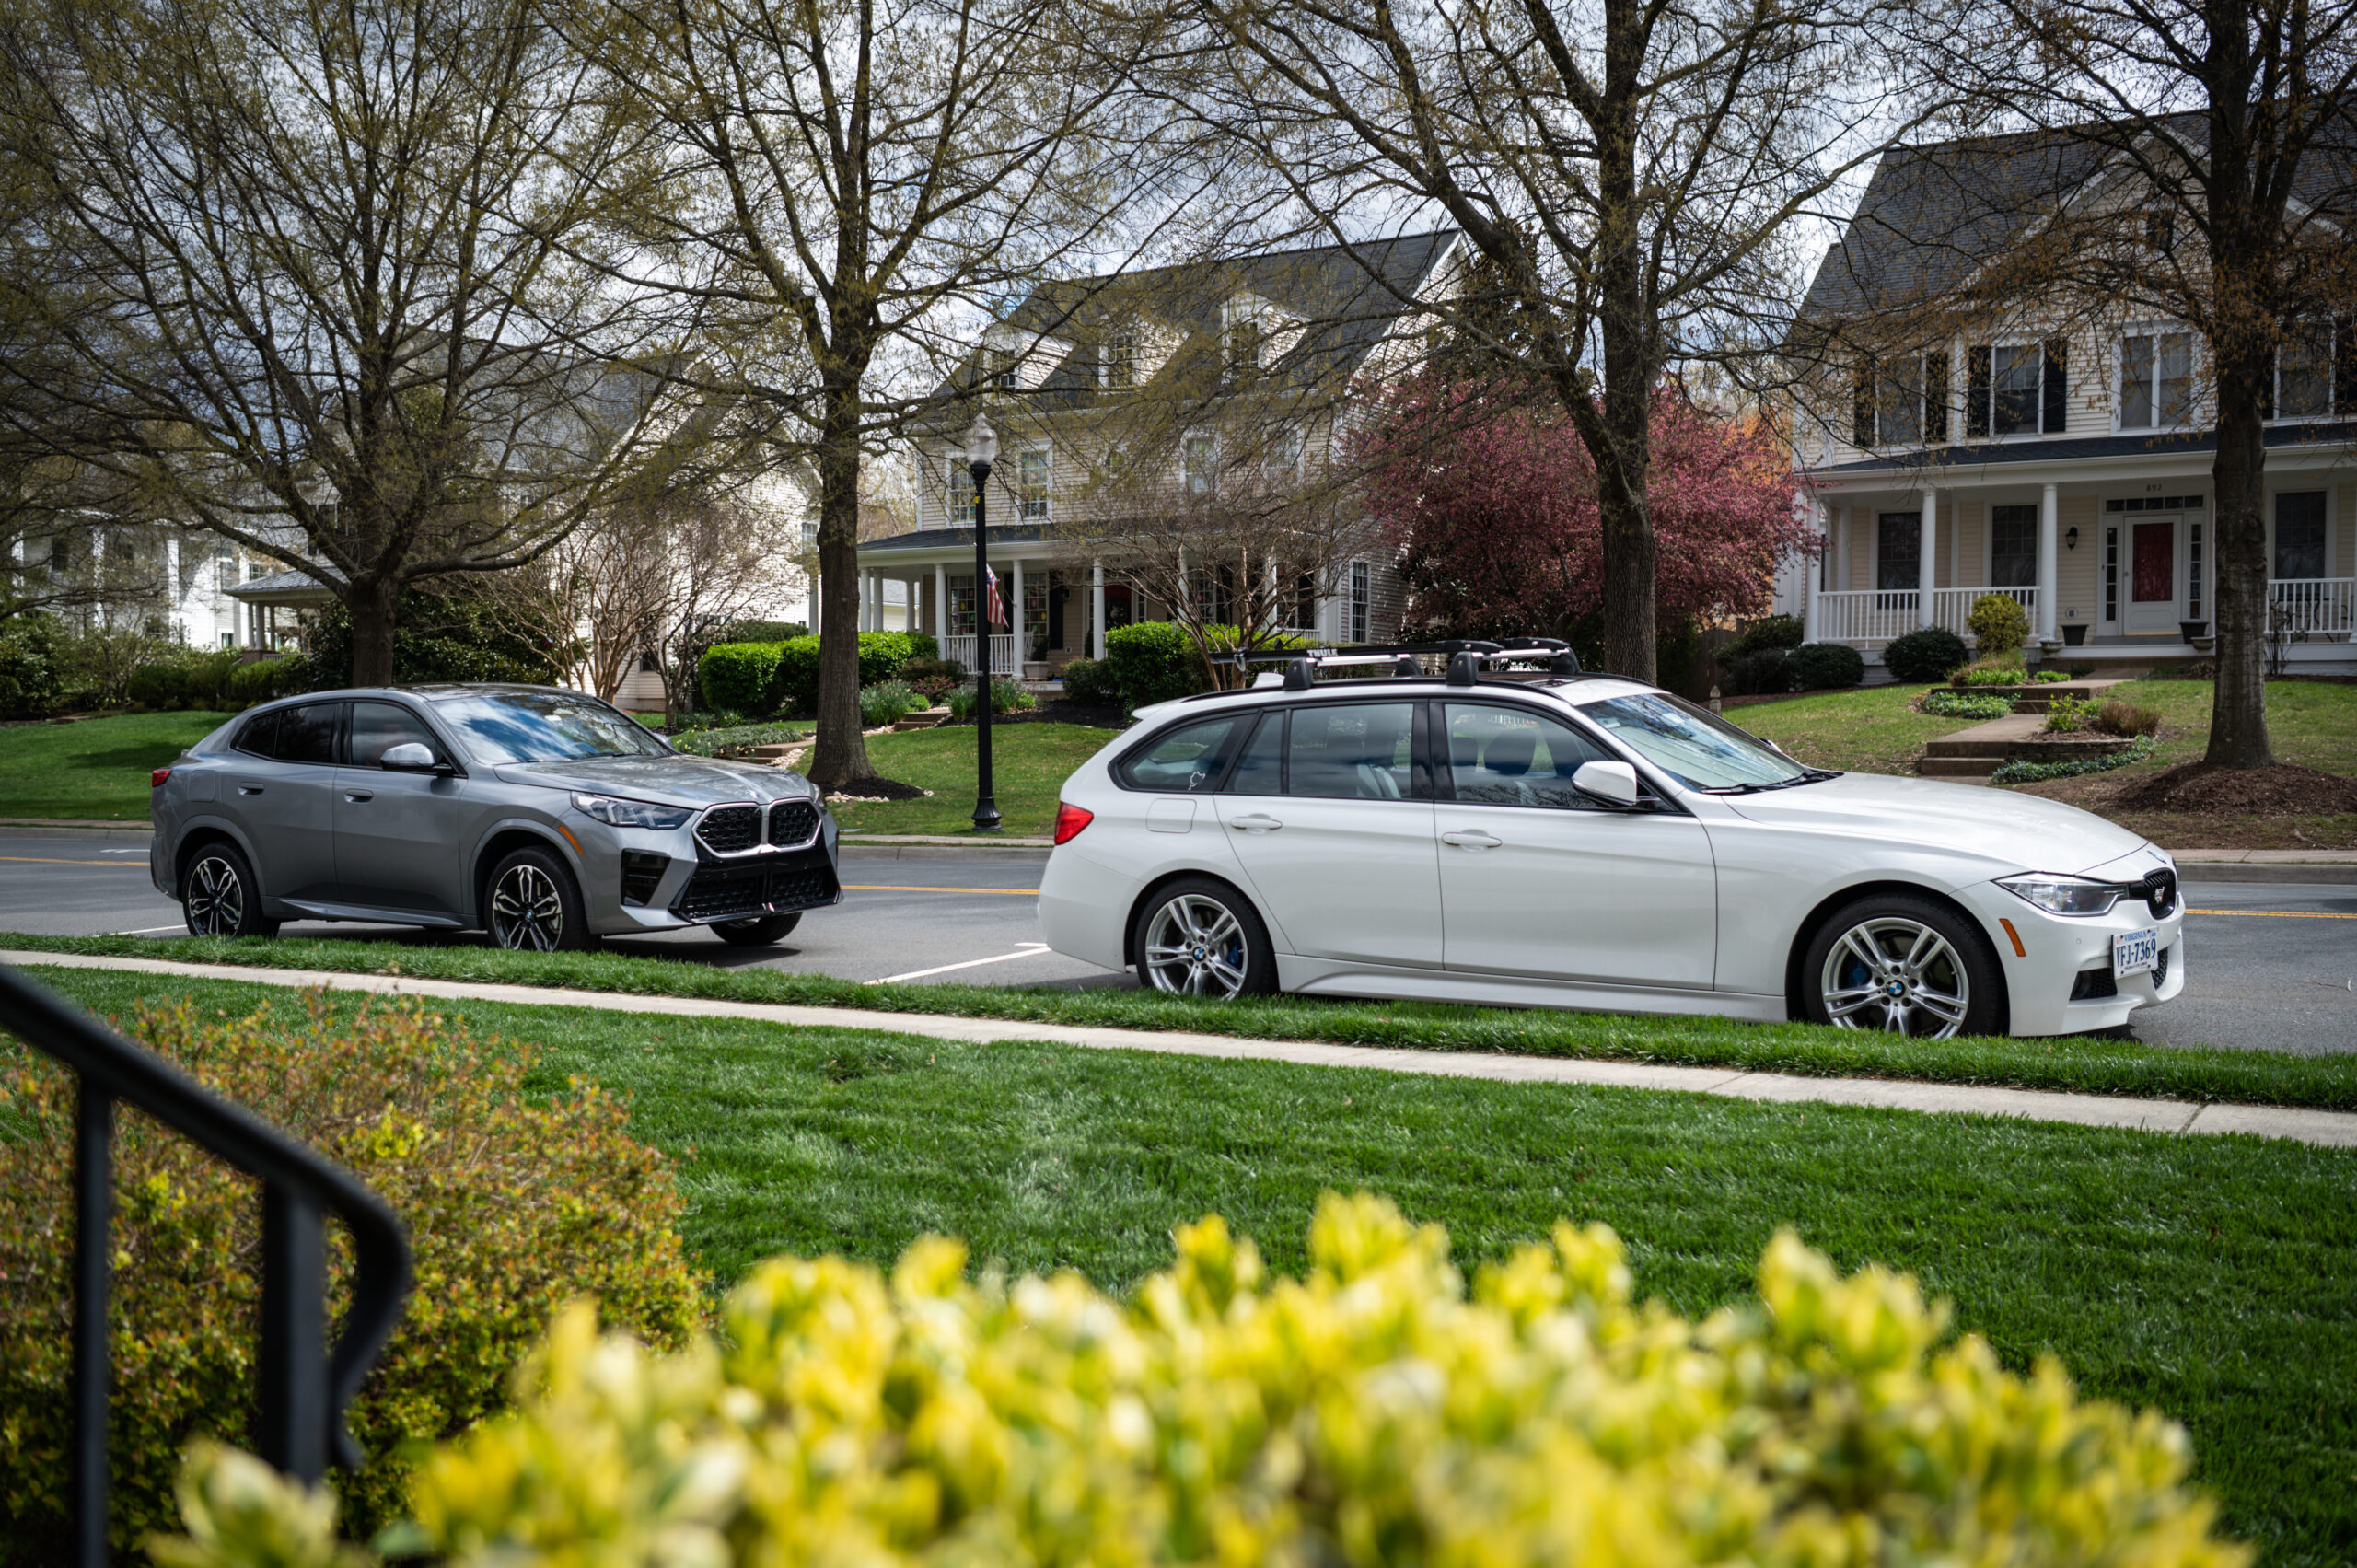
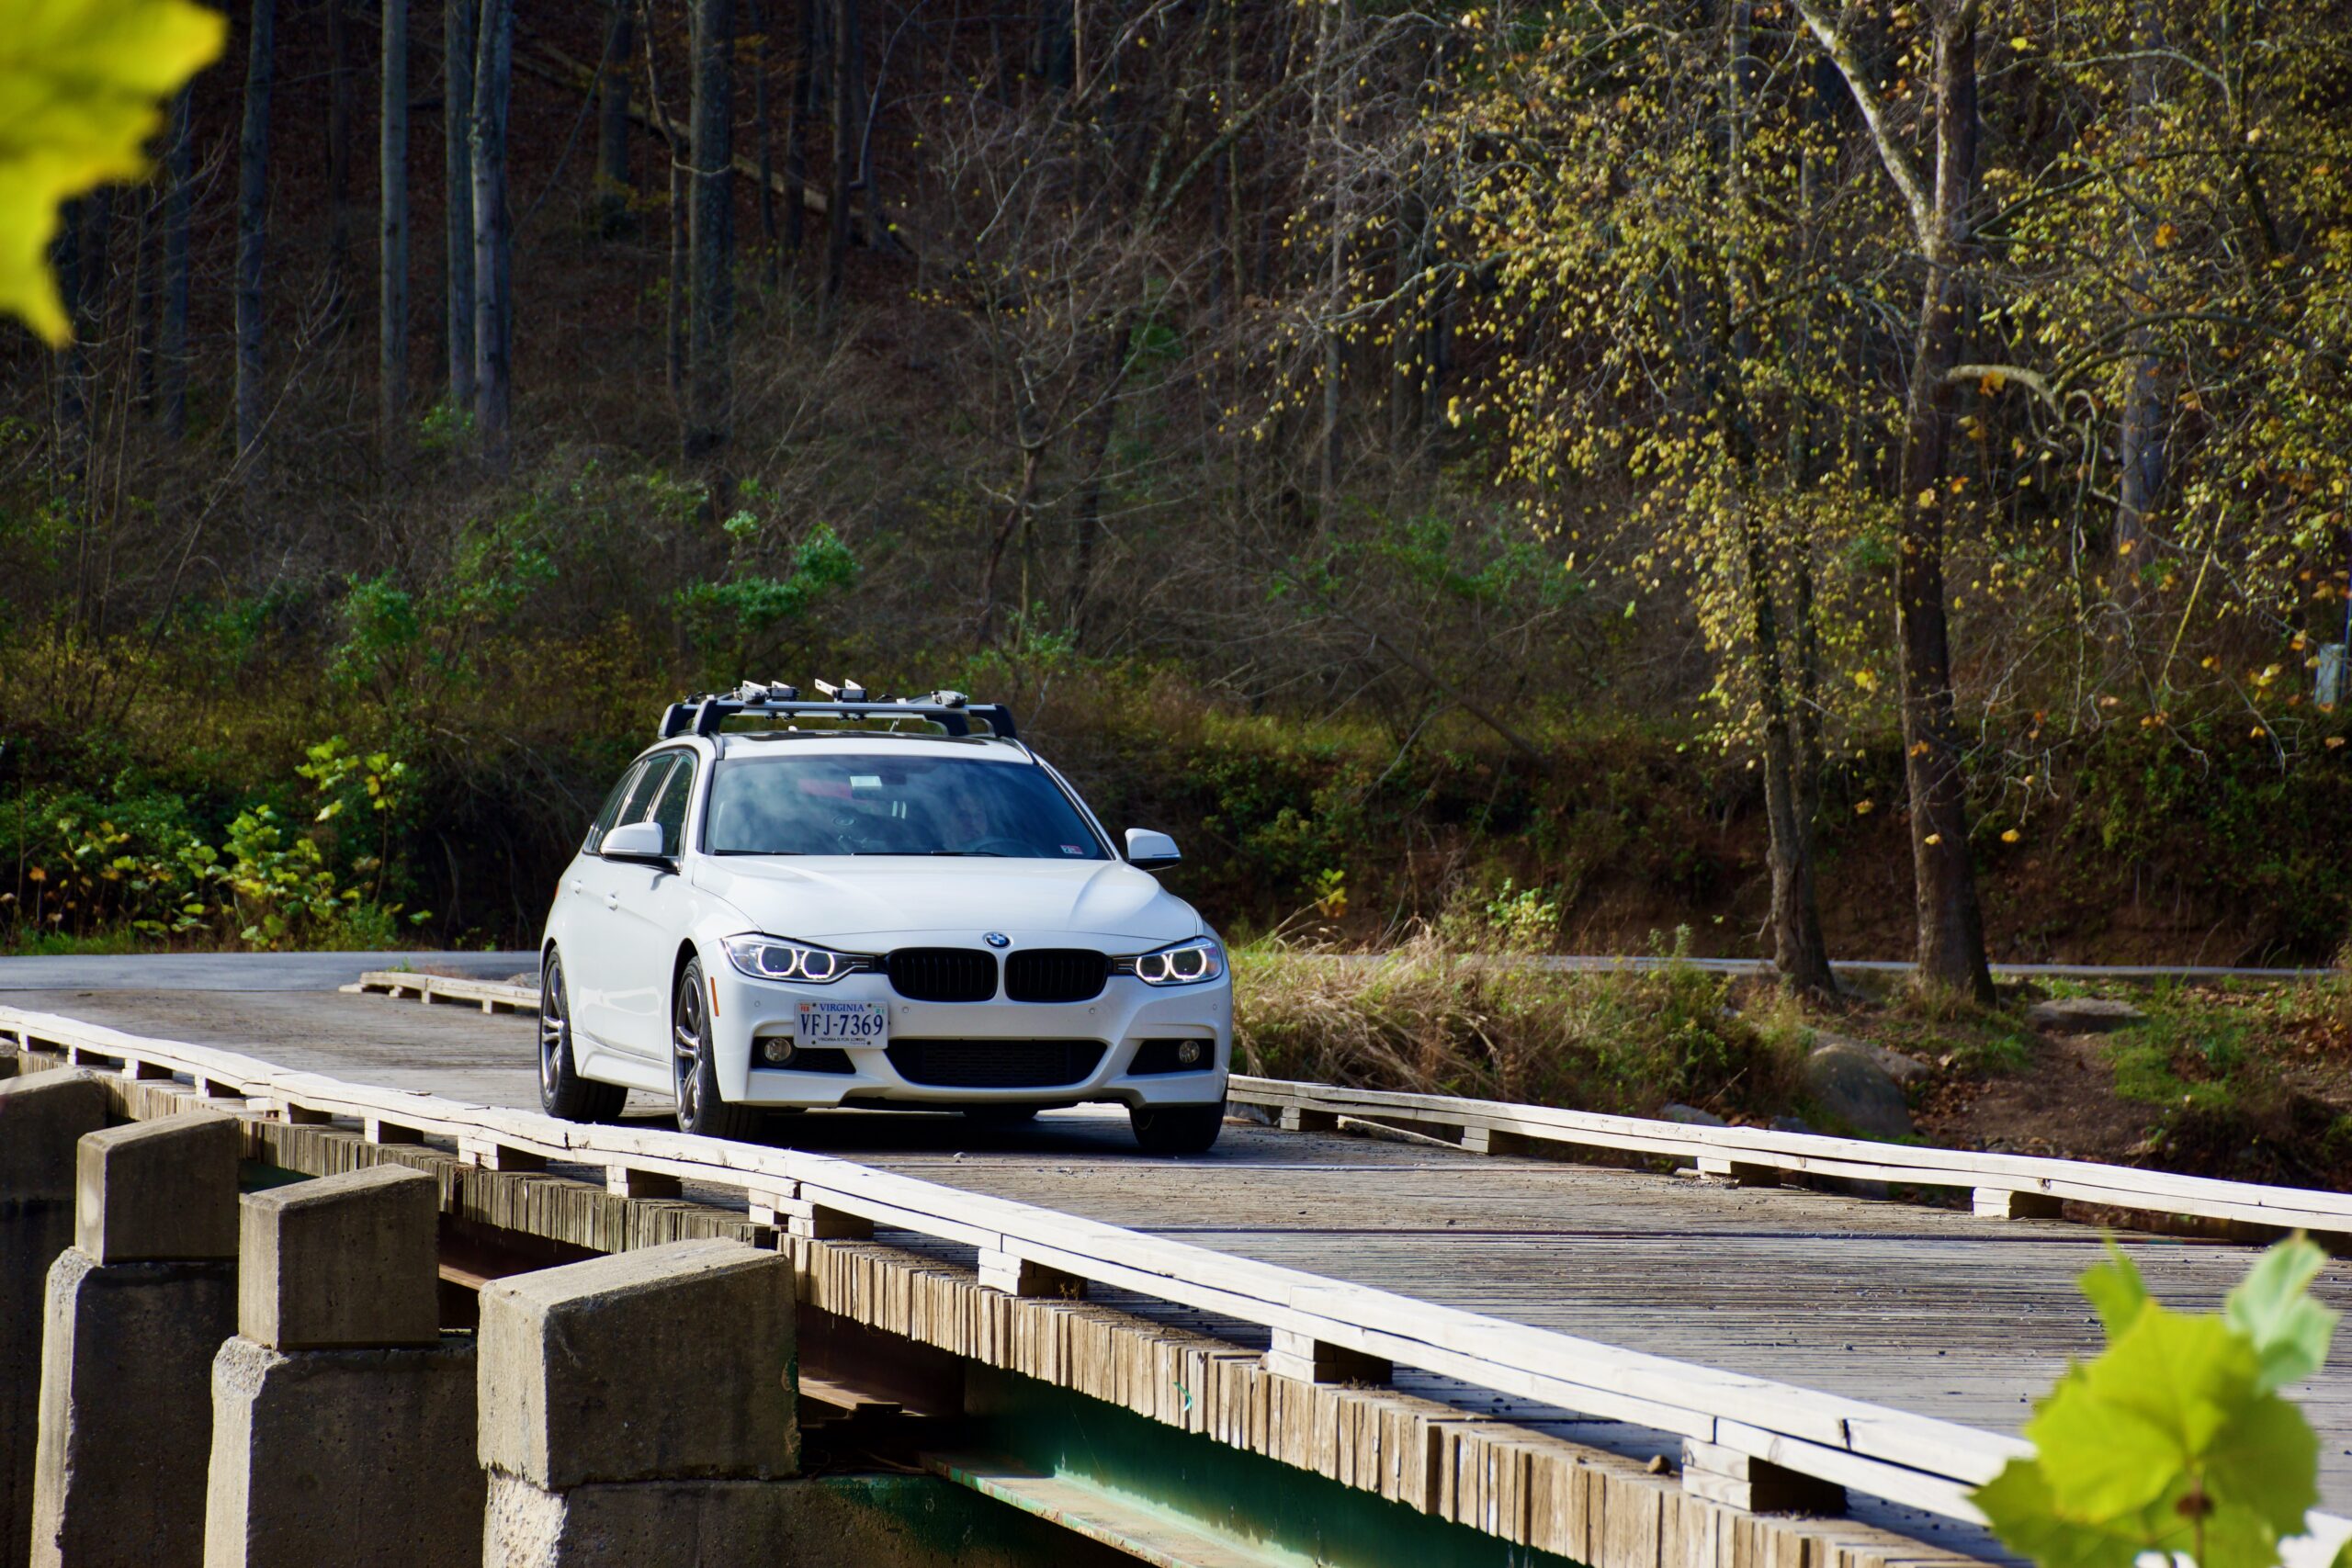
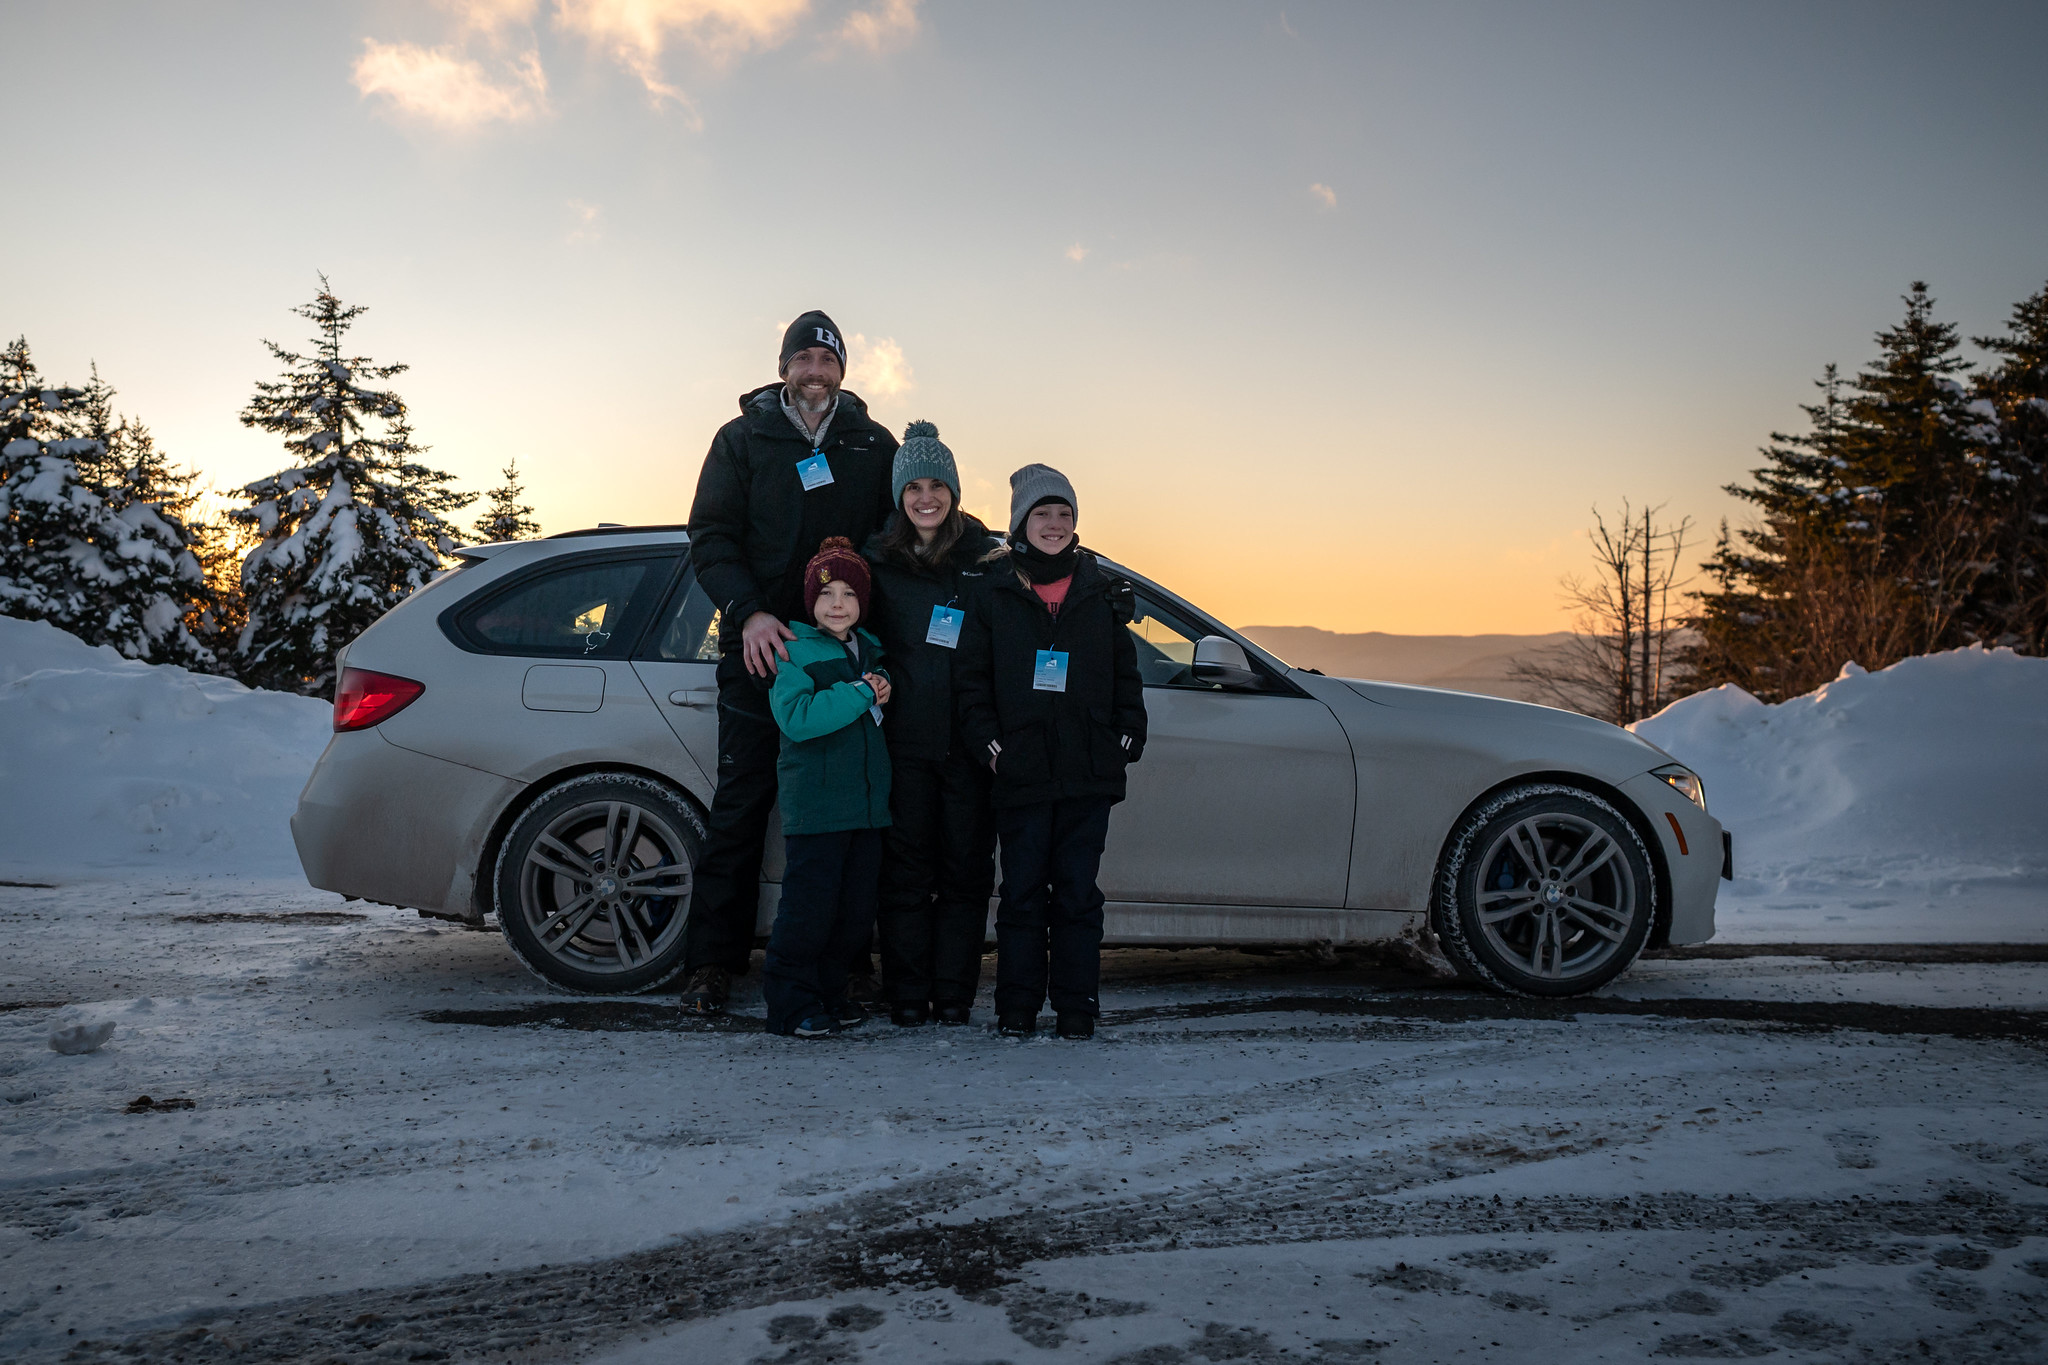
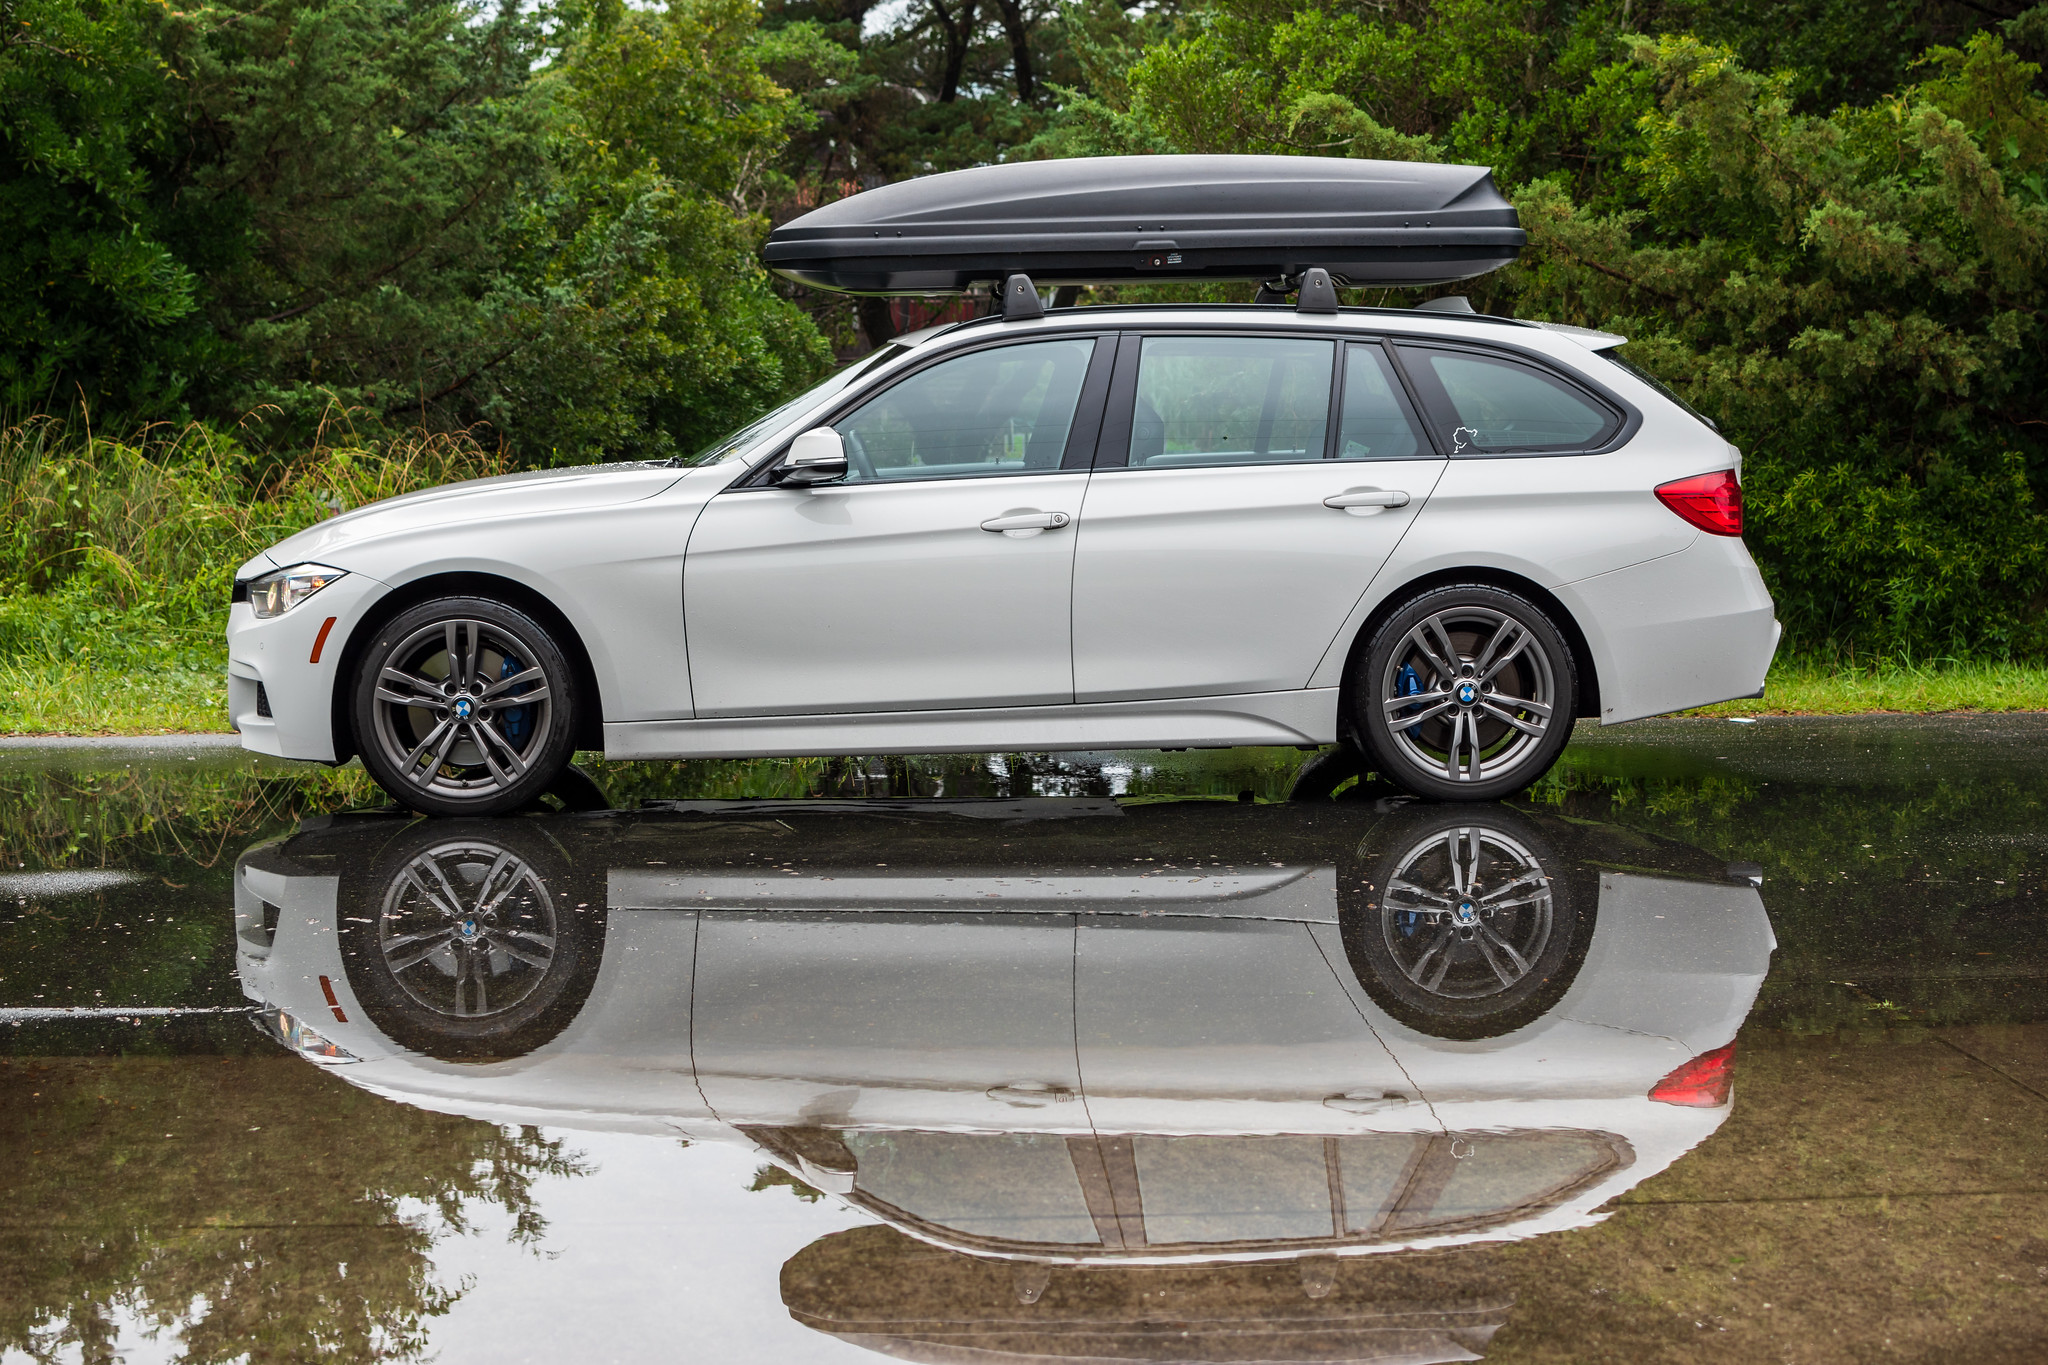
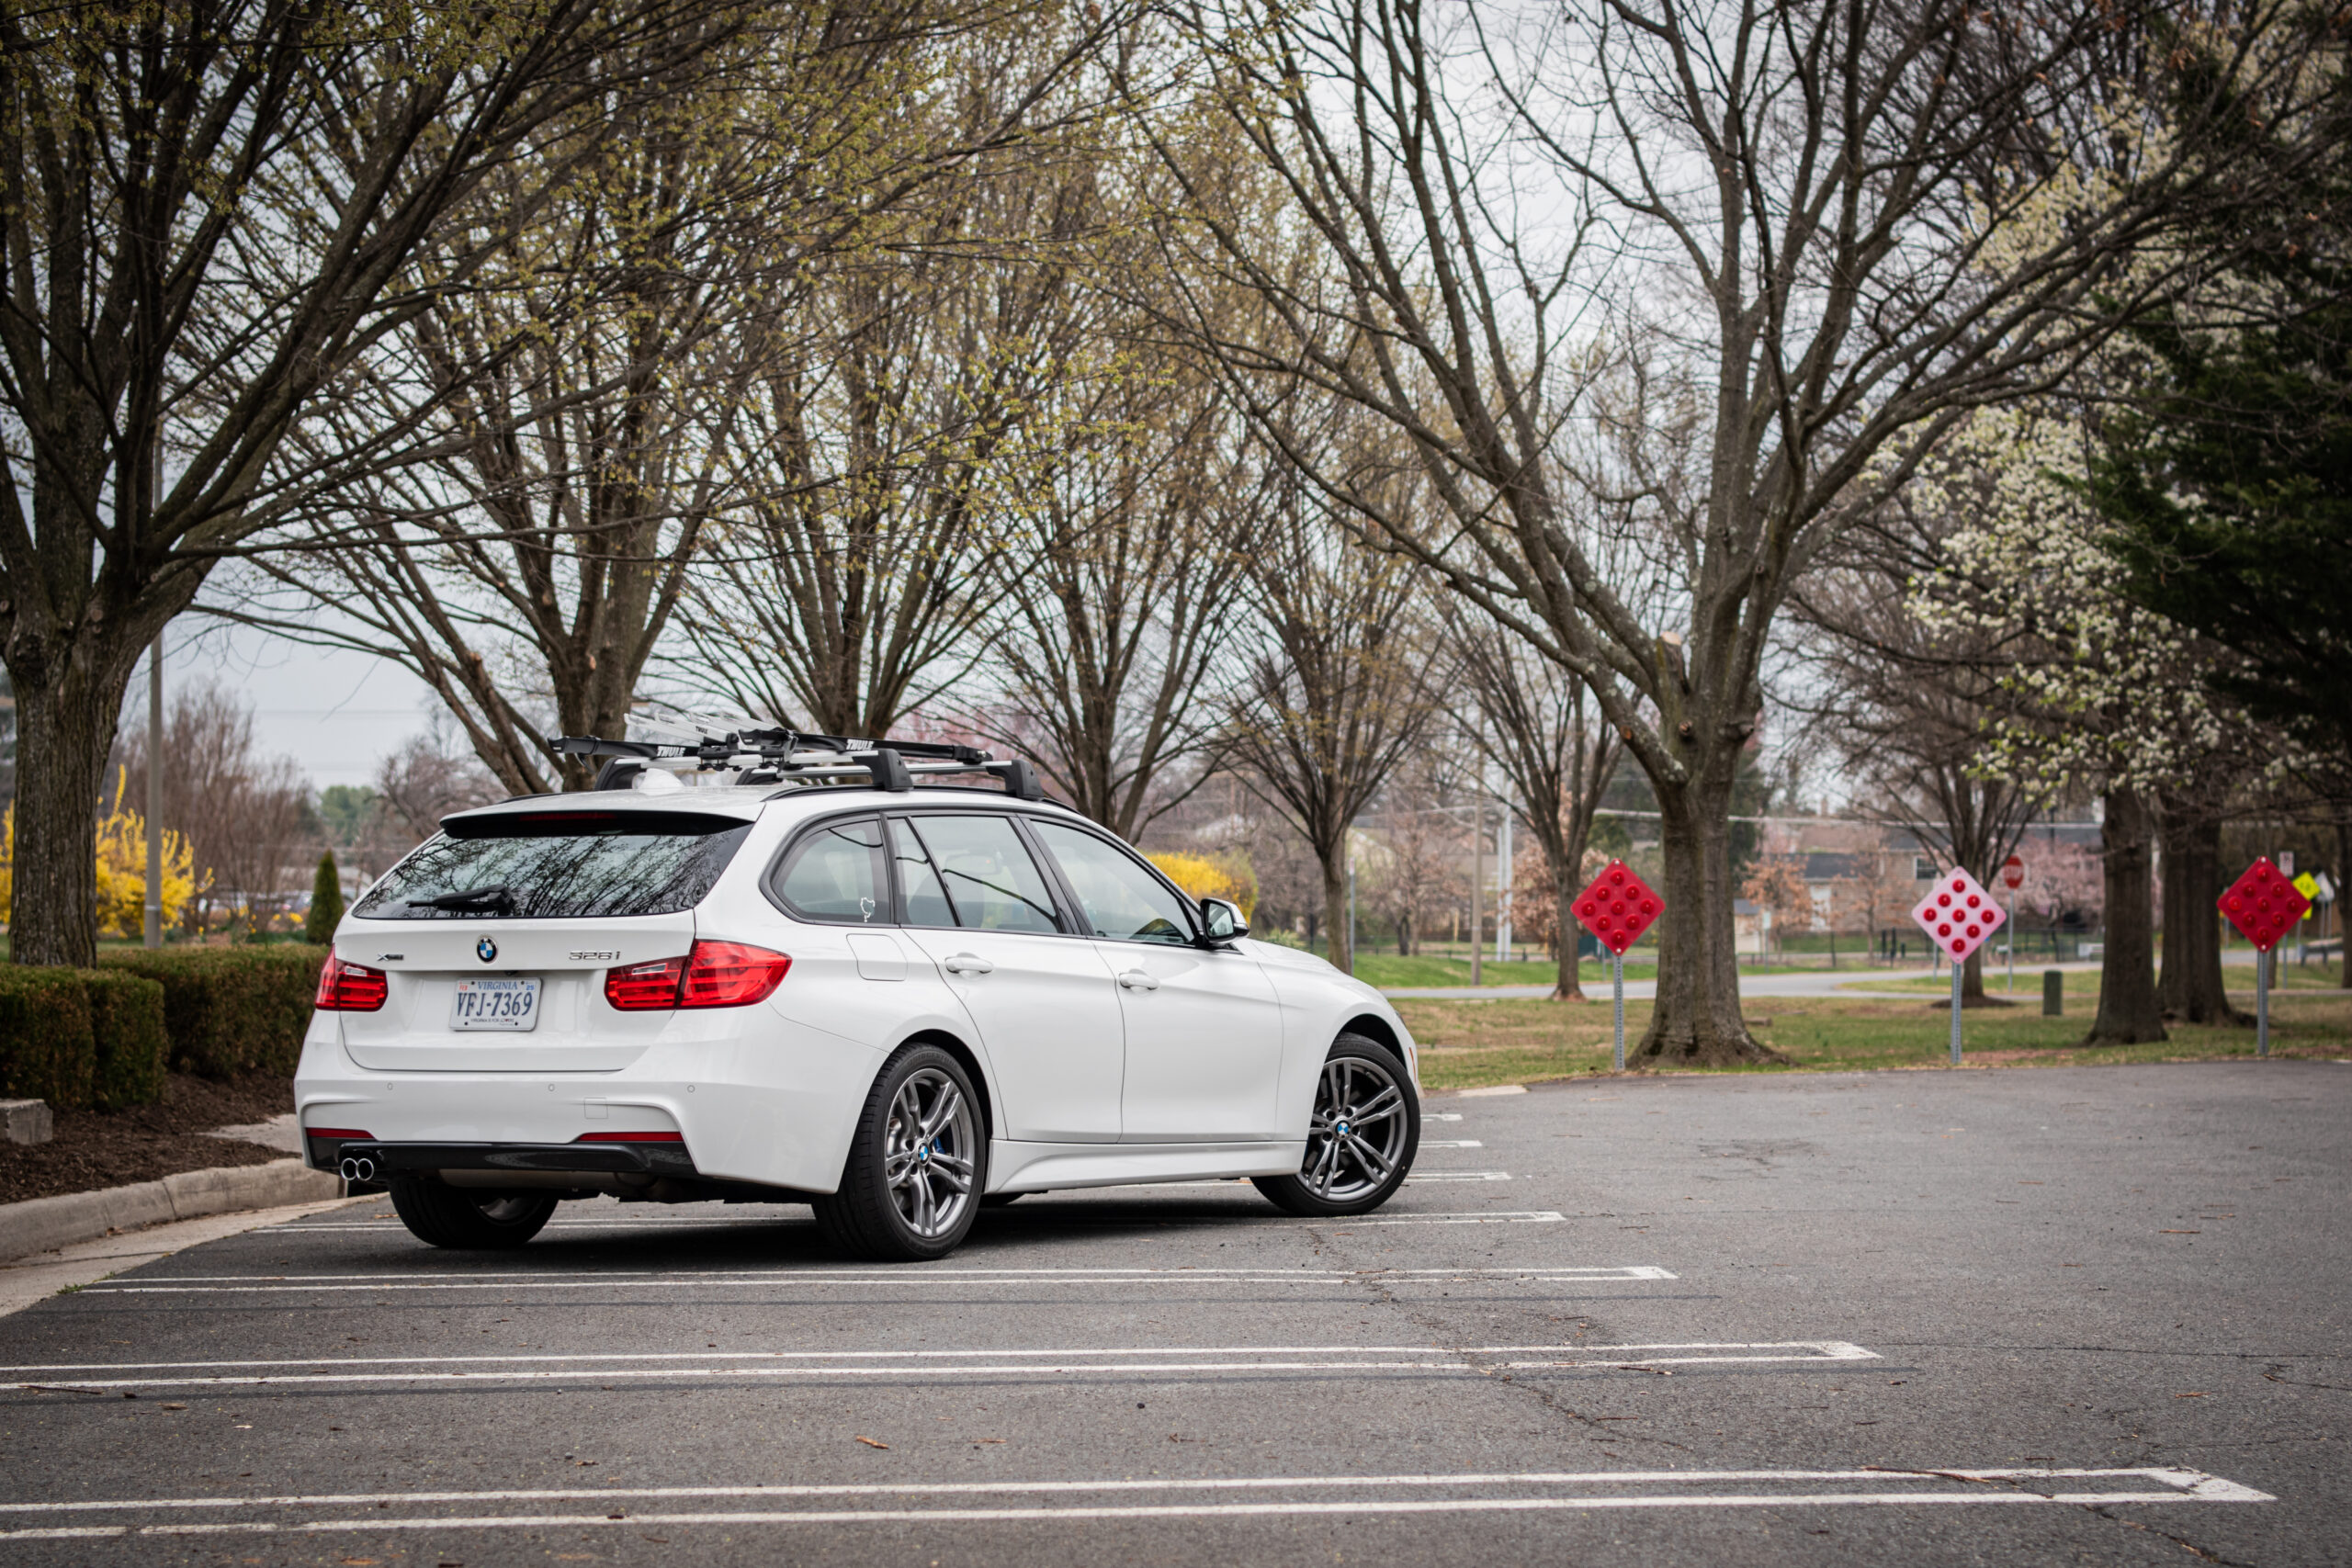
]]>While it would have been fun to take our five-speed-equipped 1991 318is or 1998 M3, northern New York and southern Ontario were still seeing freezing temperatures and trace amounts of snow at the time, so the summer tires on our classic BMWs would be an unnecessary gamble. Instead, we took our tried and true 2015 328i Sports Wagon, which we had recently celebrated ten years with. Trip preparations were light, changing the front rotors and pads and performing an oil change. The Vredestein all-season tires were only a few months old, and I’d changed or flushed all of the other automotive fluids within the last six months. A tire repair kit, floor jack, tire pump, and hand tools required to remove a wheel were stored neatly beneath the trunk floor in case we encountered a puncture.
We left our home in Northern Virginia on a Saturday morning and headed west. West?!? That can’t be right. I’ll explain—my daughter had an early soccer game in West Virginia, only a few miles from our favorite race track, Summit Point Motorsports Park. After an unfortunate 3-2 loss, we piled back into our F31 and headed north to our first official stop of the road trip, Buffalo, New York. The 422-mile route to Buffalo took us on the Pennsylvania Turnpike past Pittsburg, then on Route 79 to Erie. Almost exactly a year prior, we had taken this same route to Erie to view the Eclipse in a brand-new BMW X2 courtesy of BMW North America (see the article in the Fall/Winter 2024 issue of BimmerLife magazine), so it was fun reliving that automotive adventure in one of our own vehicles.

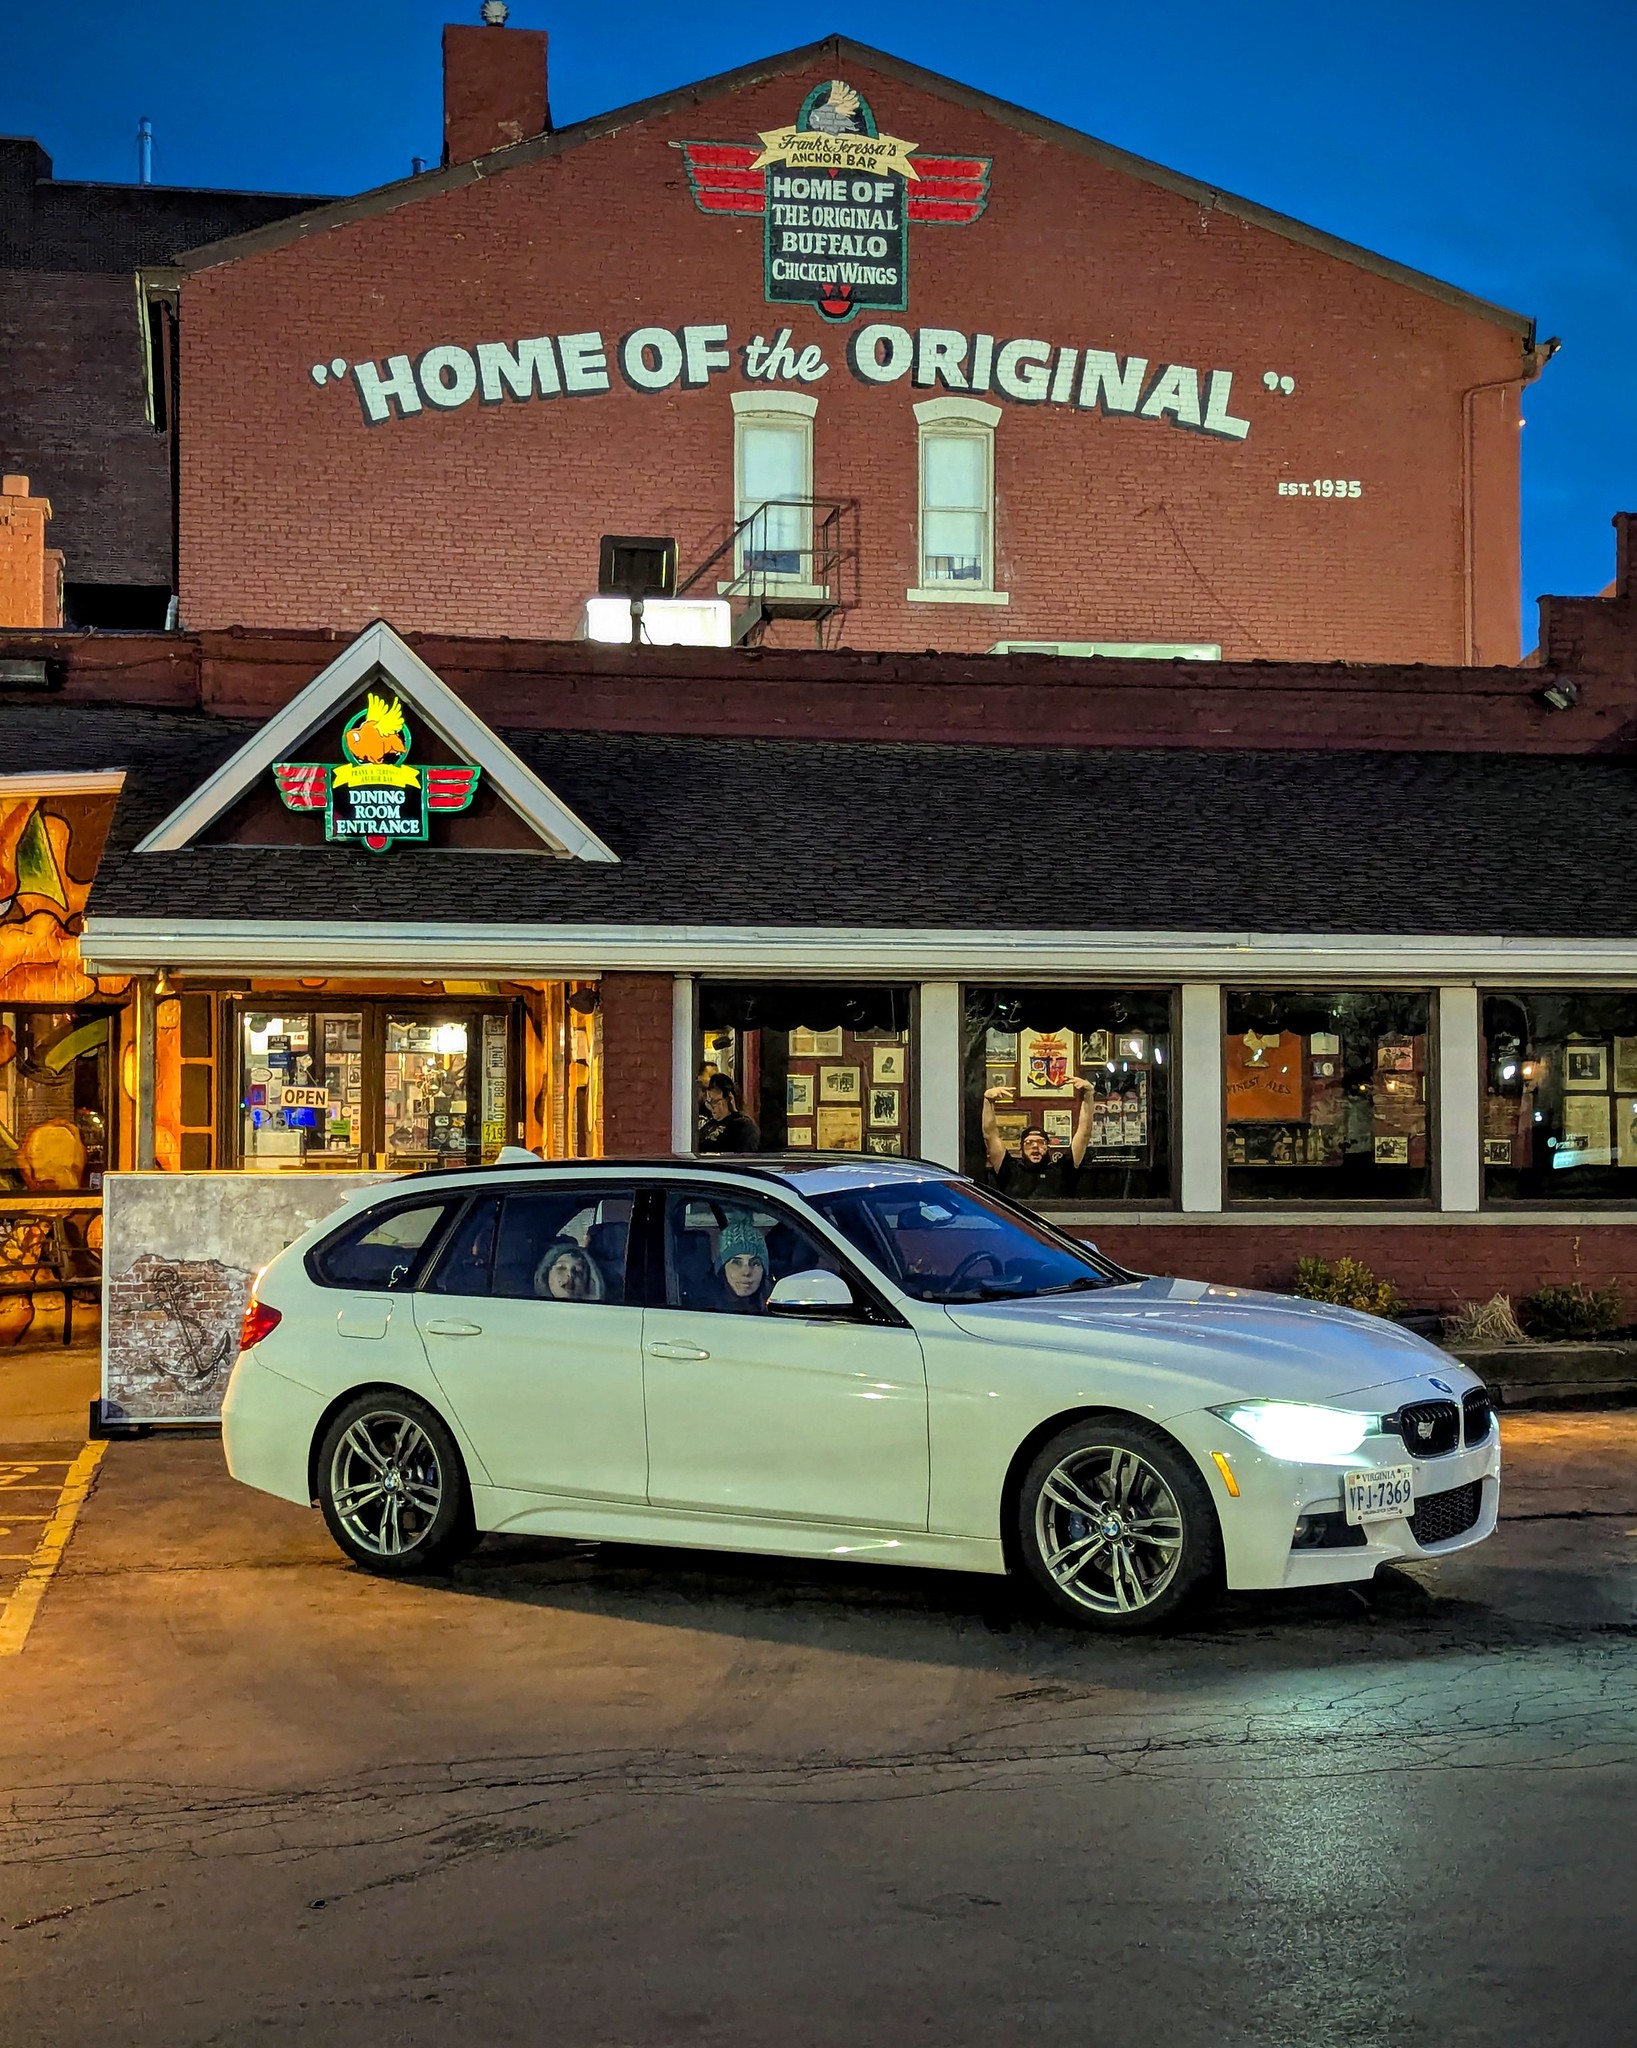
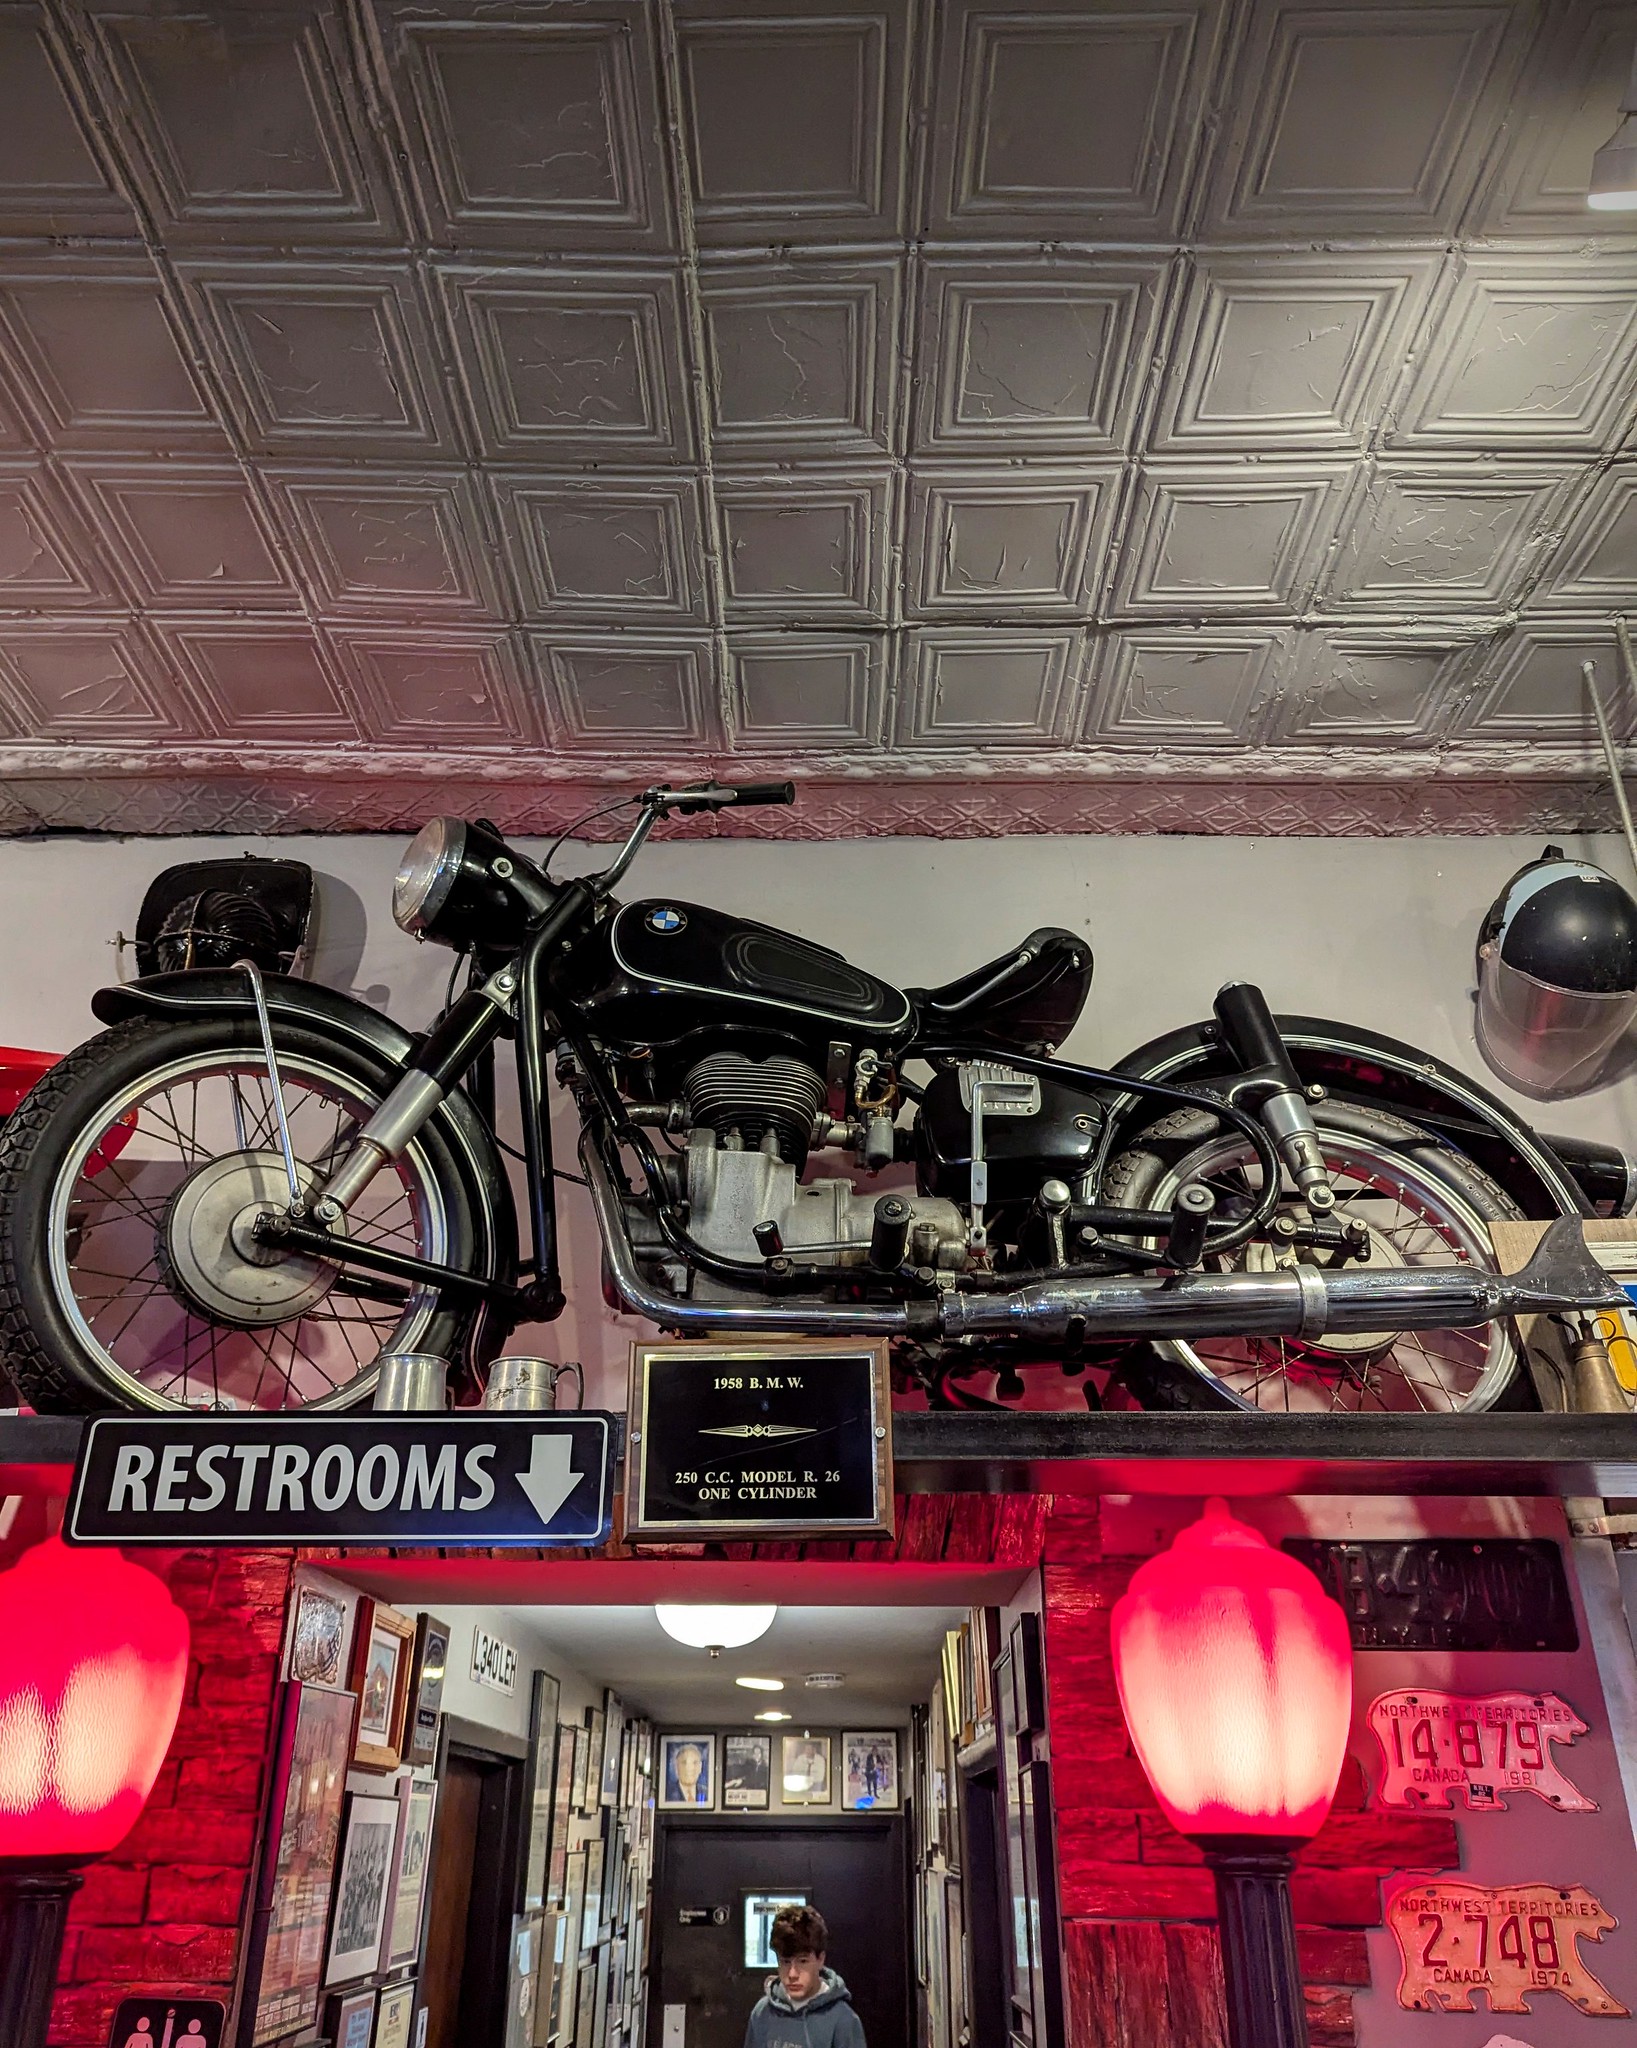
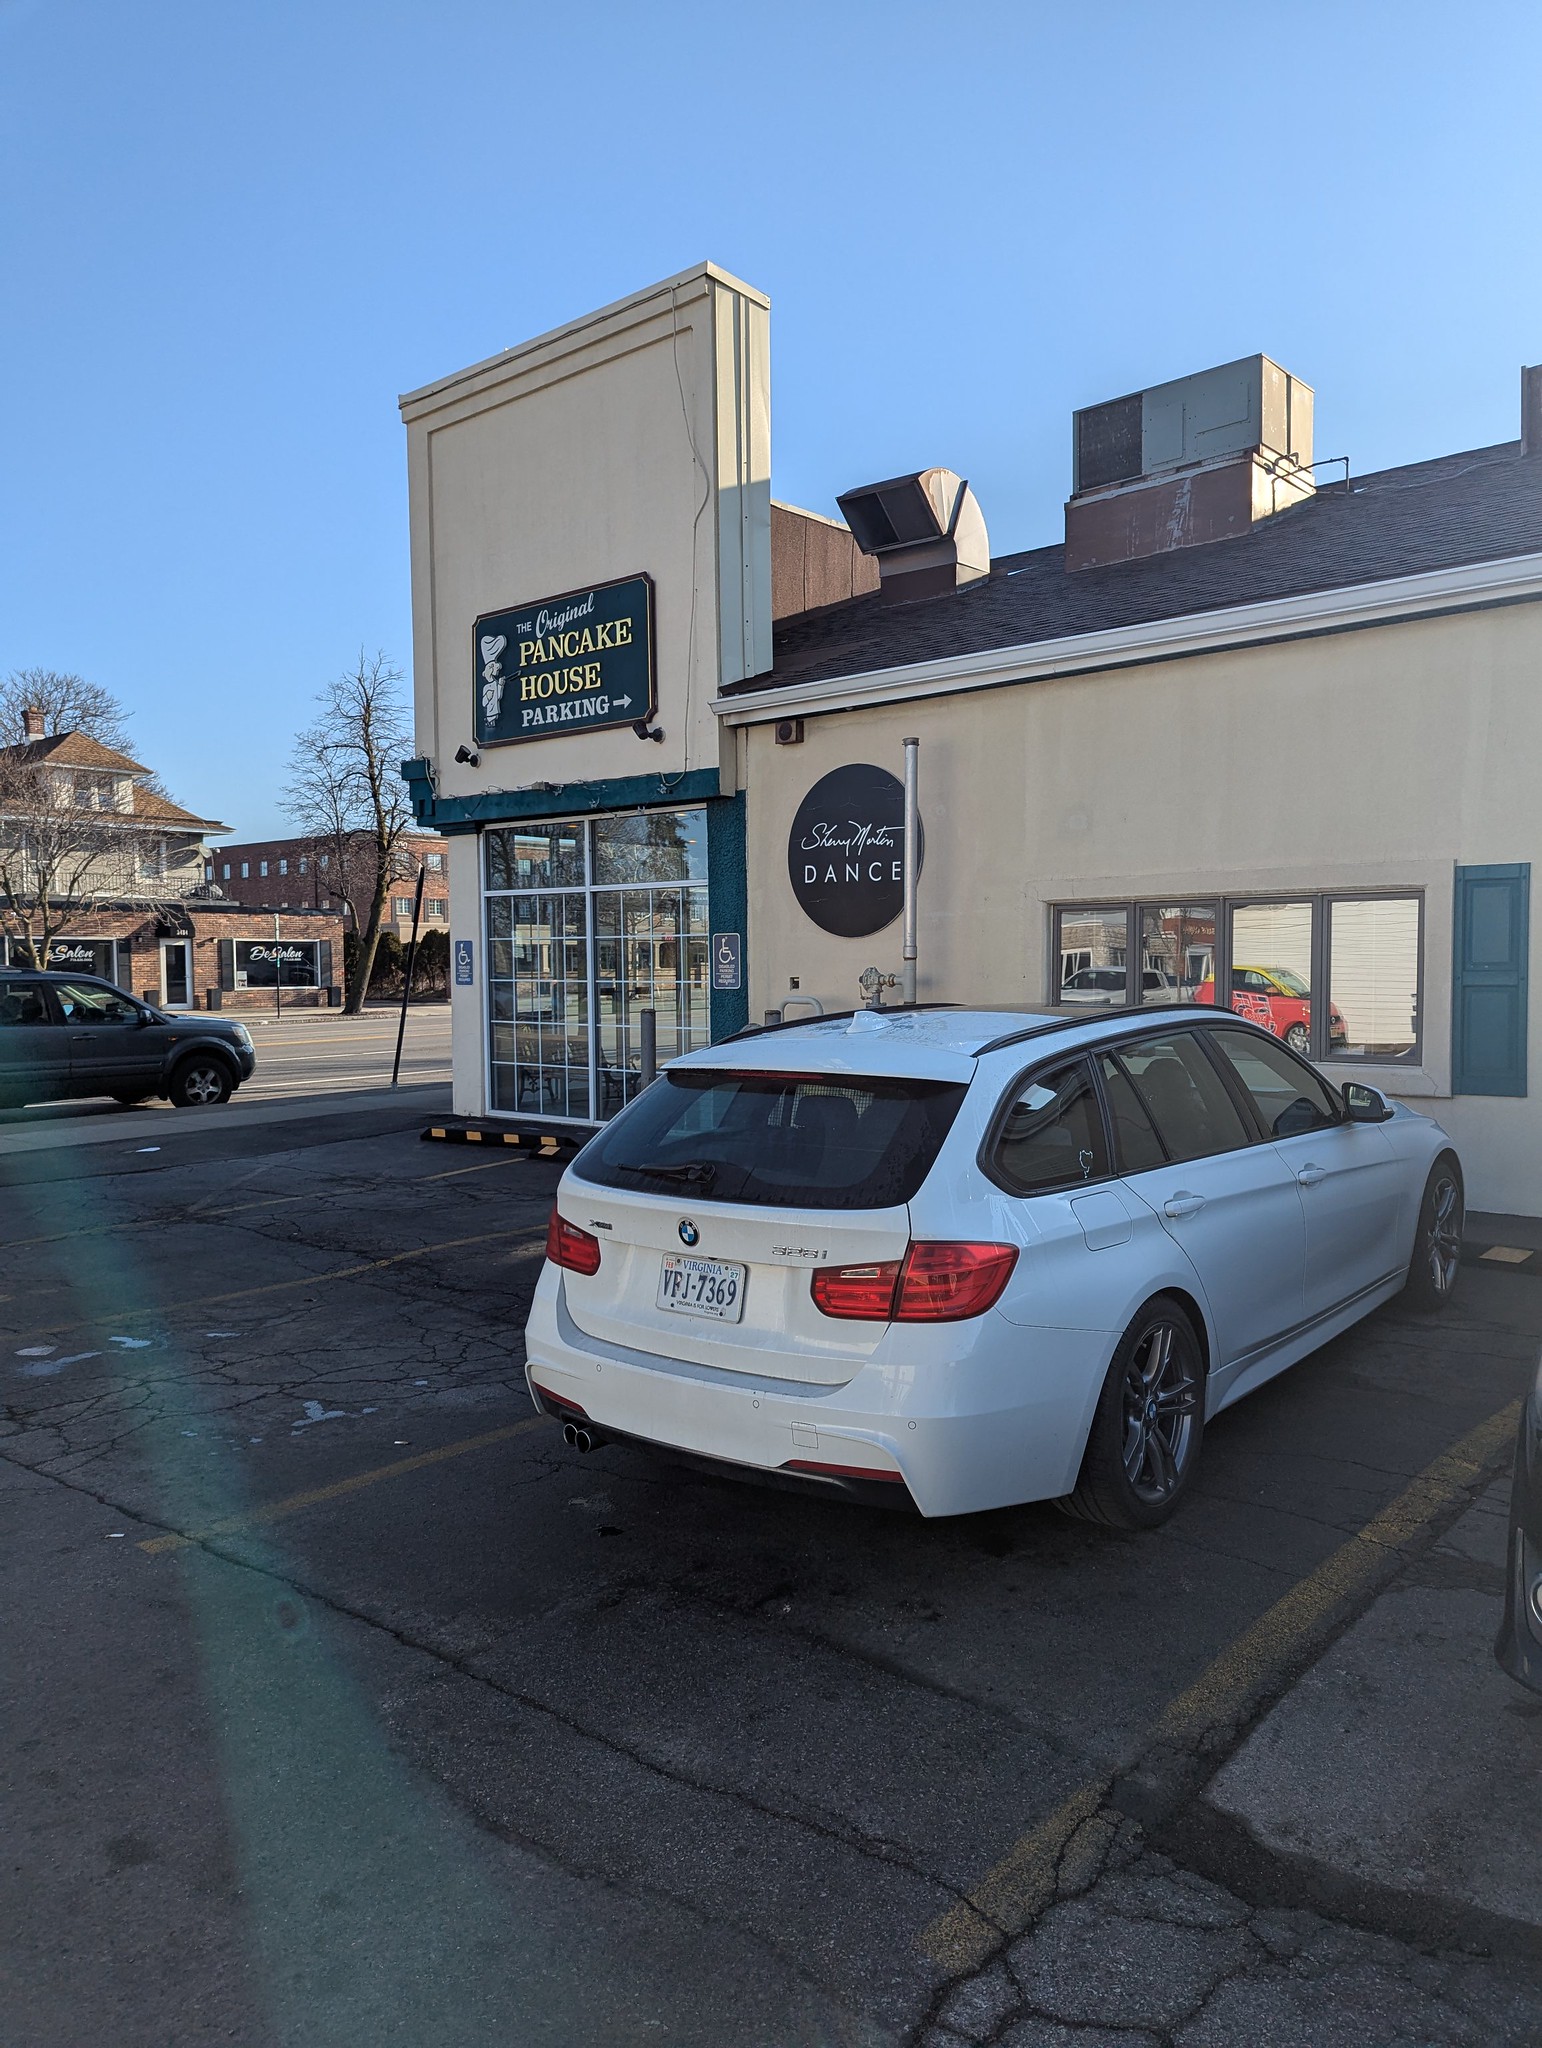
Past Erie, we headed northeast, skirting the Great Lake all the way to Buffalo. By the time we arrived at our hotel, it was past our normal dinner time. A neighbor and Buffalo native suggested we check out the original Anchor Bar in downtown Buffalo, which was a short ten-minutes away. As if rock-star parking and delicious wings weren’t enough, there was an array of cool motorcycles decorating the restaurant, including a 1958 250cc one-cylinder R26! The next morning we continued doing touristy things and ate breakfast at the original Pancake House, which didn’t have any vintage motorcycles mounted to the walls, but thankfully the pancakes and eggs were still delicious.
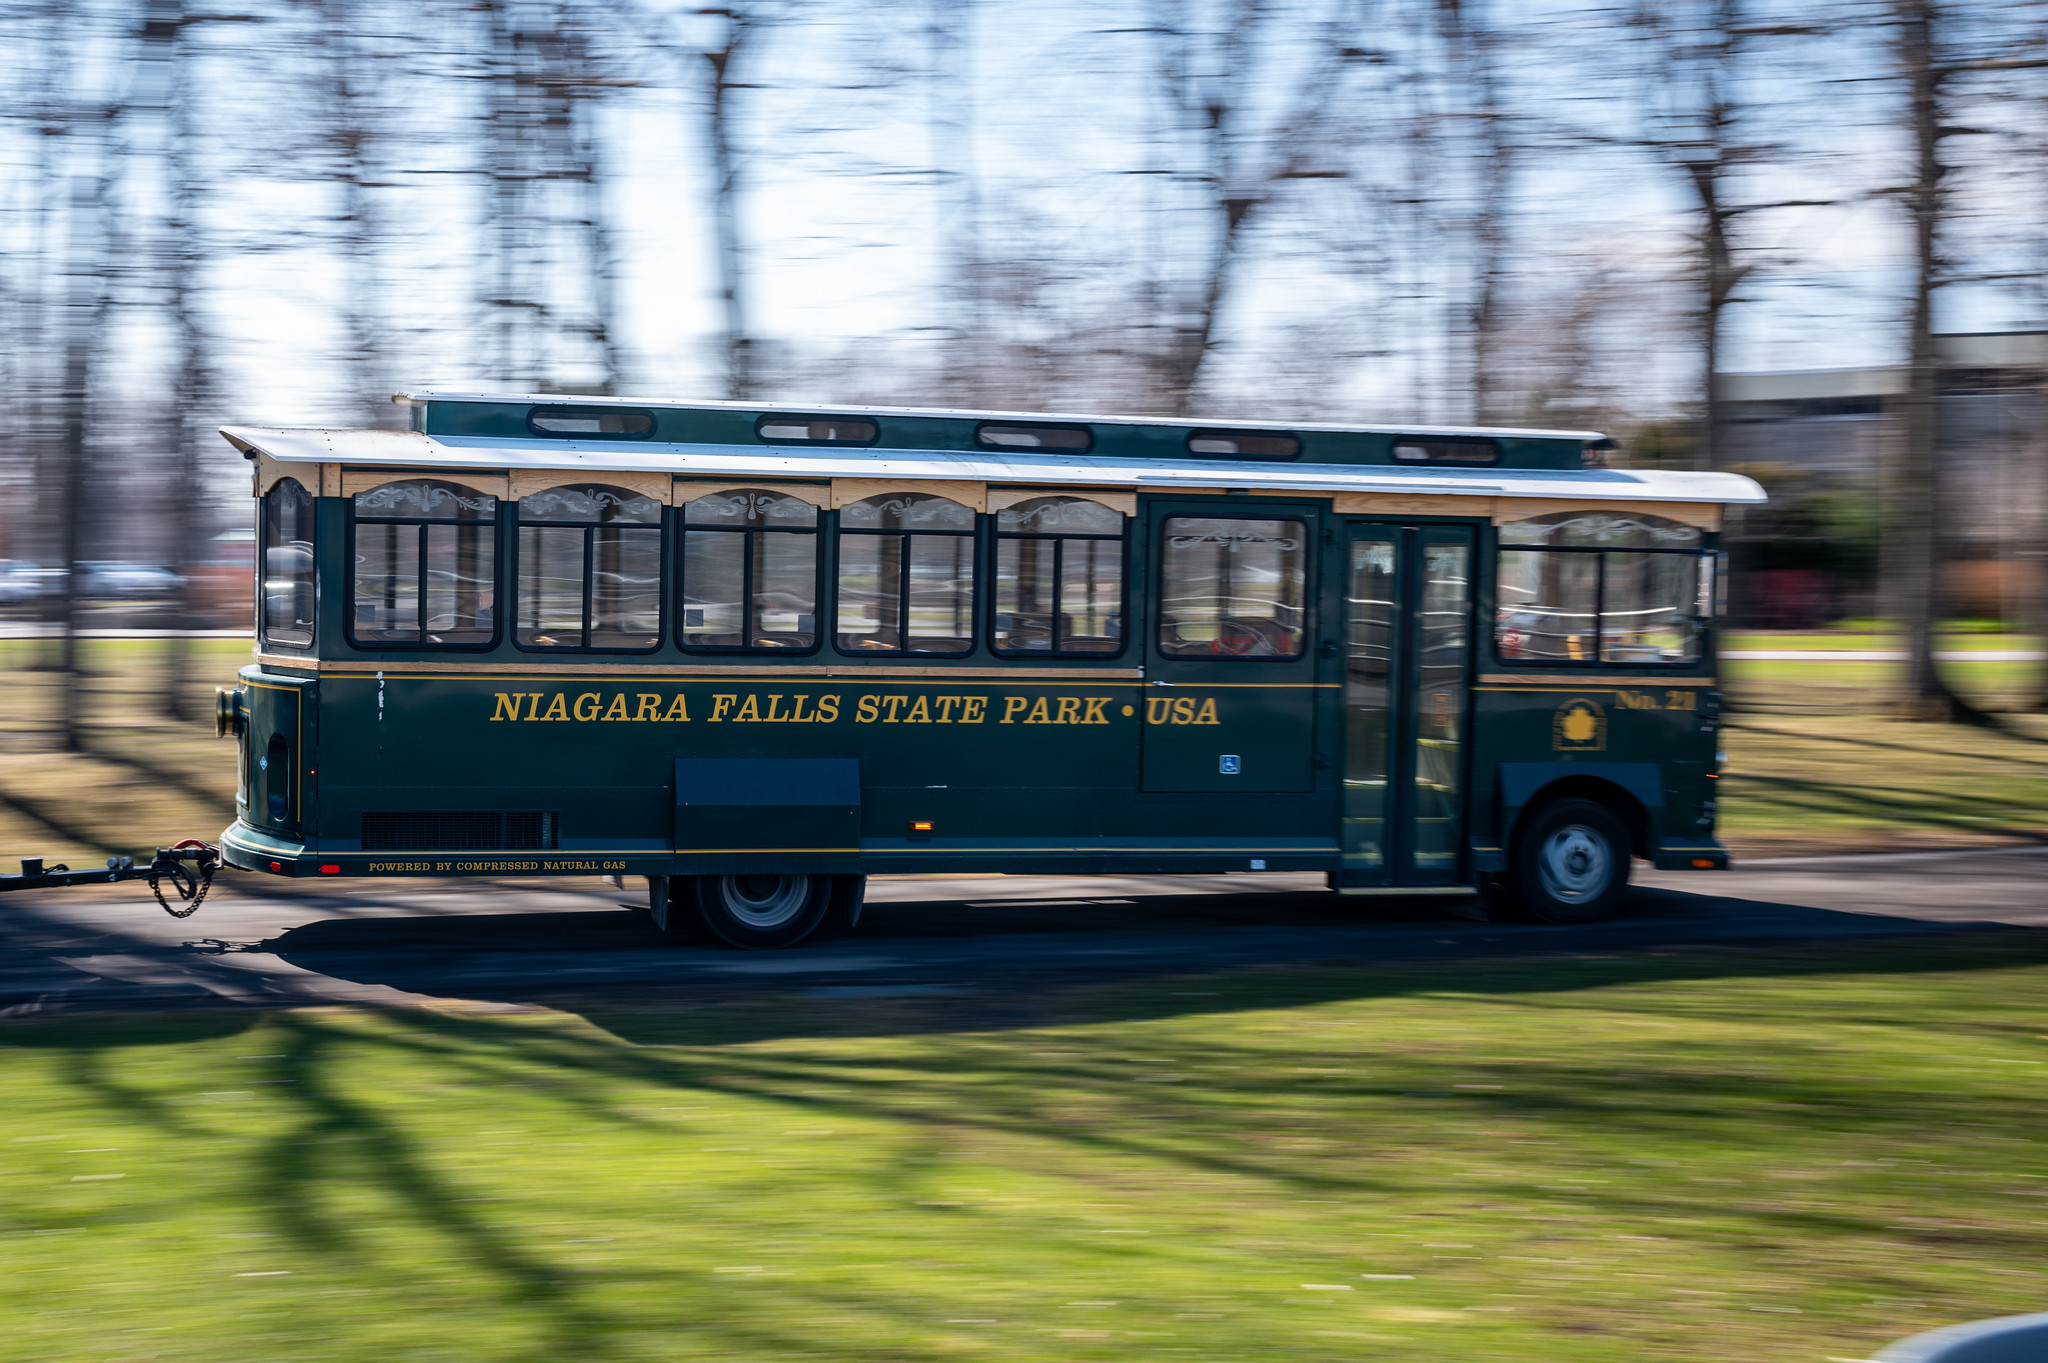
After breakfast, we headed straight to Niagara Falls State Park. Parking on Goat Island, we were able to view the America Falls as well as the Horseshoe Falls of Canada. Purchasing tickets for “Cave of the Winds” allowed us to visit a museum and take an elevator down to the base of the American Falls, providing some excellent photo opportunities. We hiked around the rest of the park, including the Observation Tower off Goat Island. While my wife Sara remembers visiting when she was a kid, it was Avery’s, Carter’s, and my first time witnessing the natural wonder of the Falls. Being able to get so close to the Falls was both a jaw-dropping and anxiety-infused experience.


A short drive over Rainbow Bridge and through Canadian Customs gave us access to the Canadian side of Niagara Falls, where we checked into the Sheraton Niagara Falls hotel. The “Niagara Falls Pass” package gave us access to the WeGo bus system, as well as a number of attractions like the Butterfly Conservatory, Journey Behind the Falls, and the Power Station.
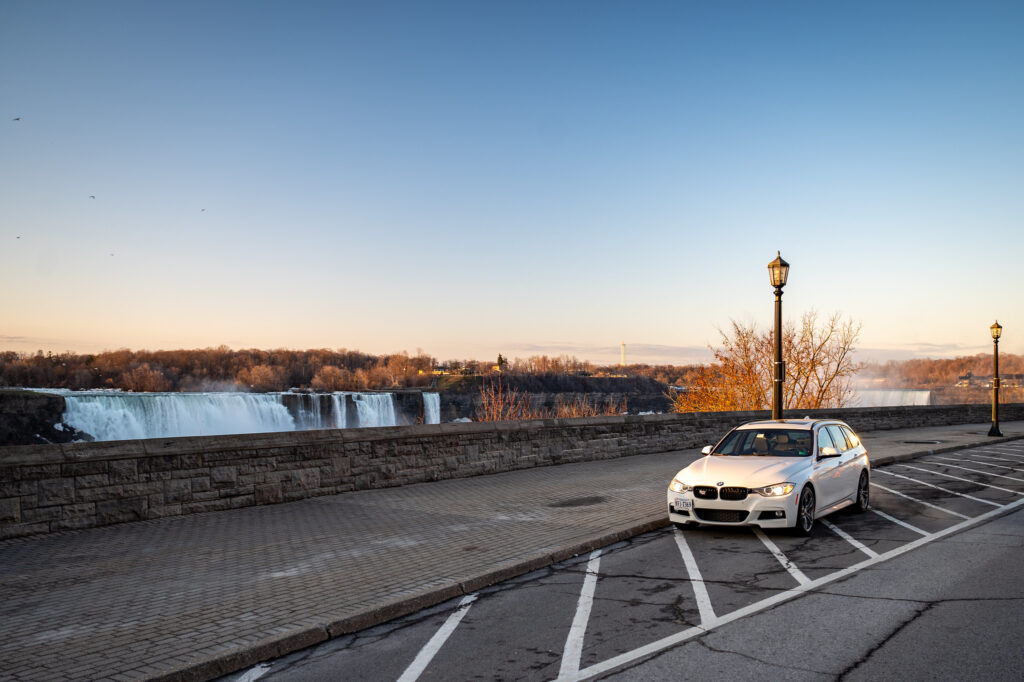
A view of the American and Horseshoe Falls from Canada.
Journey Behind the Falls and “The Tunnel” under the Power Station gave us close-up views of the Horseshoe Falls, requiring rain gear to avoid a complete soaking. Due to ice still encompassing the base of the Falls, we weren’t able to take the “Maid of the Mist” boat tour, but ambient temps in the 40s and 50s still made sightseeing quite enjoyable. Avery and Carter enjoyed collecting “activity stamps” at each of the stops listed in our Niagara Falls passports, and the view from our fifteenth-floor hotel room gave us a unique perspective of the Falls being lit up at night.


After two nights in Niagara Falls, we pushed further north to Toronto. Looping around the western side of Lake Ontario, we hugged the large body of water until we reached Delta Hotels Toronto, directly across the street from North America’s tallest standing structure, the CN Tower. The 80-mile trip from Niagara Falls to Toronto was only supposed to take 90 minutes, but due to traffic it was nearly twice that long. Given the amount of walking we’d already done on this trip, perhaps the F31, sporting an eight-speed ZF 8HP transmission, was the best vehicle choice after all. Hours of clutch-in clutch-out traffic wouldn’t have been kind to my left leg.

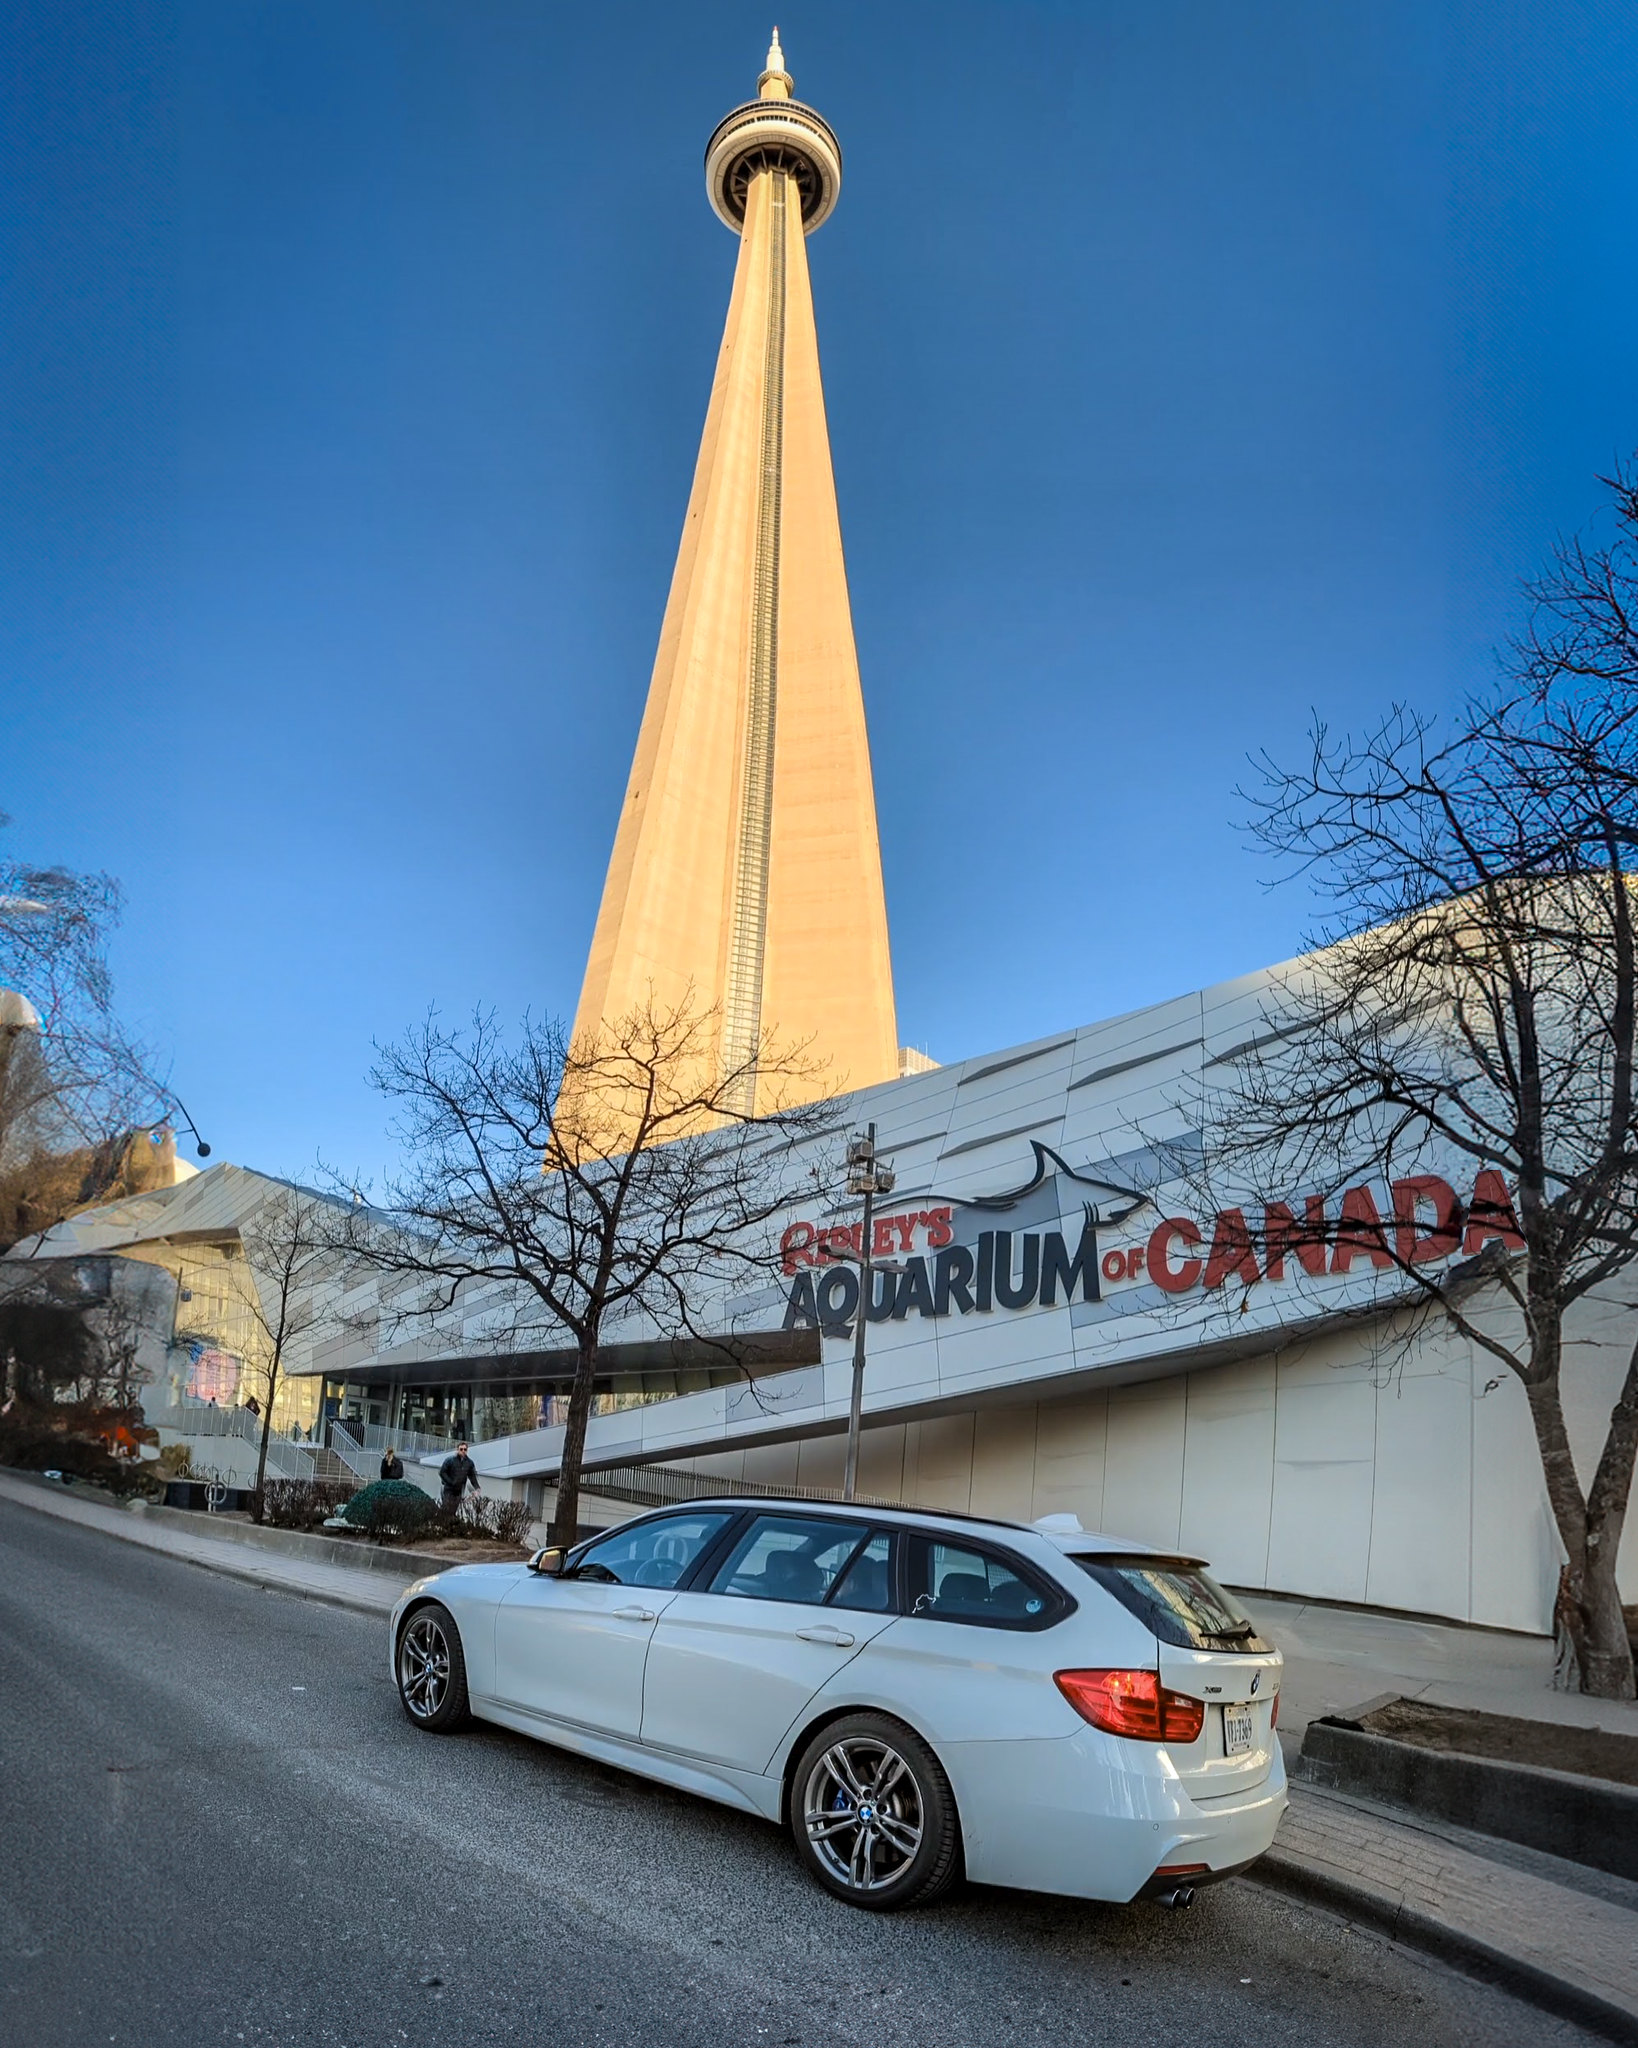
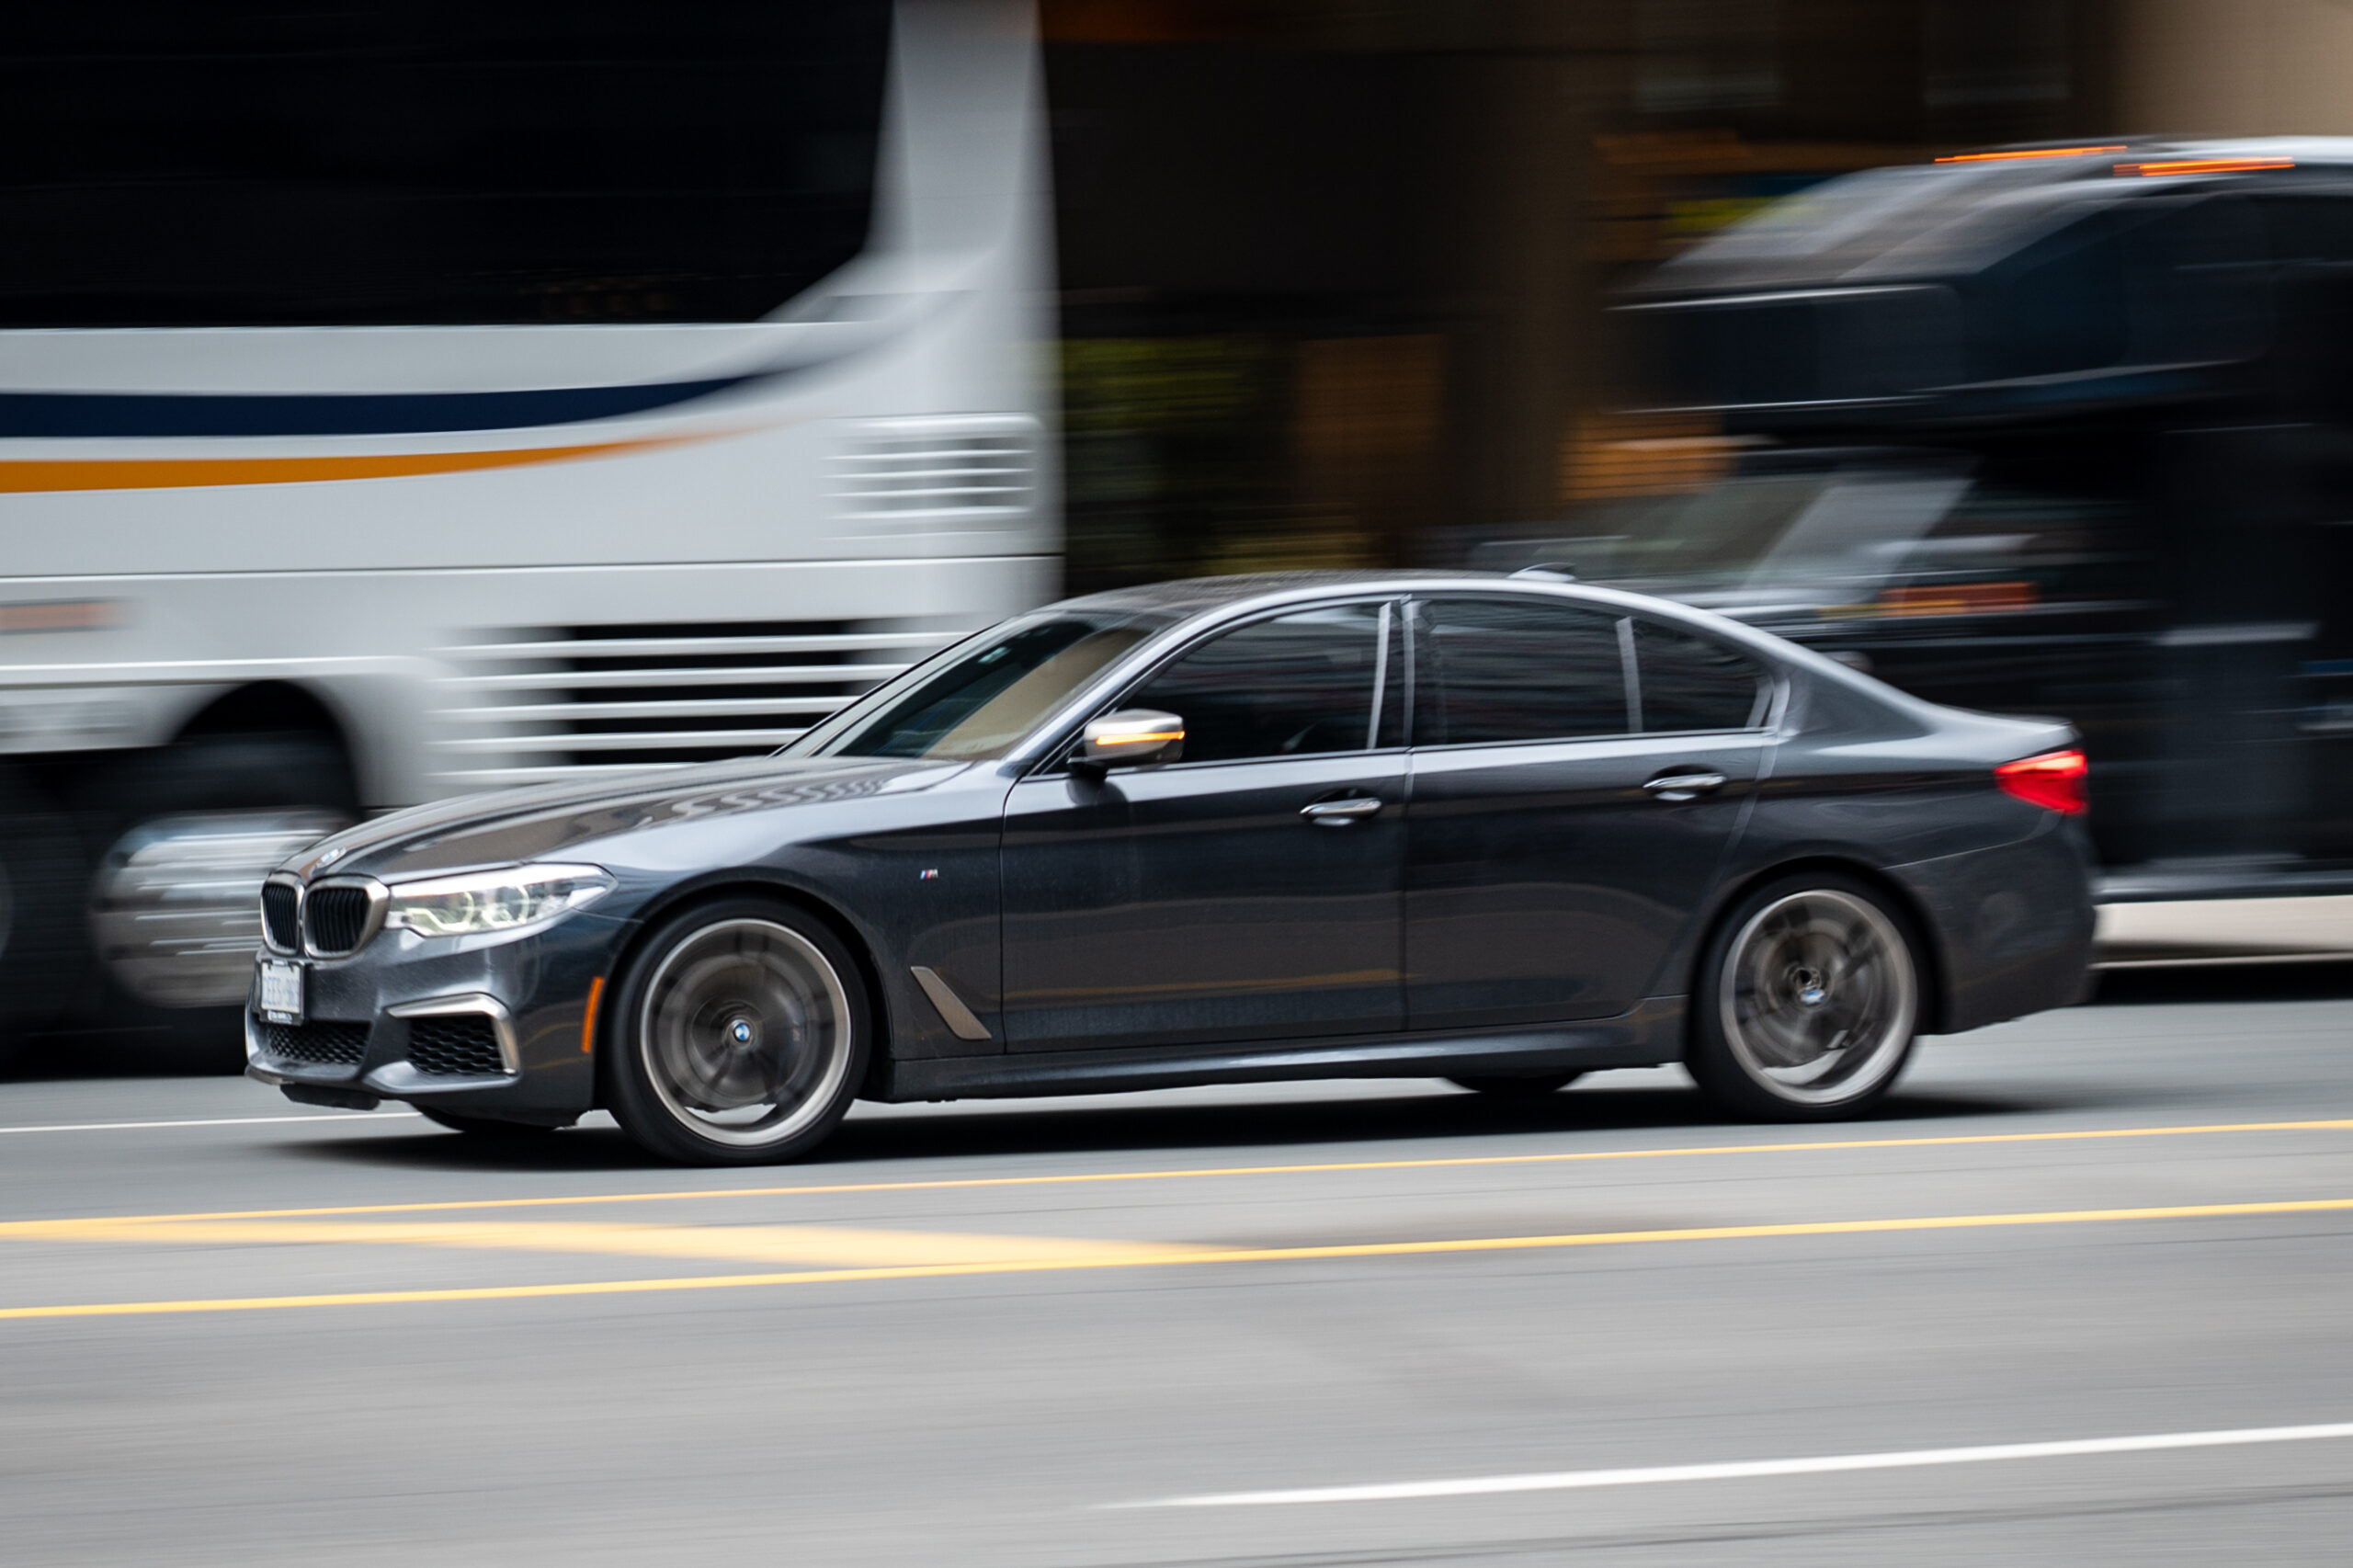
Two nights in Toronto afforded us time to see the CN Tower, Ripley’s Aquarium of Canada, the Royal Ontario Museum, and walk through the city, visiting University of Toronto, Chinatown, and Kensington Market. I spotted a number of cool BMWs, and managed to be quick enough with my camera to catch some of them. If you only have a day-and-a-half in Toronto, I recommend visiting all of those spots.
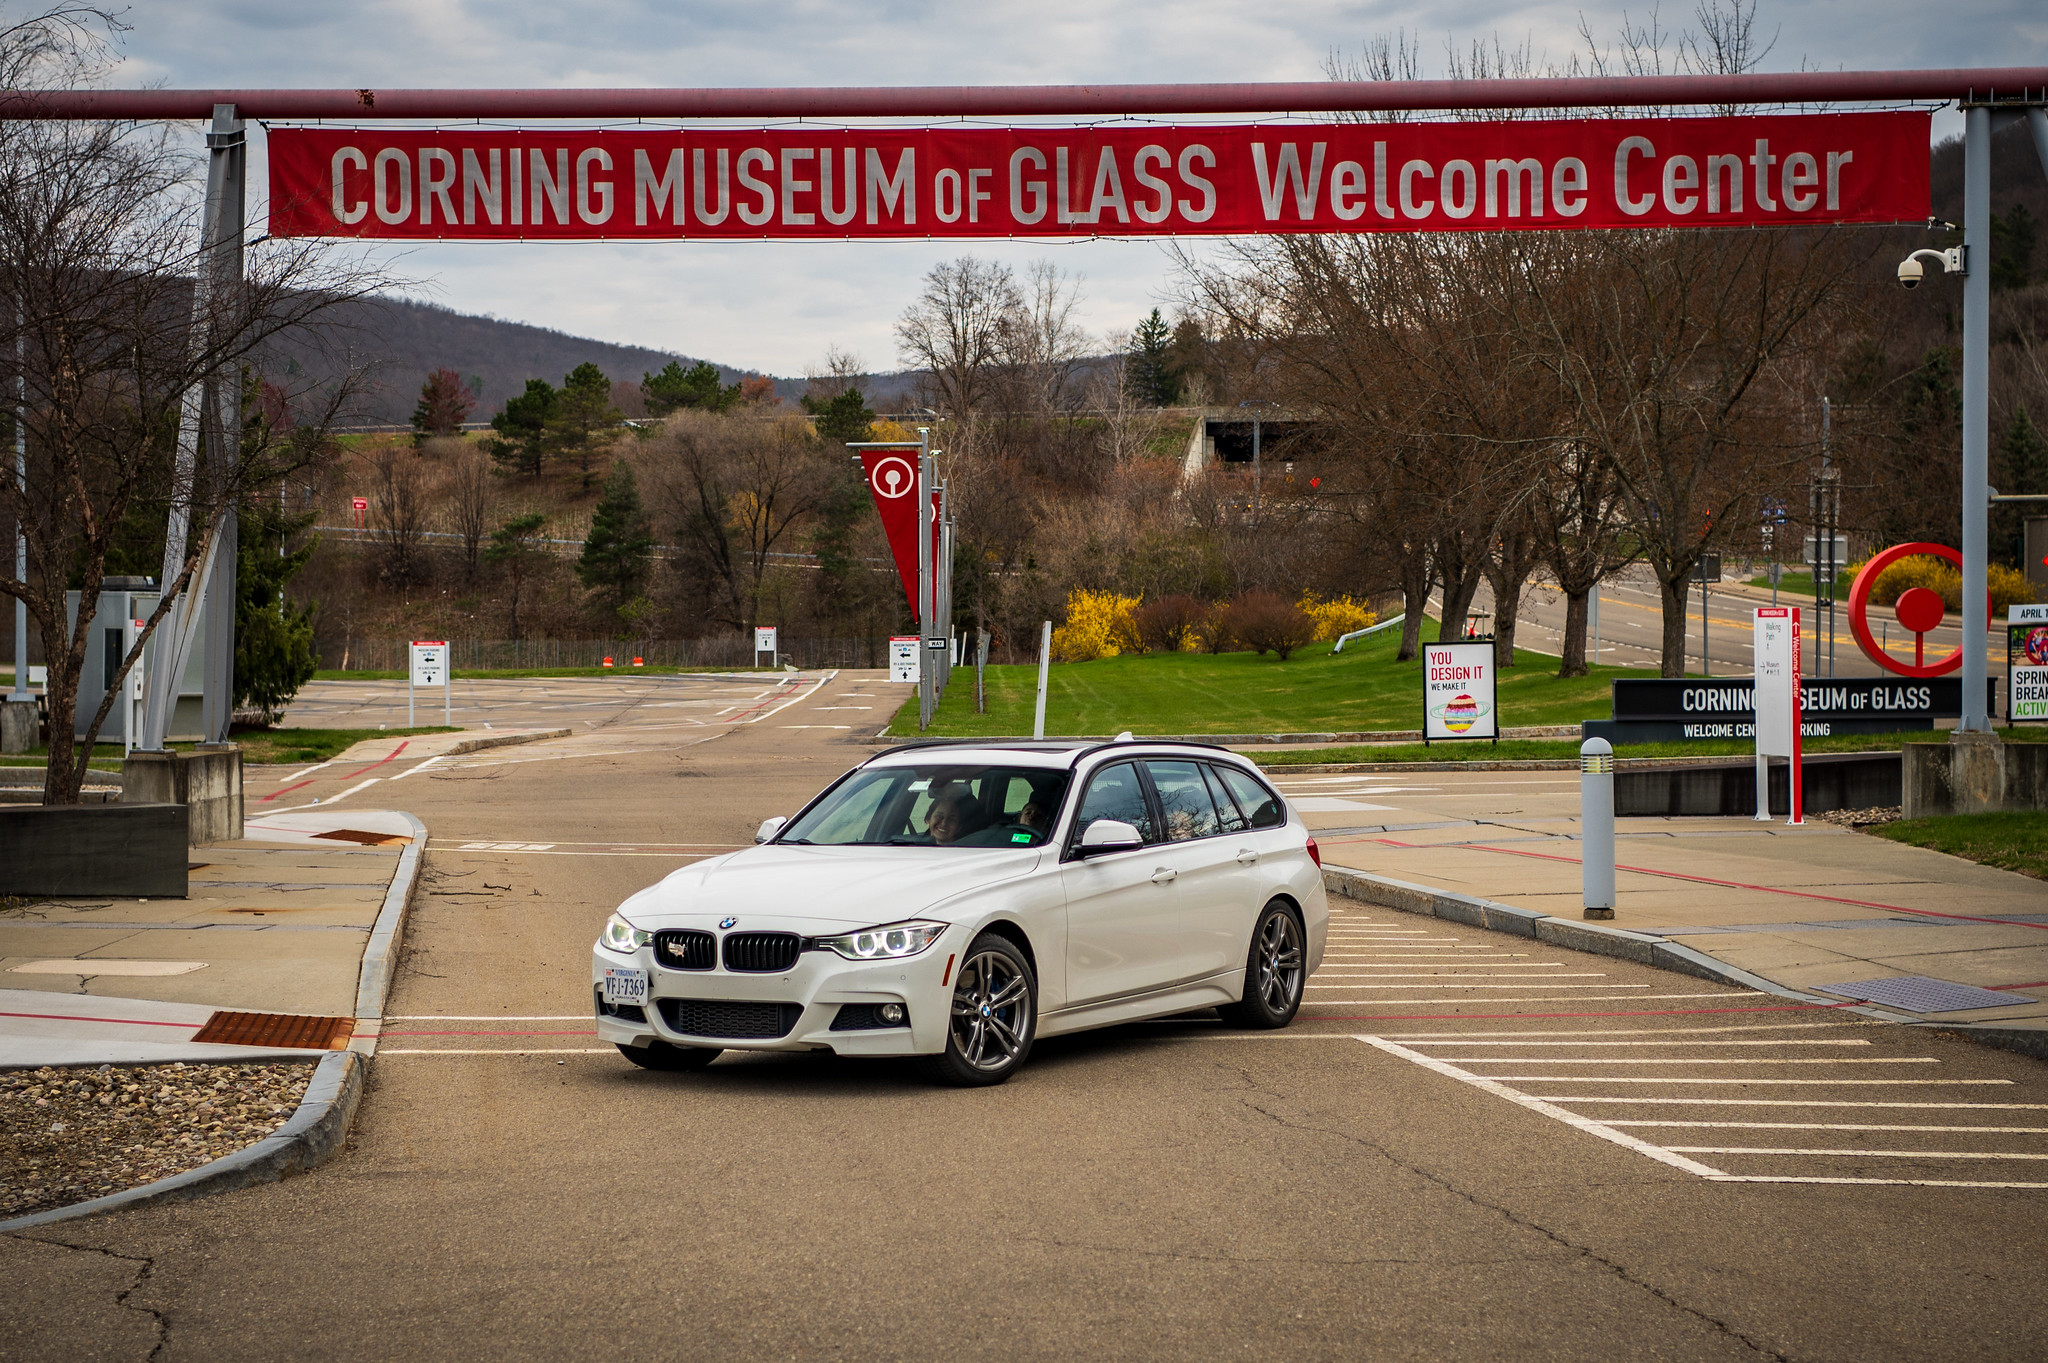
On the fifth morning of our road trip, we said goodbye to Toronto, sitting in more traffic when leaving the city. After breaking through the congestion, it was smooth sailing back to Buffalo, crossing back into the US at the Peace Bridge. Instead of heading directly home, we decided to break up the 510-mile return trip and made a stop in Corning, New York. Corning, home of Corning Museum of Glass, is a small town divided by the scenic Chemung River. The museum hosts a number of live demonstrations, showcasing the artistry and industry of glass. I wasn’t sold on the idea initially, but was pleasantly surprised by the museum’s offerings and the charm of the historic part of the town.
We knocked out the remaining 300 miles home following Route 15 south, only stopping once at a Bakery just outside of Williamsport, Pennsylvania. Throughout our trip, a series of audiobooks, breathtaking views, and conversations kept us entertained during long stretches of seat time. Thanks to virtually no cell service in Canada due to our ancient cell phone sim cards (now corrected), it was essentially a device-free trip, allowing us to focus more on the experience itself without the distractions of digital leashes.
We had a few automotive realizations during this 1,000-plus-mile road trip. First, with nearly-eight and eleven-year-old children, our F31 is starting to lack rear-seat legroom. The term “minivan” was uttered more than once, but we’ll see if we can find something a bit more enthusiast oriented than that—we still have time to figure that out. Second, Avery will have a learner’s permit in less than four years. This F31 may very well be her first car. And third, there really is nothing better than an old-fashioned road trip!
— Mike Bevels
The post Heading North For Spring Break appeared first on BimmerLife.
]]>The post Unobtainium: Rebuilding An E36 M3 Power Steering Pump appeared first on BimmerLife.
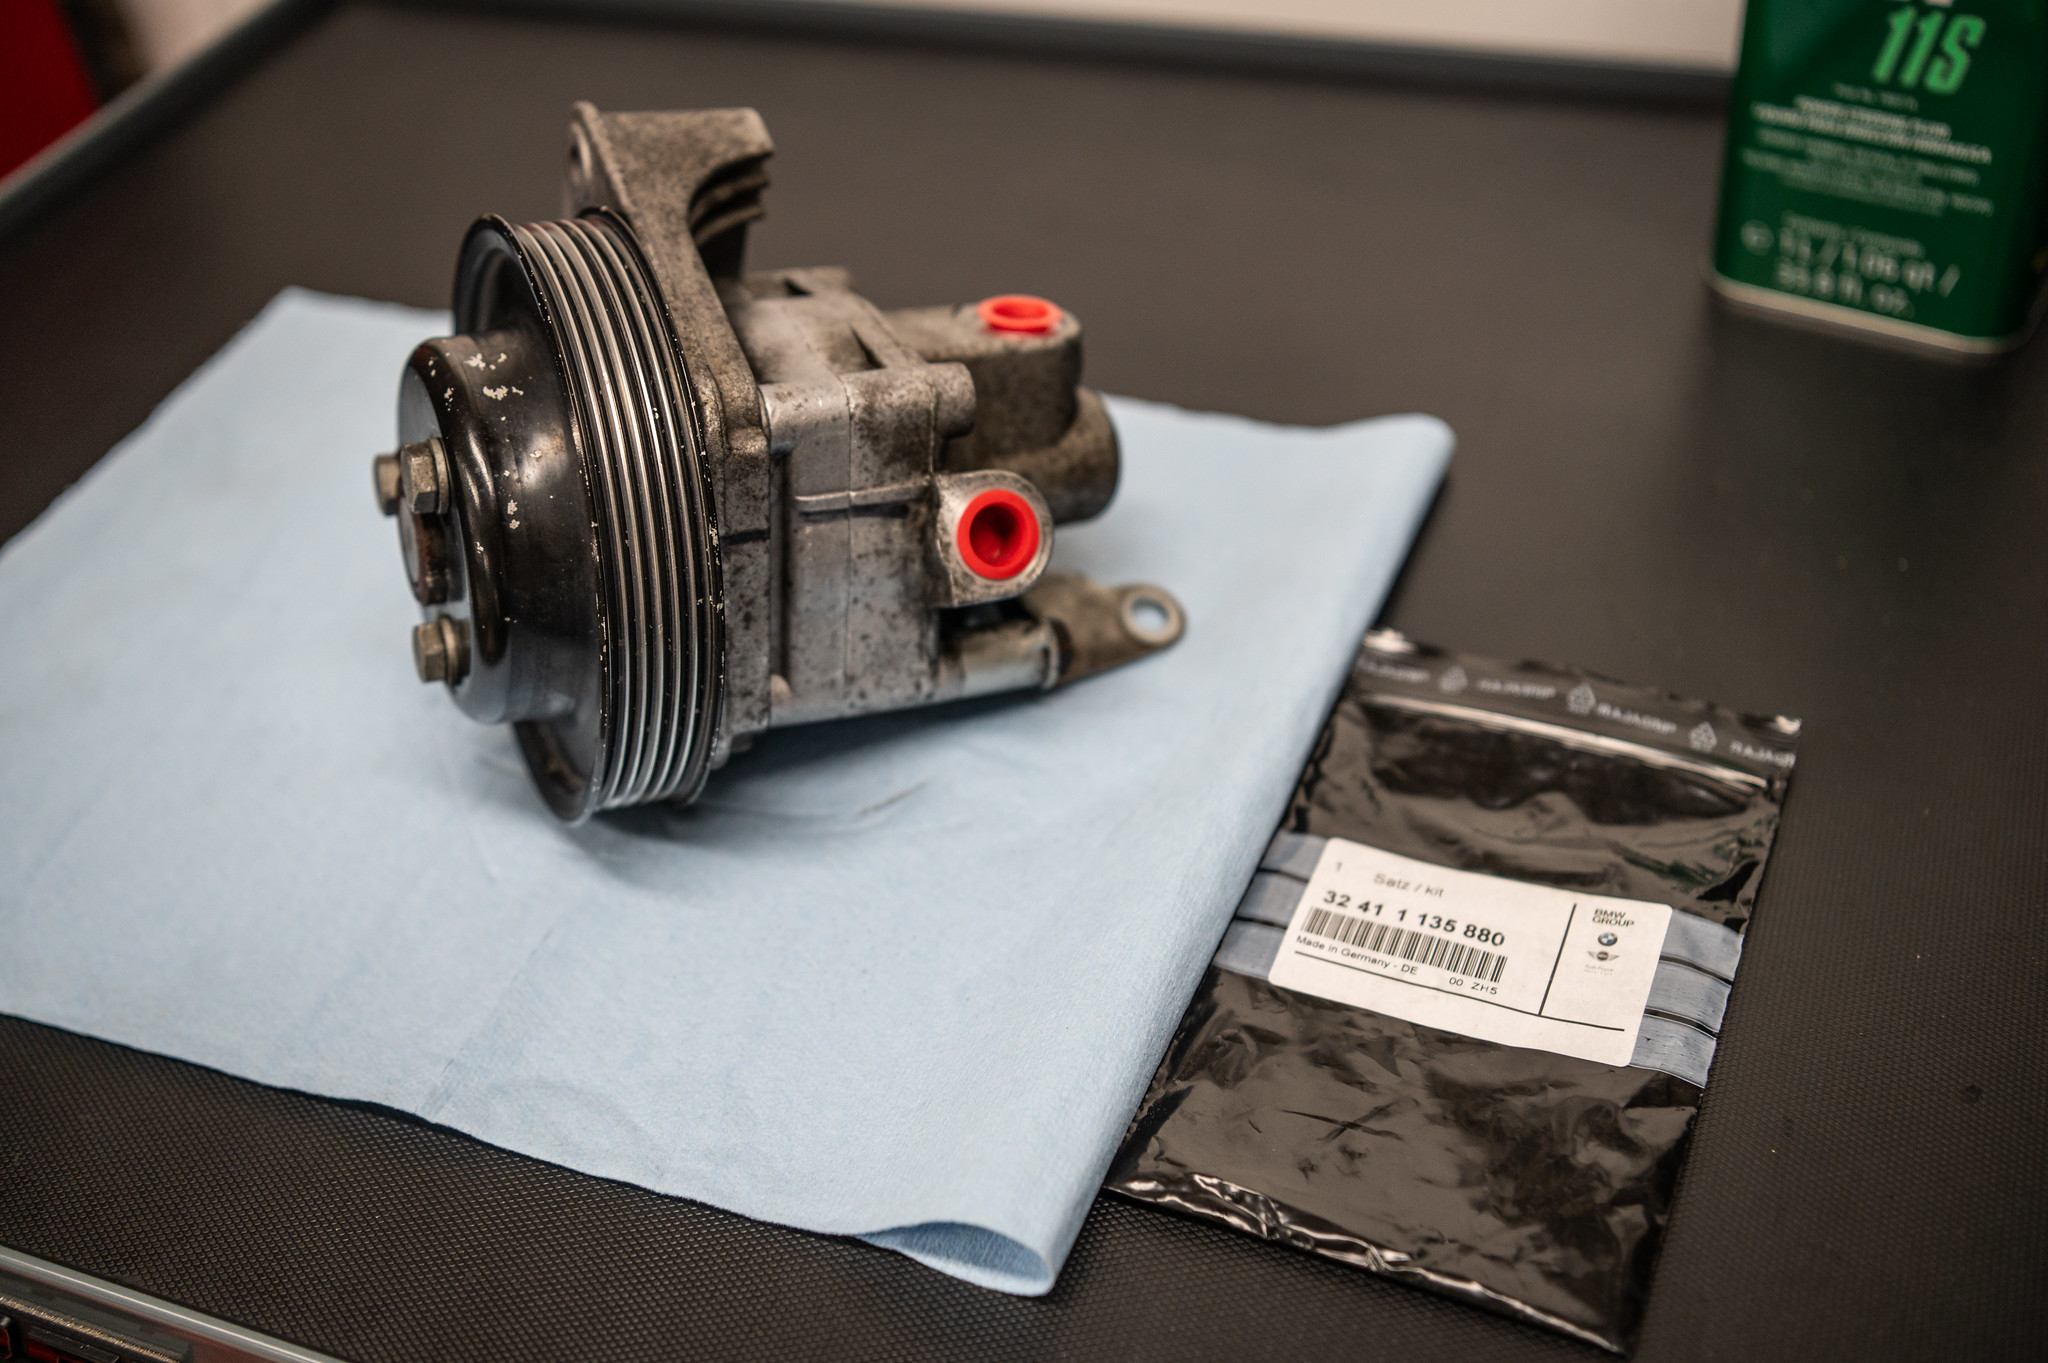
]]>I opted for a new 2.7-turns-to-lock Z3 steering rack to replace the original 3.2-turn unit, and a hose/reservoir kit and Lemforder tie rod ends from FCP Euro. The only remaining original item in the system would be the power steering pump itself, which I planned to address at a later date. The new steering rack, hoses, reservoir, tie rods, and rack were installed, and an alignment performed. The spec sheet that shipped with the steering rack stated CHF11s fluid should be used, so the old ATF was flushed out of the power steering pump, making way for the new stuff.
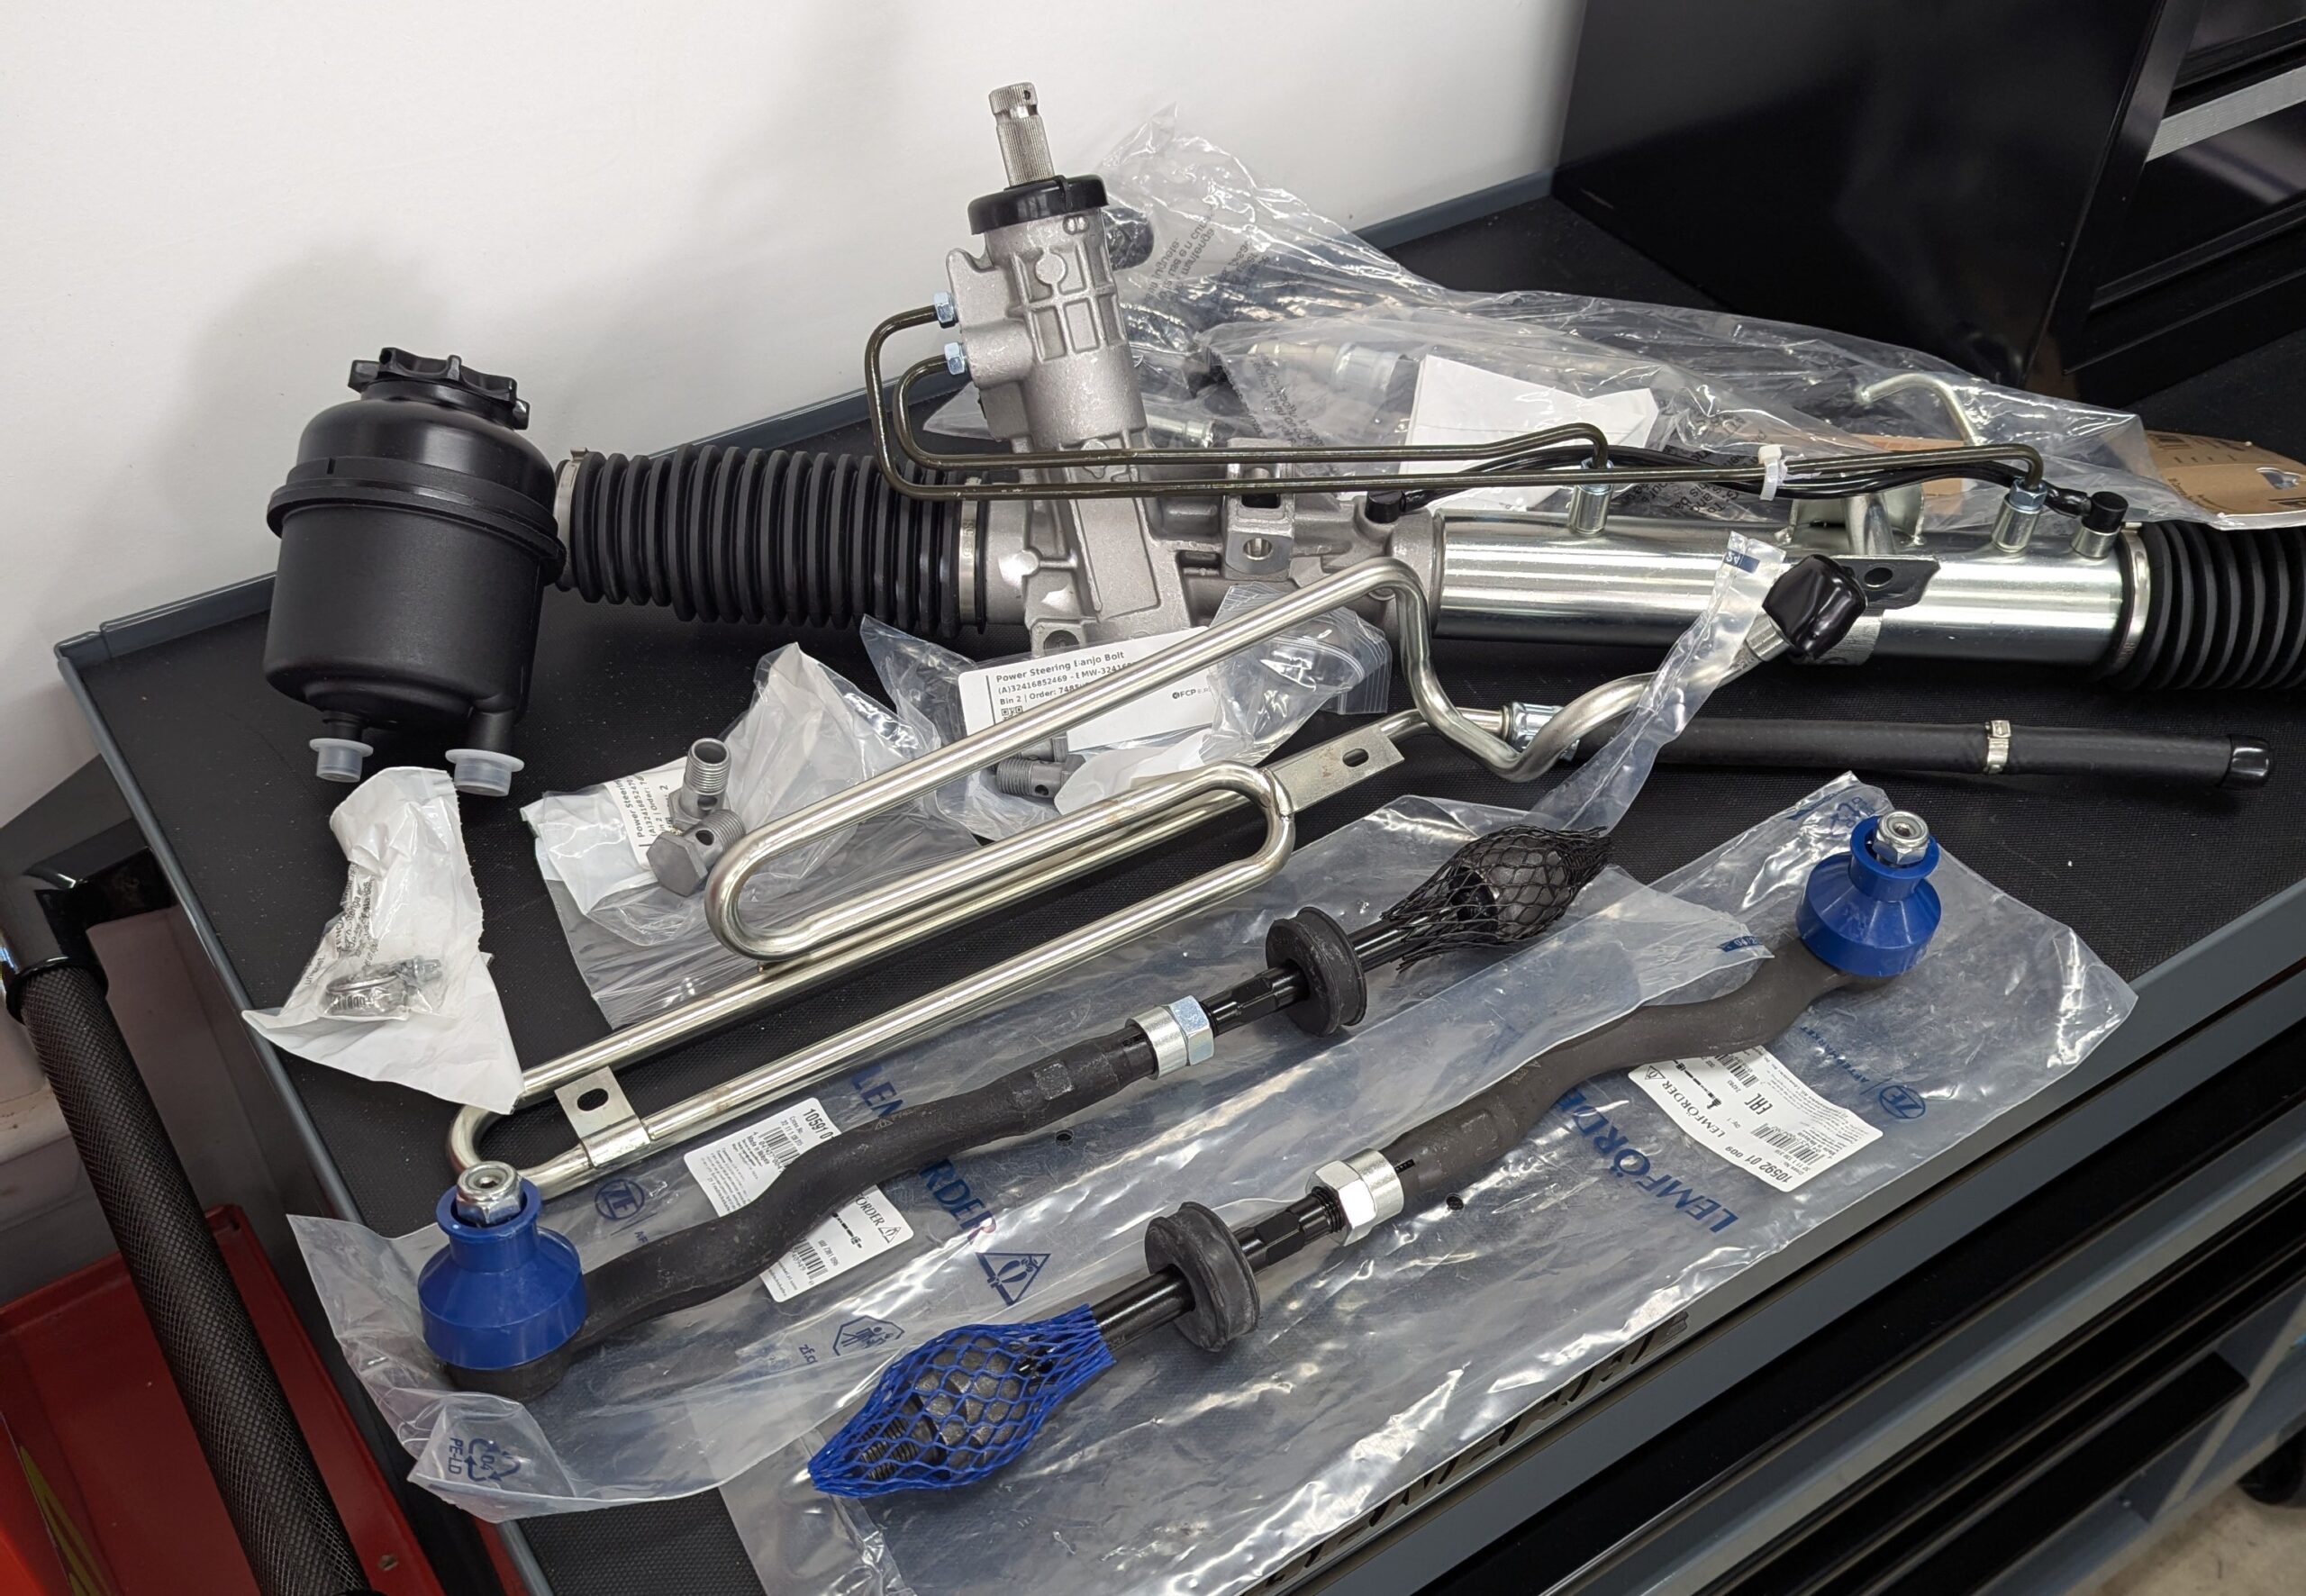
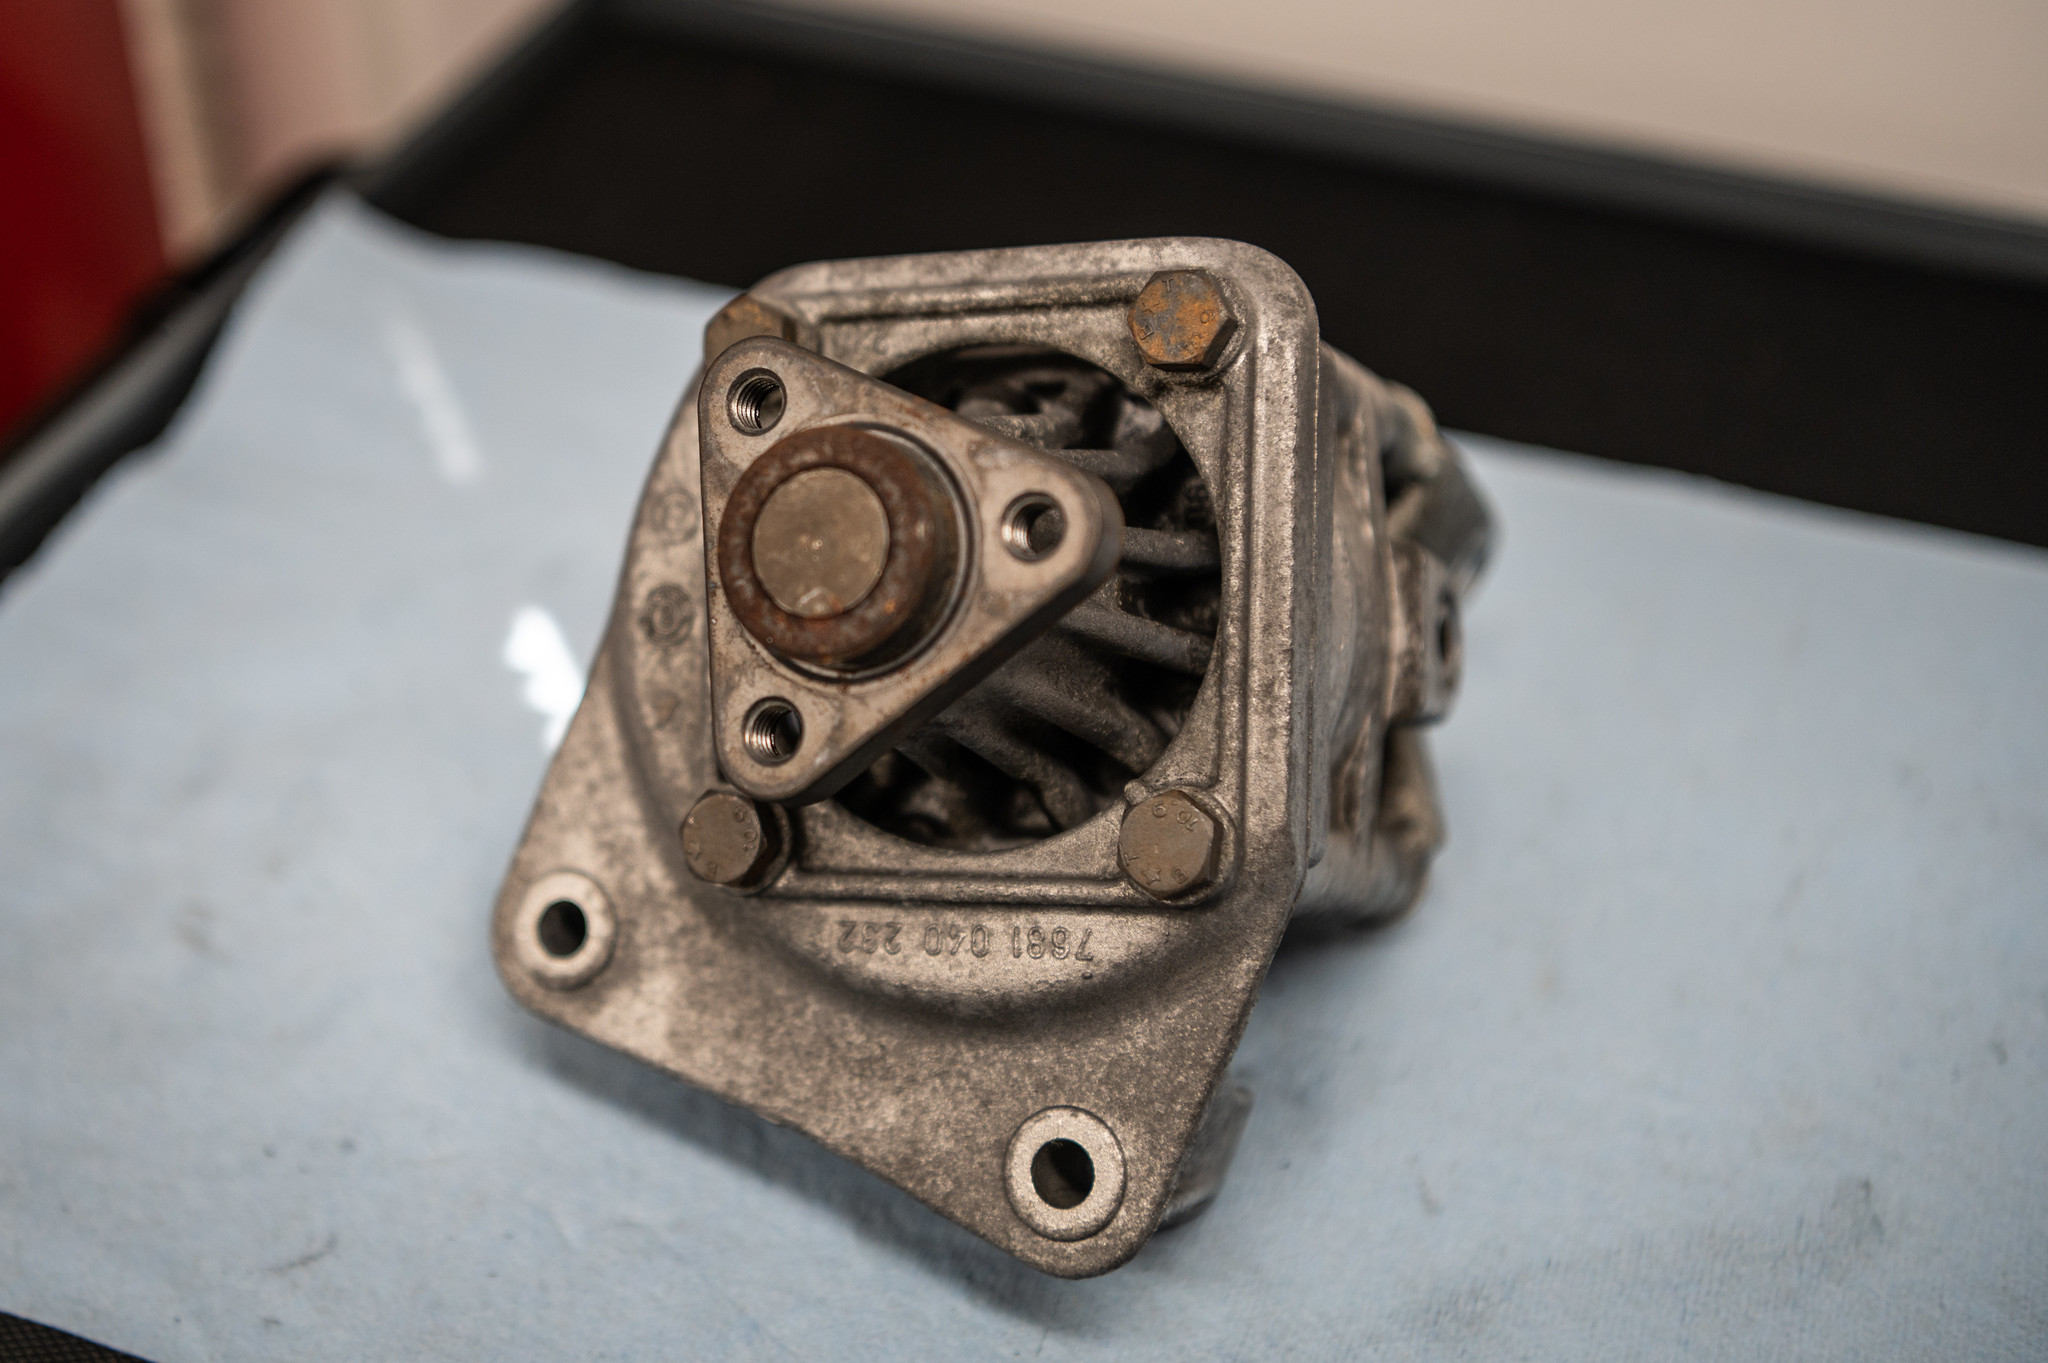
All the steering parts, minus the pump.
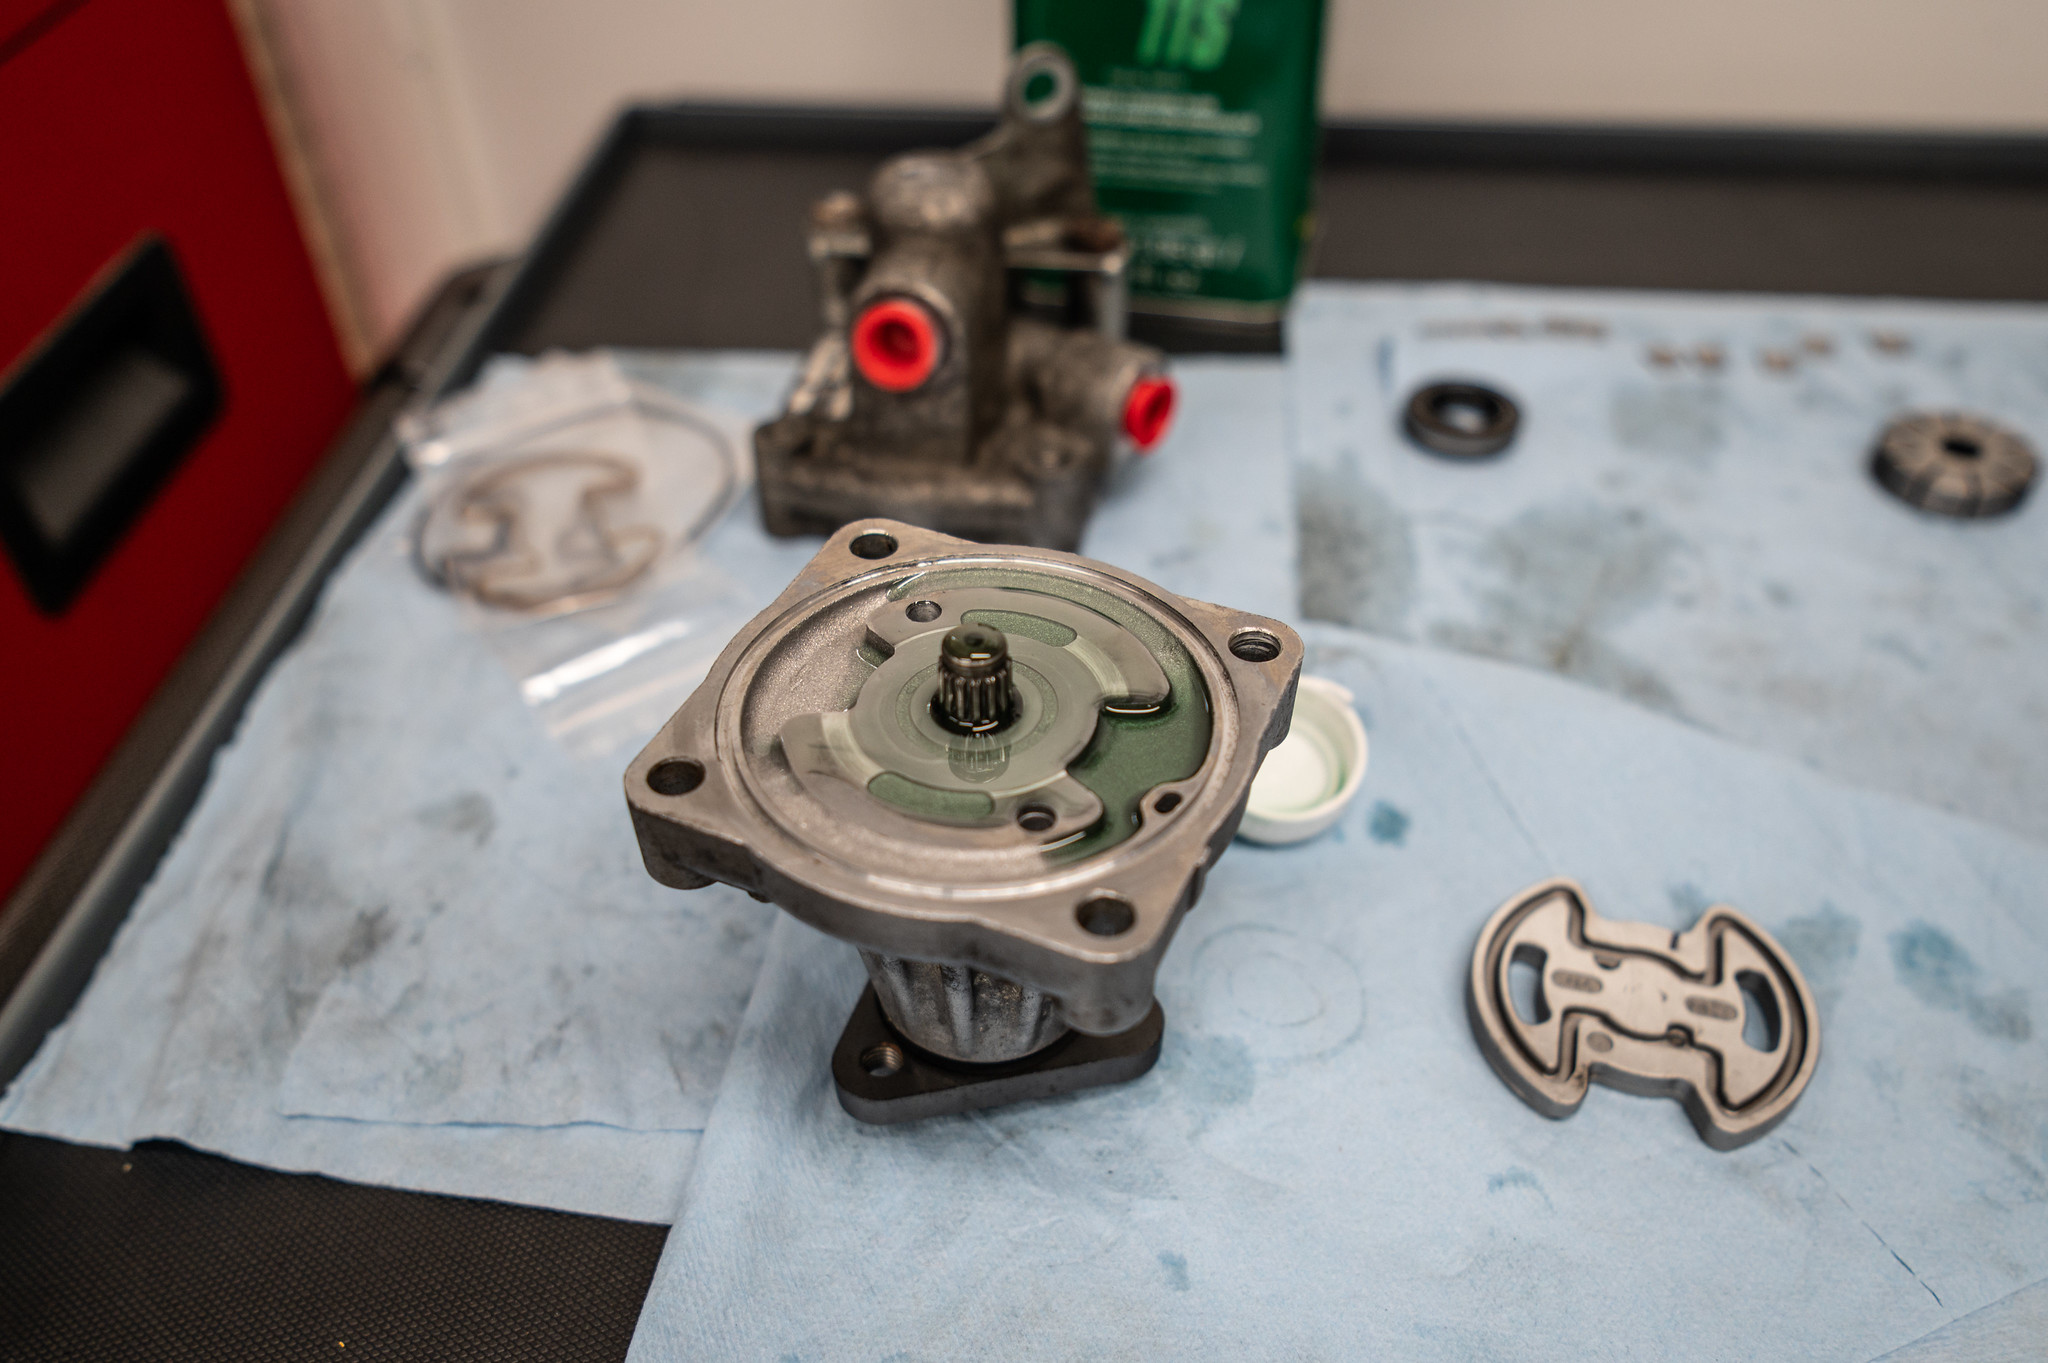
Why not replace the pump at the same time as the other components? As it turns out, original ZF power steering pumps specific to the E36 M3 (and S52-powered Z3 M Roadsters and Coupes) are NLA—No Longer Available. Only poorly-reviewed aftermarket alternatives or questionable-quality rebuilt pumps can be purchased. Assuming no internal pump damage—which you’ll only discover after splitting your pump apart—the best option is using BMW’s power steering pump rebuild kit to refresh the original ZF pump.
I was a little—OK, a lot—hesitant to split apart the original ZF pump on my car, fearing I’d run into an issue and not be able to source a spare pump in time to take my E36 M3 to The Vintage. Ebay had a handful of original ZF pumps available, but they were either high-mileage units or priced over $400 (or both), so I extended my search. Car-part.com, a site that allows you to search auto part recyclers across North America, also had a handful, and a low-mileage 2000 Z3 M Coupe adorned with numerous DINAN goodies caught my eye. I reached out to the parts supplier and asked if they’d ship the $150 pump. They sent over some photos and for an additional $20 it arrived on my doorstep a week later.
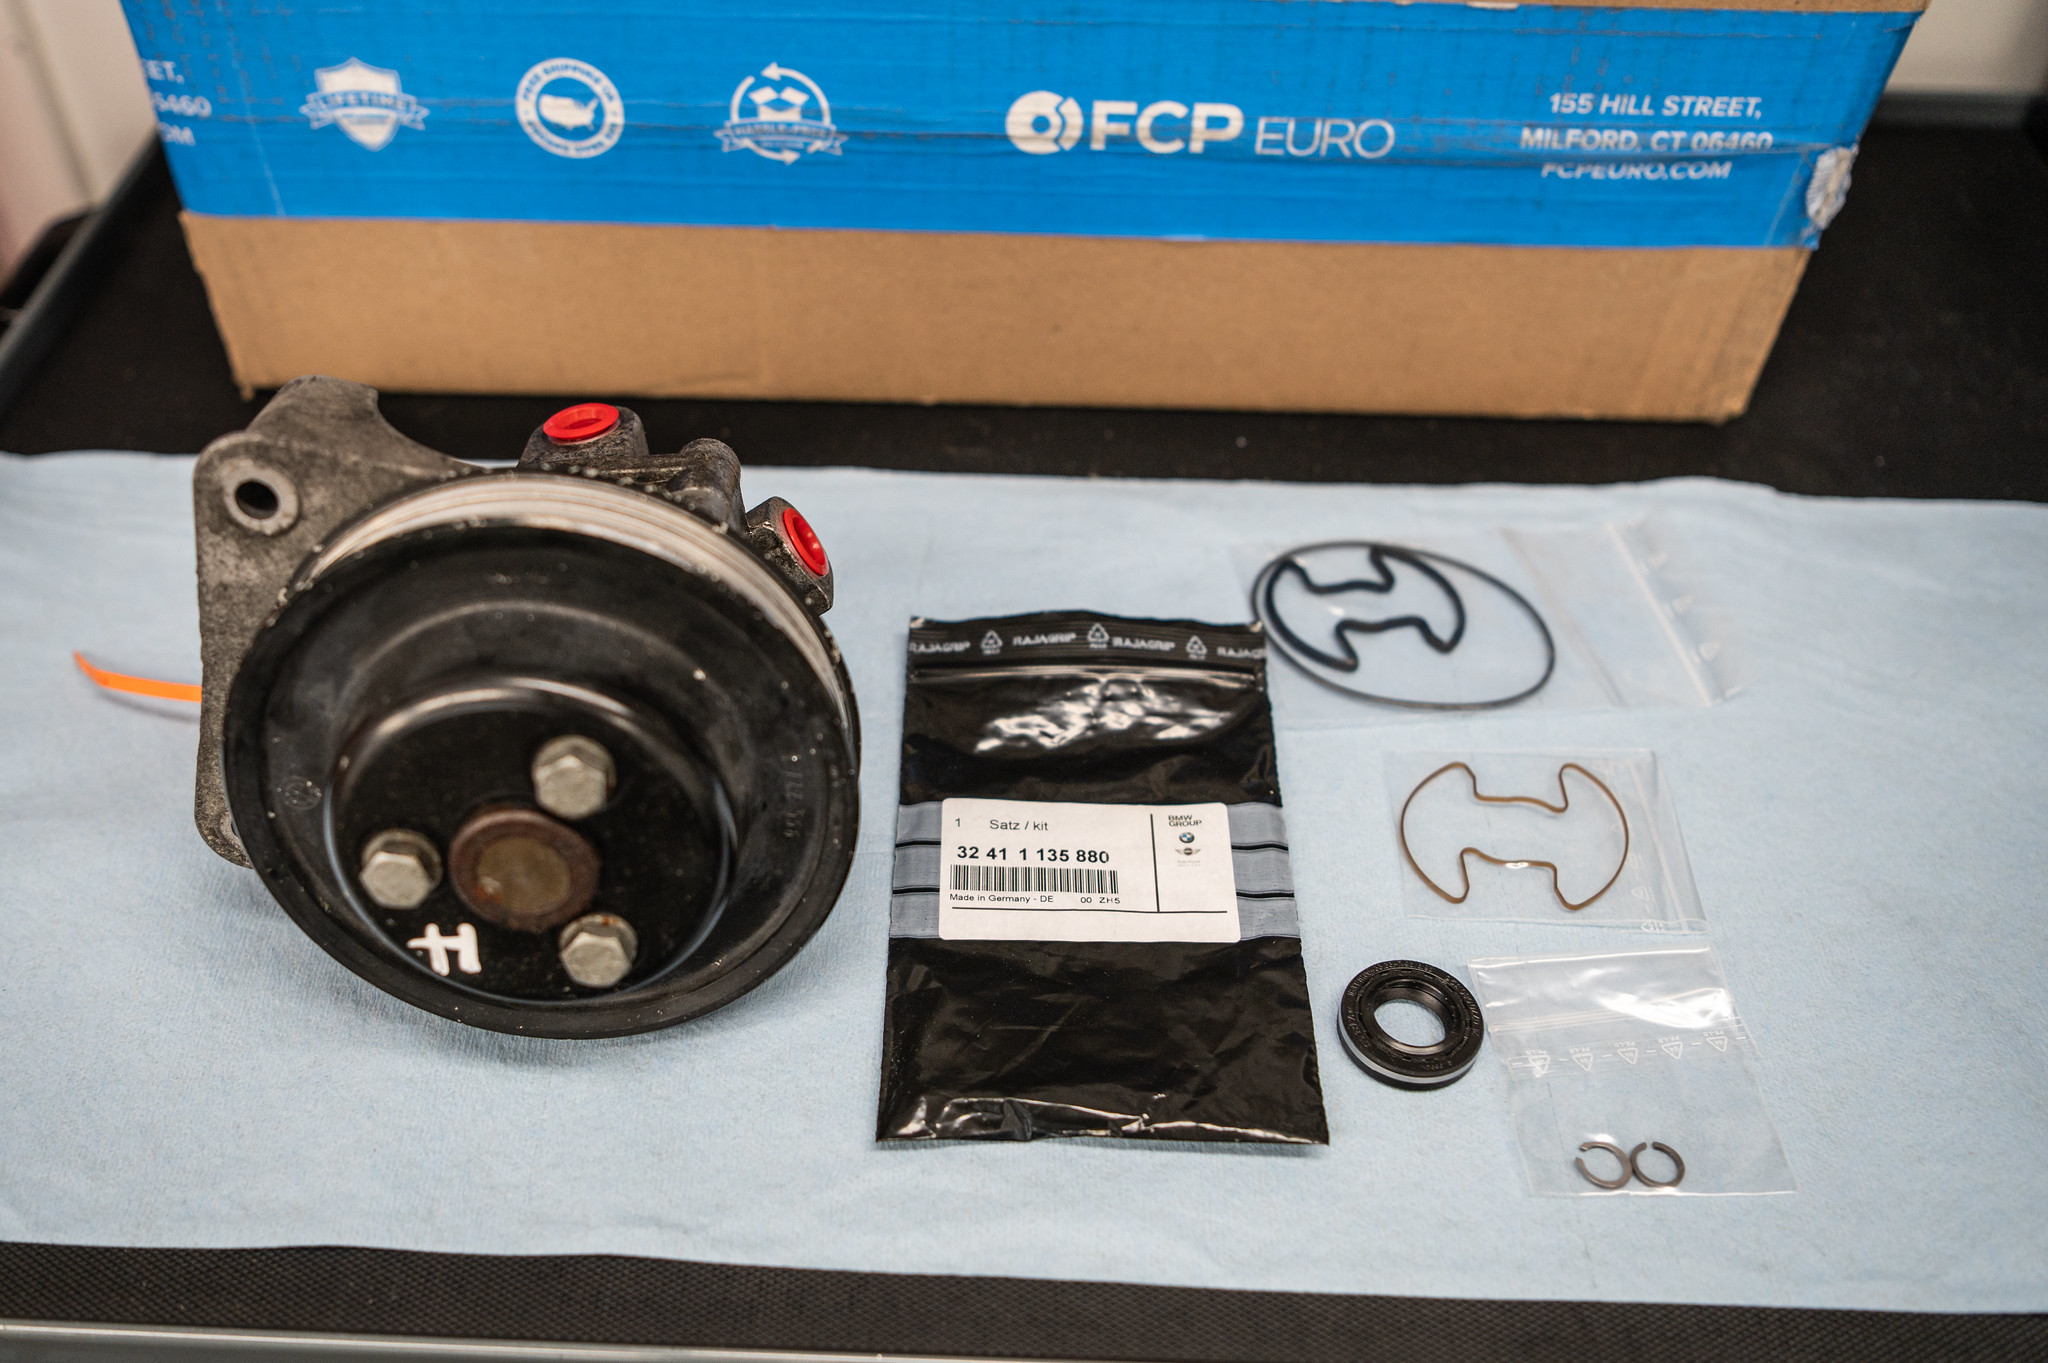
A used ZF power steering pump and BMW’s rebuild kit contents.
Armed with the rebuild kit from FCP Euro, I was ready to rebuild the low-mileage new-to-me power steering pump. It’s not a complicated repair, but it can take the better part of an afternoon if it’s your first time, like it was mine. As a hobbyist, these steps are in no way official, so please do your own research before tackling this project. You can see a YouTube “short” of the following steps here:
To kick things off, remove the three 13mm bolts holding the pulley to the shaft. This gives access to the four 13mm bolts on the snout, and allows for some light cleaning of the pump’s exterior. I used brake cleaner and brush to knock off the loose grime.
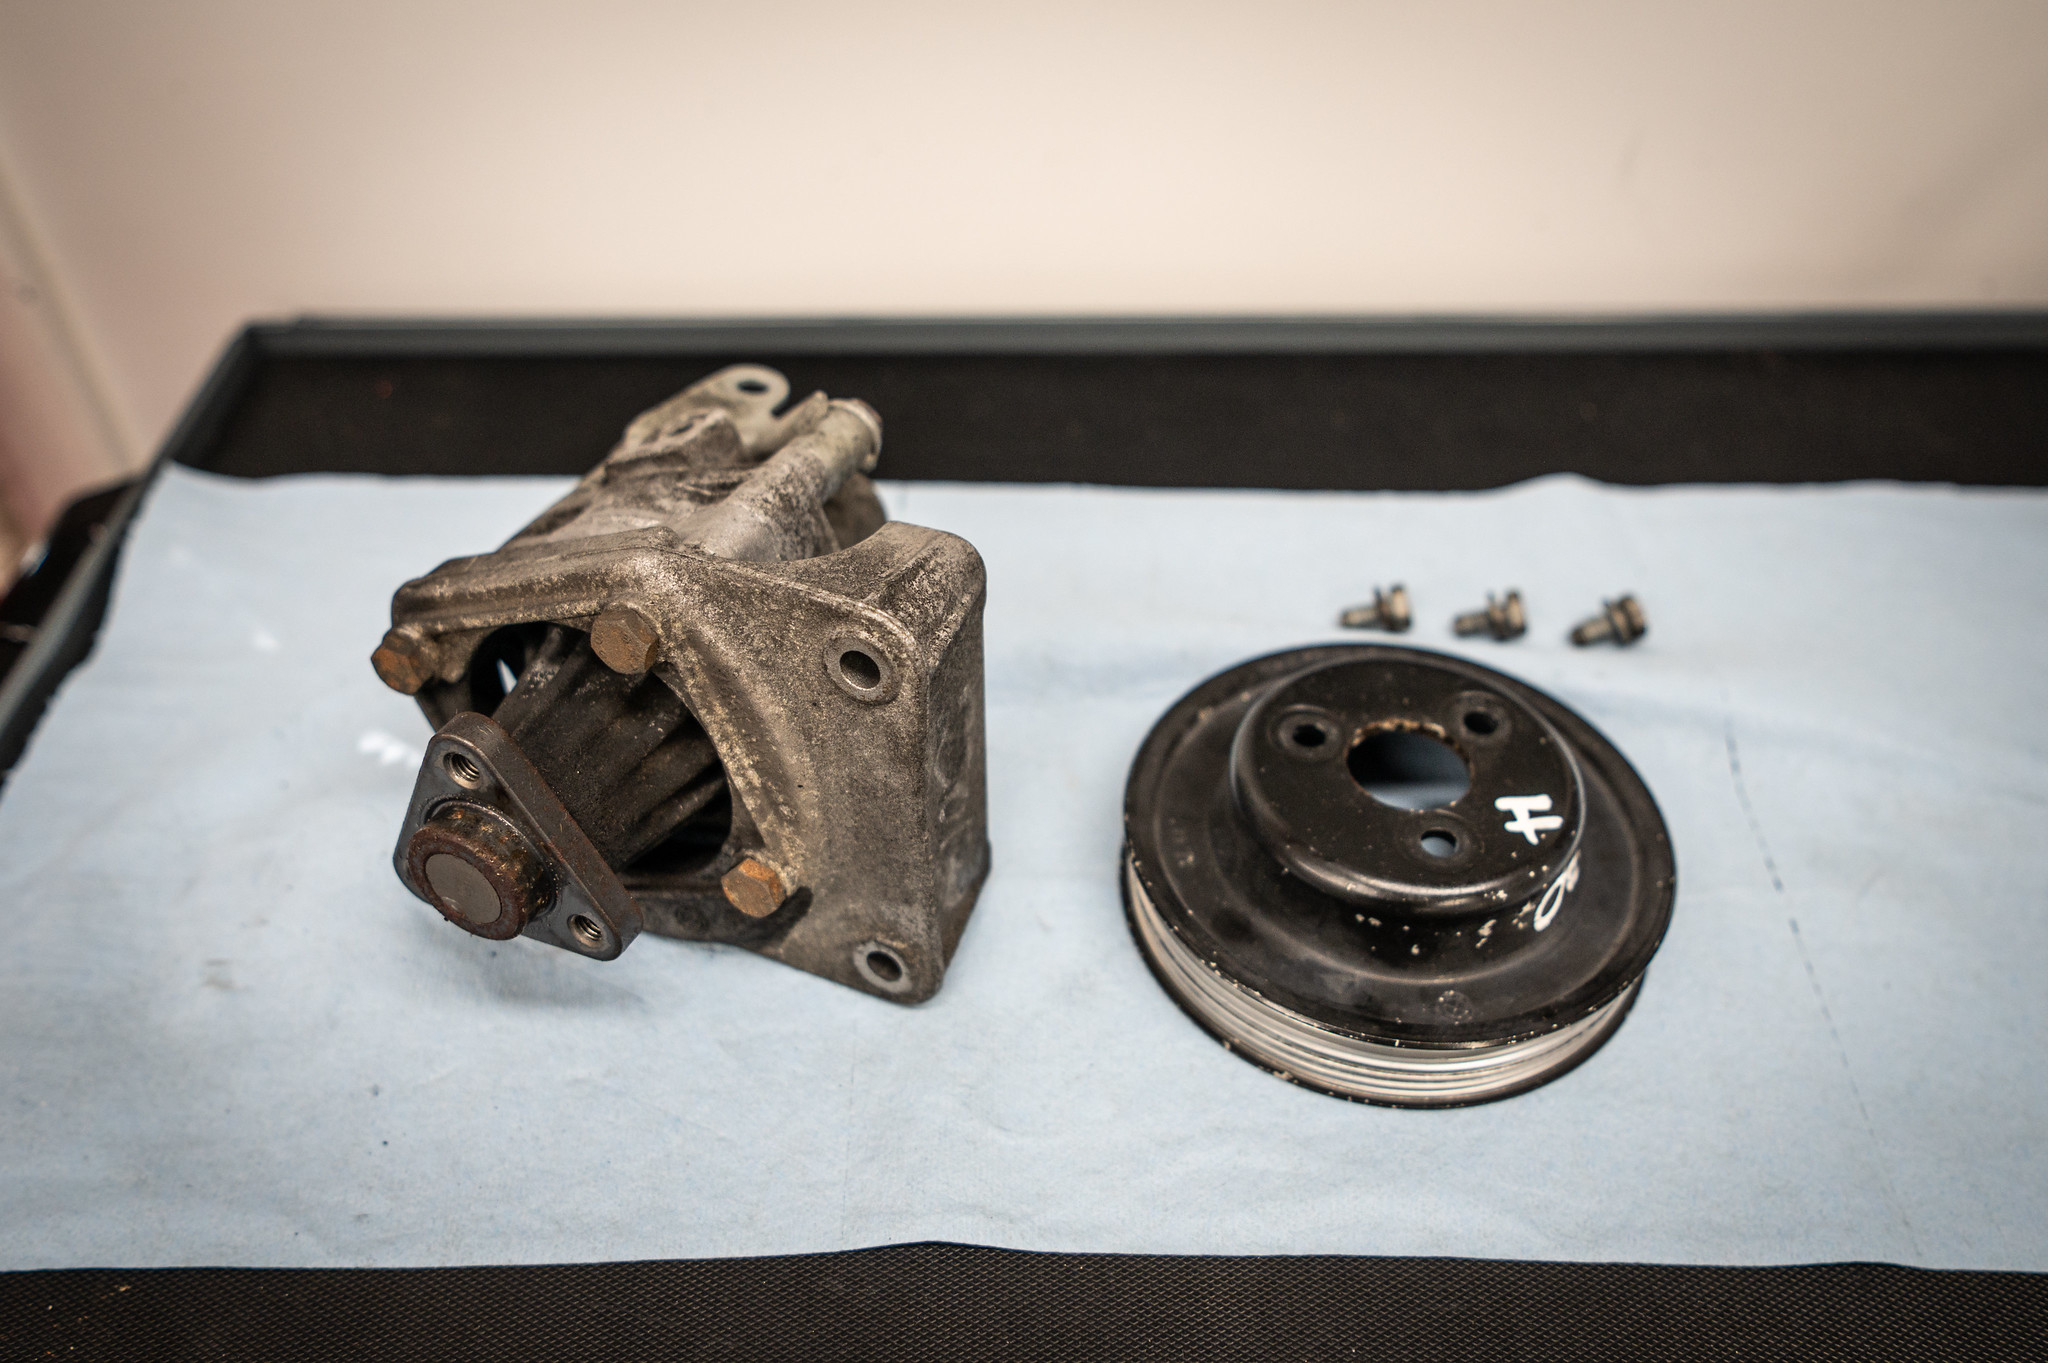
Pulley removed.
Next, mark the orientation of the bracket, snout, and base so that they’ll go back together the same way. I used a sharpie to draw a line across all three parts. Then, remove the four 13mm bolts holding the bracket, snout, and base together. Split the case apart.
Only four 13mm bolts hold the bracket and case together.
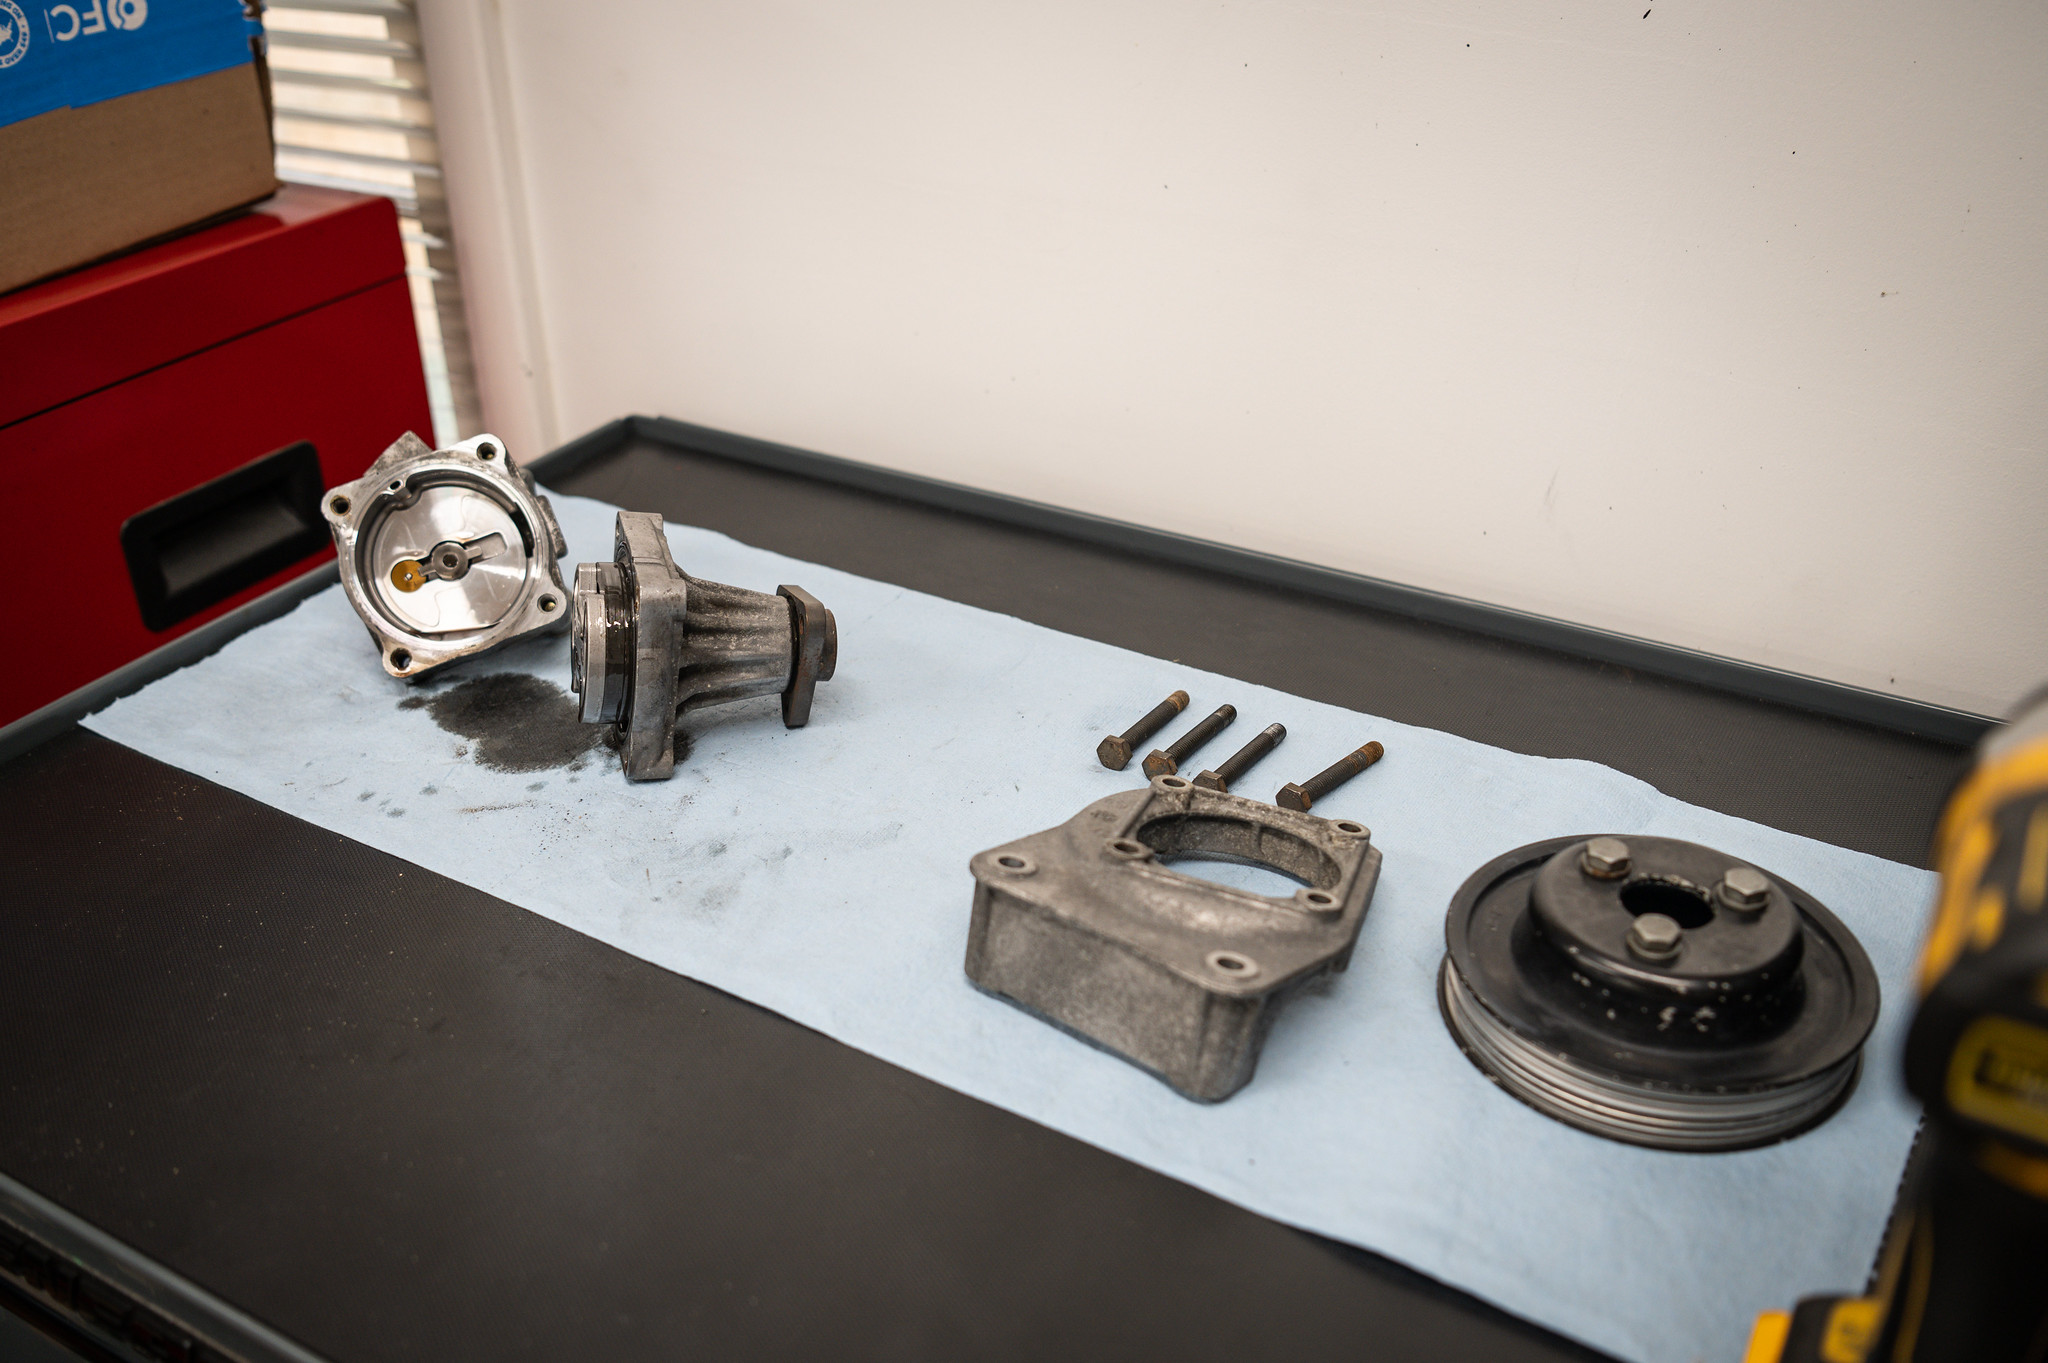
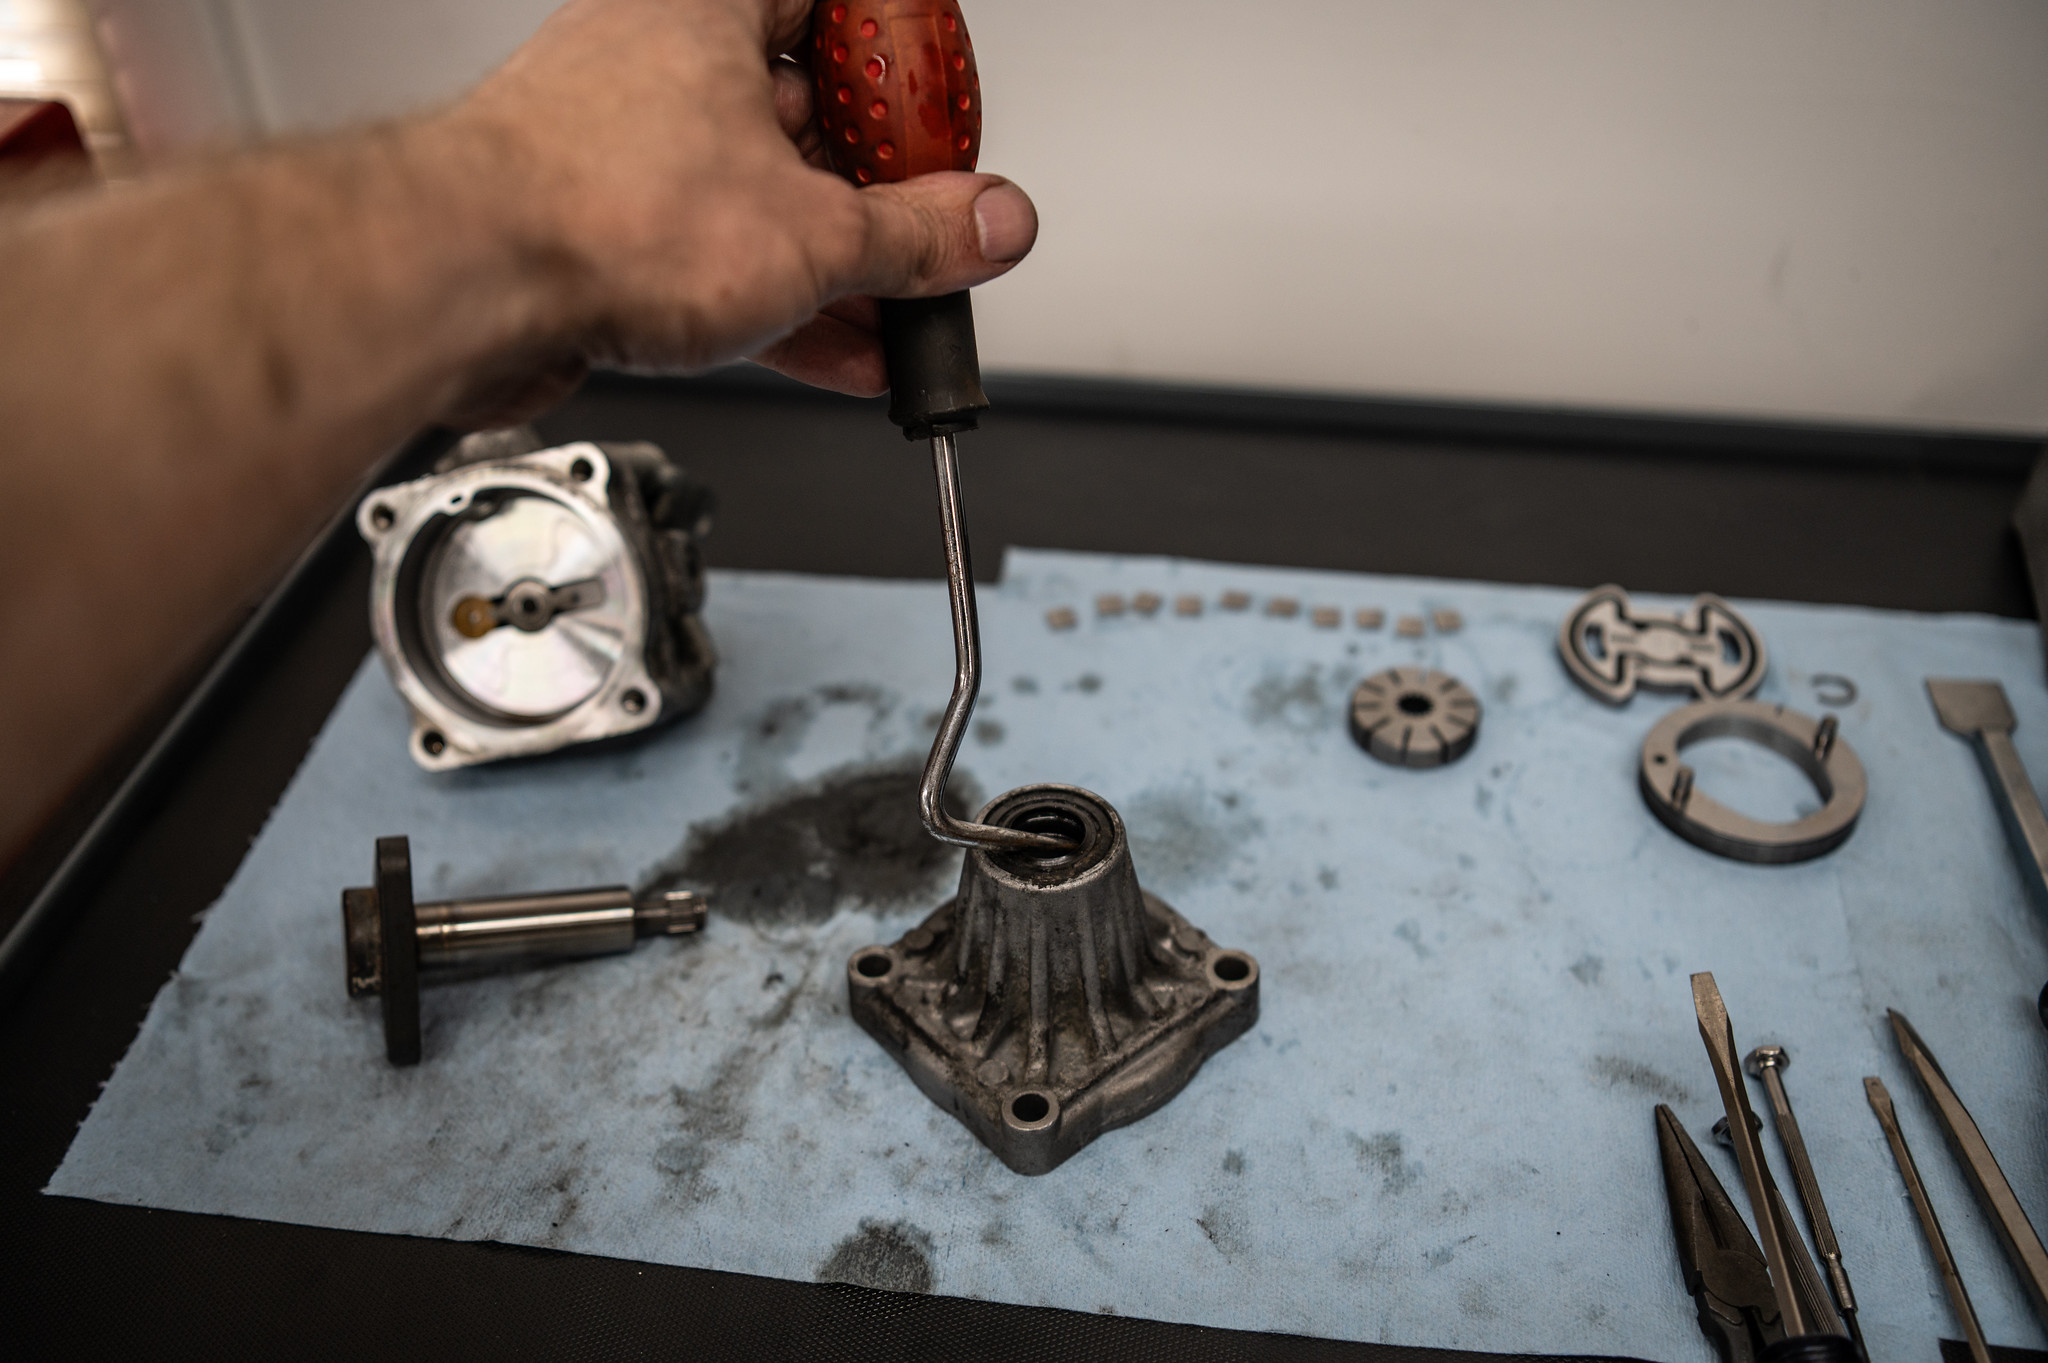
As it has been called on online forums, you’ll see the “tie fighter” in the snout. Using a plastic pry tool, pry this off and remove the two seals. The large o-ring seal can be removed from the base.


The oval retainer surrounding the rotor and its small vanes can also be pried up with a plastic pry tool. Note its orientation so it can go back in the same way. The vanes will likely start falling out, so it may be helpful to clean the surface of the rotor and mark the orientation of the vanes with a sharpie (smooth/curved sides outward, sharp/squared sides inward).
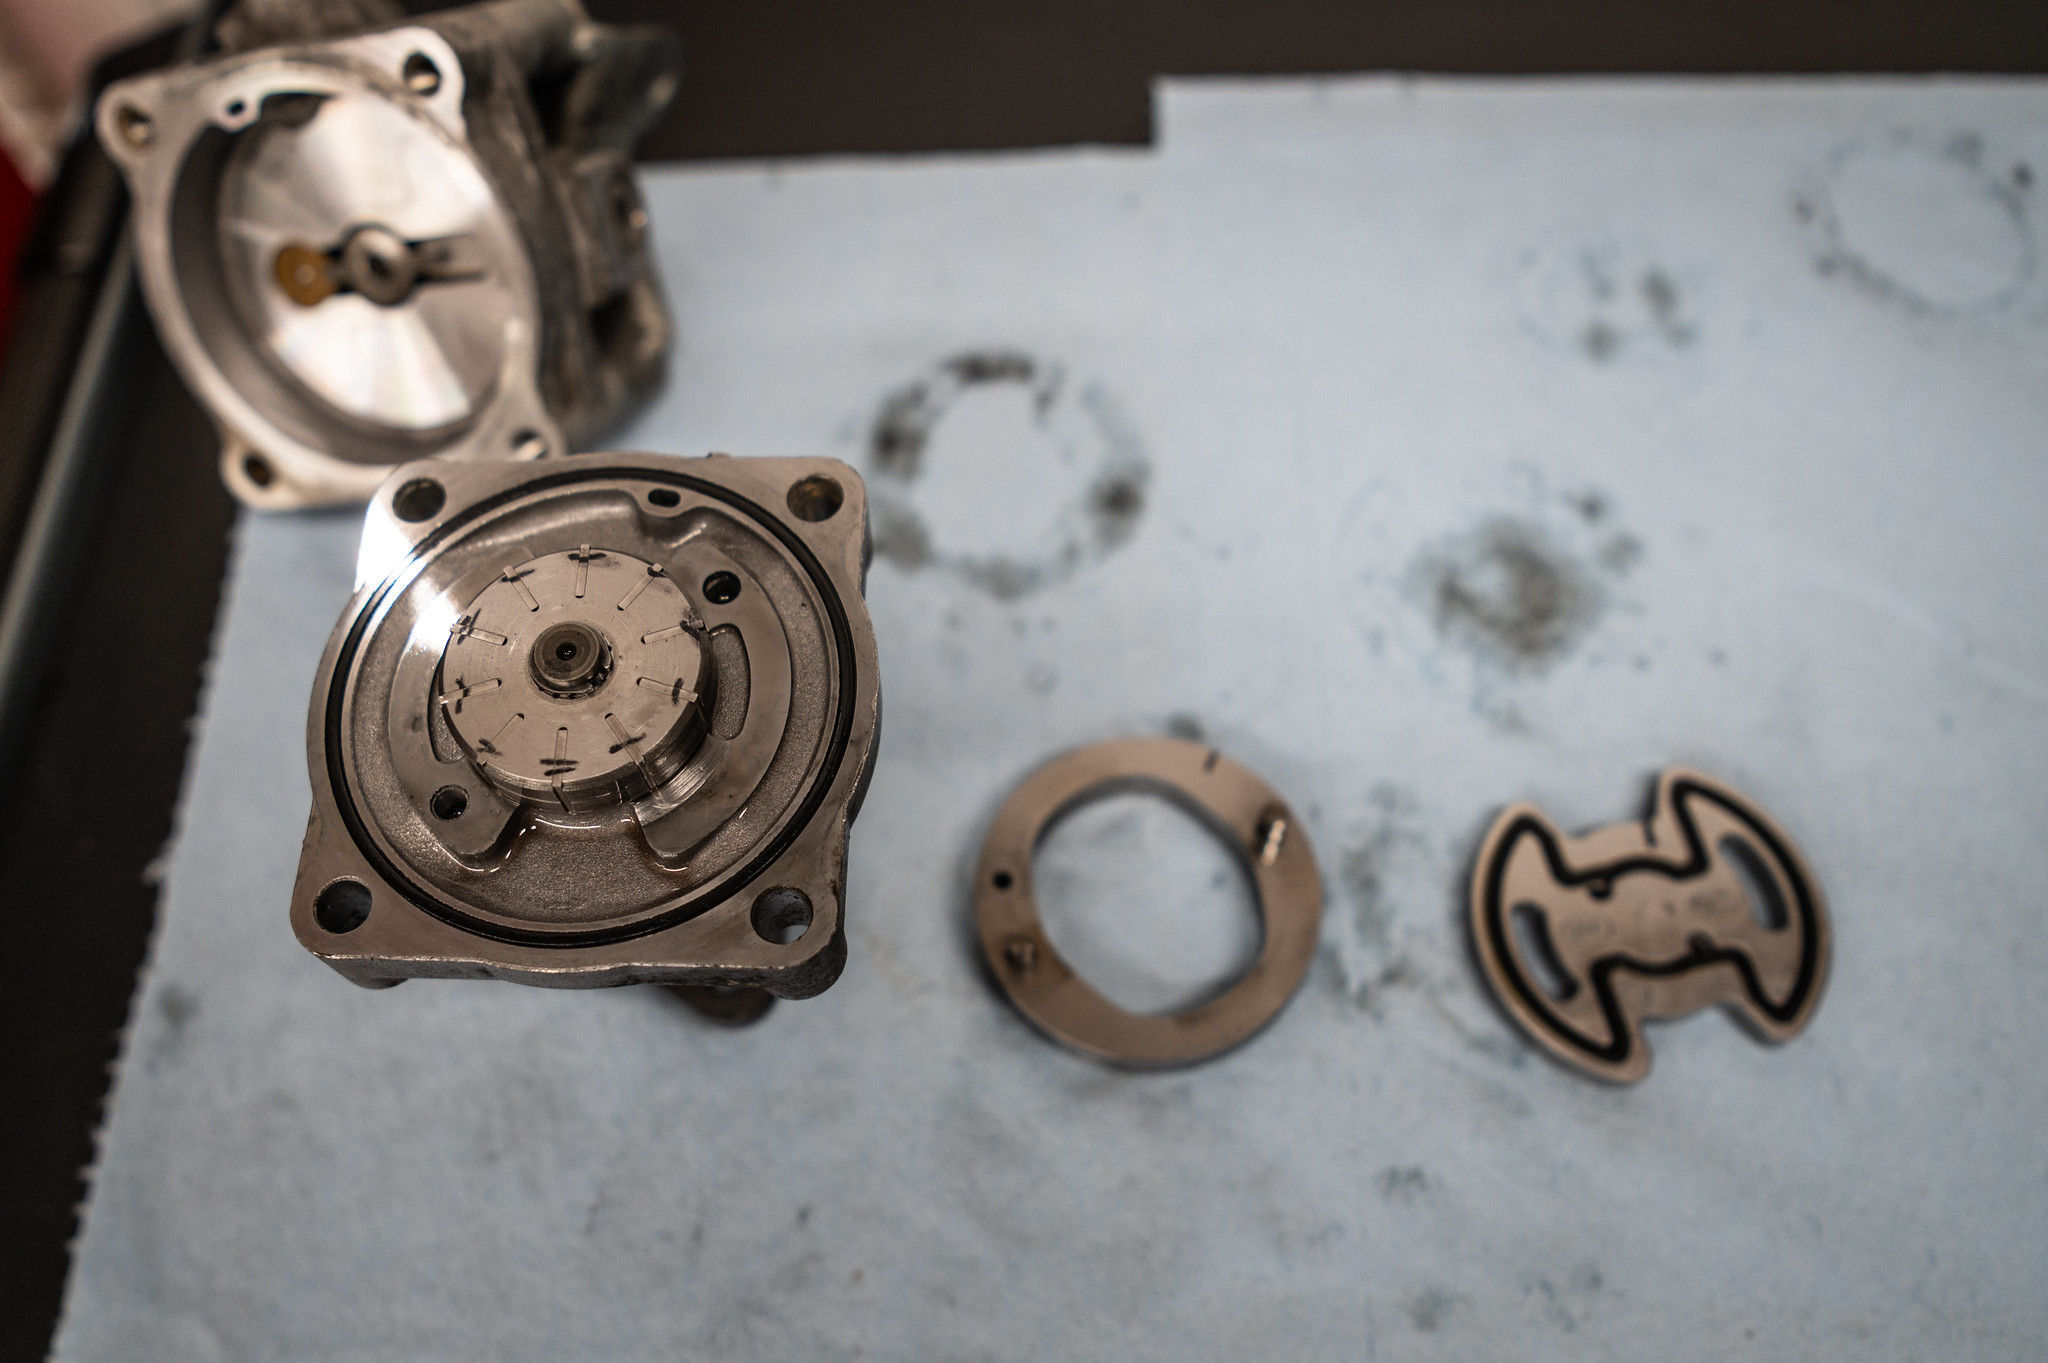
I marked the orientation of the rotor vanes with a sharpie, so I wouldn’t put them back in incorrectly.
Now, the hard part—removing the snap/retaining ring that holds the rotor to the shaft. I used a series of small screwdrivers and a pair of vise grips to press/pry it out, being careful to not knick any pump components. Some have suggested doing this in a plastic bag as the snap ring will go flying and it will also ensure the rotor/vanes don’t drop to the floor.
Removing the snap ring is the hardest part.
With the shaft dropped out of the snout, the old seal can be pried out with a pick or pry bar, again being very careful to not knick or mar any metal surfaces.
Pry out the old snout seal.
A new seal can be hammered gently into the snout, using an appropriately sized socket to apply even pressure until it’s fully seated. I used a 21mm socket.
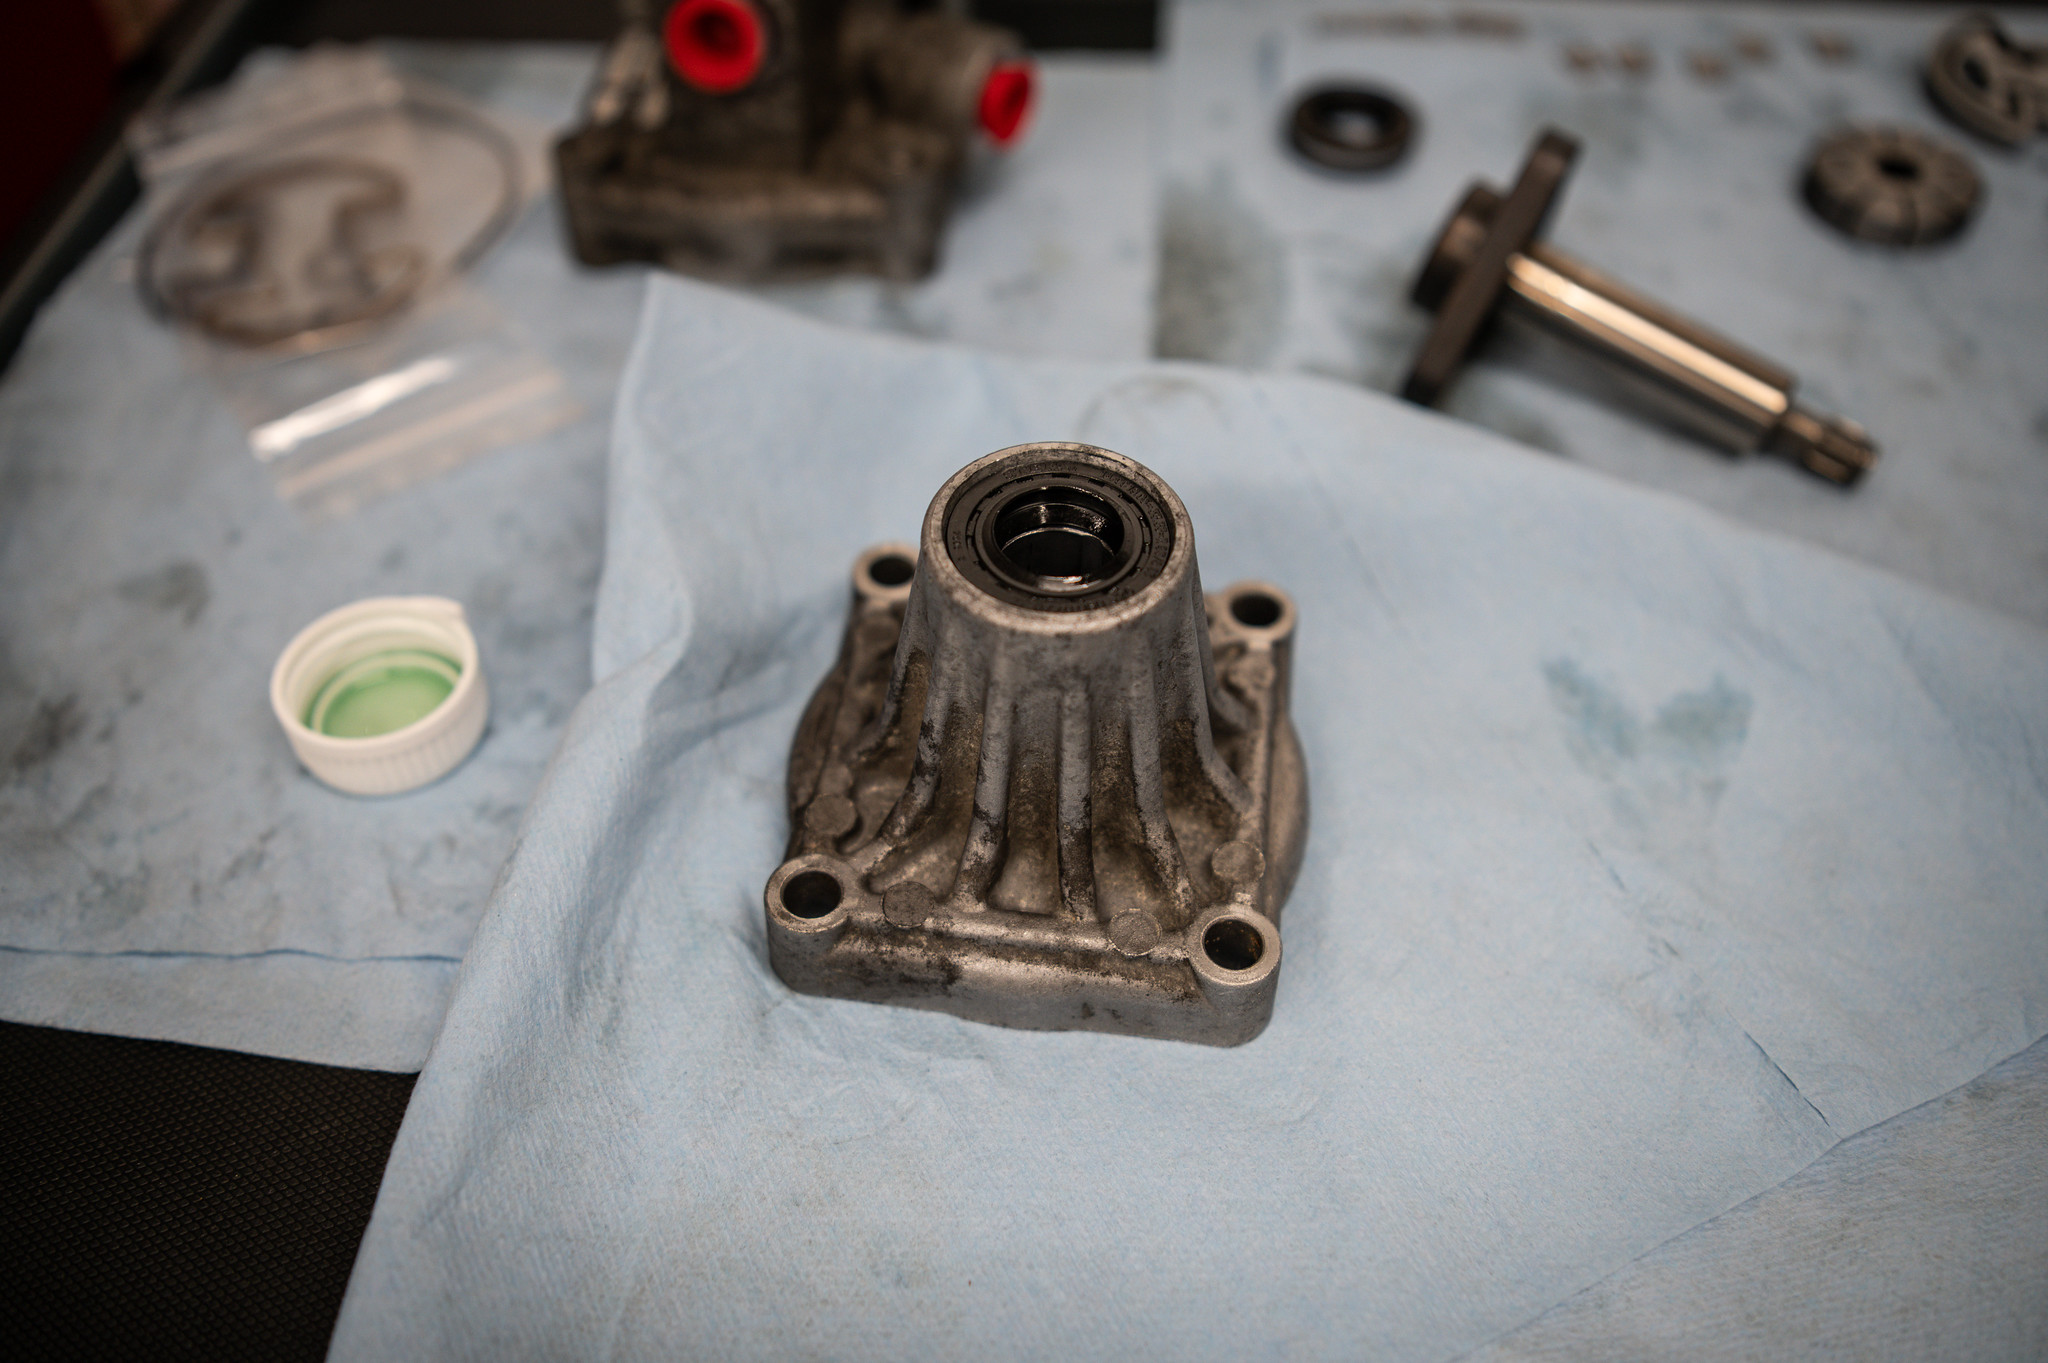
Tap in a new snout seal.
During reassembly, lightly coat the parts with the fluid you’ll be using in the power steering system. The shaft can go back through the snout and rotor, pressing in a new snap ring from the rebuild kit. The vanes can go back into the rotor, ensuring the correct orientation.

Shaft, rotor, and new snap ring installed, with all parts lightly coated in power steering fluid.
The oval piece that surrounds the rotor goes in next, ensuring proper orientation.
Parts are just falling into place now.
The tie fighter is next, with the thinner tie-fighter seal surrounding the thicker one. Note the flat side of the thicker seal points downward. Don’t forget the large rubber o-ring!

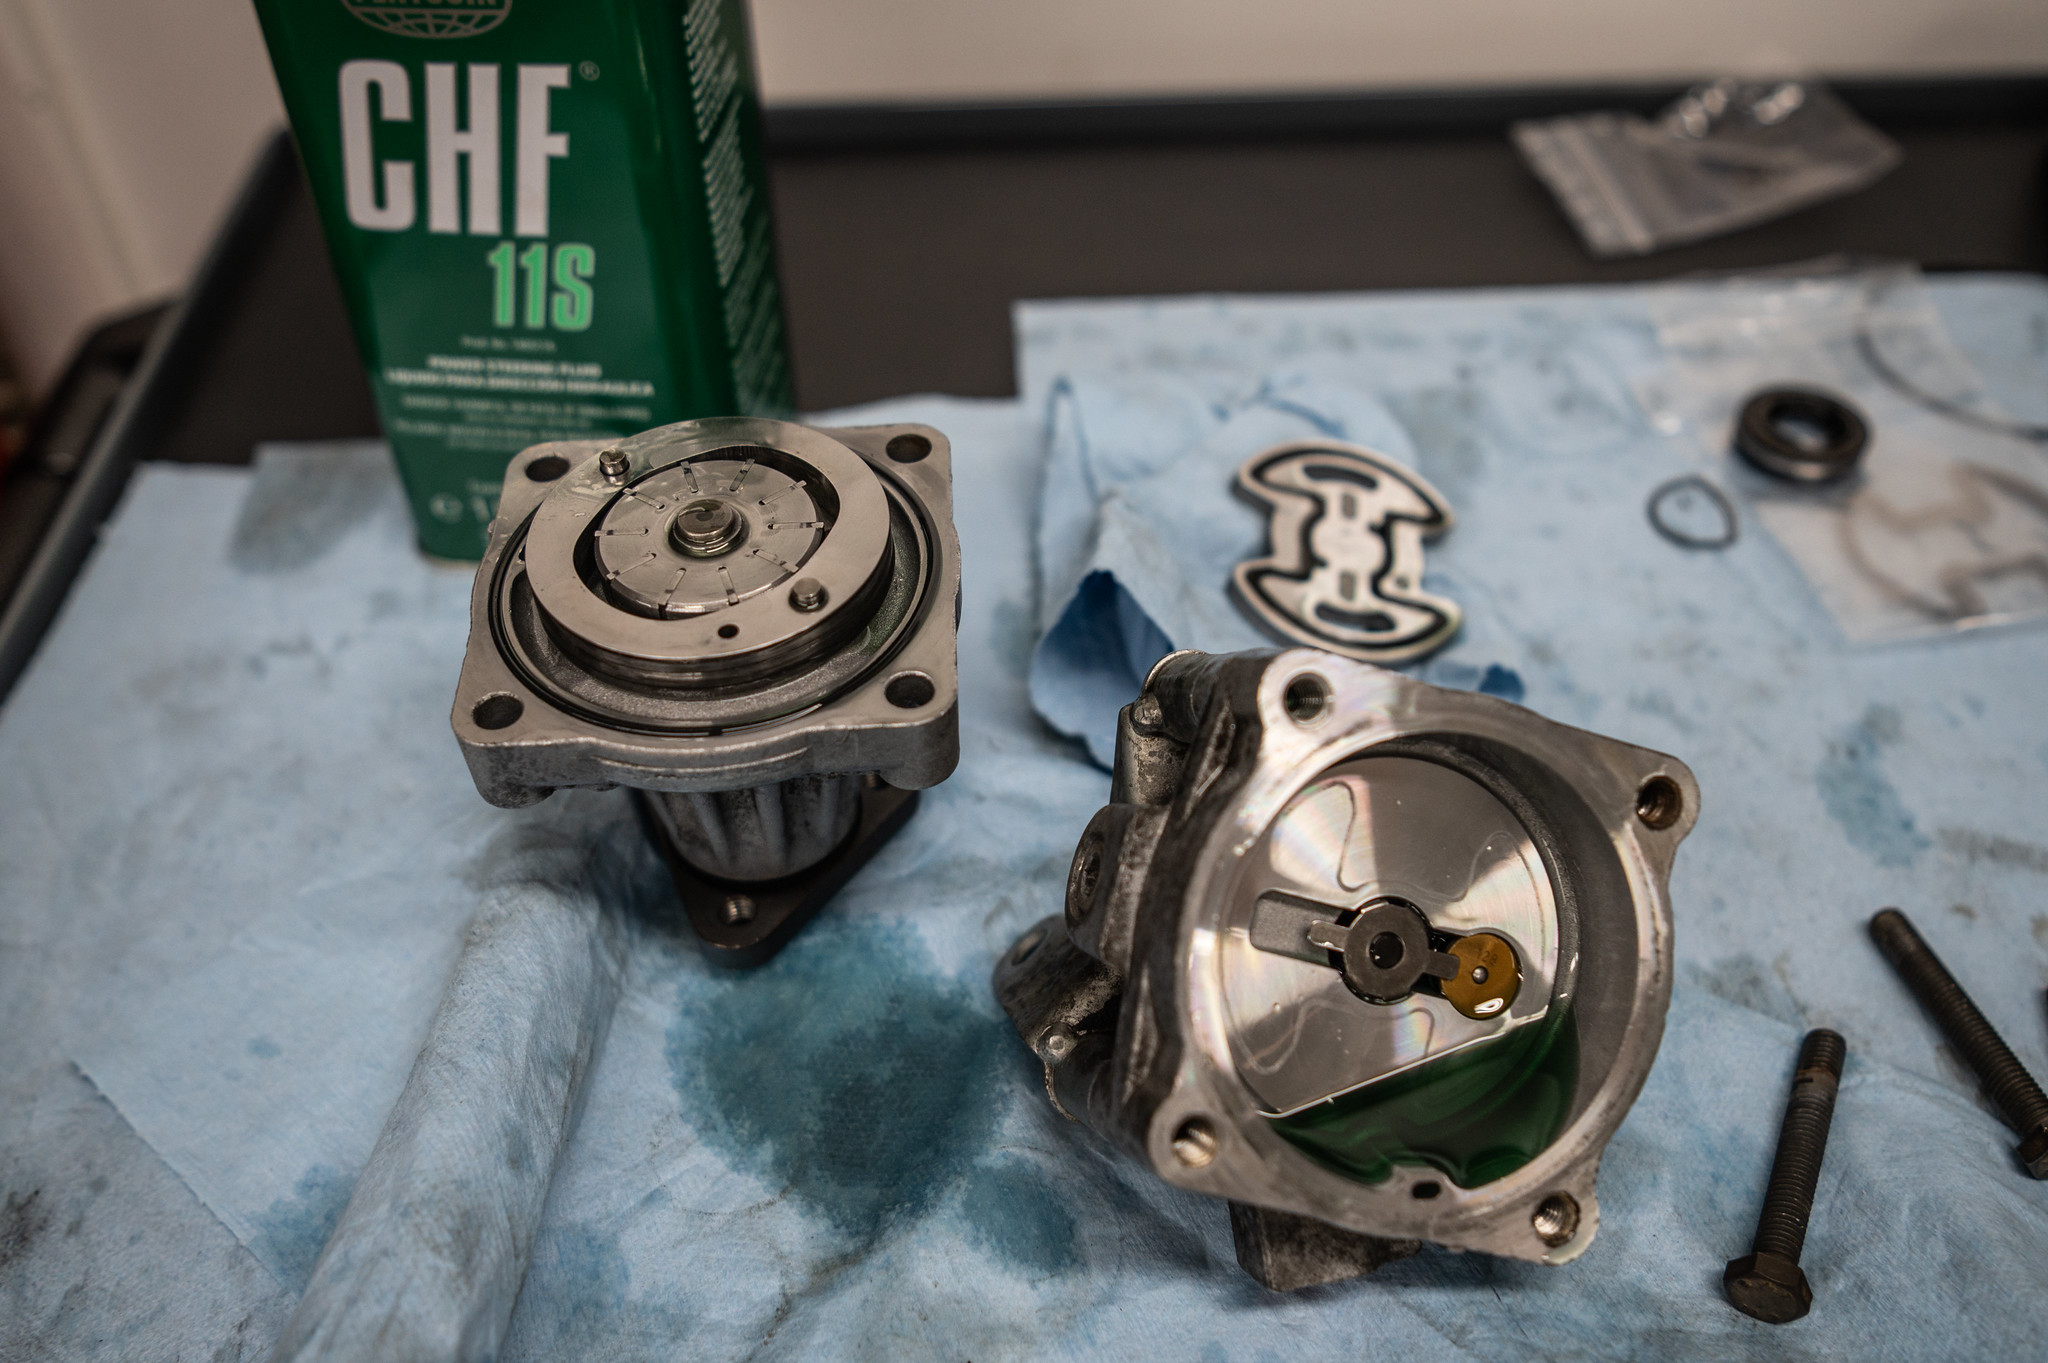
Now, mate the snout, base, and bracket using the four original bolts, lining up your sharpie marks. I couldn’t find the proper torque spec for the four 13mm bolts, so after lightly tightening the bolts with an impact driver, I torqued them to 20 foot-pounds in a criss-cross pattern.
Case and bracket back together again.
Reattach the pulley using the three original bolts.
A rebuilt/resealed E36 M3 power steering pump.
And that’s it! Mission accomplished. Now the rebuilt pump just needs to be installed in the car for miles of trouble-free goodness. During installation, after the power steering lines have been connected and the reservoir refilled, make sure to “prime” the pump by rotating the pulley before starting the car. Rotate the pulley, check the fluid levels in the reservoir, turn the steering wheel from lock to lock a number of times, and check the fluid levels again. Once you’re sure that the pump is full of fluid, put the drive belt back on the power steering pump and start the car.
Given that I performed this pump rebuild only a week before my road trip to The Vintage, I have yet to take the final steps of installing it in my M3. Given my luck with automotive repairs, I don’t want to introduce unnecessary risk with such a short timeline to resolve any new issues. But, on second thought, maybe I’ll bring the rebuilt unit on the trip, along with fresh fluid and my roadside-repair toolset—you know, just in case. It wouldn’t be the first power steering pump replaced in the parking lot of Asheville’s Clarion Inn on a Vintage weekend, and it certainly wouldn’t be the last.
— Mike Bevels
The post Unobtainium: Rebuilding An E36 M3 Power Steering Pump appeared first on BimmerLife.
]]>The post Failing State Safety Inspection Like a Pro appeared first on BimmerLife.
]]>What an embarrassment.
When the inspector called out “BMW [owner], come here.” I heard Winnie the Pooh’s voice in my head, responding with, “Oh, bother.” Actually, it may have been a bit more colorful than that, but the sentiment remains. Given that this was my first time failing a state safety inspection, I have a pretty good track record.
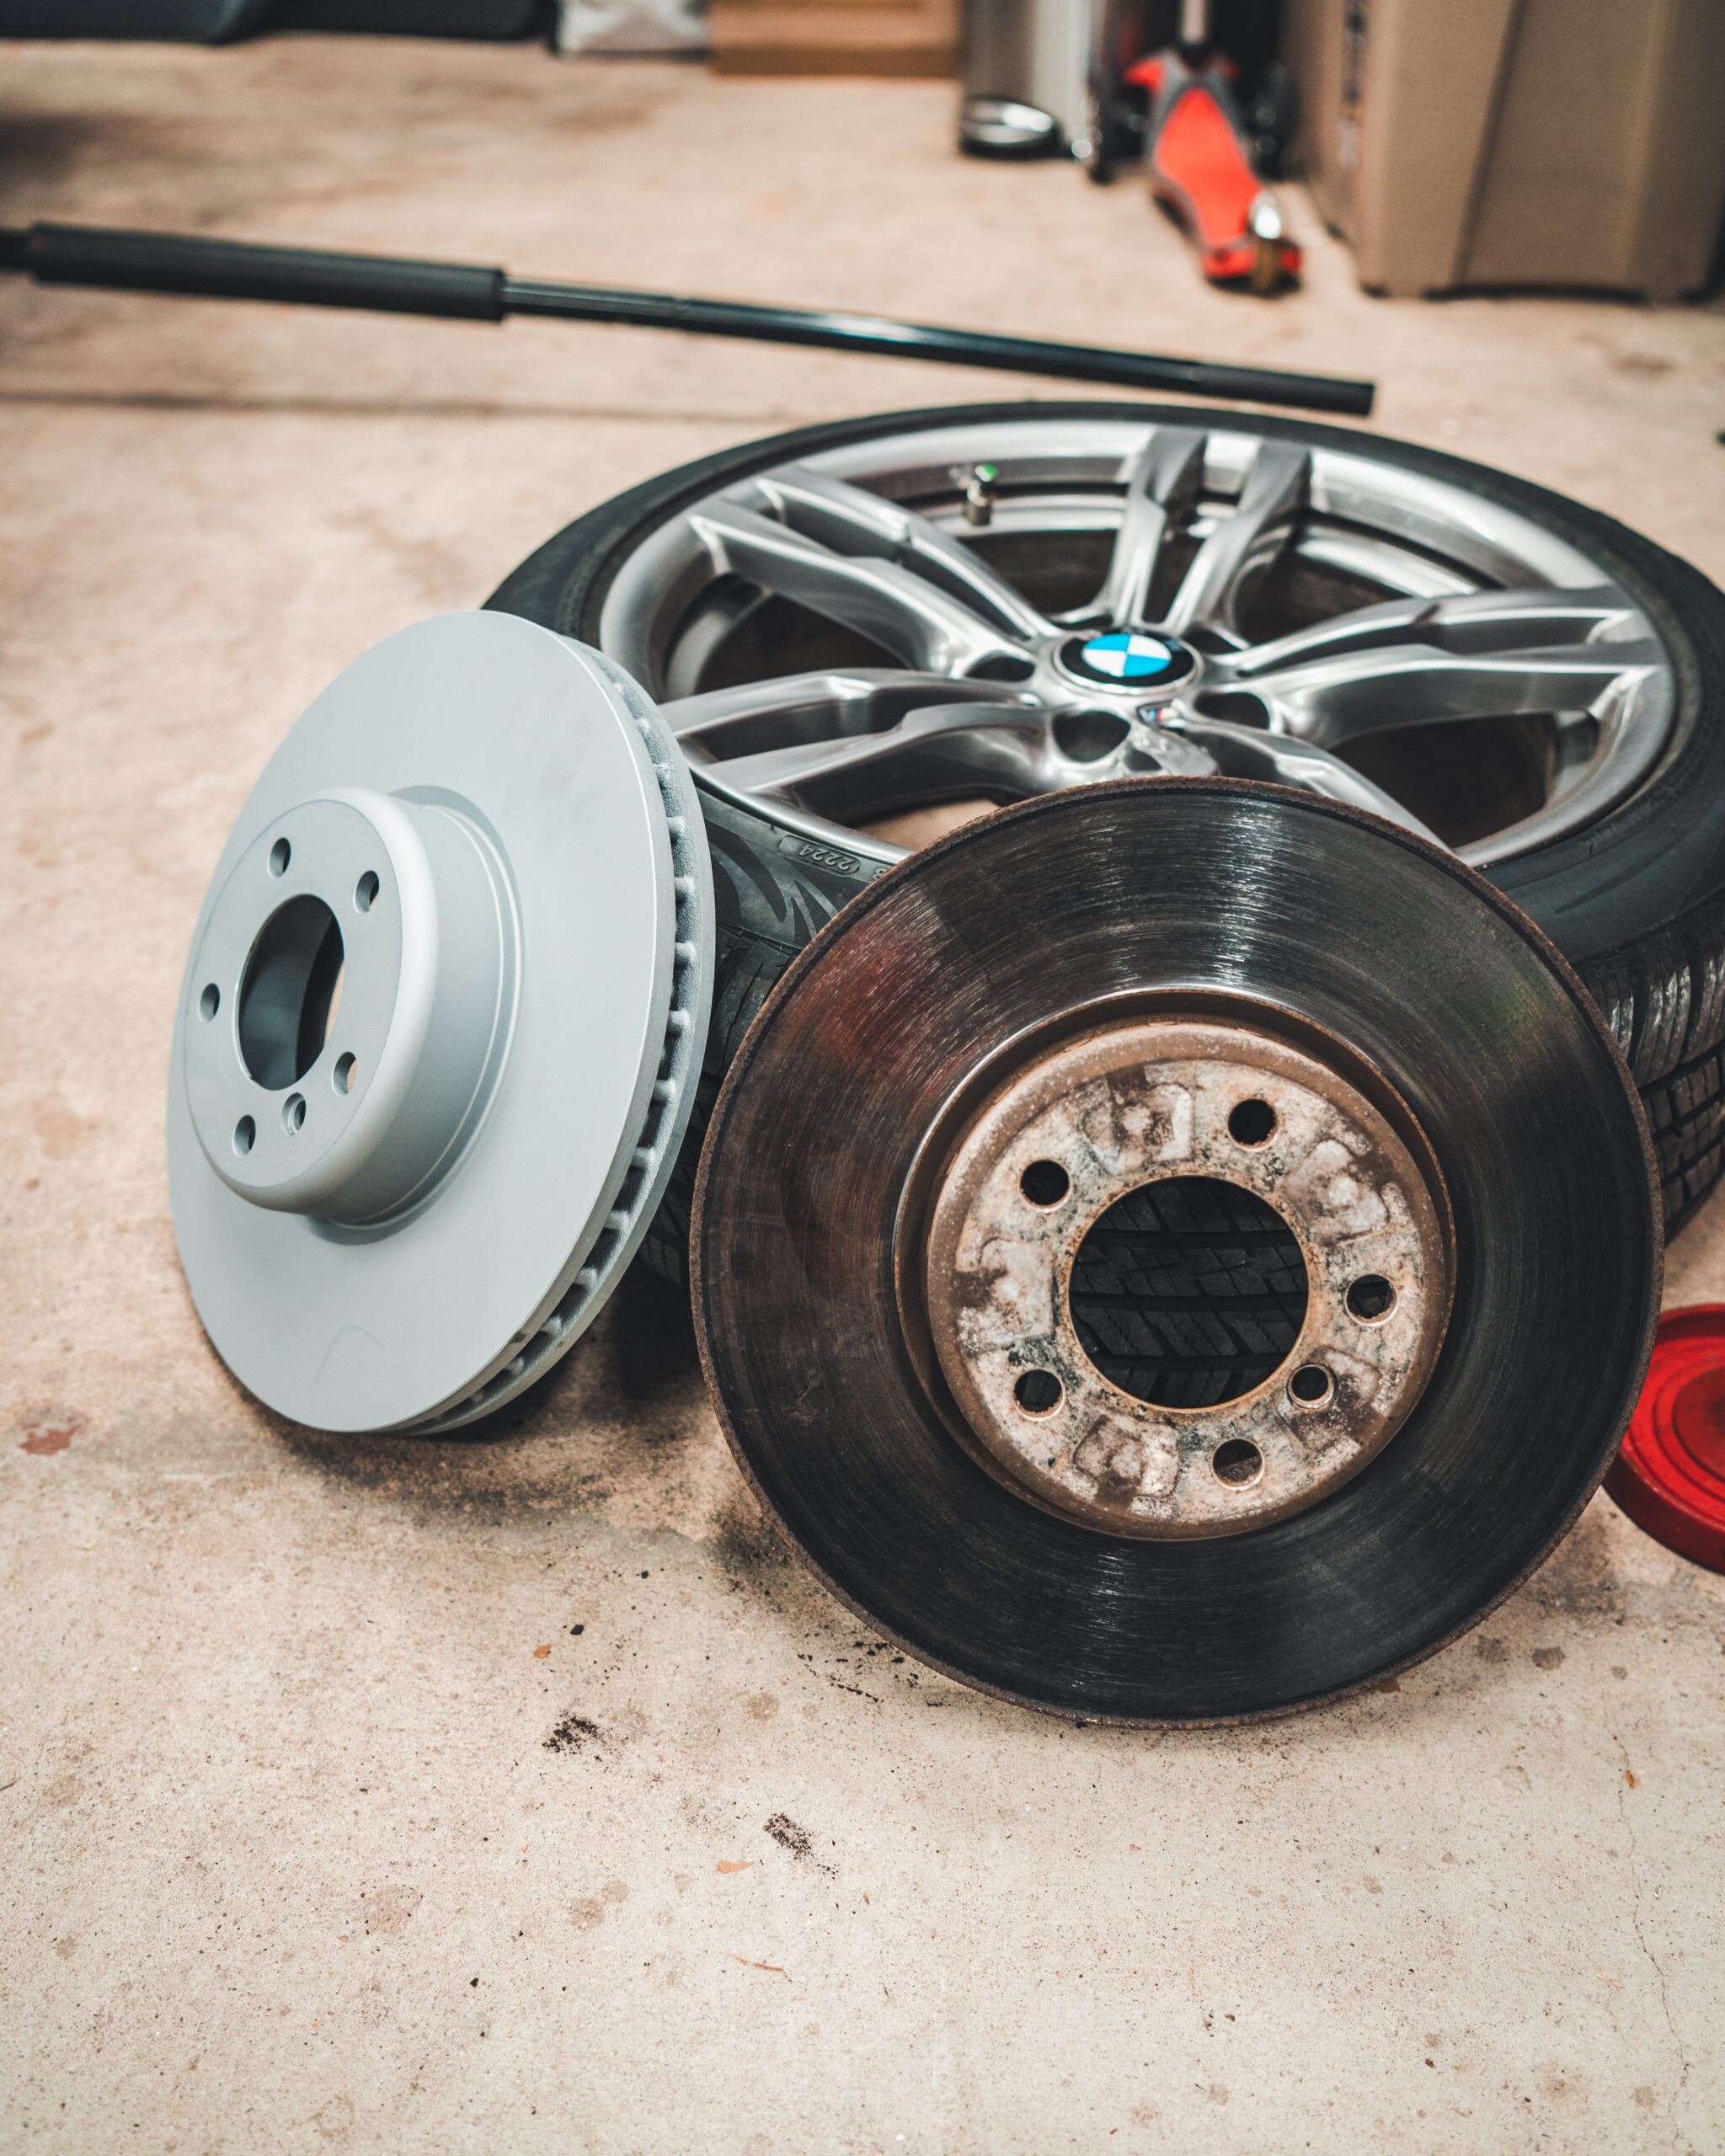
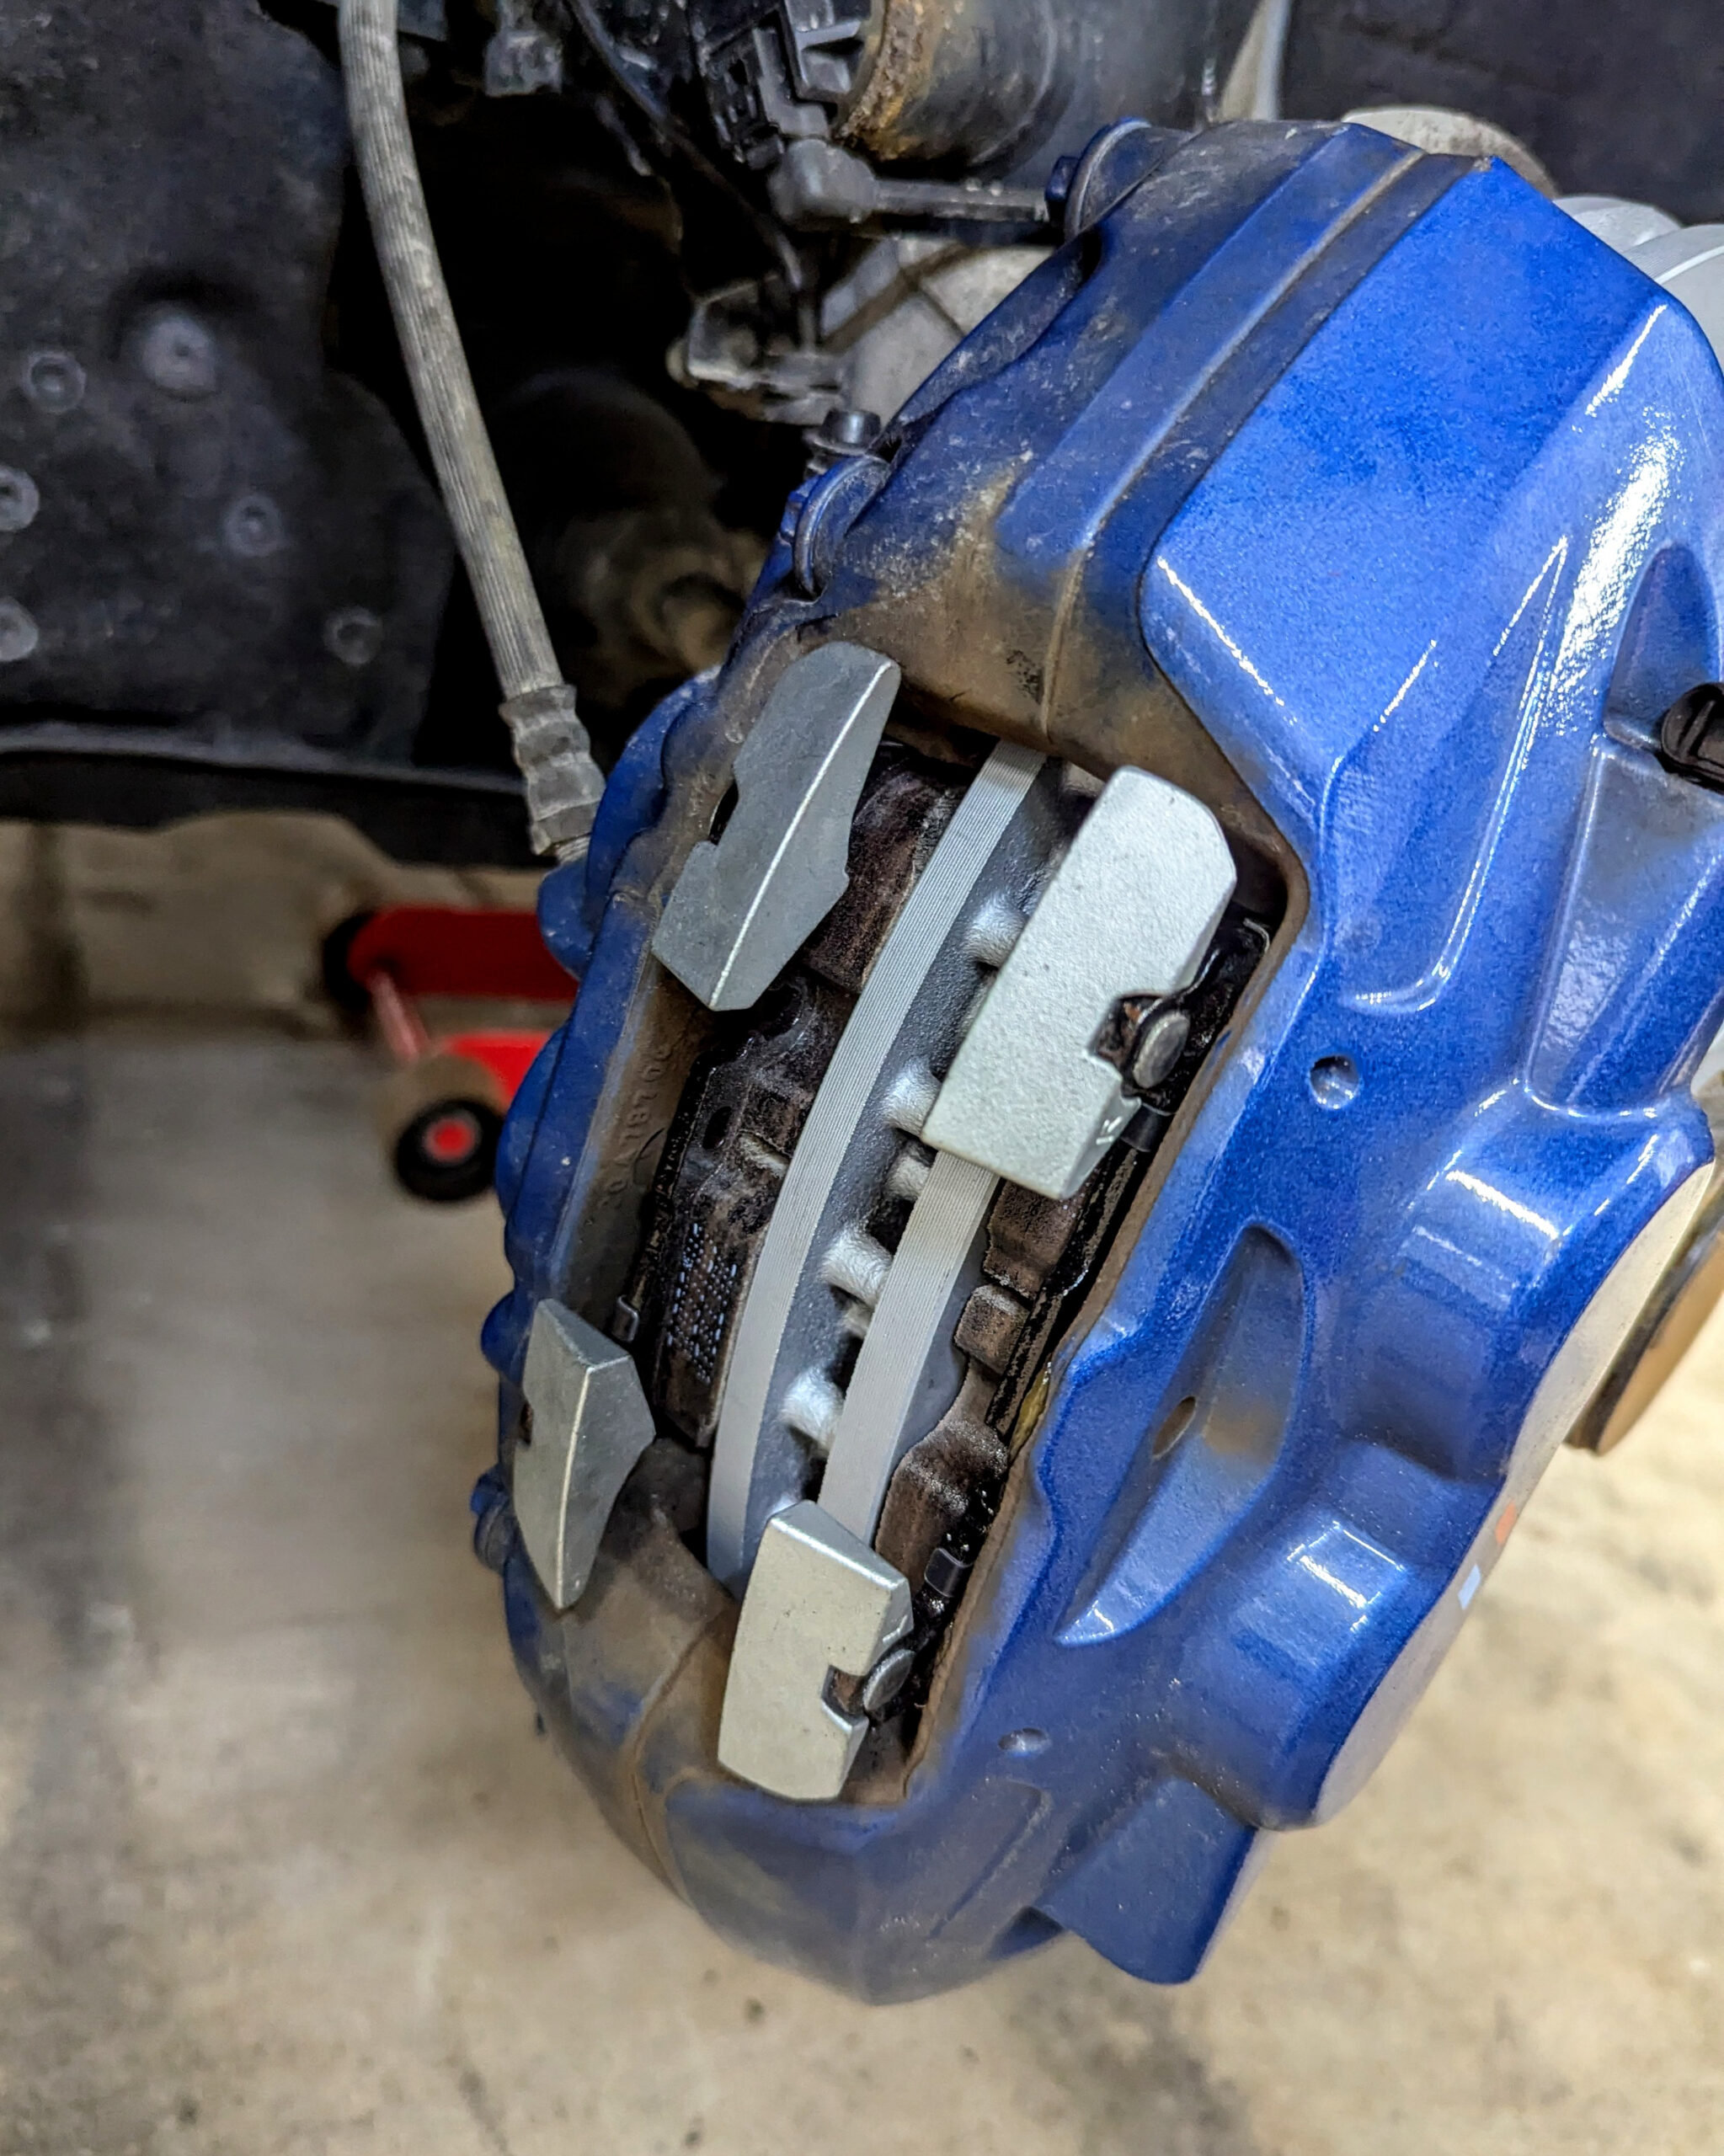
This M Sport-brake-equipped 3 Series wagon failed because of “front brake pads not making full contact with the rotors.” There was some rust on the interior side of the rotors due to not driving the car for a few days after some recent rain, which is a common occurrence for any steel-based brake rotors coming into contact with water. Given that the inspection station is very close to my house, the mighty four-piston front calipers, an a-la-carte option when we ordered this wagon, did not have ample opportunity to dissolve said rust en route.
Now, I could’ve simply gone out for a quick drive and performed a few hard stops to remedy this, but I could tell arguing wasn’t going to solve anything. The fact is, a few days prior to the inspection I measured the front rotors with a caliper and I knew the front rotors were just at their 28mm minimum thickness. I was planning to do a full brake job in the coming weeks anyway, but I thought I could get away with passing a safety inspection as there was plenty of pad left and the exterior rotor face looked perfectly fine. The time it would take to wait another hour-and-a-half in an inspection line would be better served simply replacing the pads and rotors. A “FAILED” sticker was placed on the windshield where the old inspection sticker used to be and the fourteen-day clock for reinspection started.
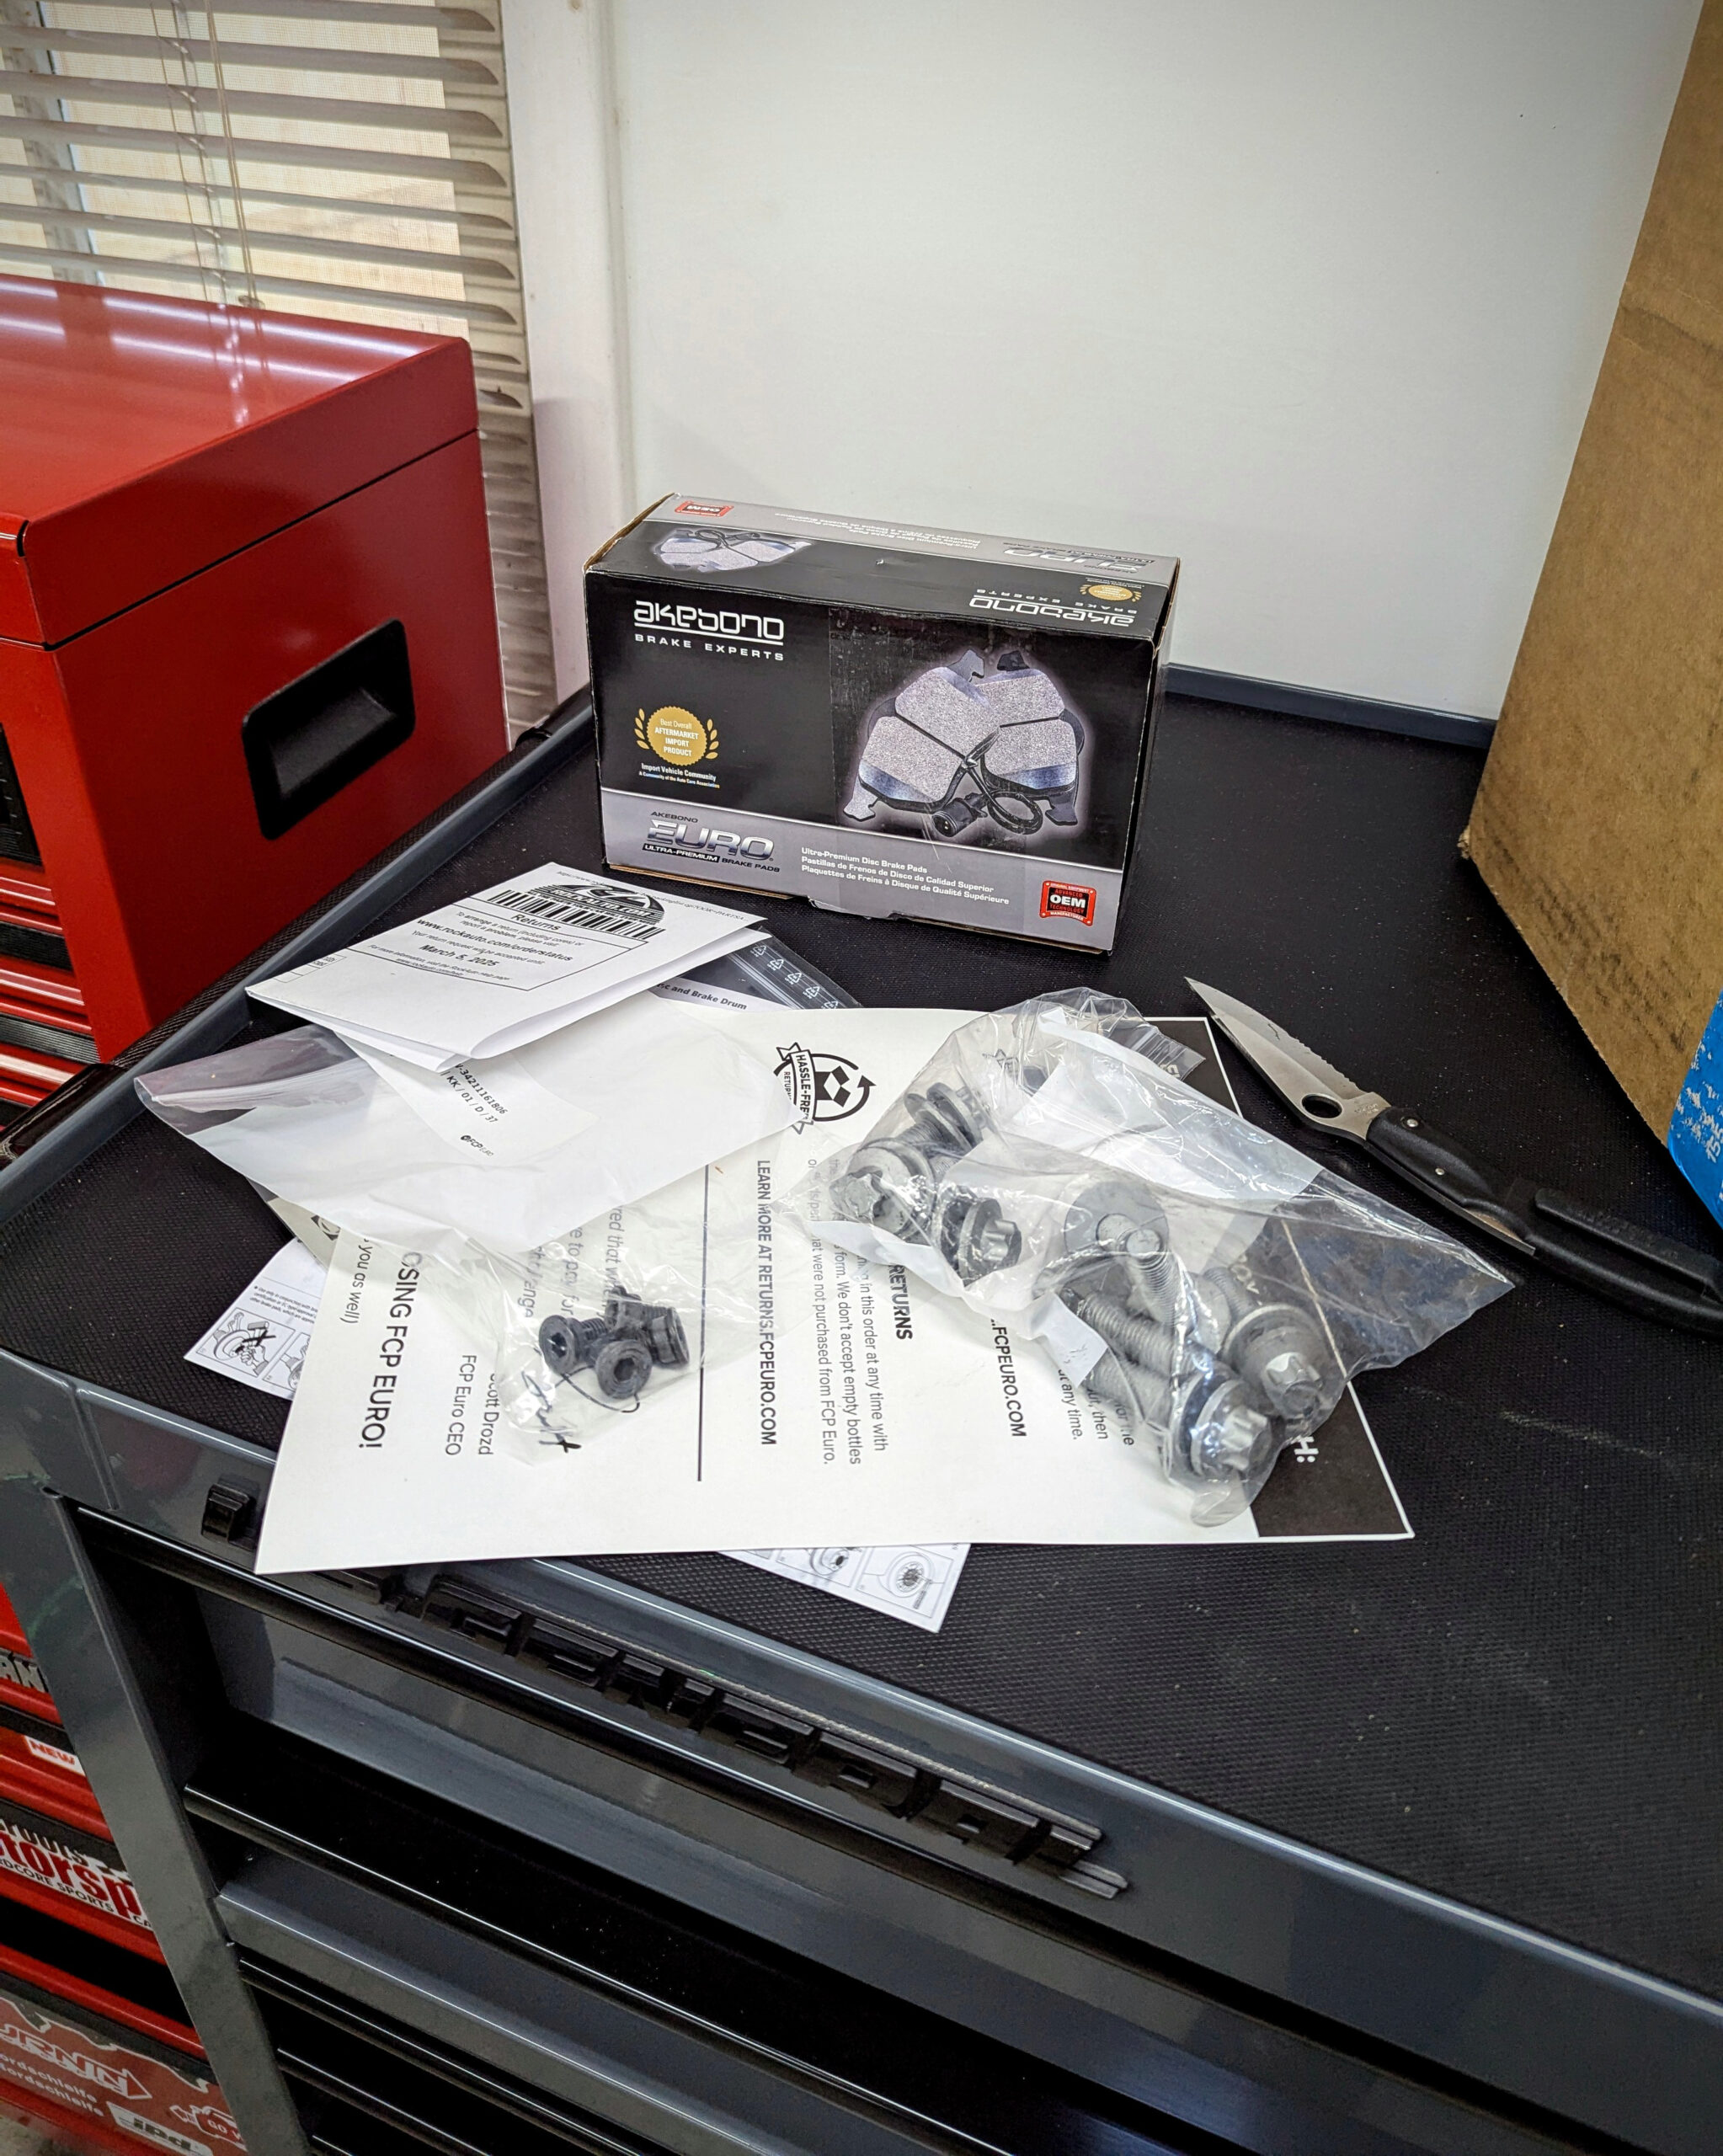
After some internet research and shopping around, I ordered new front and rear Zimmerman Z-coated blank rotors, new caliper bolts, and new rotor set screws from my go-to source, FCP Euro. Making things slightly complicated when ordering parts, there are a variety of sizes and options for F30/F31 pads and rotors. The M Sport brake option (S2NHA) is not the same as the M Sports Package (P337A) or the same as the non-factory M Sport brake upgrade (which uses 370mm front rotors). Additionally, things can differ between 328, 330, 335, and 340 models. Thankfully, between forums, FCP Euro’s website, and BimmerWorld’s website, I figured out the correct parts to order.
New parts!
I didn’t actually need new pads as there was plenty of pad material left, but in an effort to eliminate any potential hassle I ordered new front and rear Akebono EUR pads (model EUR1880 front, EUR1656 rear) from Rock Auto. I also have these pads on my ‘91 318is and ‘98 M3 and absolutely love them for nearly zero brake dust while still maintaining good initial bite and pedal feel. They’re certainly not “track” pads, but that’s actually a good thing for street-driven cars.
The F31 gets a garage spot and is ready for new brakes.
The F30/F31 factory M Sport brake package (option S2NHA) for turbo-four-equipped cars consists of 340mm front rotors and 345mm rear rotors. These are a two-piece design with an aluminum hat from the factory. I opted for solid single-piece steel Zimmerman coated rotors as they are half the price of the two-piece versions. The single-piece steel rotors weigh about three more pounds per rotor than their two-piece counterparts, but, again, this isn’t a track car, it’s a daily driver.
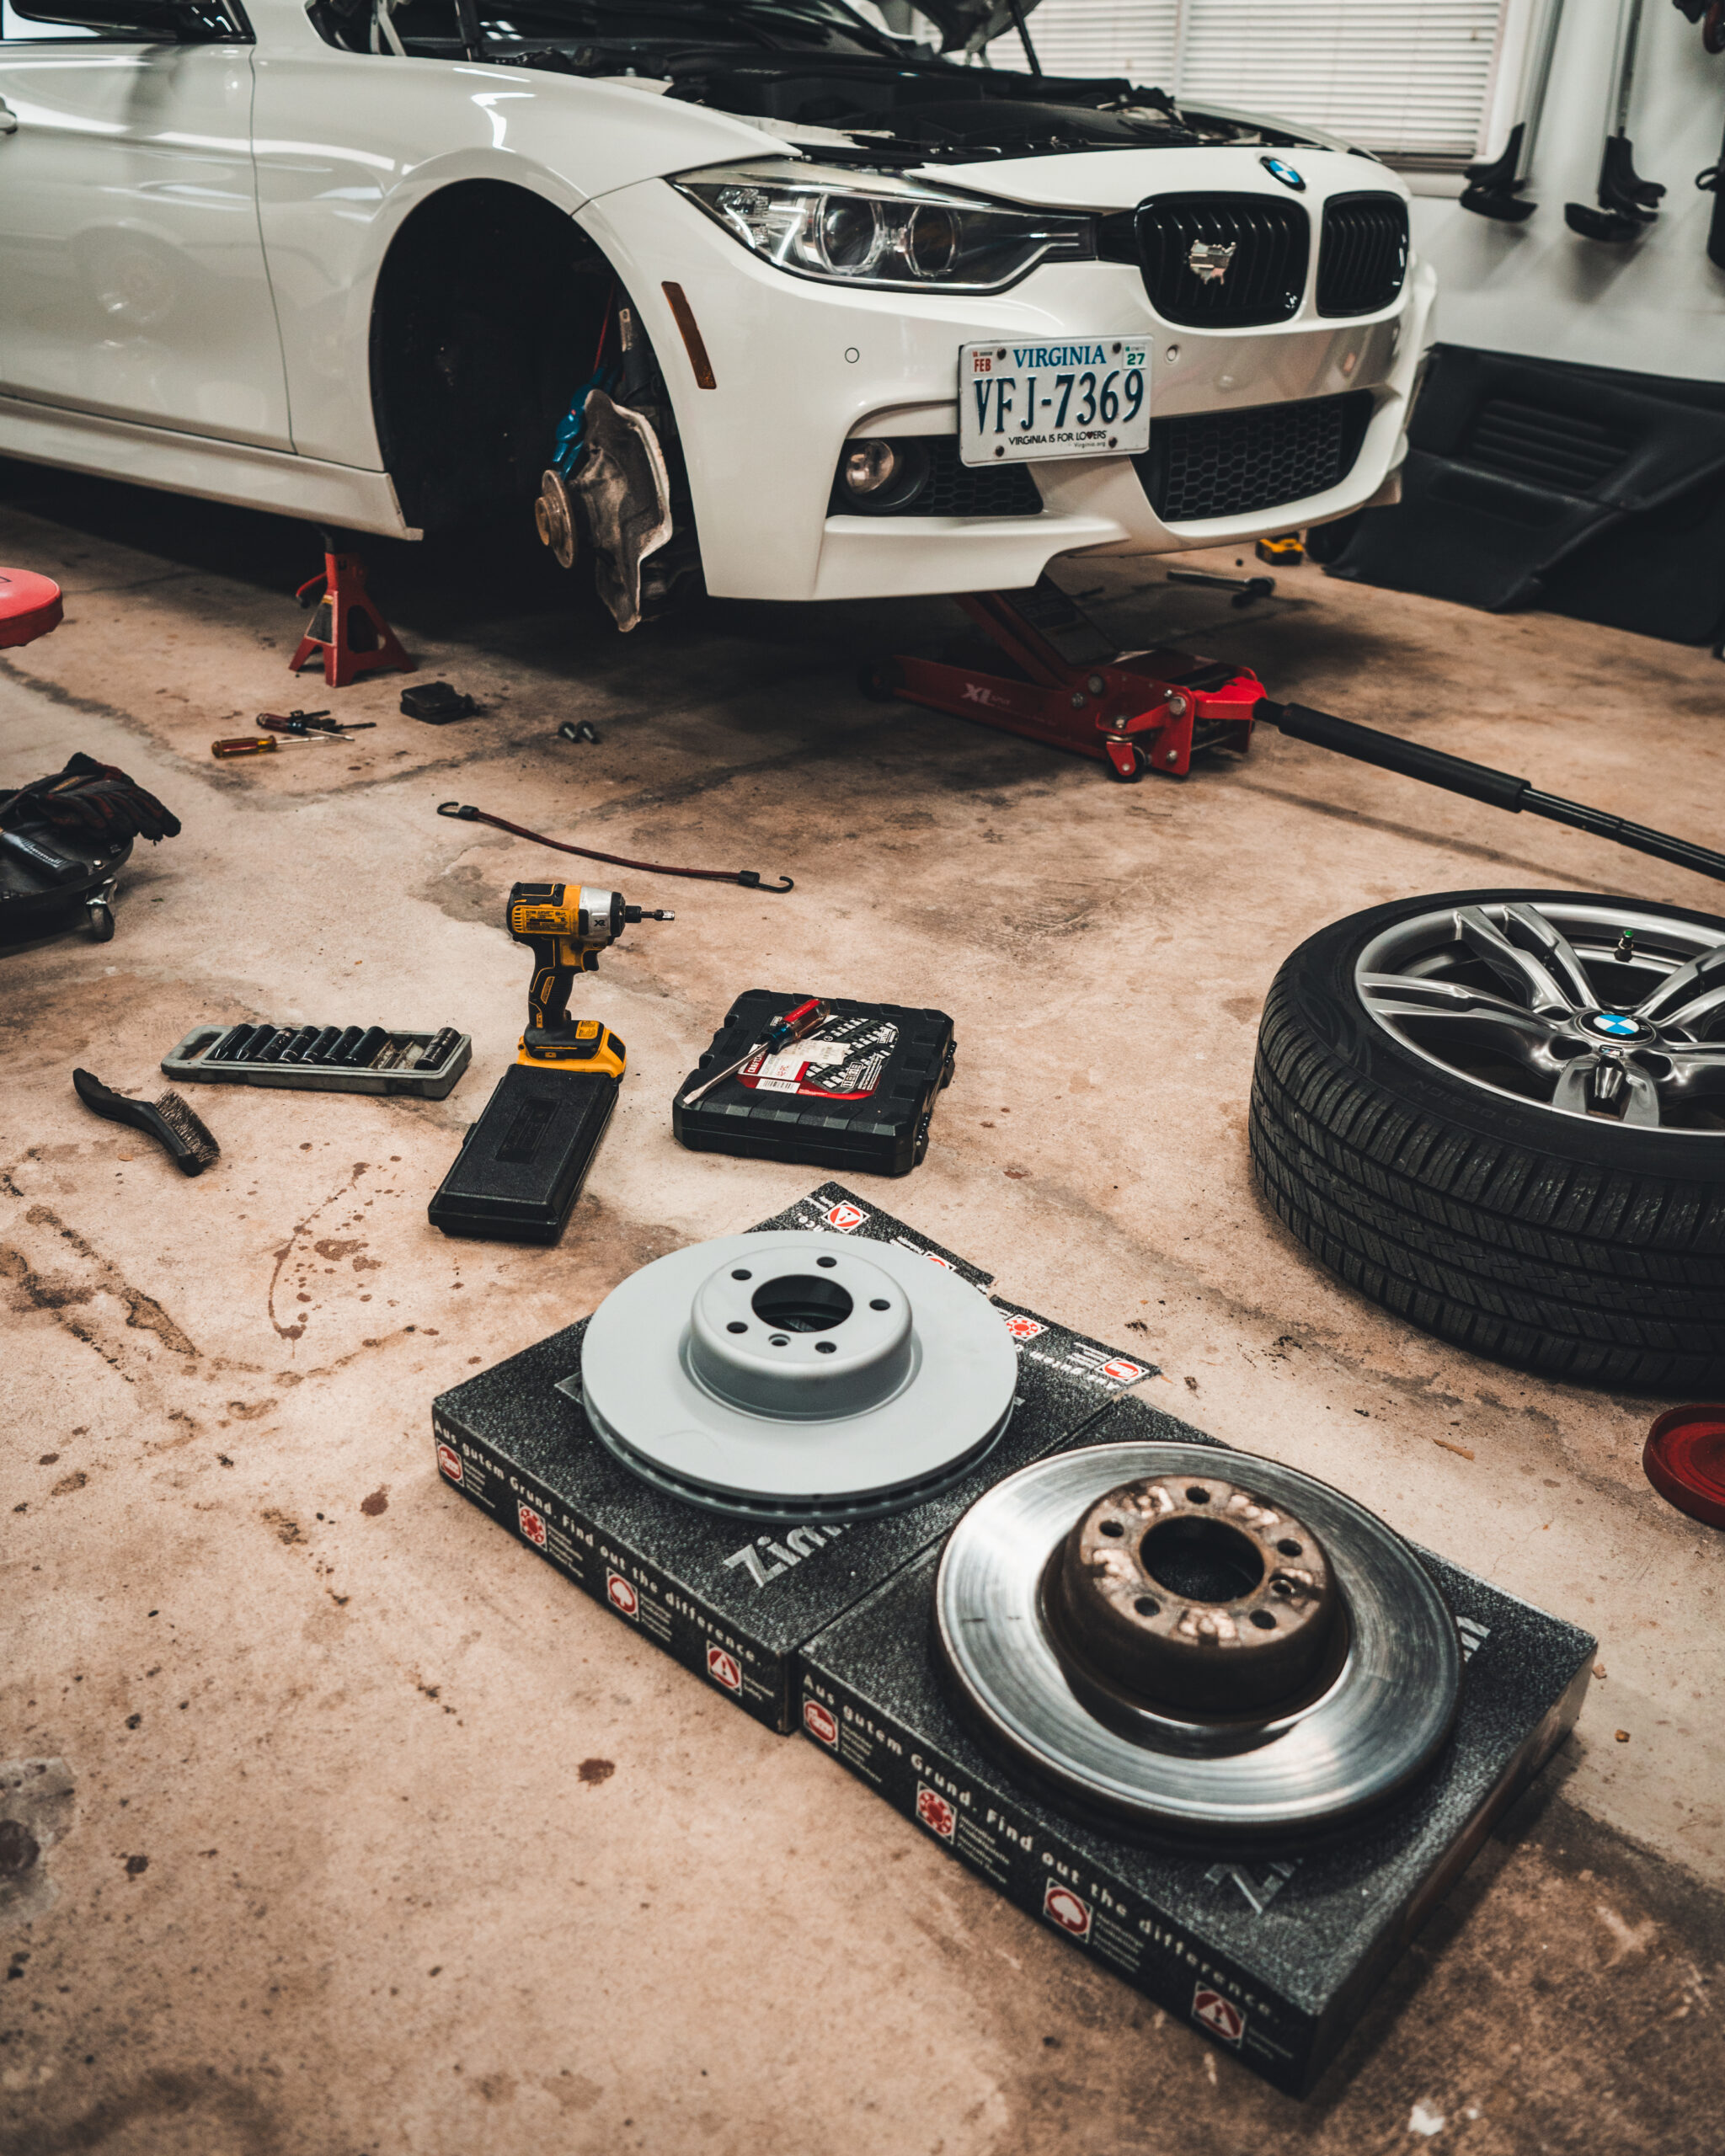
This was the first time I’ve changed rotors on this proper-roof-length vehicle. The original rotors lasted a whopping 66,000 miles, so I was quite happy about that. Having watched FCP Euro’s DIY video, which details the tools necessary for the job, torque specs, and each step in the process, installation was a breeze. After using the front center jack point to lift the car onto jack stands, it was time for business.
The M Sport brake design makes things nice and simple, with only a couple of bolts and brake-pad pins to remove. First, remove the 6mm allen rotor set screw. Then use a small punch to knock the brake-pad pins and brake-pad clip out.
Use a pair of screwdrivers to press the pads against the caliper pistons to make room for the new/thicker parts during reassembly. With the pins and clip removed, the pads slide out like toast out of a toaster.
Unbolt the two 18mm bolts holding the caliper to the hub. Hang the caliper with wire or string from the spring above—you never want to let it hang by the brake line. Remove the rotor, using a swift knock of a hammer on the brake rotor hub if it’s stuck. Use a wire brush to knock off any rust/scale on the hub itself, it’s the rotor’s mating surface and the rotor needs to sit perfectly flush.

Installation is the reverse of removal, applying brake grease to the back of the pads, anti seize on the rotor set screw and torquing everything to spec.

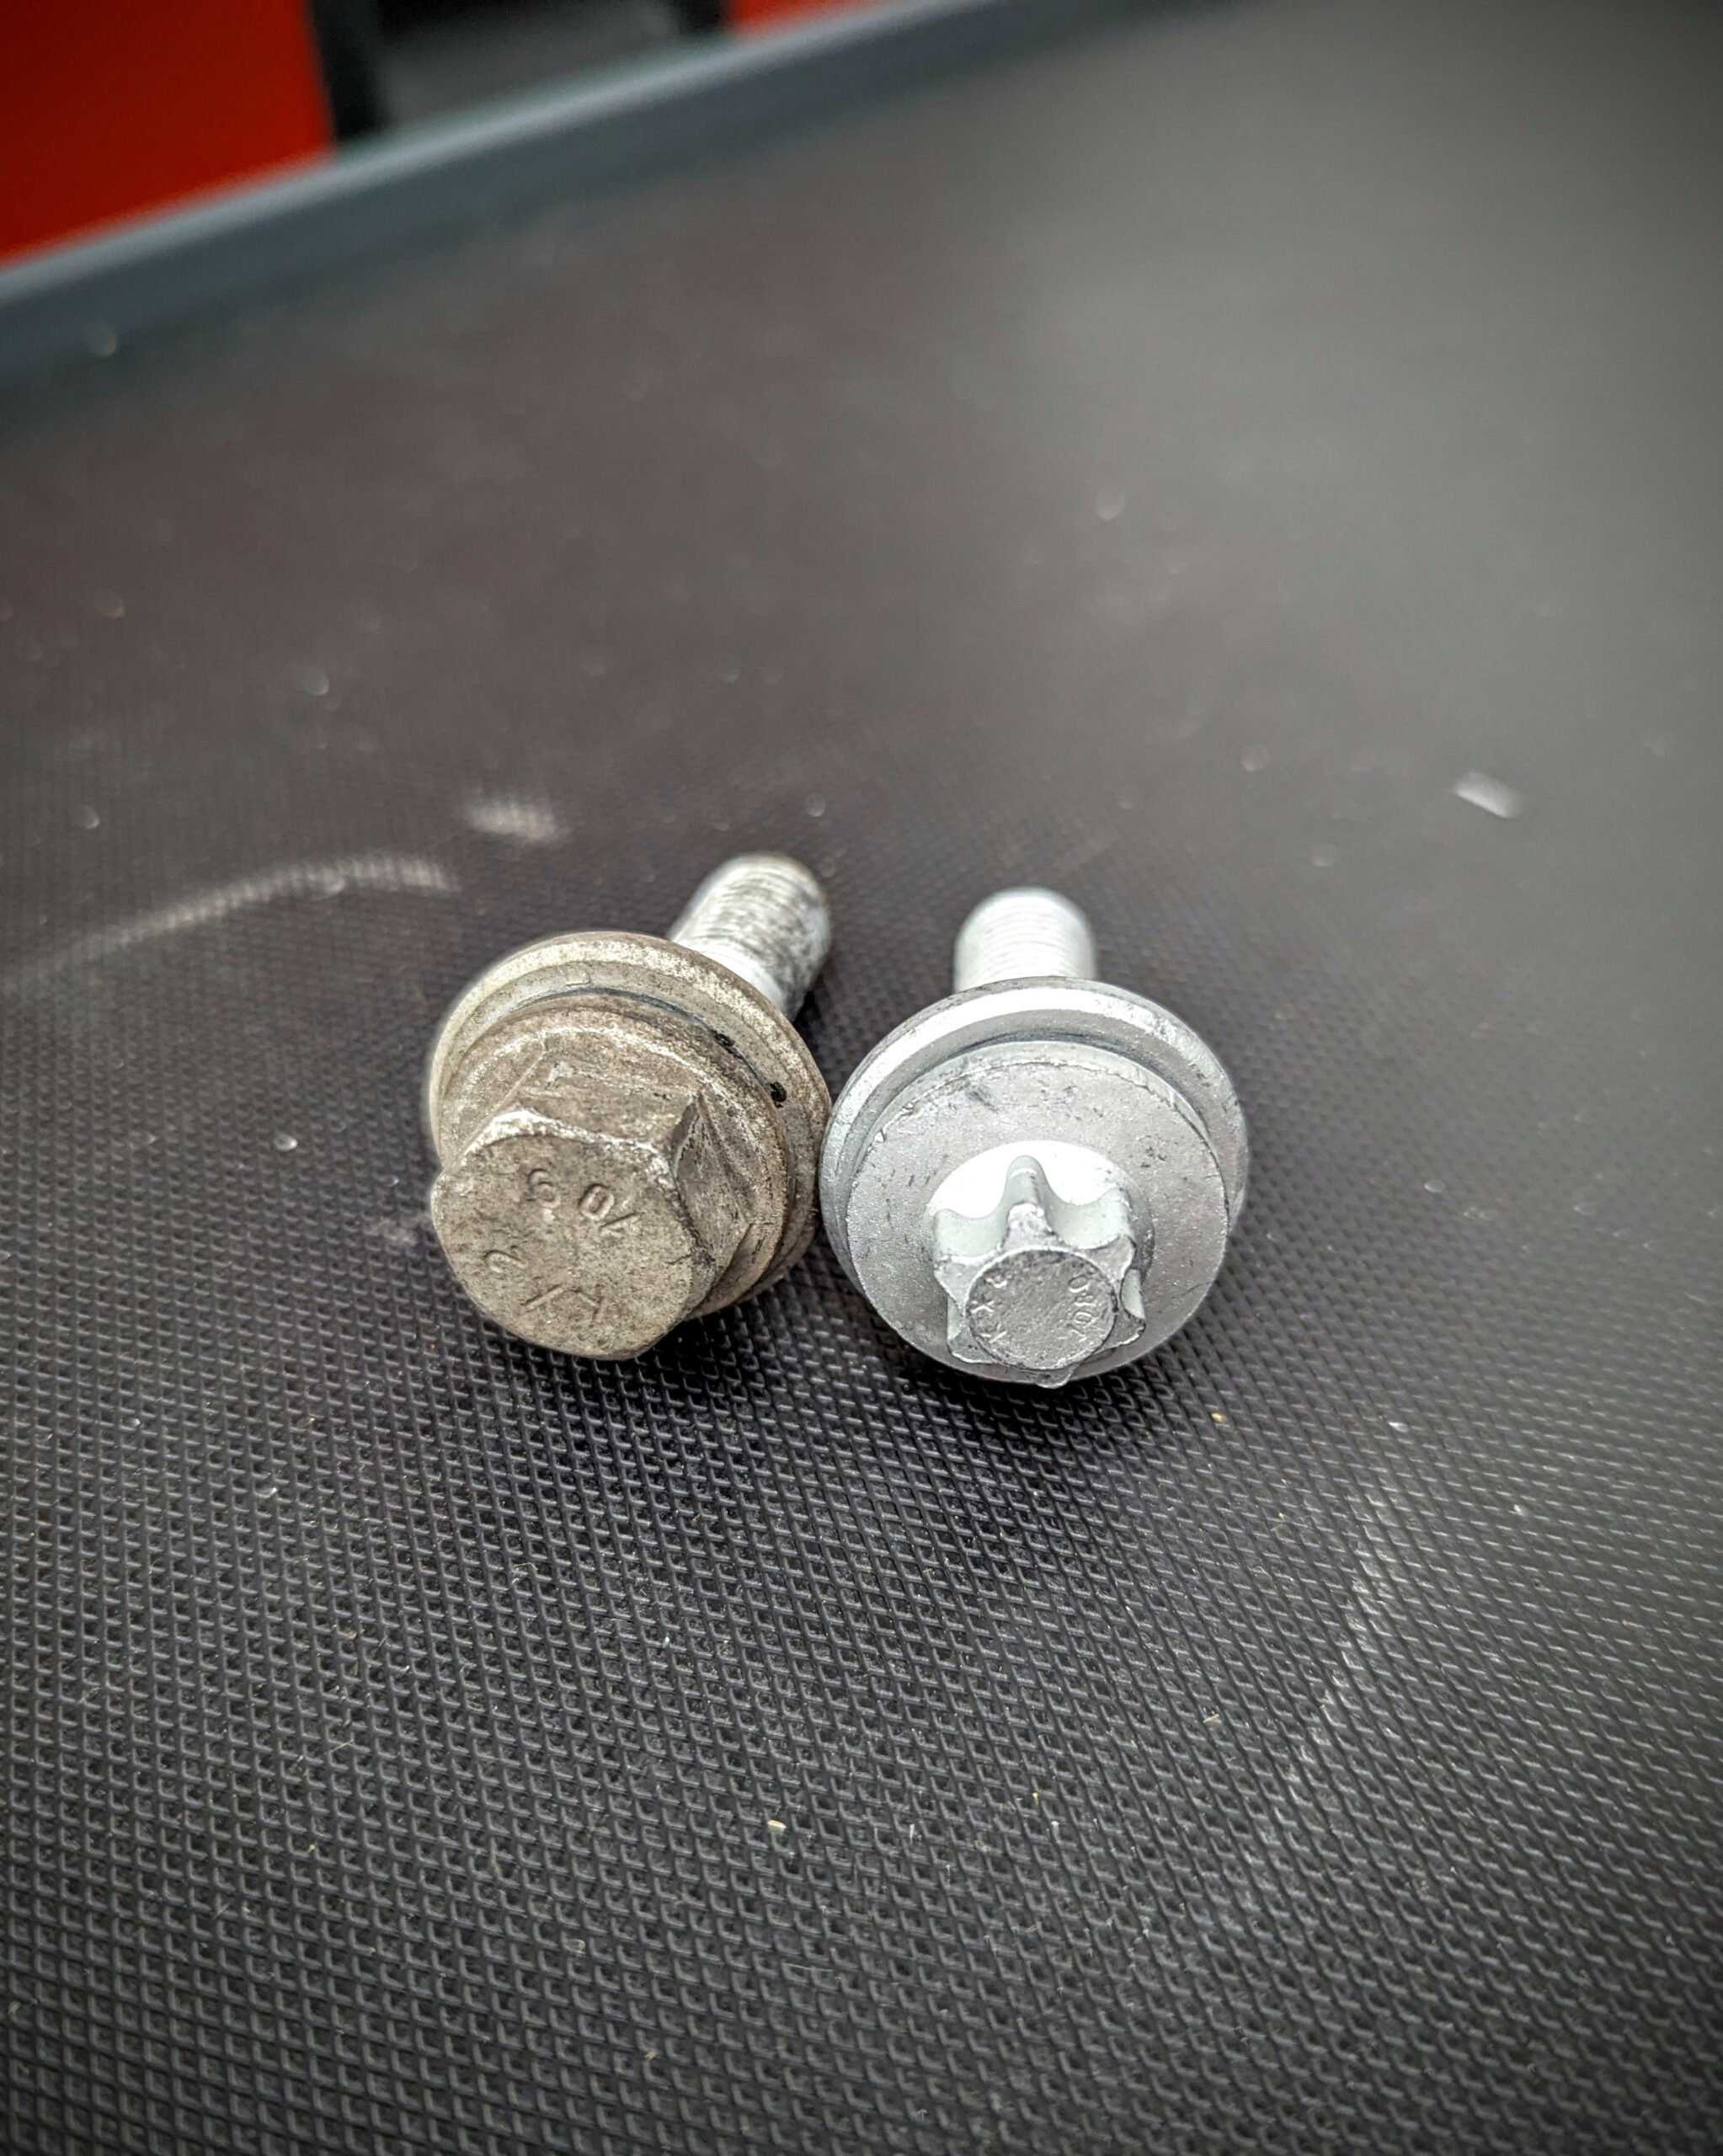
I did order $75 worth of eight new caliper bolts, in the updated E-torx E16 format compared to the older 18mm bolt format, so don’t think I cheap out on everything. While the front caliper bolts are torqued to 100 Nm, the rears involve a two-step sequence, first torquing to 30 Nm and then tightening another 90 degrees. Torque-to-yield bolts shouldn’t be reused—especially for what’s arguably the most important part of the car, the brakes.
The same afternoon I installed the brakes, I took it back to the same inspection station where I had failed the safety inspection. Was I a glutton for punishment? While the cost of a Virginia State Safety Inspection is $20, a re-inspection fee is only $1 at the same location. This time around there was no line and the F31 passed with no issues. Hurray.
Fresh.
What about the rear brakes? Well, I only had to replace the front brakes to pass inspection. The rear rotors and pads still have plenty of service life left in them–as verified by measuring with a caliper. Regardless, I did order new rear rotors and pads (and set screws and bolts) at the same time as I ordered the fronts, so those parts will wait on the shelf until they’re needed. Perhaps that will be when it’s not the middle of winter, and it’s more than 35 degrees in my garage. —Mike Bevels
The post Failing State Safety Inspection Like a Pro appeared first on BimmerLife.
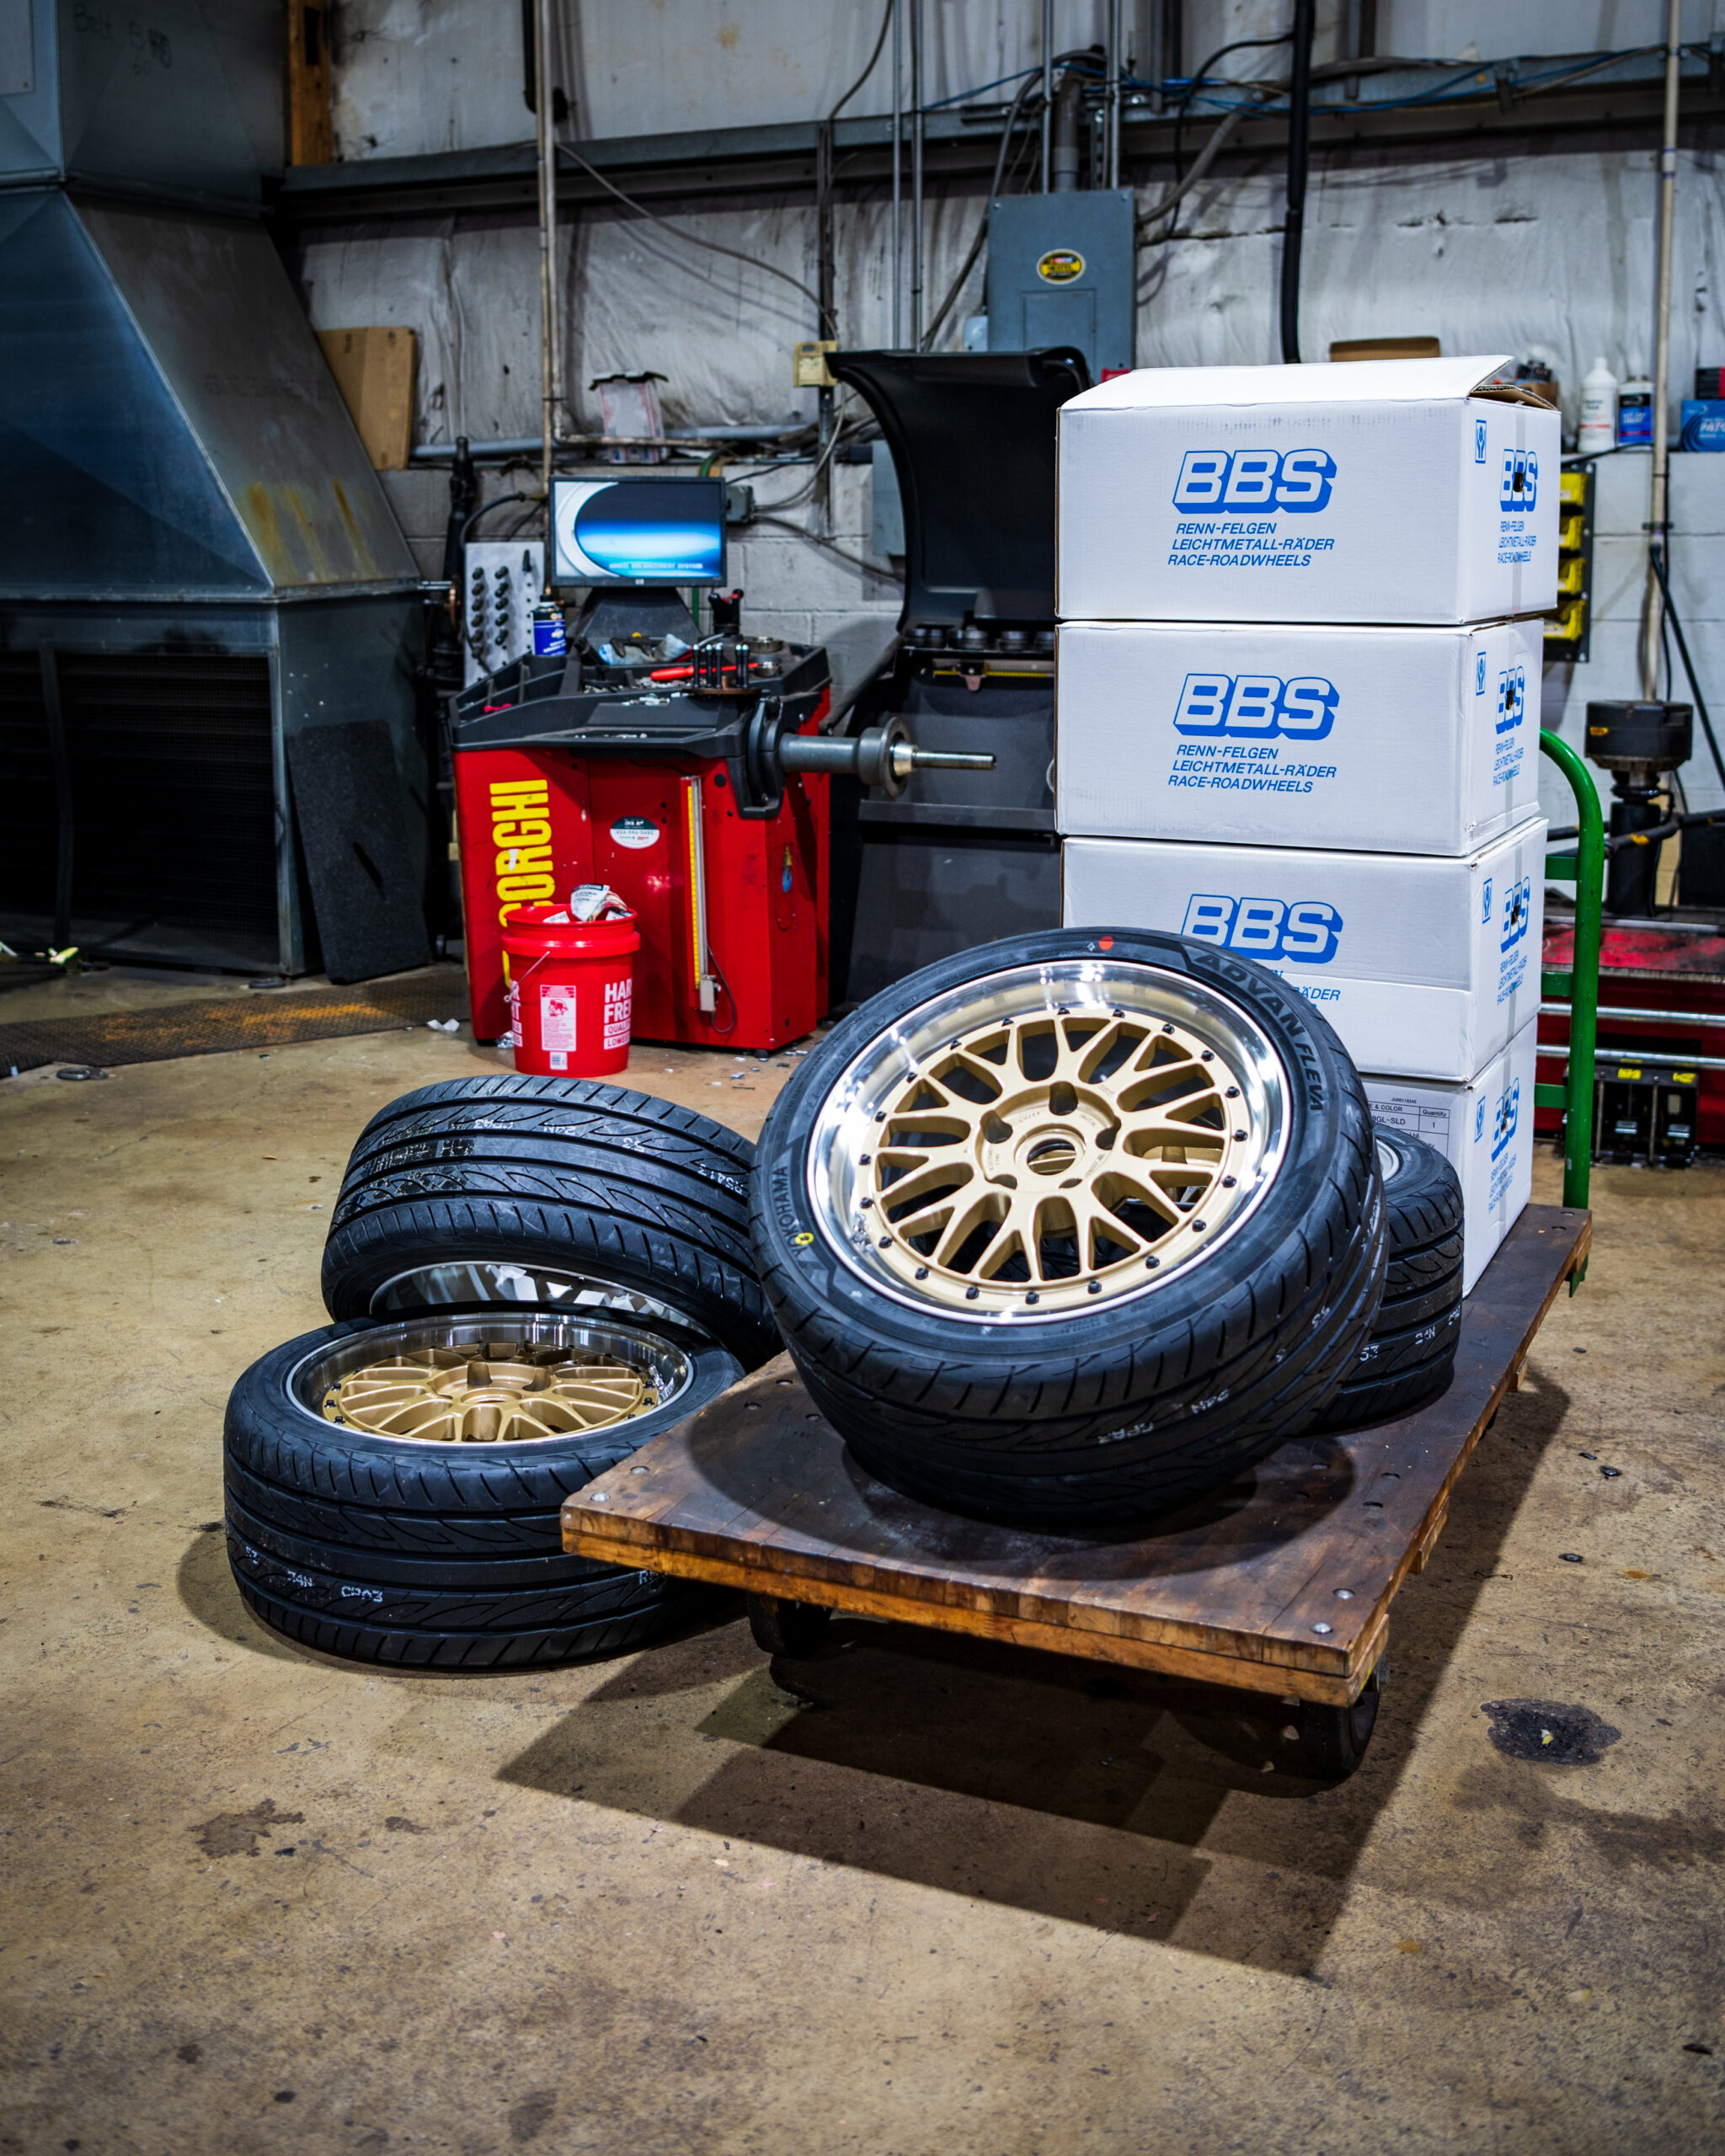
]]>The post Classic Fitment appeared first on BimmerLife.
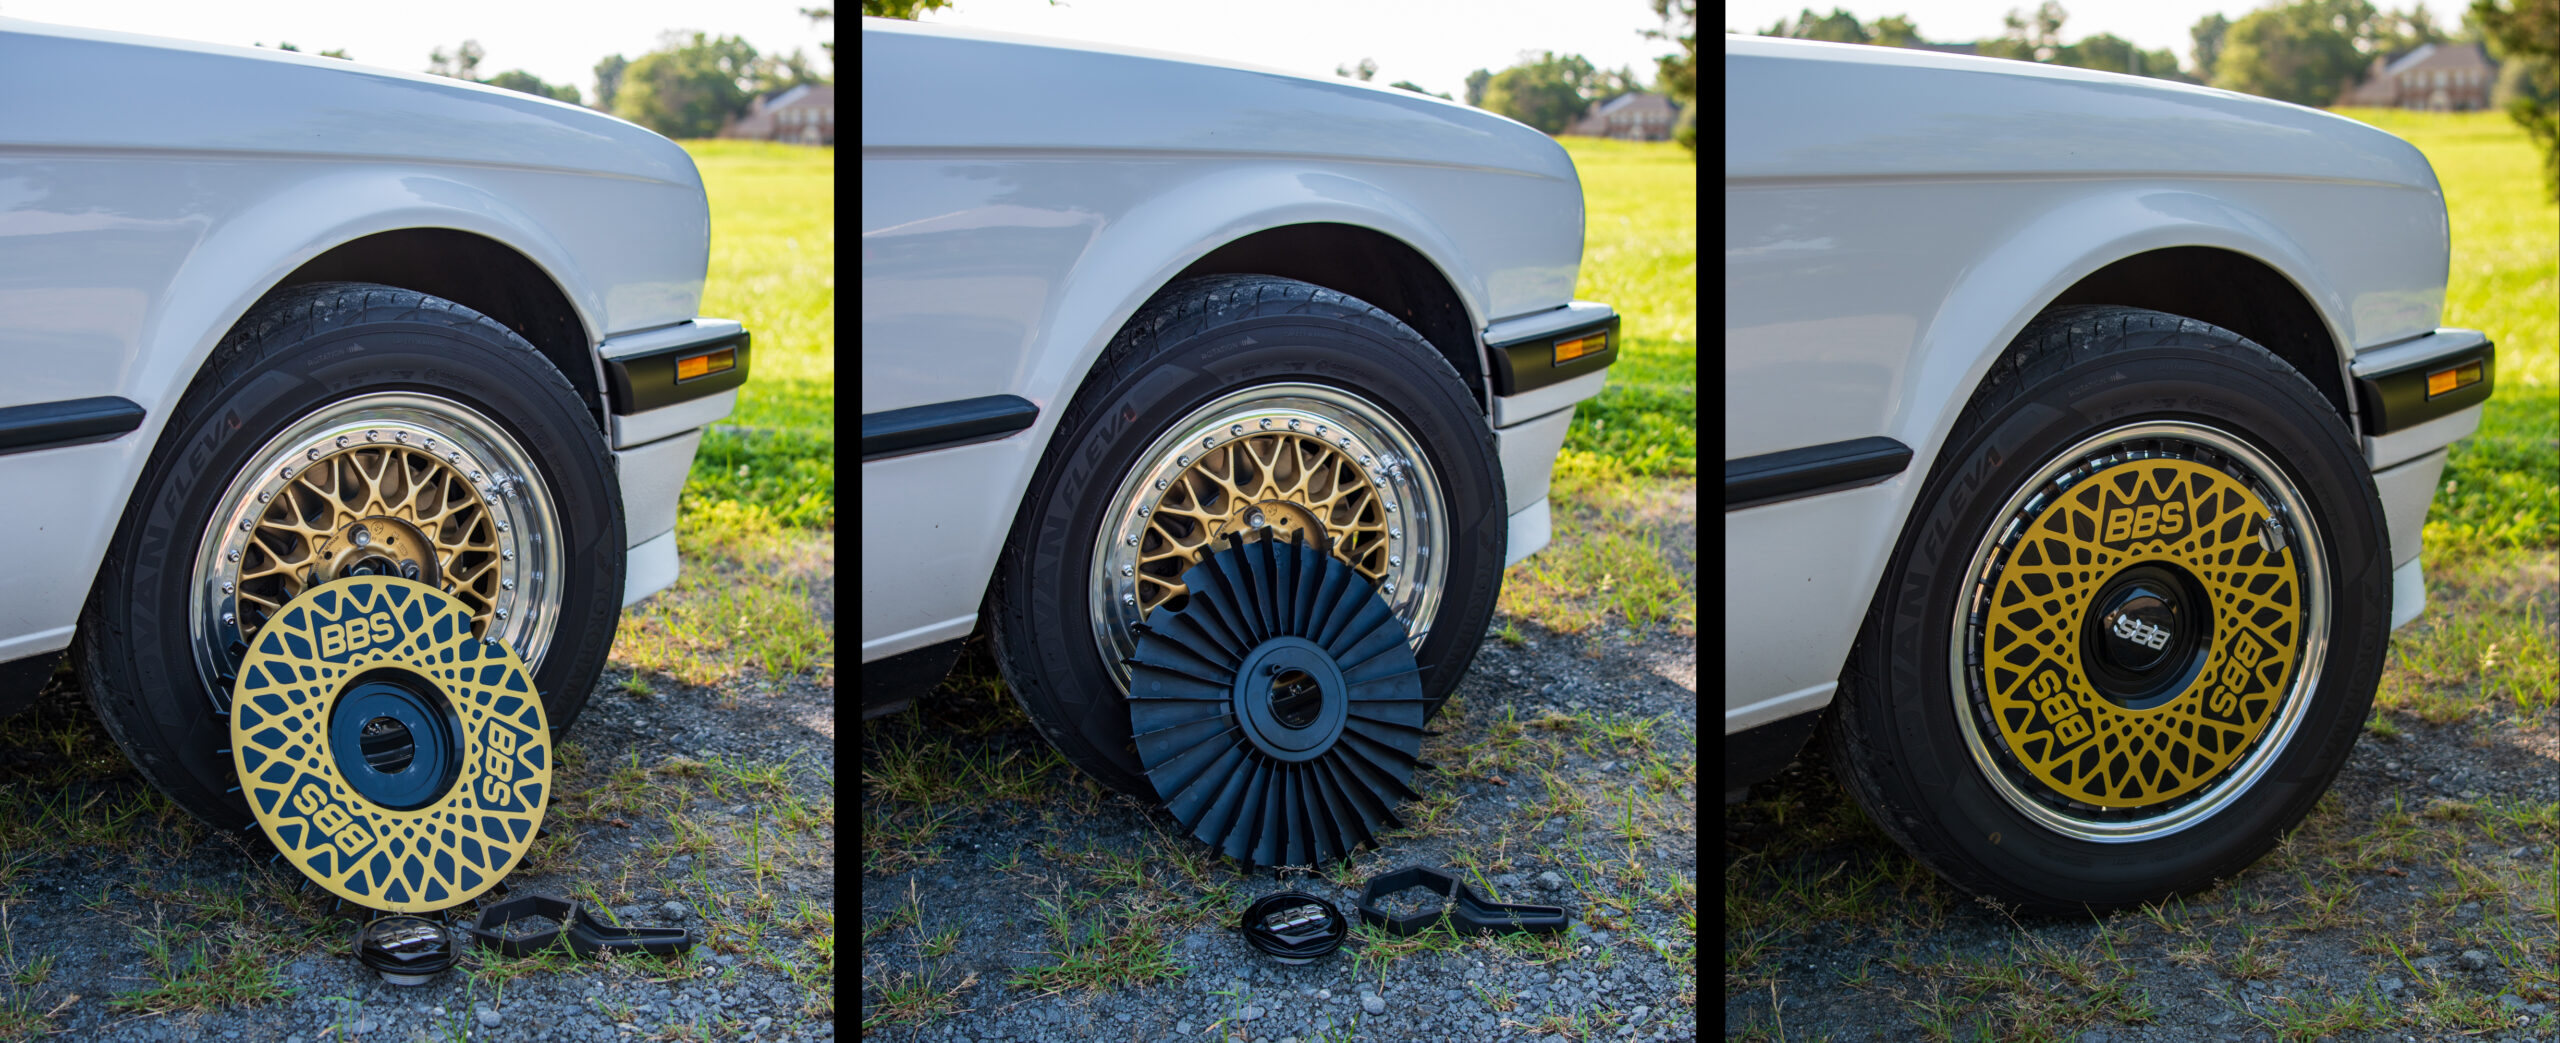
]]>Decades ago, I remember playing video games like Gran Turismo, where you could modify your in-game car and “upgrade” things like the wheels. Even then, without knowing much about wheel manufacturers, wheel construction, or fitment, I gravitated toward mesh-style multi-piece wheels. Naturally, this led to an obsession with BBS—especially motorsport-style BBS with gold centers and polished or machined lips.
How can you go wrong with gold centers and a polished (or diamond cut) lips?
BBS was founded in 1970 by two amateur racers, Heinrich Baumgartner and Klaus Brand, in Schiltach, Germany. (See what I did there? Now you know where the “BBS” name comes from.) In their first few years, BBS worked with driver Martin Braungardt to further develop the wheels on Braungardt’s Ford Capri race car. Later, BBS partnered with Mahle to create wheels for Braungardt’s 1973 3.0 CSL when he moved to the BMW race team. By 1978, BBS had its own production plant and in addition to their association with many successful racing campaigns, they provided optional “upgrade” wheels to manufacturers, namely BMW. Given their innovations and involvement in racing, the BBS motto of “Technology through Motorsports” makes total sense. Currently, BBS has a number of locations around the world, including BBS of America in Braselton, Georgia, BBS Japan, in Takaoka City, Japan, and an HQ, machining plant, and motorsports division located in Germany.
Some wheel upgrades are born in necessity, or perhaps that’s just an excuse we tell ourselves and our significant others to justify buying more car parts. After a few years of owning my 1991 318is (E30) on stock 14×6.5 basketweaves (factory BBS wheels), I wanted to change things up. Finding correctly sized 14″ tires was becoming increasingly difficult, so it only made sense to look for something in the 15″ or 16″ variety. At the time, my friend Lewis Zehmer educated me on multi-piece BBS RS wheels with proper E30 fitment, bolt pattern, hub bore, and offset.

Zehmer’s 325is taking home top honors at the National Capital Chapter Deutsche Marque Concours d’Elegance.
BBS’s RS model was launched in 1983 and is a prime example of technology developed for the race track becoming available for the street. The RS’s forged aluminum three-piece design, consisting of a “lip” and “barrel” sandwiching a “face”, reduces unsprung weight, increases strength, and allows for plentiful fitment customization by exchanging the various components. The BBS RS003s on Zehmer’s 325is are nothing short of spectacular, and every time I see them the scene from Wayne’s World replayed in my head with Michael Myers saying, “It will be mine. Oh, yes. It will be mine.”
Thus began a multi-year search for a budget-friendly set of BBS RS001s (4×100, 57.1 center bore, 15×7 ET25) or RS003s (4×100, 57.1 center bore, 16×7 ET25). Combing through forums and online marketplaces almost daily, it got to the point where I had seen so many BBS RS wheels that I could catch a glimpse of one and know the exact model and whether it was a replica or a genuine article. After a few full-day road trips to look at “cheap” sets, which I determined would cost thousands more to restore, I was nearly going to give up on my search. That was until I came across an ad on Facebook marketplace that simply said “BBS wheels”. There was one photo that didn’t even capture the entire wheel, but I was sure that part of the photo included an E30 fender. Could it be?
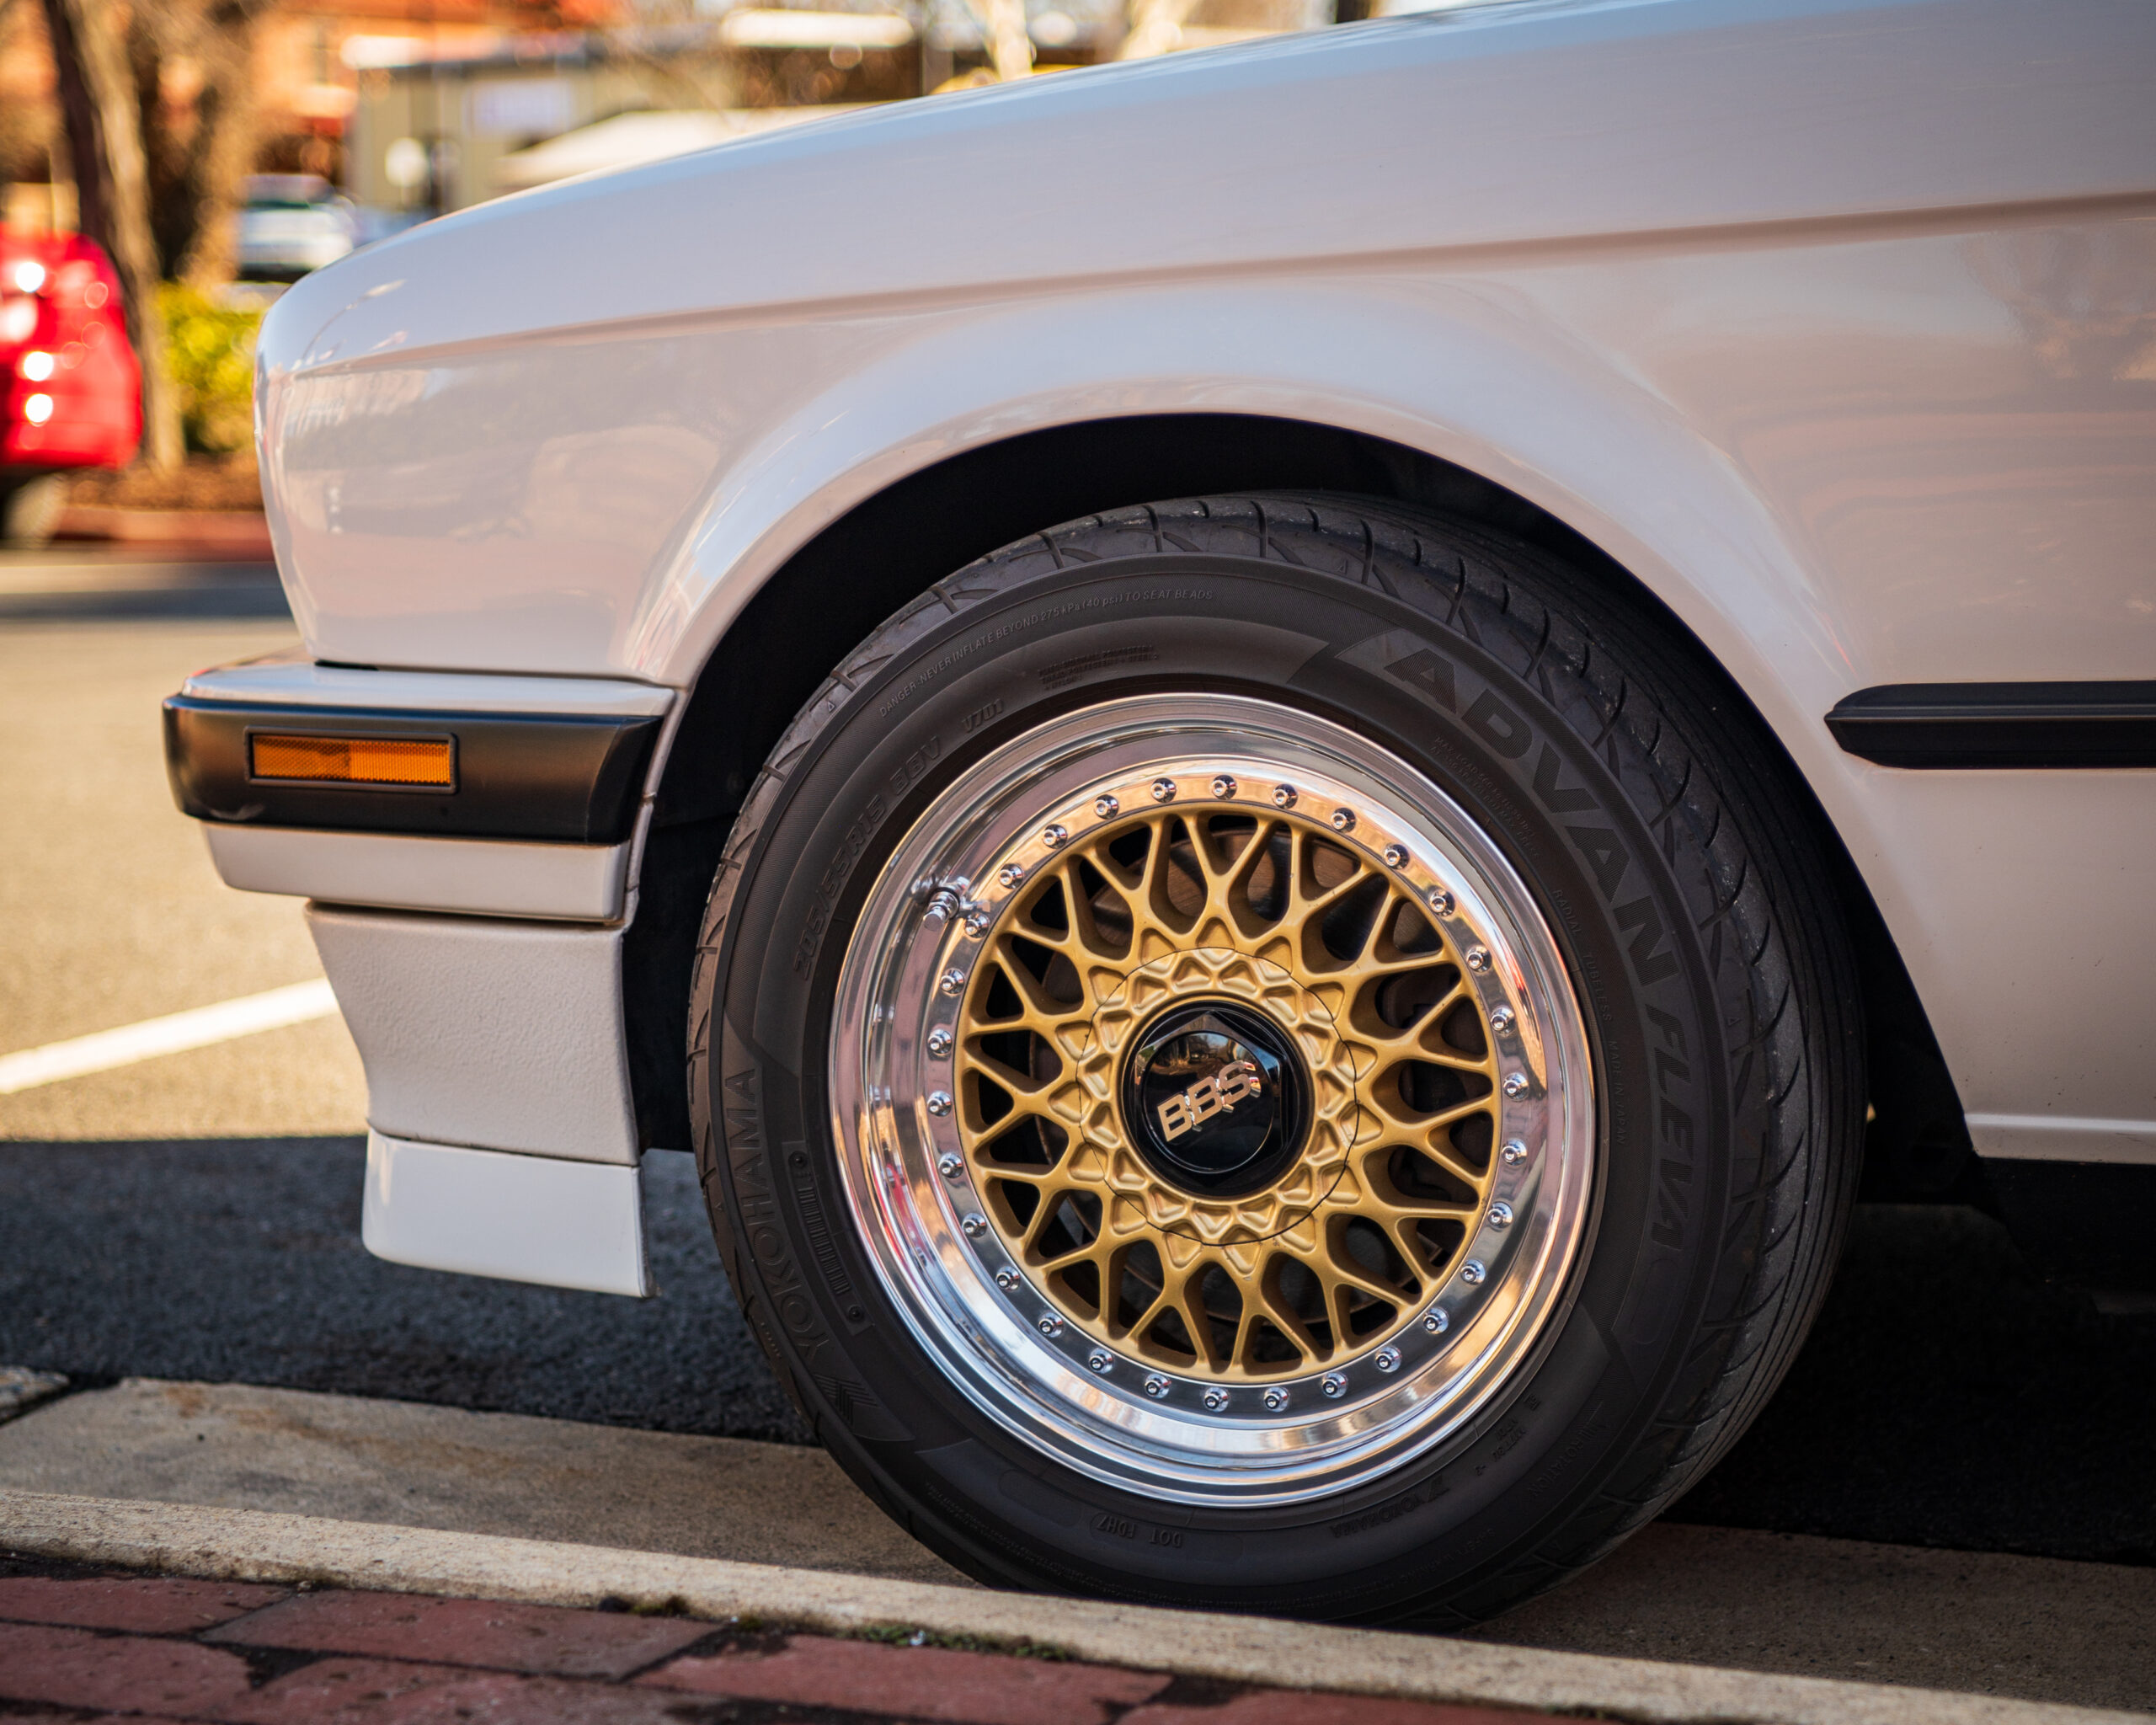
After meeting with the seller and chatting about E30s for a bit, we agreed on a price, and I loaded them into my trunk. New tires were in order, as were some Ehrlich Wheel Works 1/3rd-height aluminum hexes (in both polished and black powder-coated varieties), replacement BBS caps, and a couple of replacement gold waffles. These three-piece wheels fill out the wheel wells nicely while weighing two pounds lighter per corner (with tires) than the stock 14s. Just for fun, I bought a set of reproduction BBS turbofans (scanned from a set of originals) for a little extra style. Six years later, I still stare at them every chance I get and hand polish the lips on a regular basis—it’s automotive therapy.
BBS turbofans are in fact the best hubcaps.
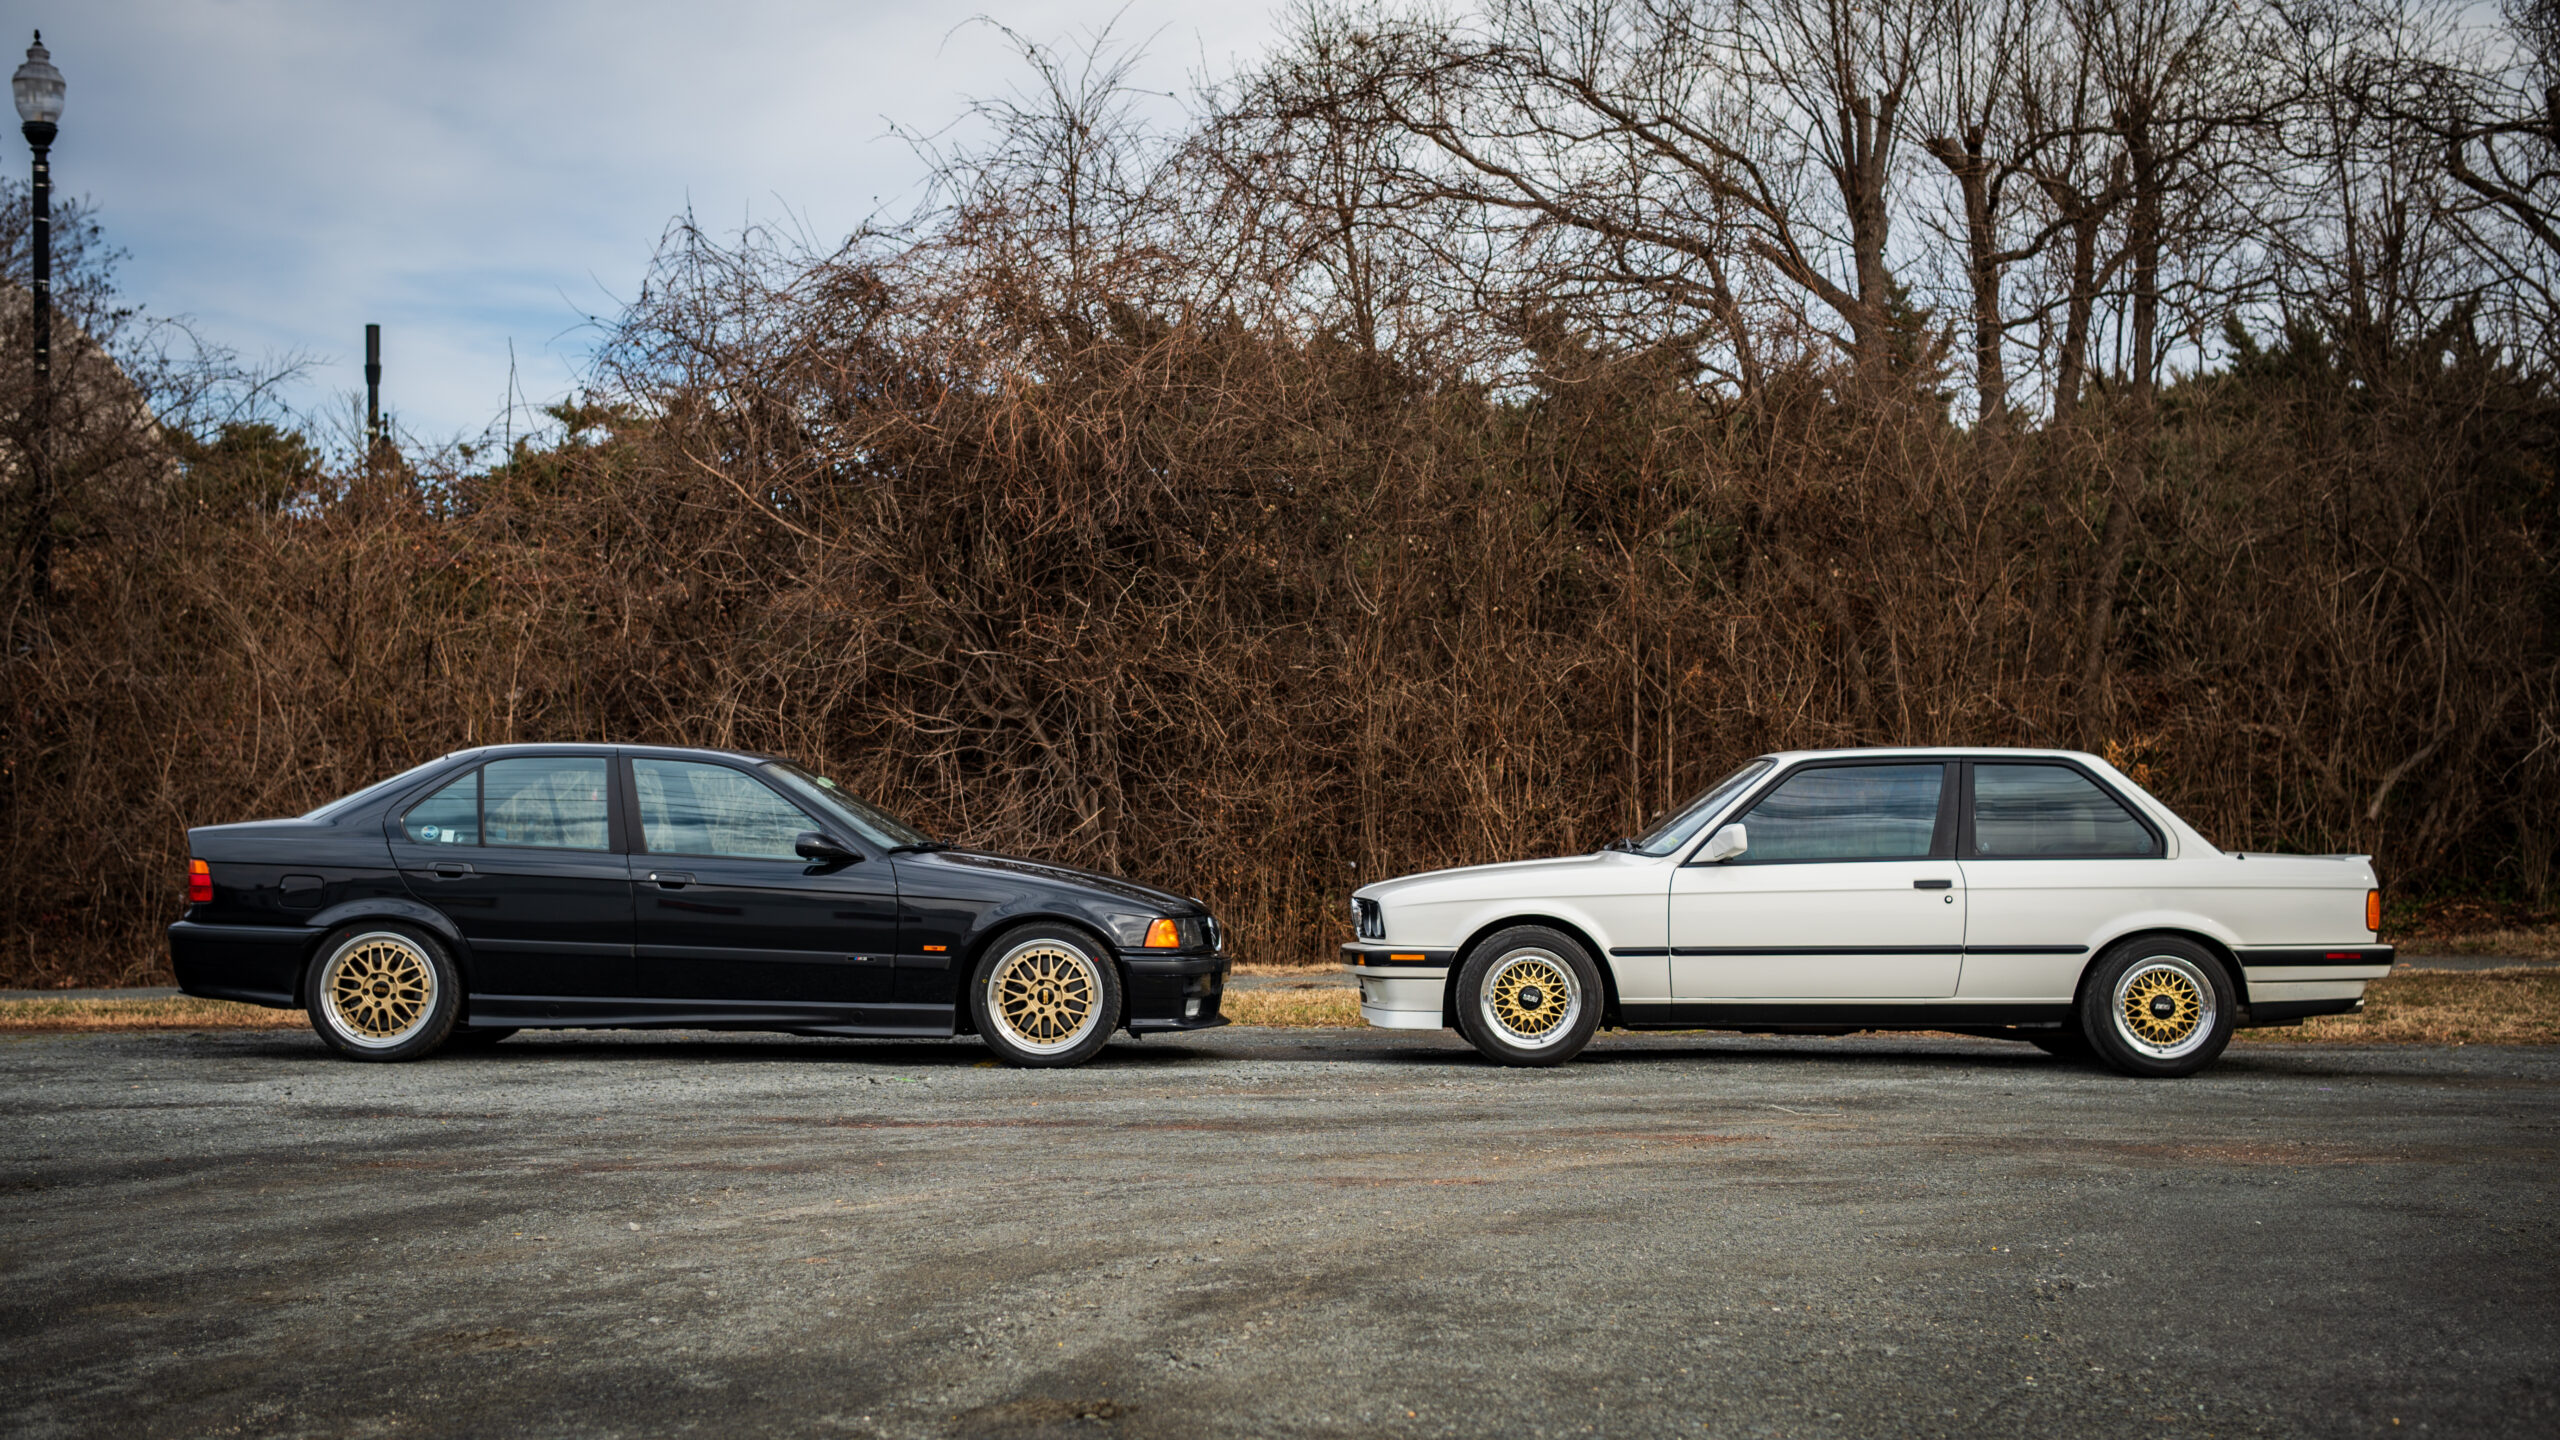
When it was time to replace the tires on my 1998 M3 (E36), I decided to go a step further and also change the wheels. This time with a direct throwback to my decades-old video-game days, the BBS LM. Oh, and wouldn’t it be fun if they had gold faces and a machined lip so they’d be all matchy-matchy with my E30? Yes. Yes, it would.
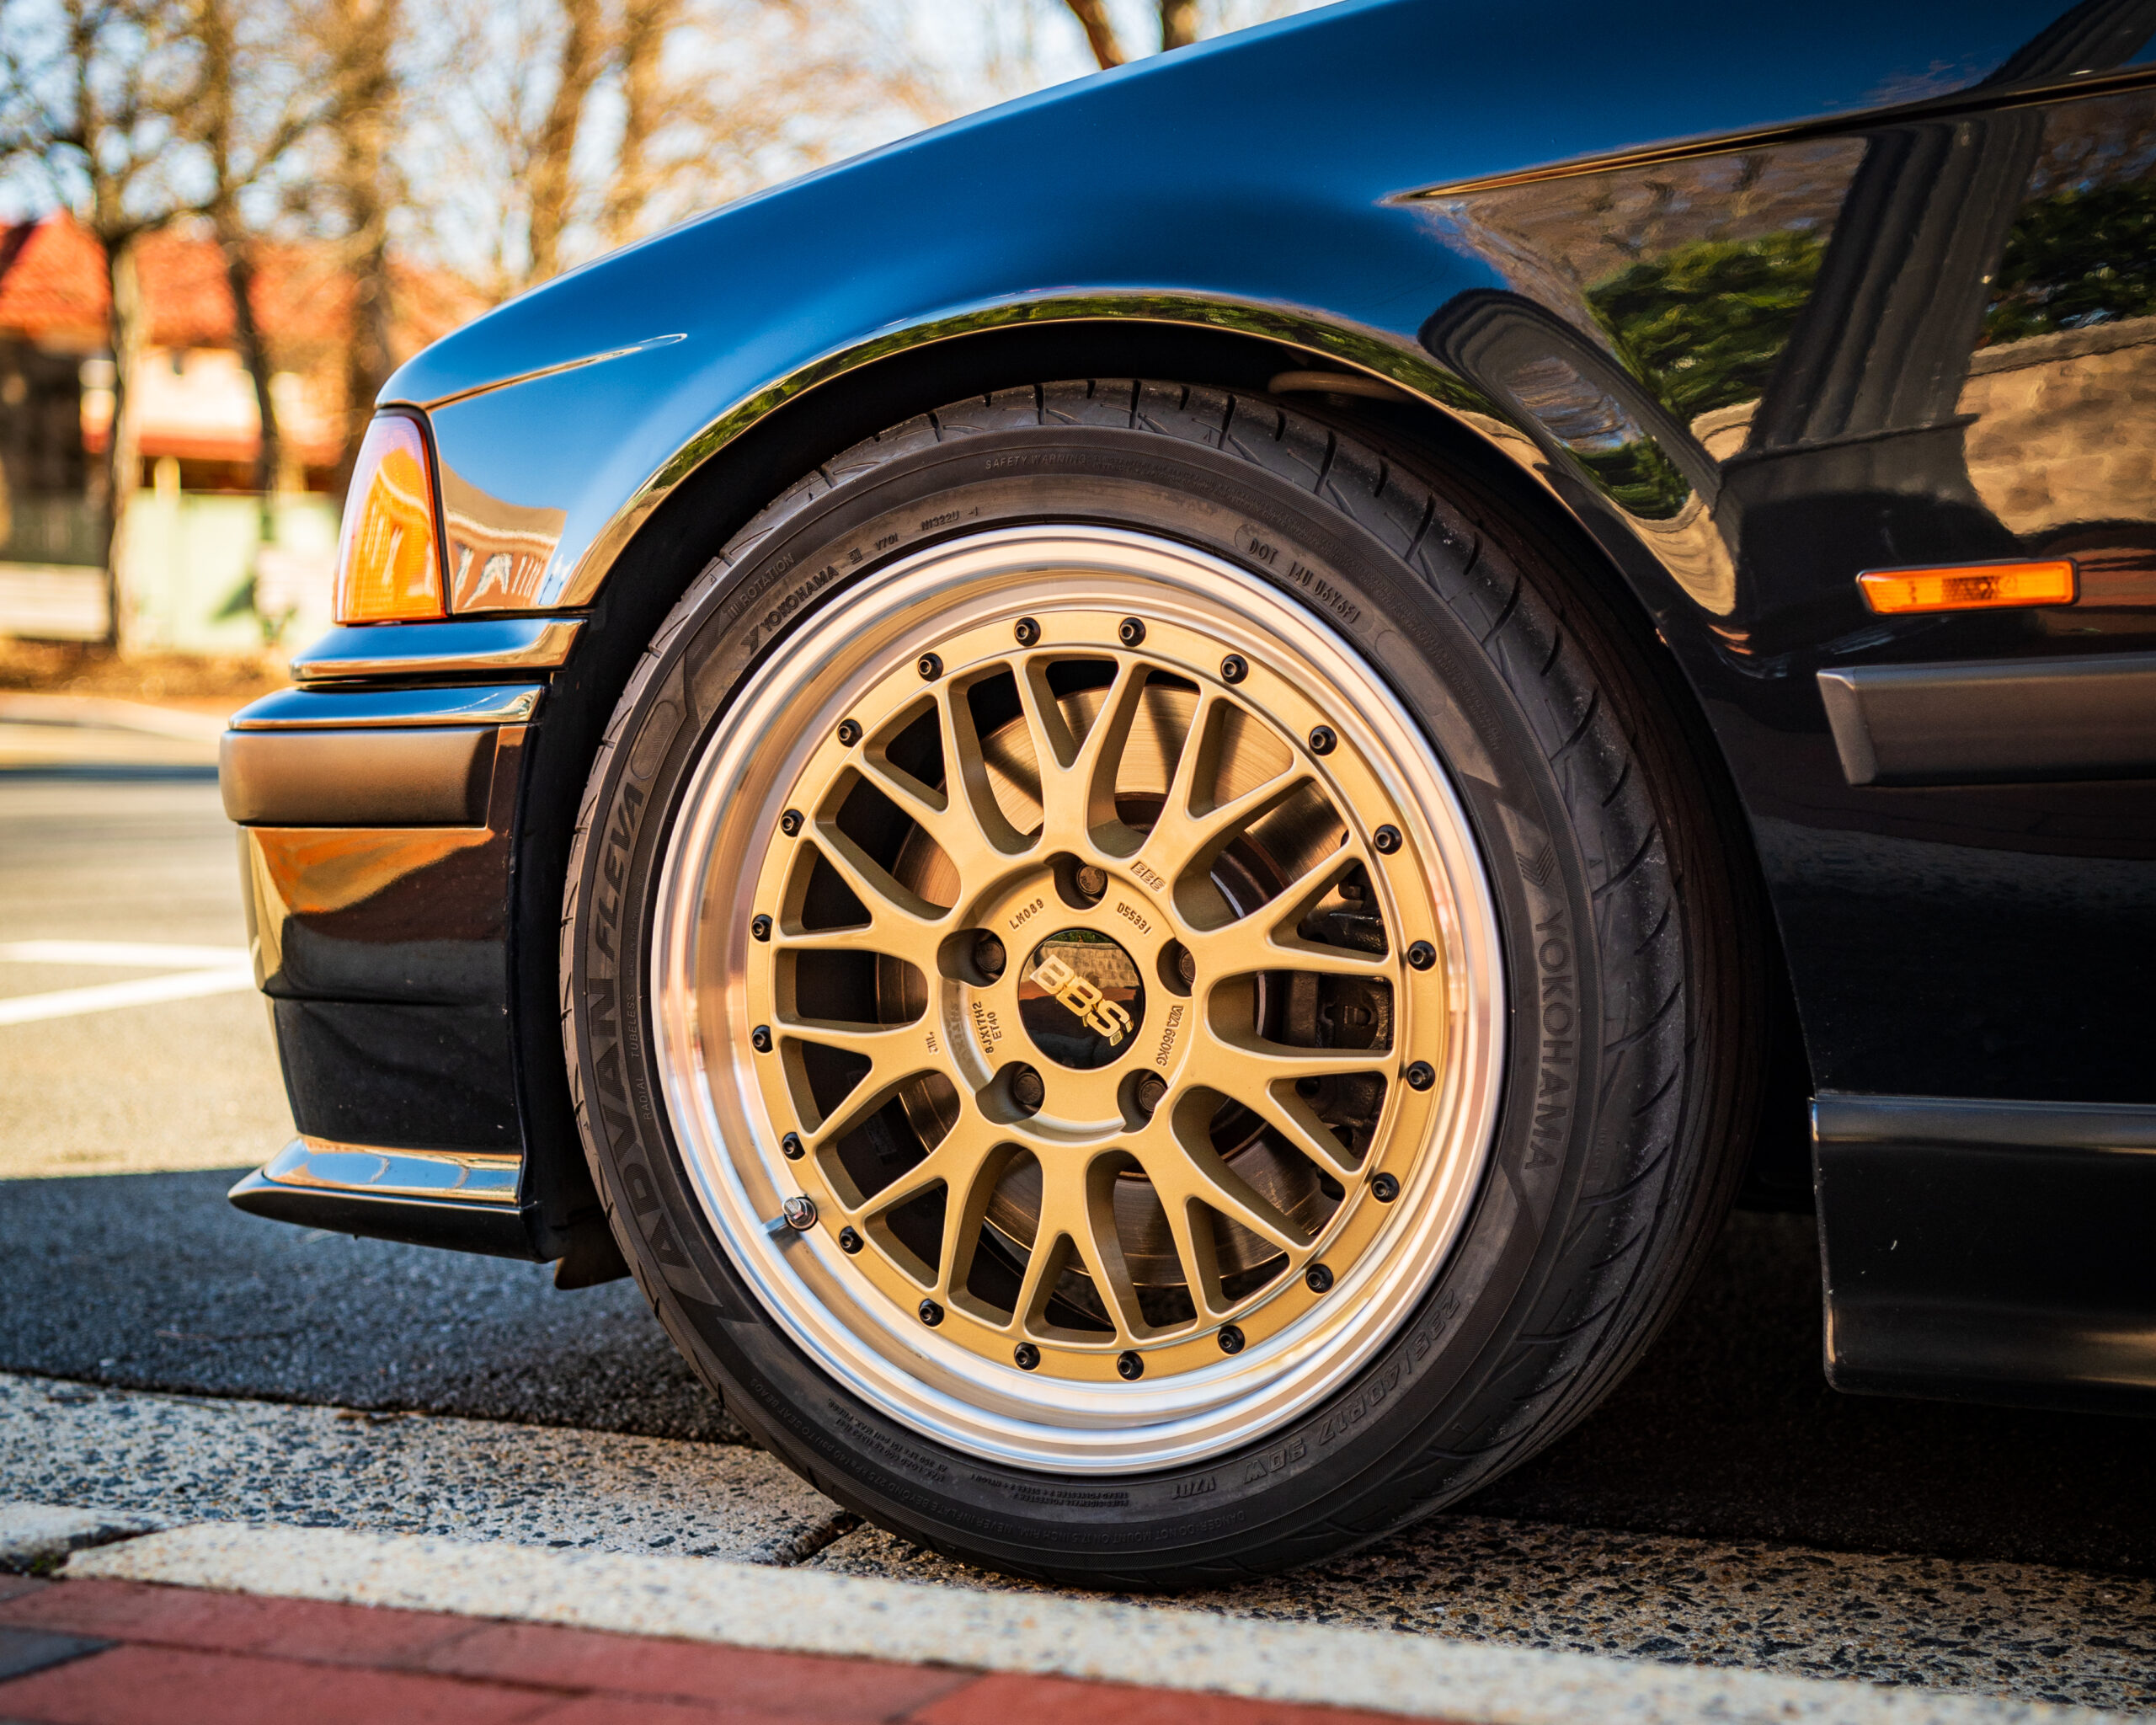
Just over a decade after the RS was released, the LM was introduced in 1994. It consisted of a forged aluminum two-piece design, giving a nod to the Le Mans race wheels of the era. Similar to the RSes, the LMs come in a variety of diameters, widths, offsets, bolt patterns, center bores, and colors. After weeks of research, using online “fitment” calculators, and reaching out to experts in the industry for advice, I settled on the BBS LM089—an LM model produced by BBS Japan with nearly perfect specs for the E36: 5×120 bolt pattern, 17×8, ET40. Gold faces, machined lips, black bolts. Yum.
Instead of potentially spending years trying to find a decent used set like I did for my E30, I opted to buy new. Enter Henry Vo of Supreme Power in Fullerton, California. Henry had the LM089s in stock and shipped them out immediately, making this a no-hassle and positive purchase experience. The LMs and new tires arrived just before Christmas. I popped over to a trusted shop, Mach V Motorsports, in Sterling, Virginia, to have the tires mounted. With great anticipation leading up to this moment, I installed them on my E36 as soon as I got home.

Sorry, kids. No more room under the tree.

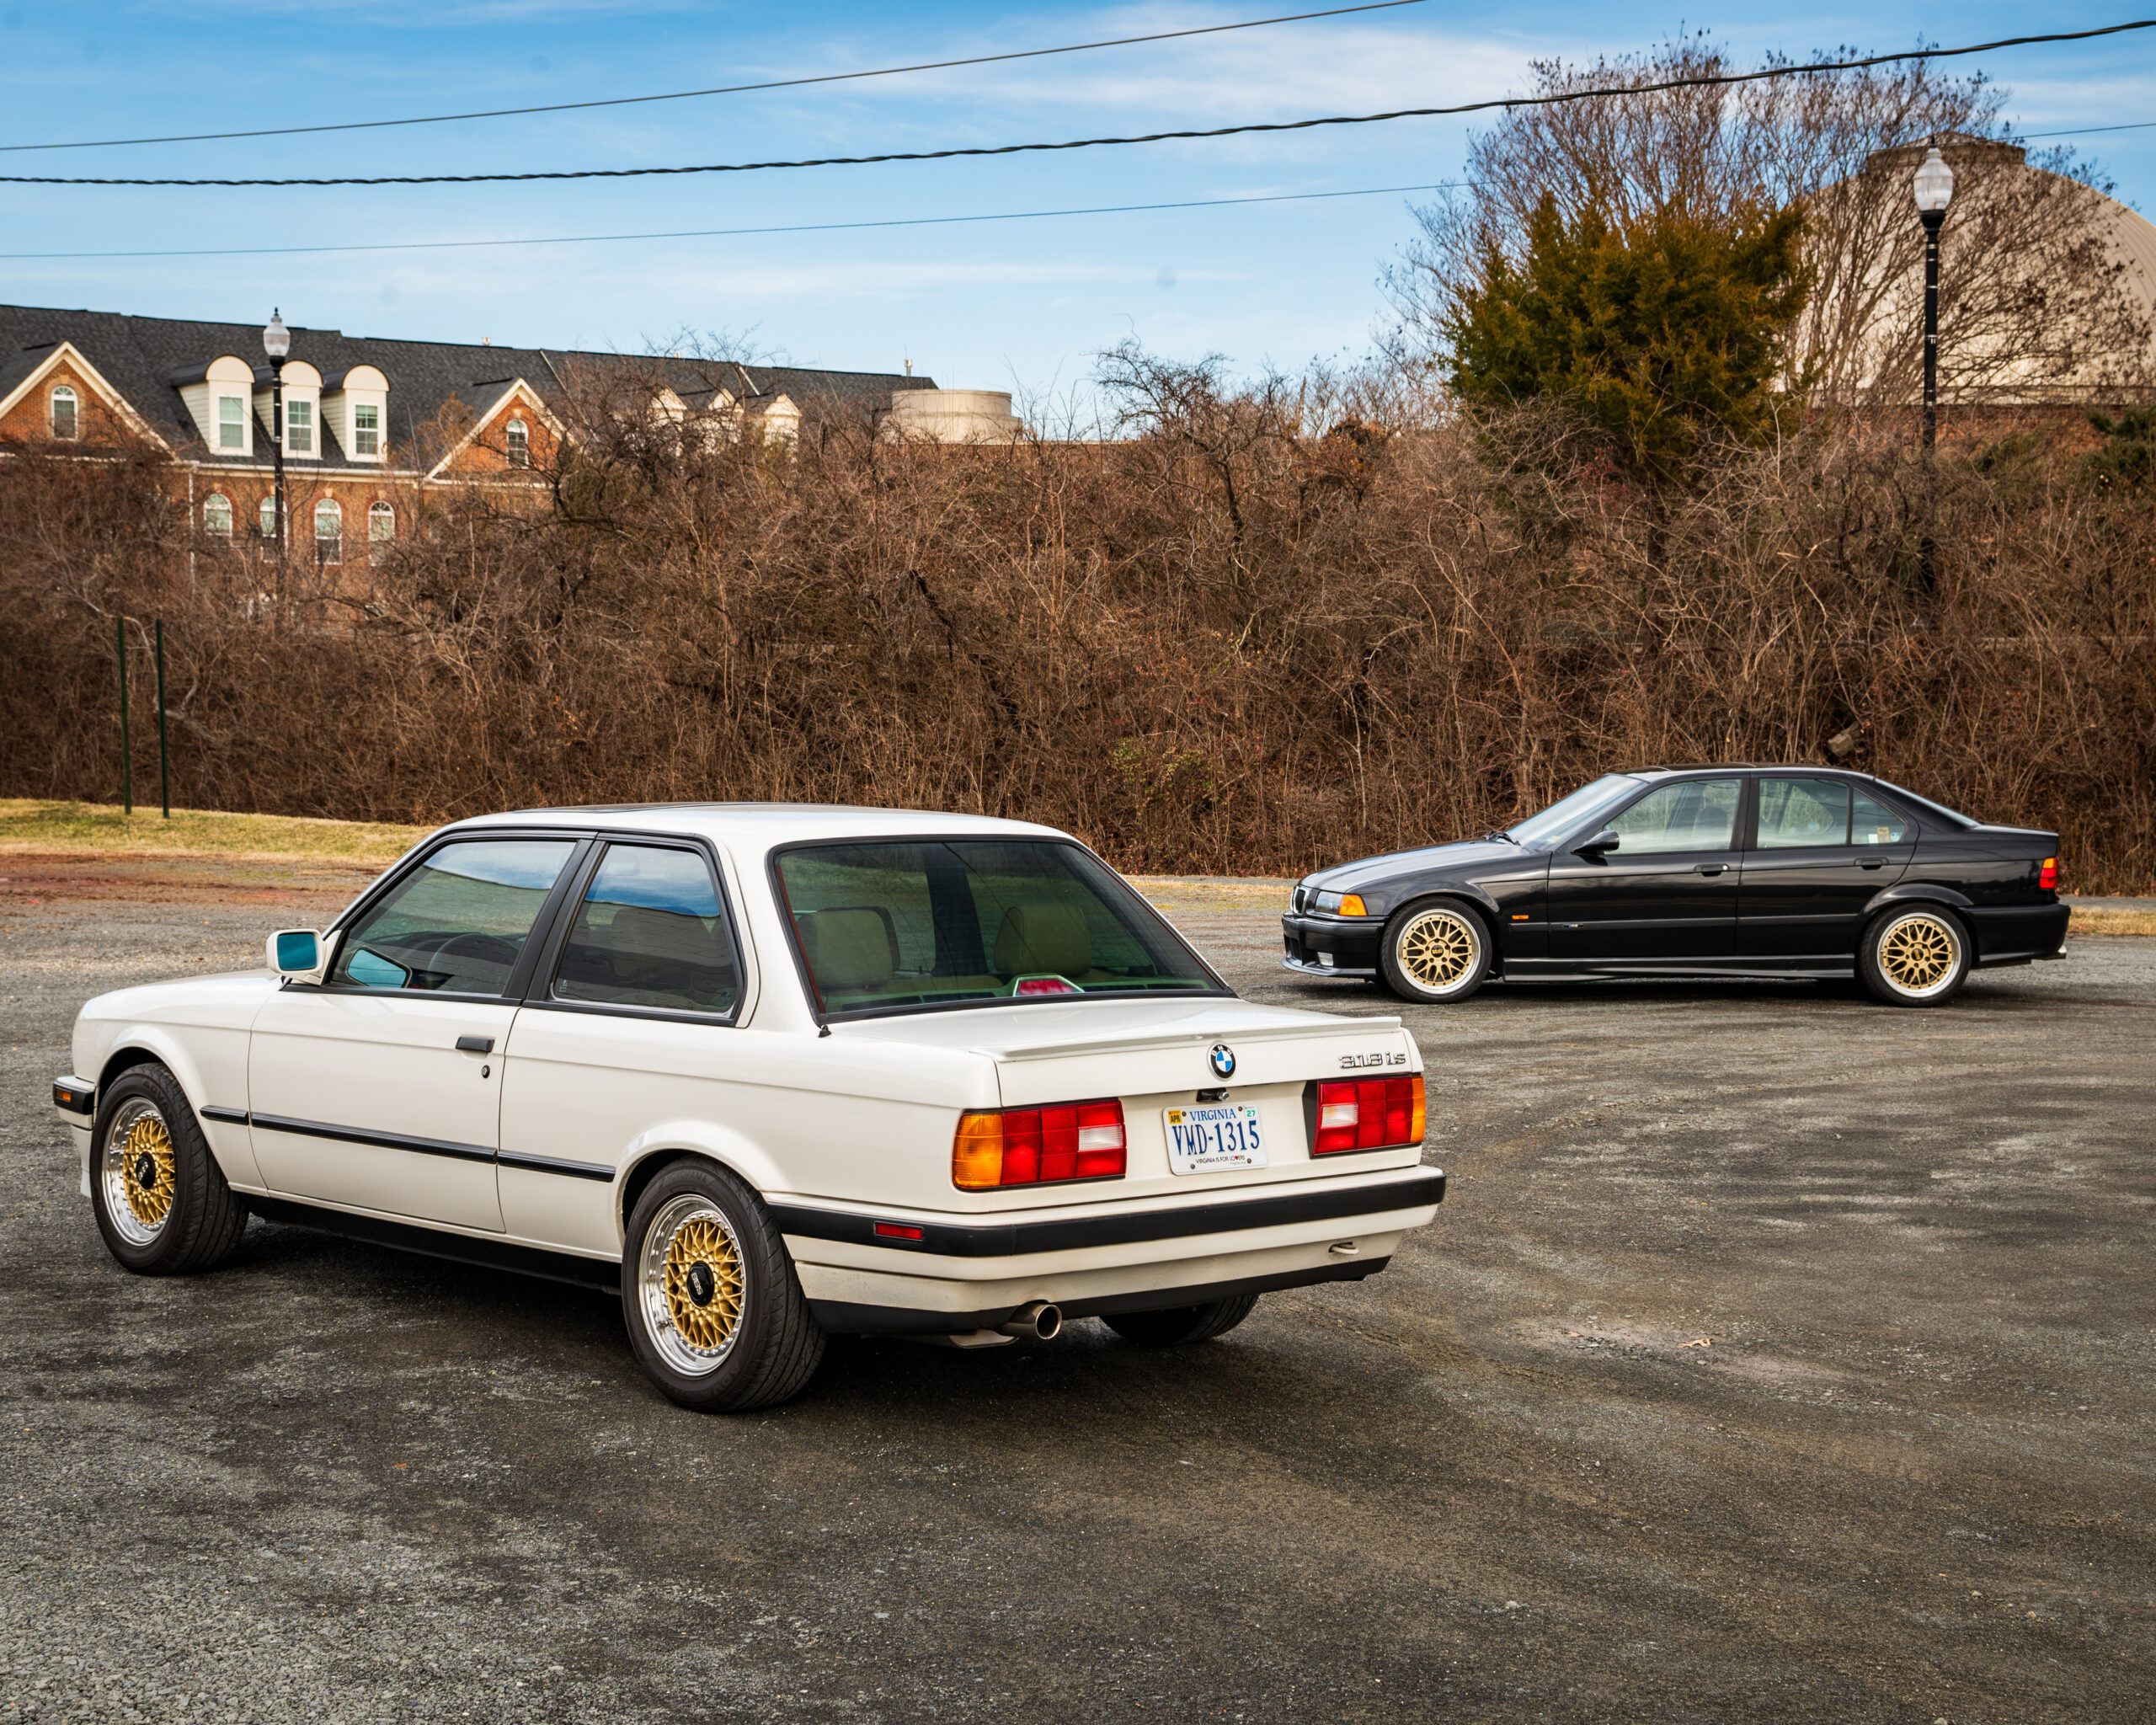
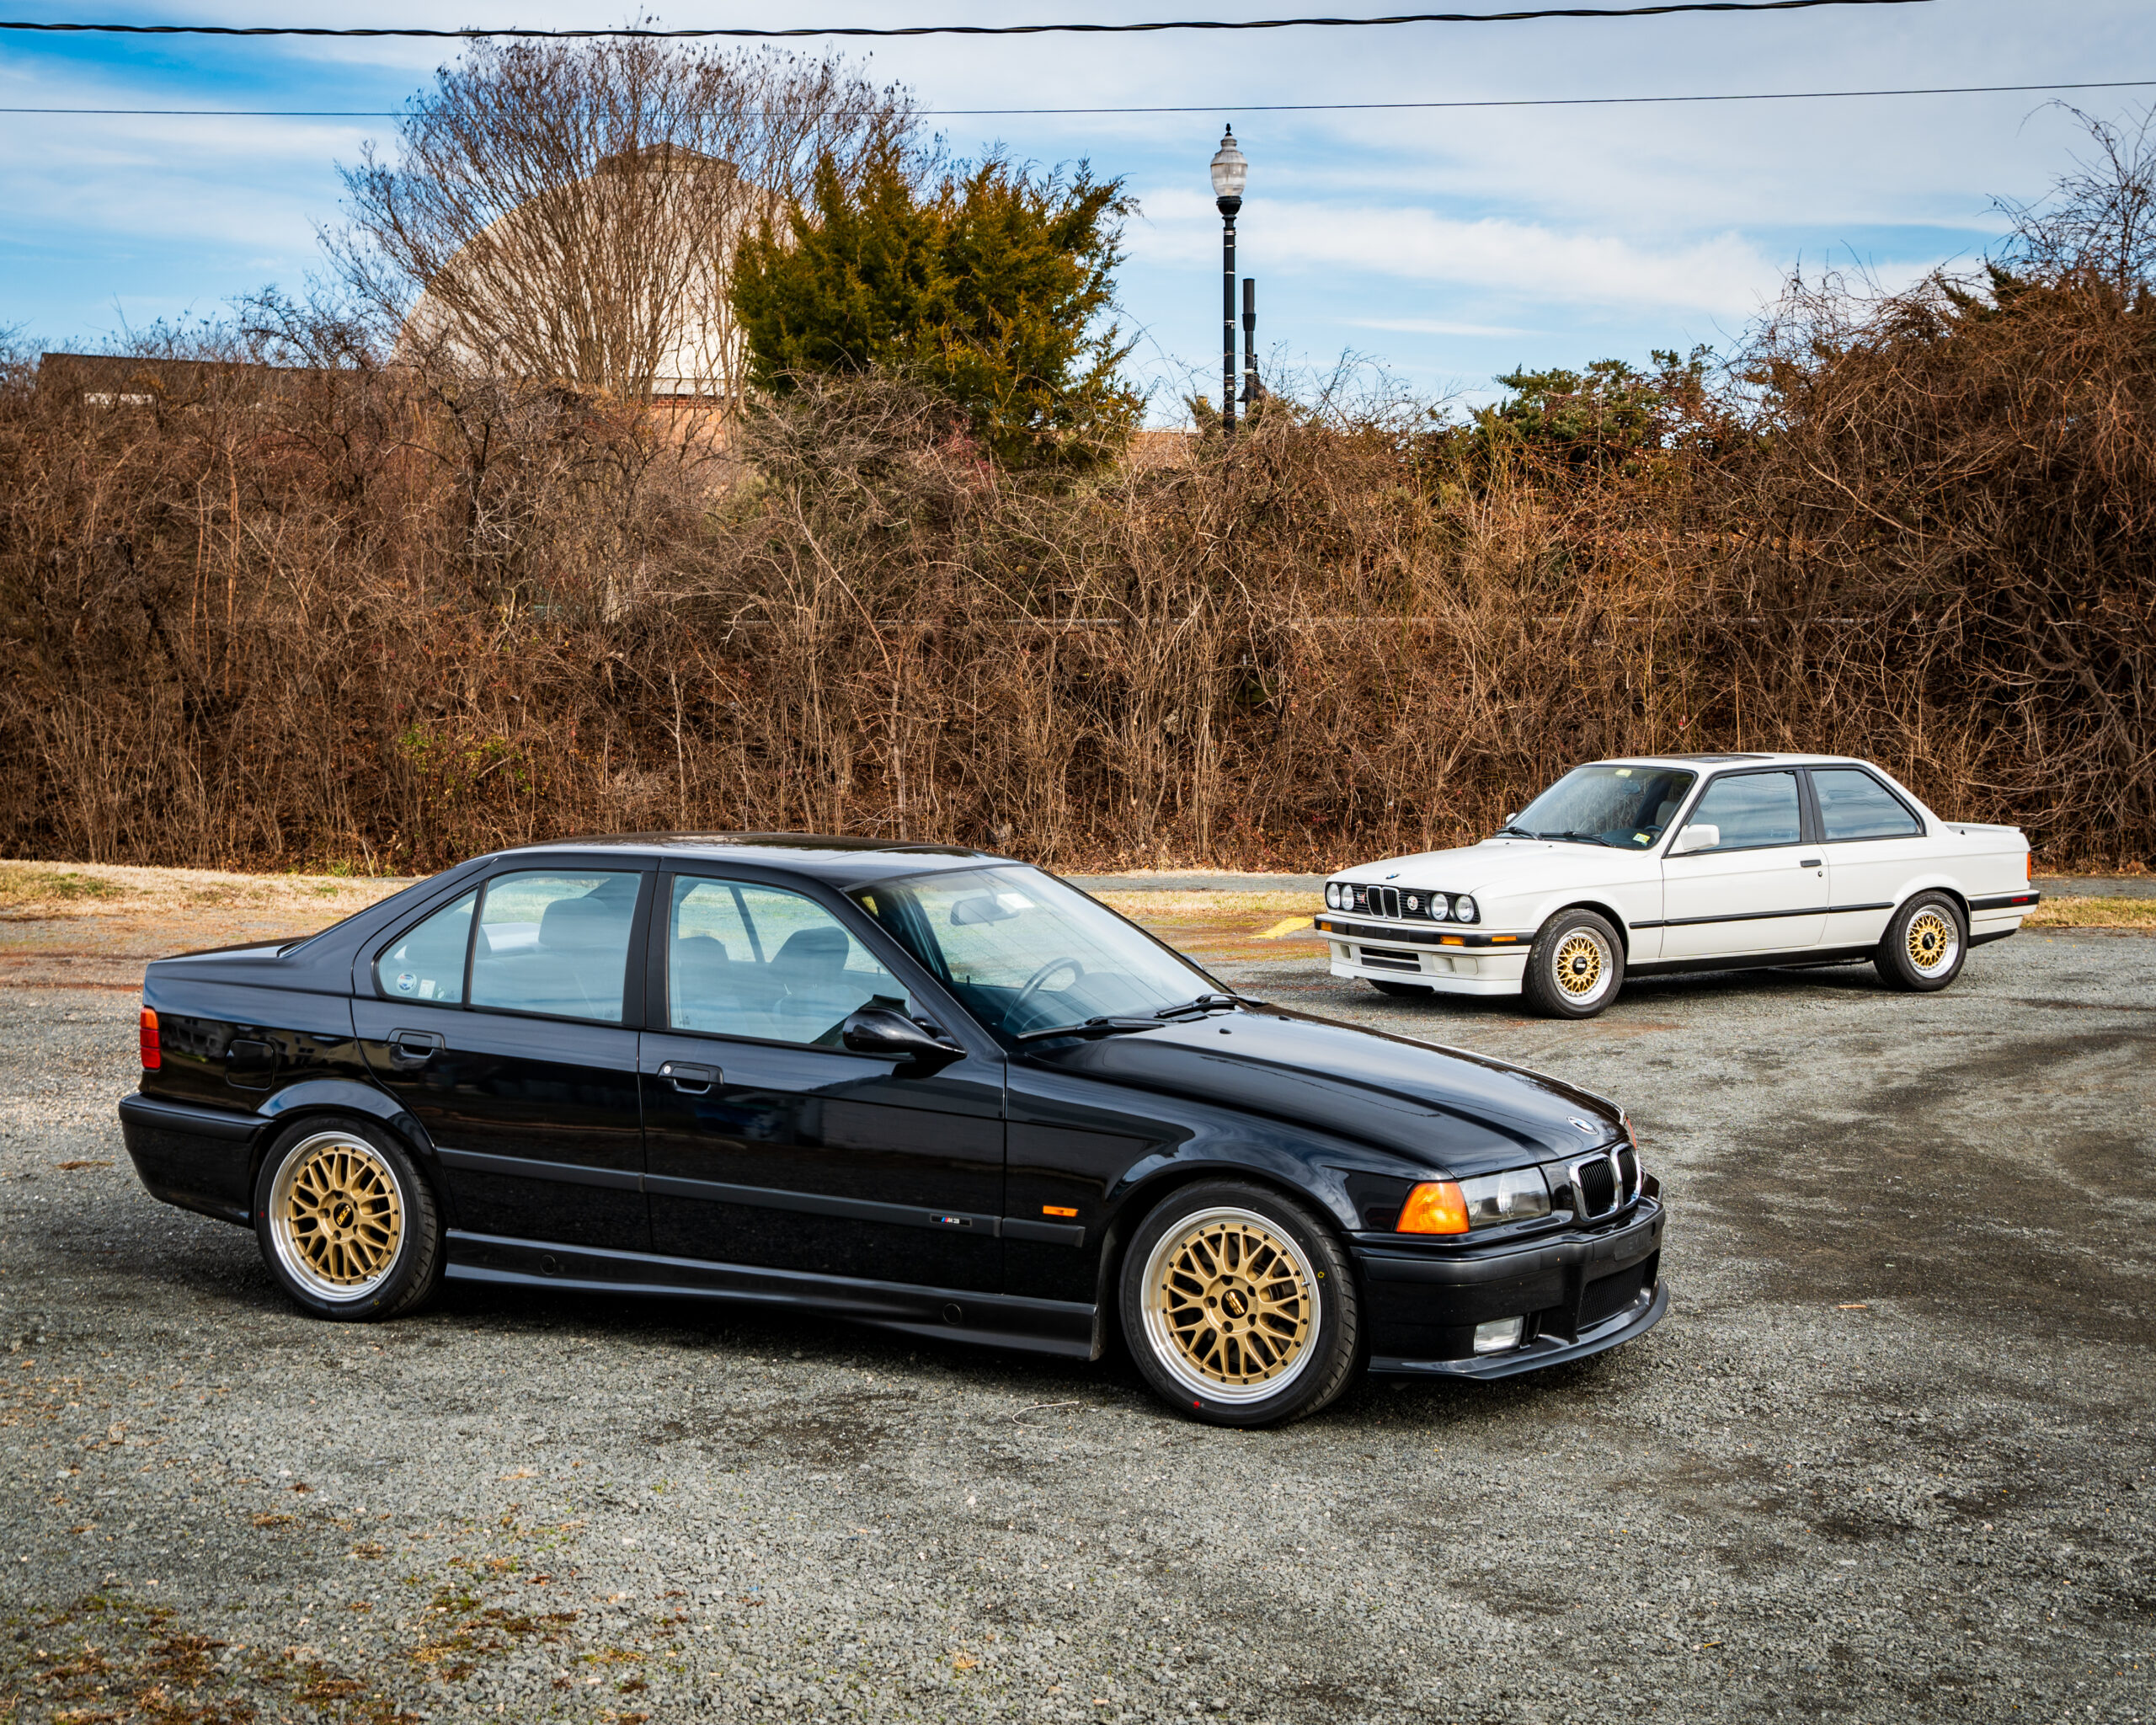
Fitment was just as expected. The inner wheel barrels and tires had plenty of up-front clearance from the TC Kline SA coilover perches, and there was just the right amount of fender clearance—both up front and out back—as well. All of this without using spacers. Naturally, a lazy mid-winter driveway shoot with both the E30 and E36 was completely necessary.
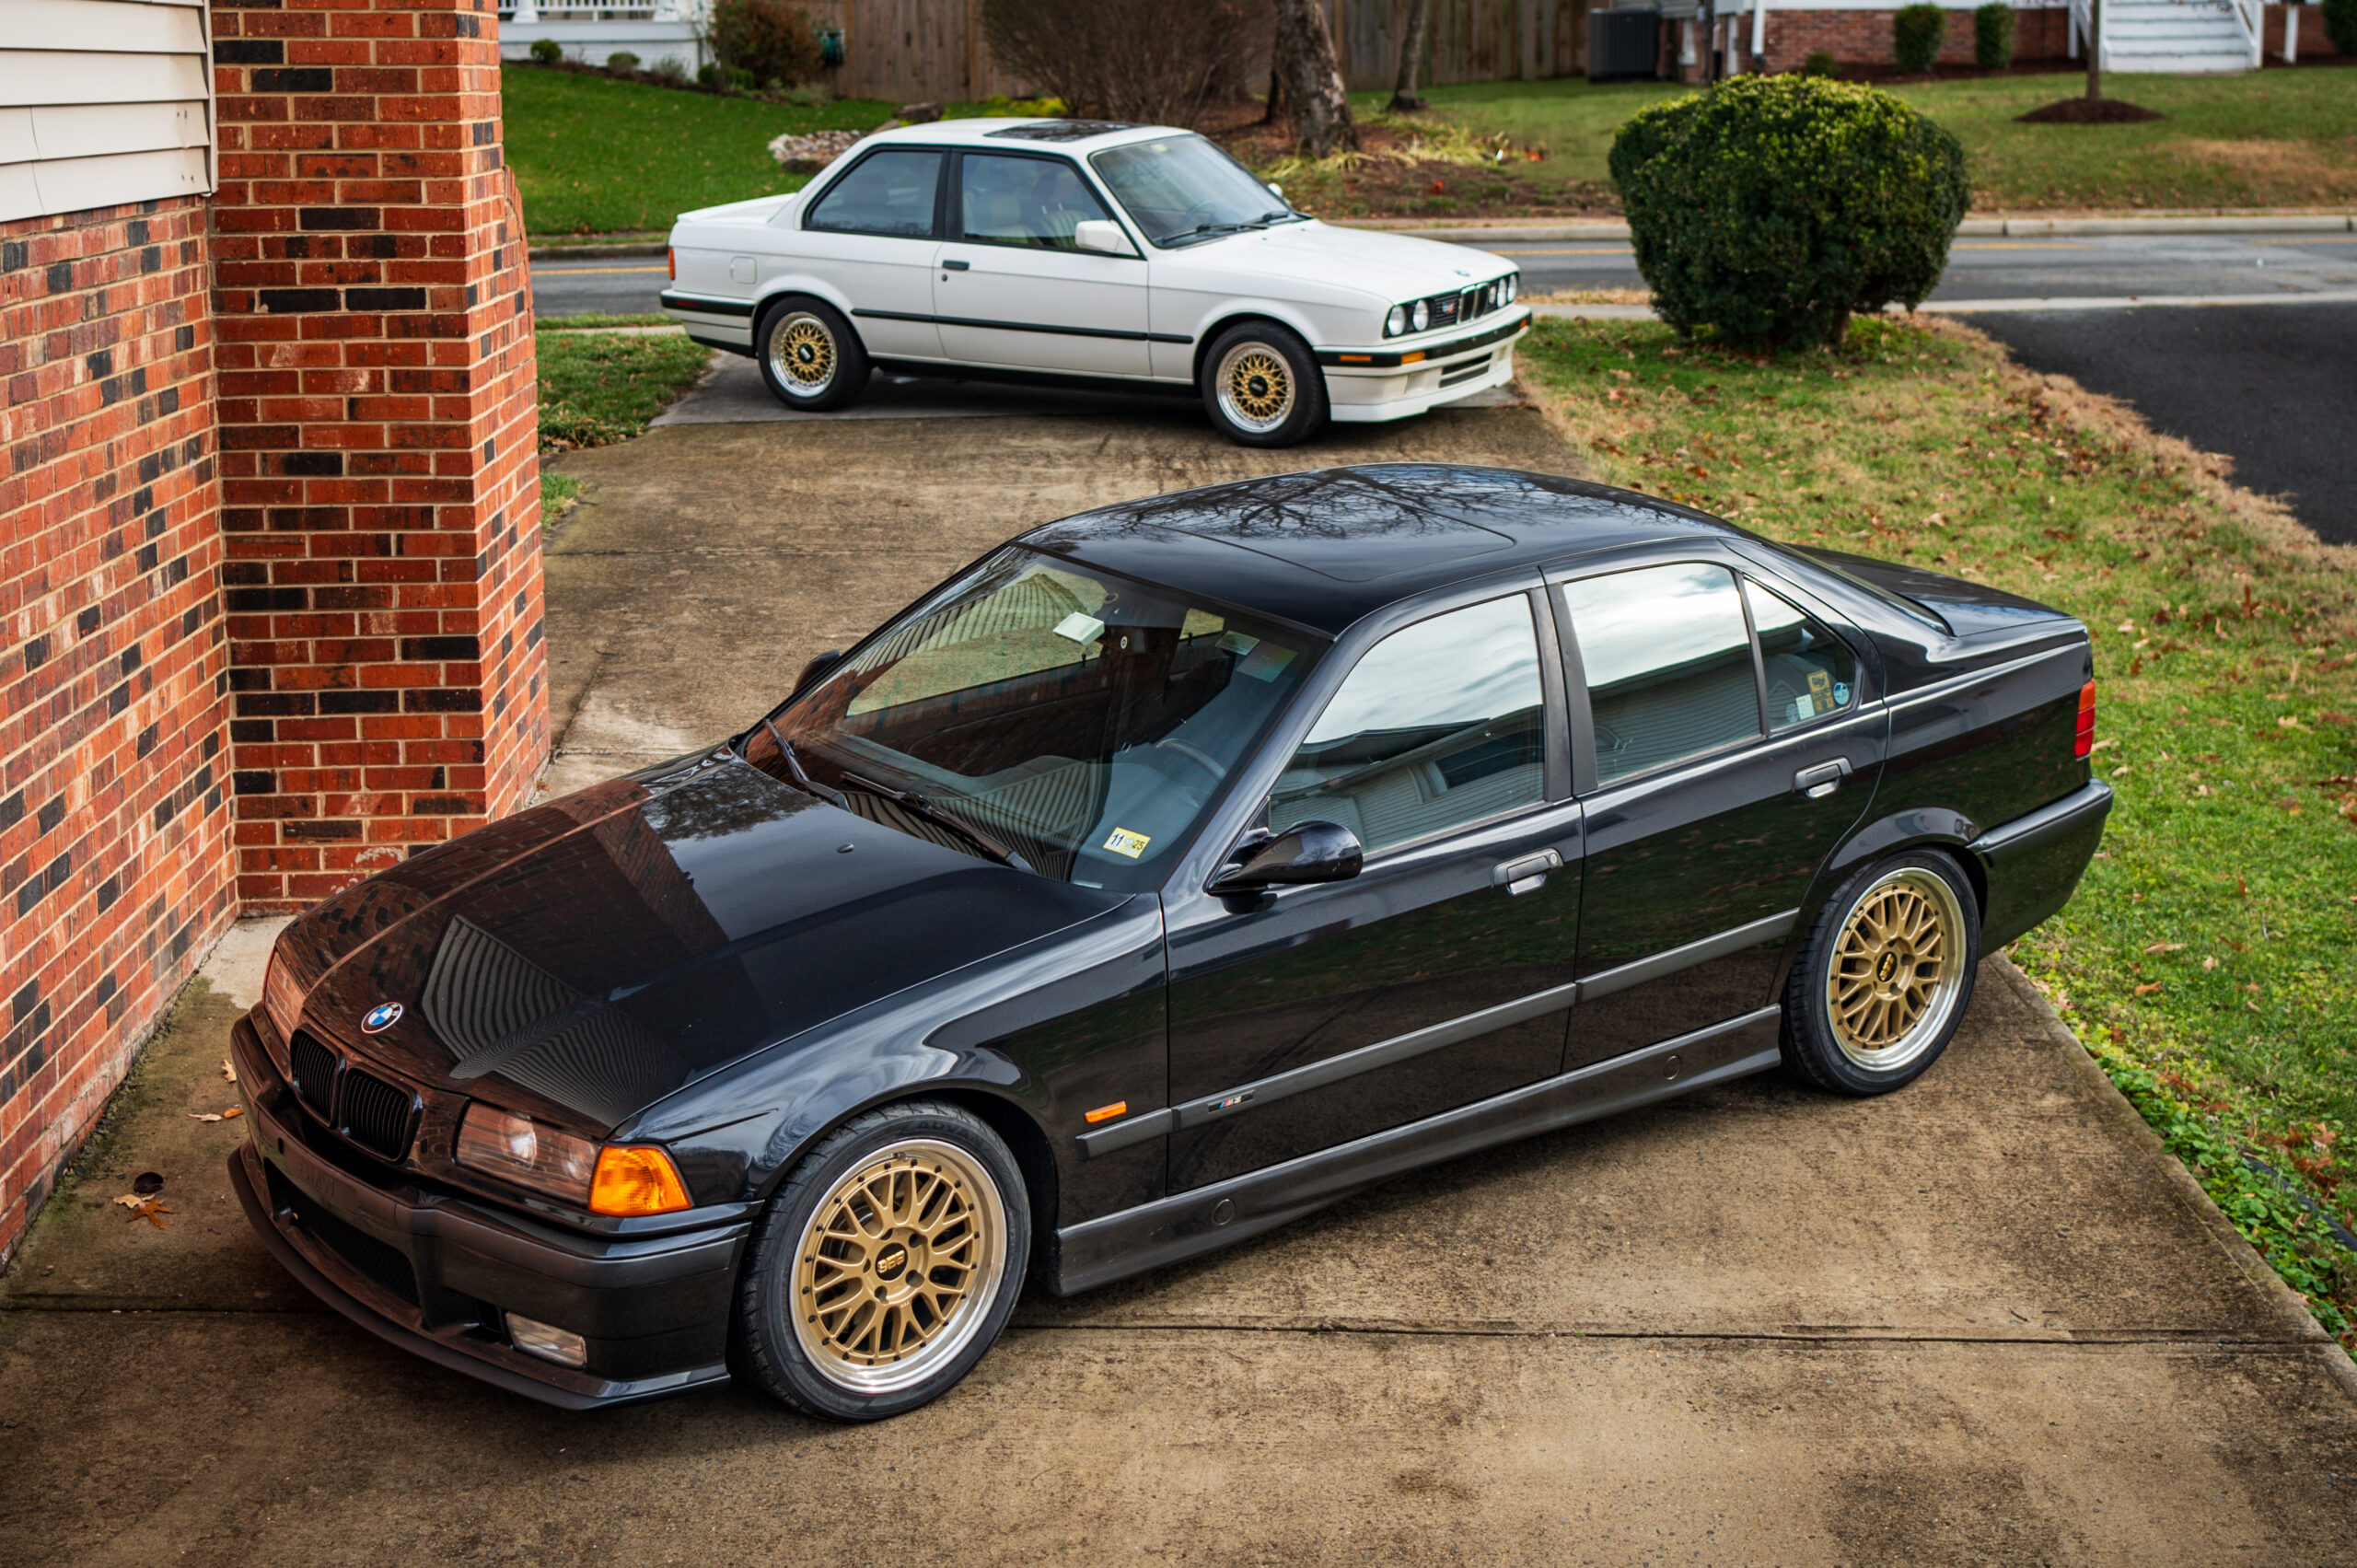
A lazy mid-winter driveway shoot.
In addition to enjoying the journey of research and discovery related to these pieces of rolling artwork, they put a smile on my face every time I look at them. Similar to how Zehmer’s E30 inspired me, it’s humbling to see that my E30 has inspired others, like my friend, artist, and National Capital Chapter member Pete Burnes. After a few spirited back roads drives with Burnes, he created actual art and gave me this print, which is now hanging in my office. —Mike Bevels
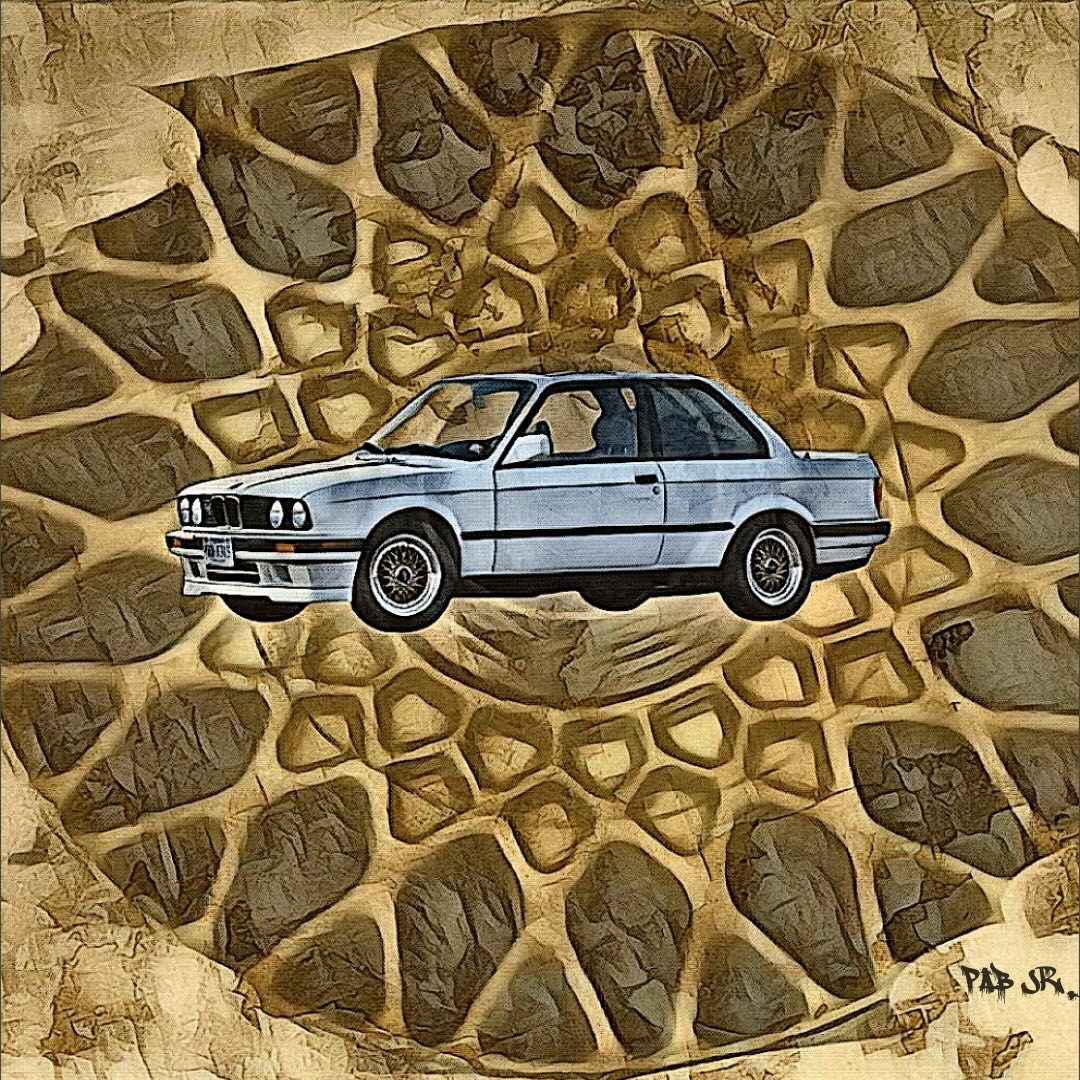
A Pete Burnes original. Thanks, Pete!
The post Classic Fitment appeared first on BimmerLife.
]]>The post Reflections—A Decade With a 2015 328i Sports Wagon appeared first on BimmerLife.
]]>Cars on that short list included the 2015 Volvo V60 R Design, 2015 Subaru Legacy 3.6R, and 2015 BMW 328i Sport Wagon (F31). I tried to be objective about this choice, so I made a list of “requirements” and then test-drove and scored each vehicle against those requirements. Surprisingly, the BMW didn’t win on paper due to things like price and cargo capacity, but in the end, that’s the one I really wanted. I threw out my scoring system and declared the BMW wagon the winner. The BMW’s best-of-the-bunch ZF 8HP automatic transmission, chassis balance, performance, and style pushed it to the top of the list.
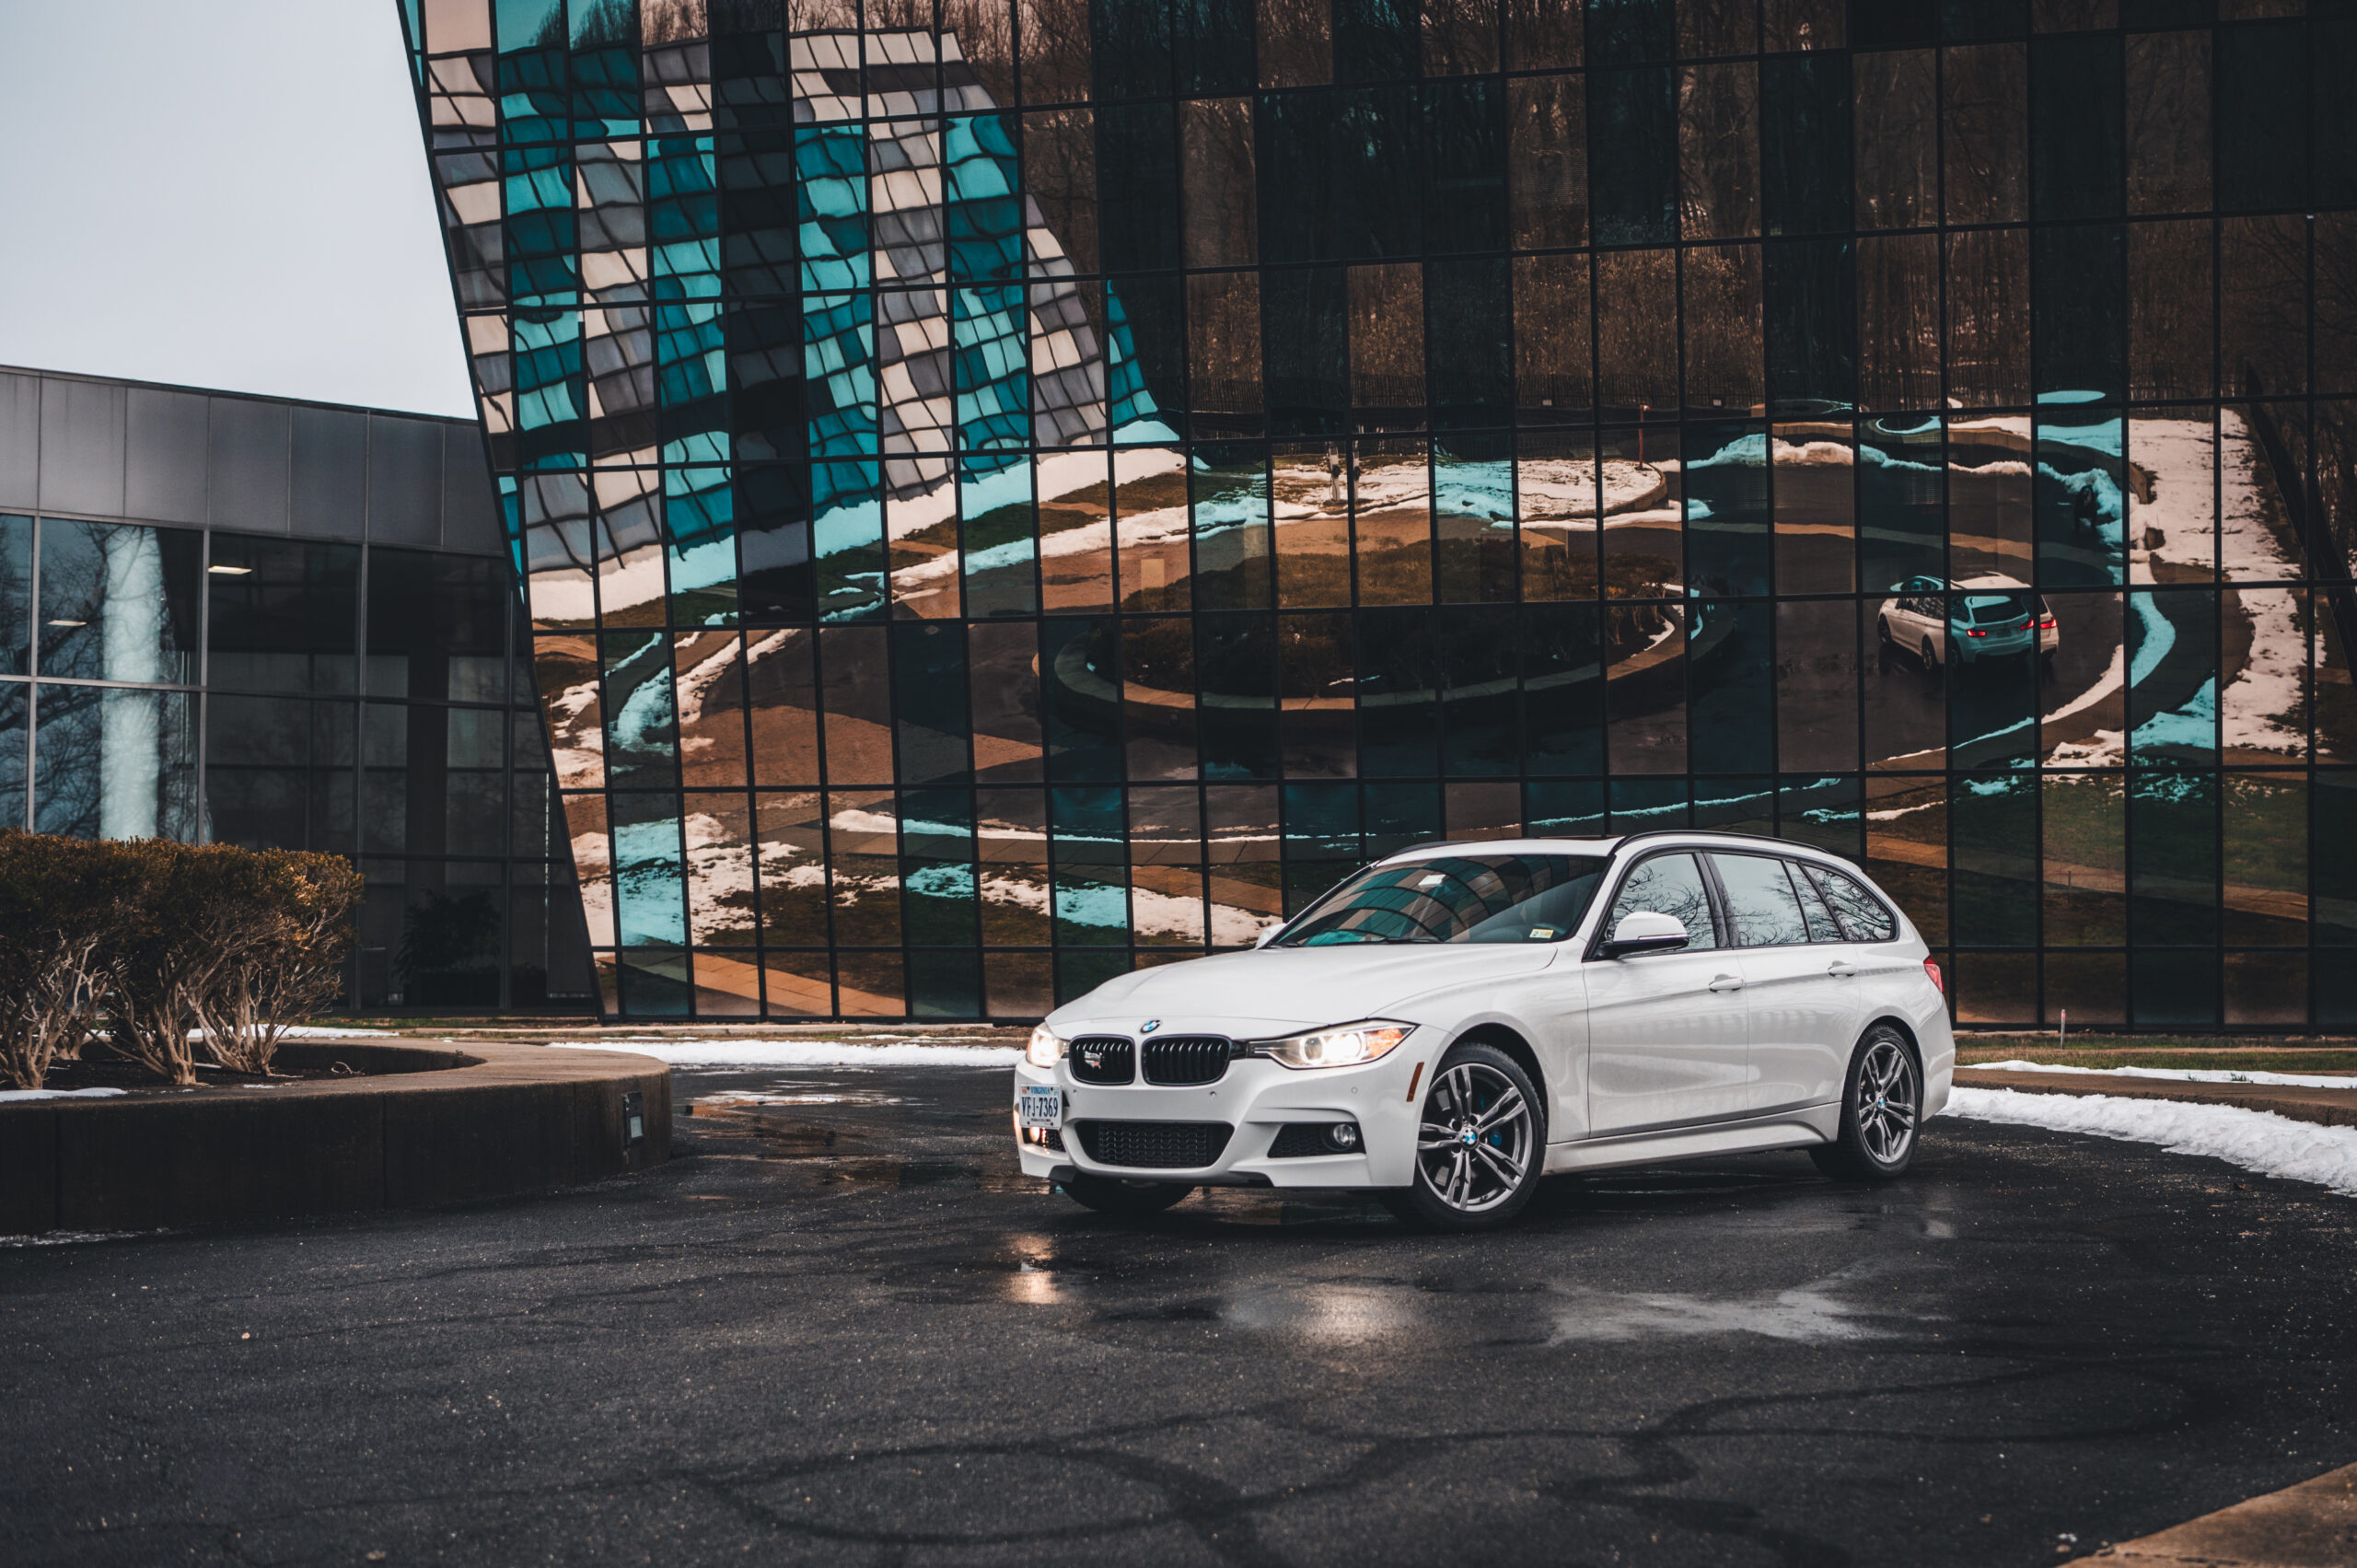
In December 2014, I placed an order at BMW of Sterling, speccing the exact F31 I wanted—an Alpine White 2015 328i Sport Wagon equipped with some key extras: the M Sport Package, M Sport brakes, Dynamic Handling Package with Adaptive M Suspension and Variable Sport Steering, Lighting Package with Xenon headlights, Driver Assistance Package, Premium Package, Navigation package, and other odds and ends like factory gloss black kidney grilles to match the Shadowline exterior trim, gloss black interior highlights, and anthracite headliner. Unlike F31s sold outside of the North American market, manual transmissions and sunroof deletes were not options for US-spec F31s.
As far as automatics go, the ZF8 is ZF-great.
Checking that healthy list of option boxes elevated the base MSRP of $41,950 to a suggested retail price of $54,950. Thankfully, I was able to negotiate something a bit cheaper, even with a seven-year warranty. As a bonus, this was when BMW offered a standard four-year, 50,000-mile warranty and four years of free maintenance, which was just the kind of worry-free driving I was after with a baby at home.

A gathering of five generations of 3 Series wagons for BimmerLife magazine.
After placing the order, when I wasn’t making a daily call to BMW’s automated delivery status hotline to get an update, I prepped my hot-hatchback Subaru STI for sale and made plans to give the 1993 Volvo 240 back to my Dad—a car we had traded back and forth over the years. At the end of February 2015, the F31 arrived in port and was delivered to the dealership shortly thereafter. My pickup date happened to coincide with an impending snowstorm, and as it so happened, it began snowing—and icing!—while I was signing the final paperwork. Let’s just say there was a bit of white-knuckle driving while I tested the grip limits of the summer-only Bridgestone Potenza S001s in snow and ice.
Summer tires in a snowstorm!?! Well, as it turned out for 2015 models, optioning the M Sport brakes forced a staggered 441M wheel and performance-summer-tire setup with 225/45R18s on the front and 255/40R18s on the rear. Not my brightest decision, but we made it home unscathed—barely. A few days later, I serendipitously found a set of brand-new zero-mile BMW 400M wheels and all-season tires on Facebook Marketplace (which are the wheels that would have come on this car without M Sport brakes) and promptly installed those for the remainder of winter and early spring.
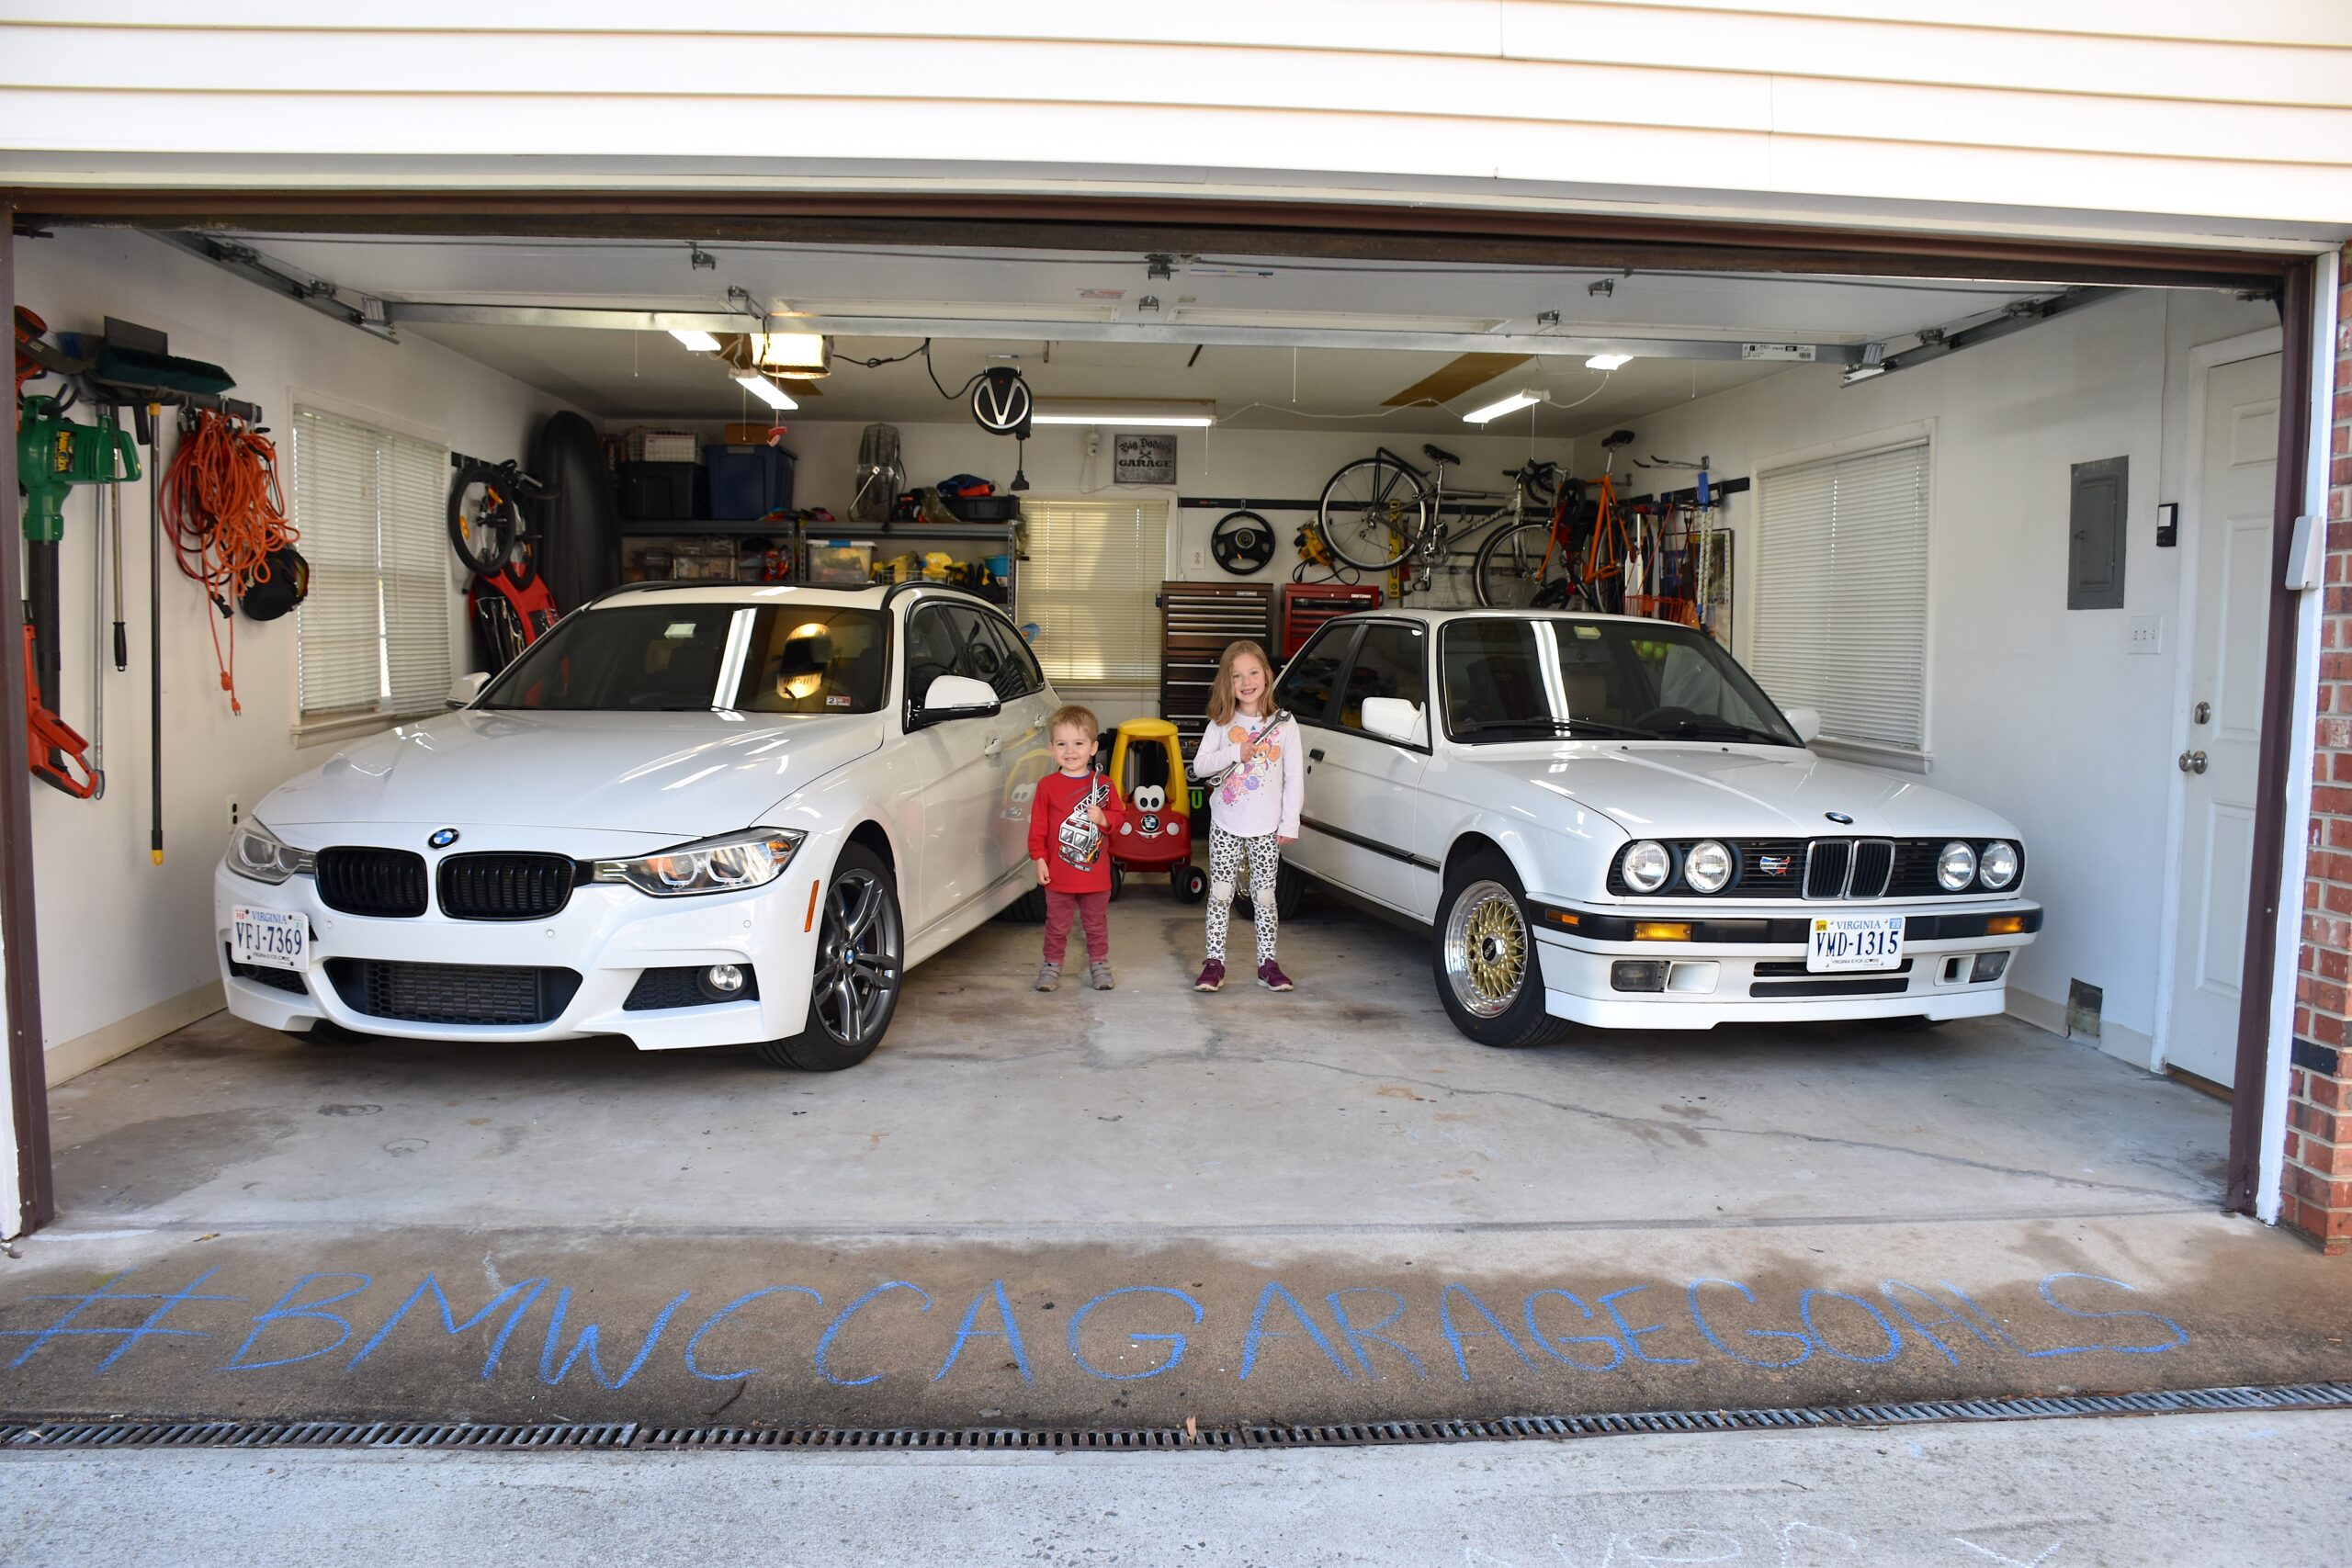
Within the first month, I performed a few small “mods,” if you could even classify them as that. The “mods” included a tow-hook license plate bracket (because I requested the dealership not drill a license plate bracket into the glorious M Sport bumper), WeatherTech floor liners, a BMW rubber trunk mat, and BMW cross bars to accept the Thule cargo box and bike attachments I’ve retrofitted on my cars for the past twenty years—mostly stuff for utility and practicality. My 1991 318iS, which followed me home a year after buying the F31, and my 1998 M3, which joined us in late 2022, are the cars that get all the “fun” parts while this 3 Series wagon stays stock.
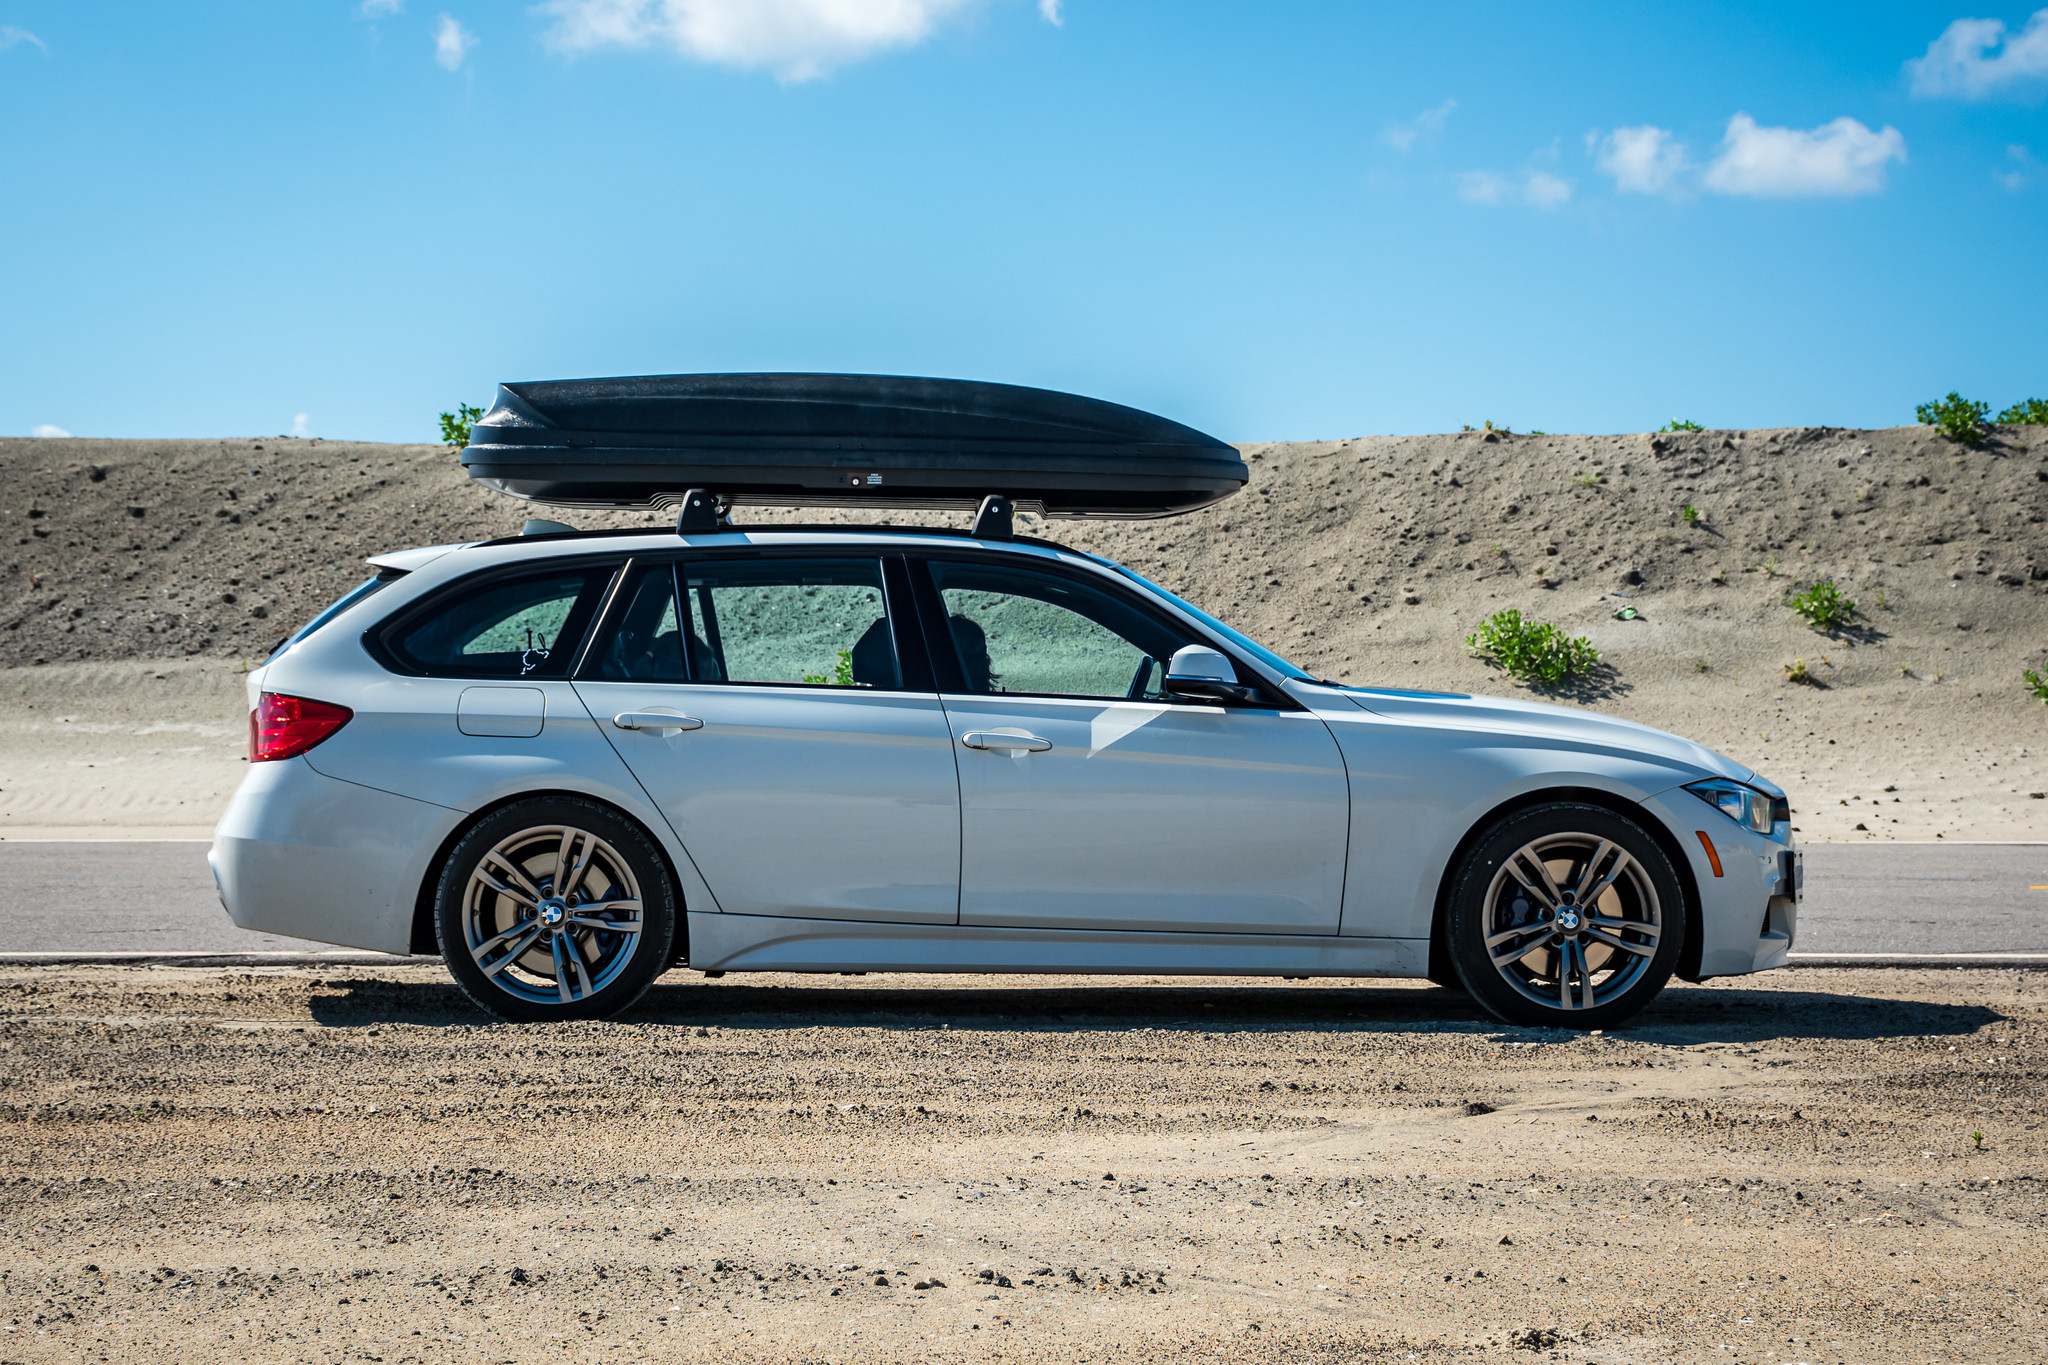
The Thule cargo box provides ample space for summer beach trips.
The 328i’s 2.0-liter four-cylinder turbocharged gas burner packs plenty of punch for the 3,800-pound vehicle. Rated at 240 horsepower and 270 pound-feet, the N20 engine pulls strongly with the ZF 8HP transmission, providing optimally timed solid and fast shifts. If you’re in the mood for really wringing it out, the wheel-mounted flappy paddles or console-mounted shifter provide complete control of the transmission. This generation of N20 engines has a reputation for potential plastic timing guide failures, but frequent oil changes with quality oil alleviate some of those concerns.

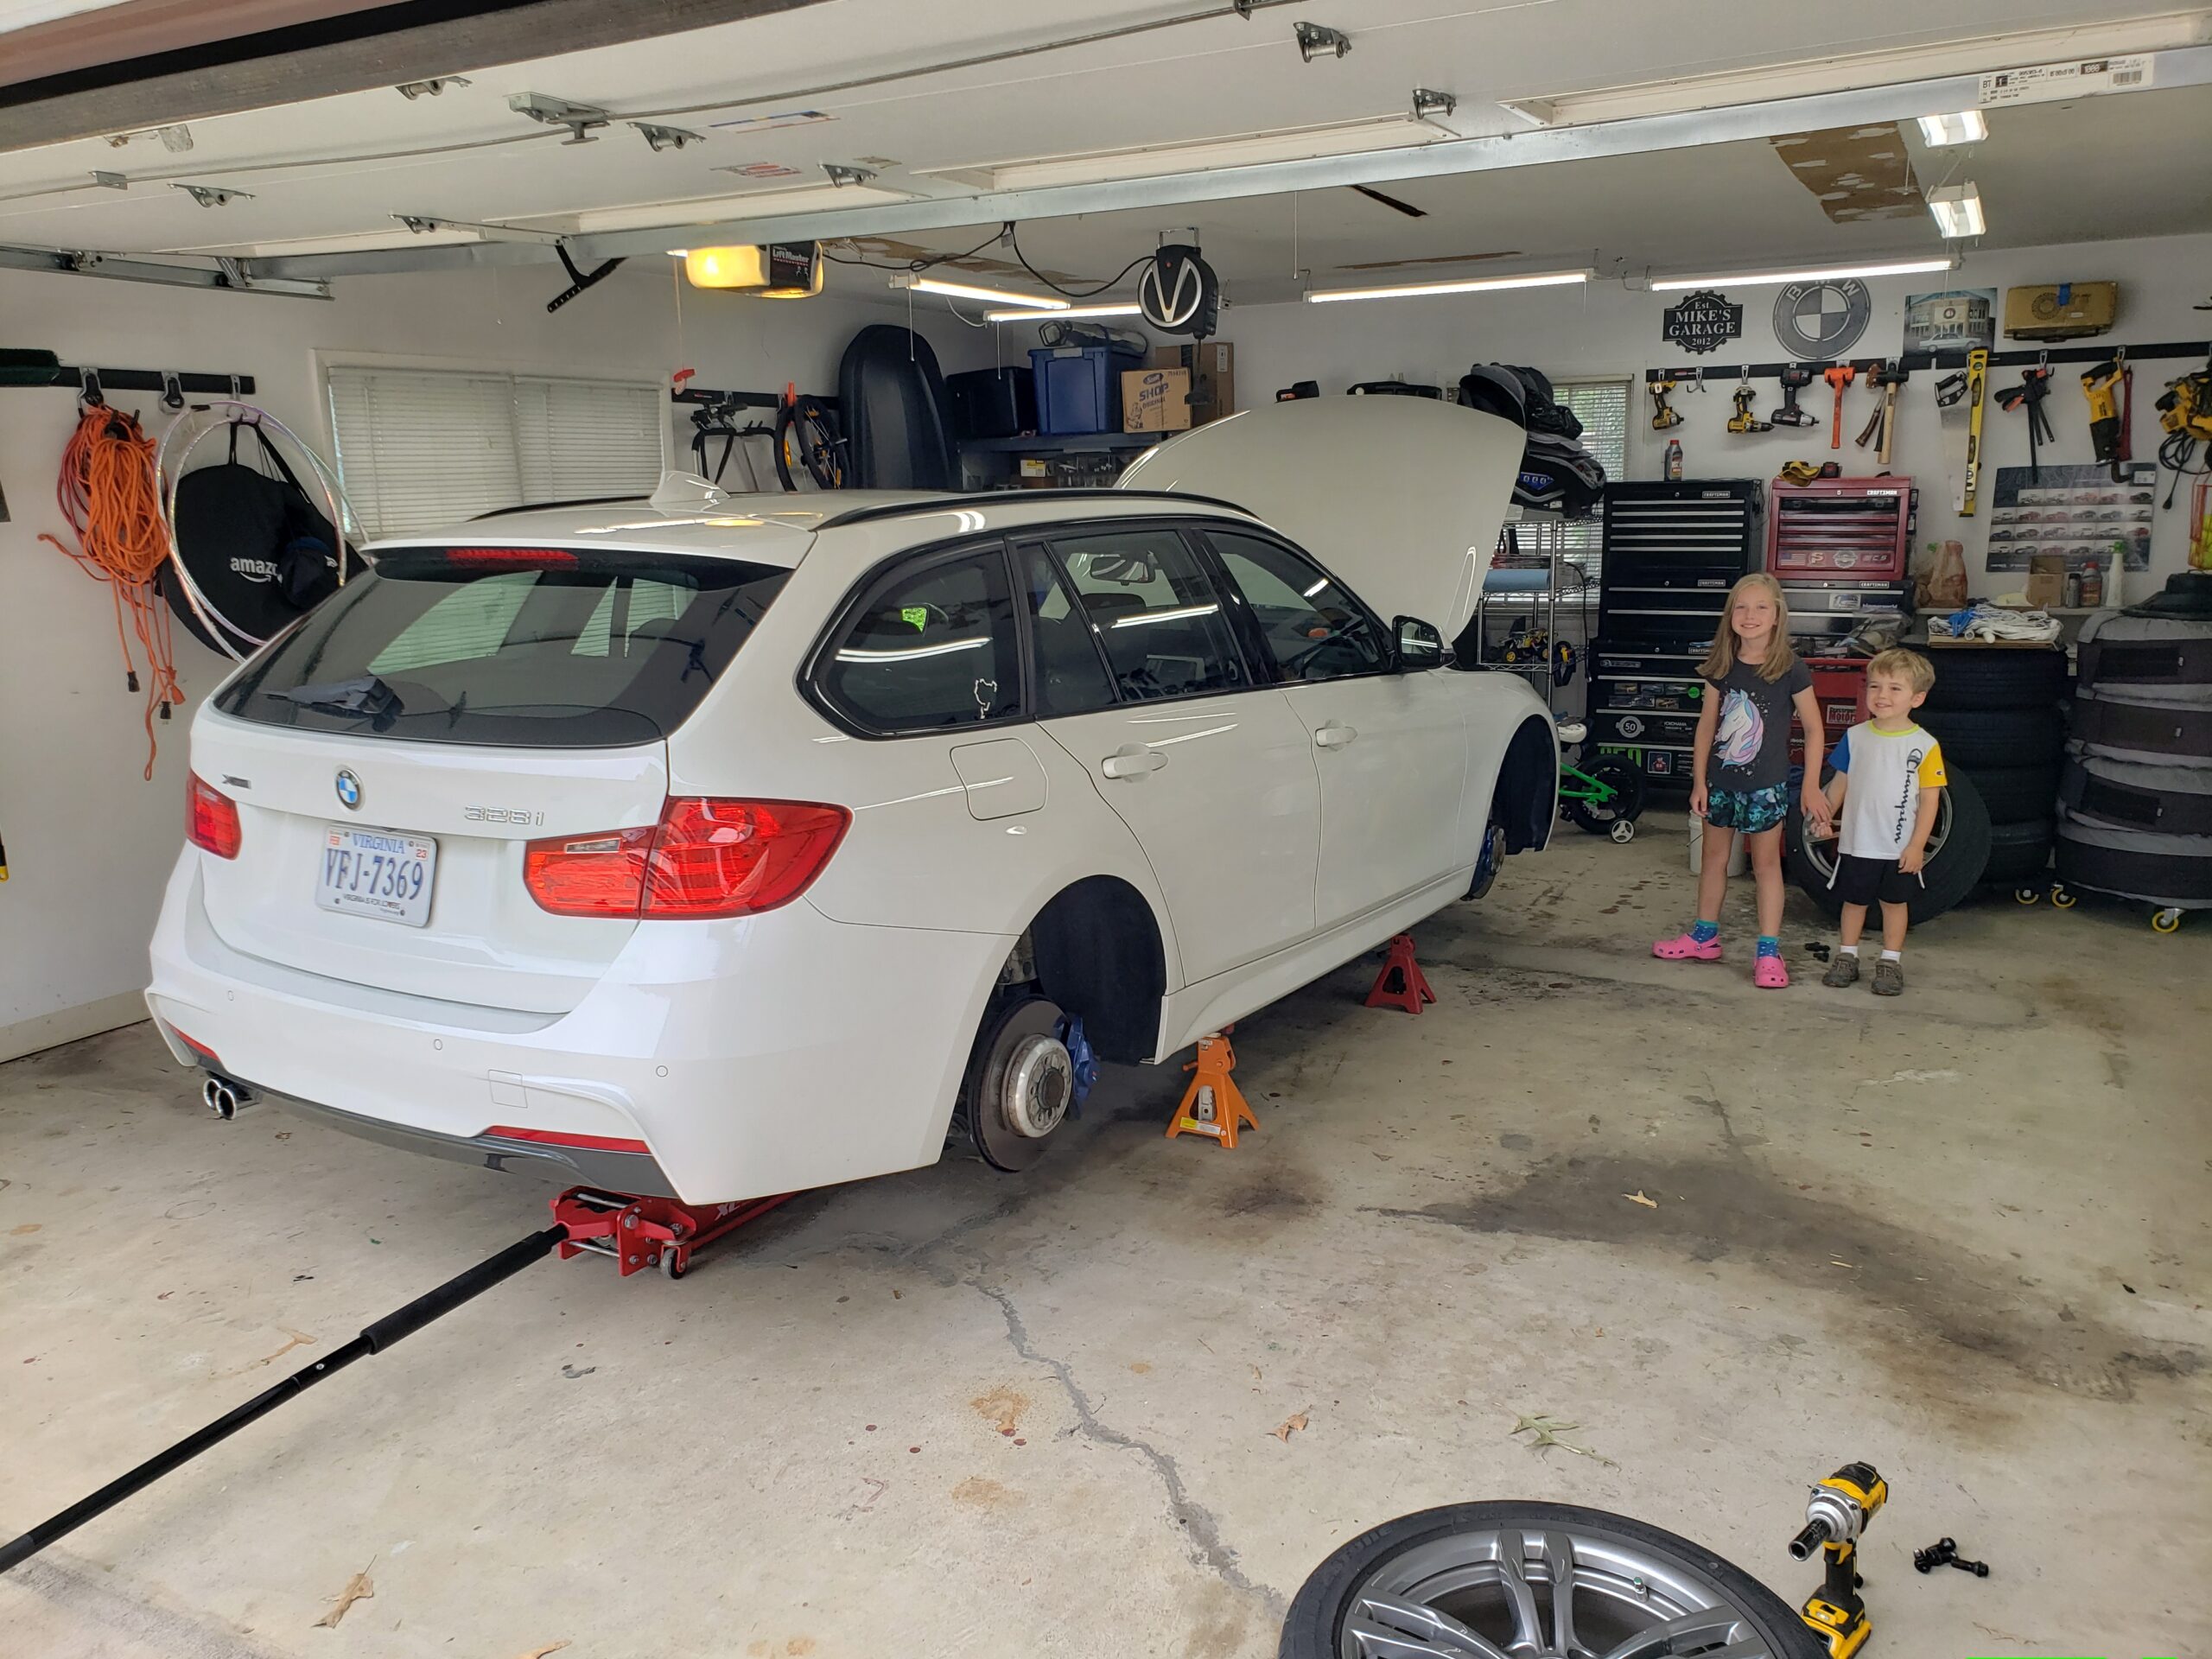
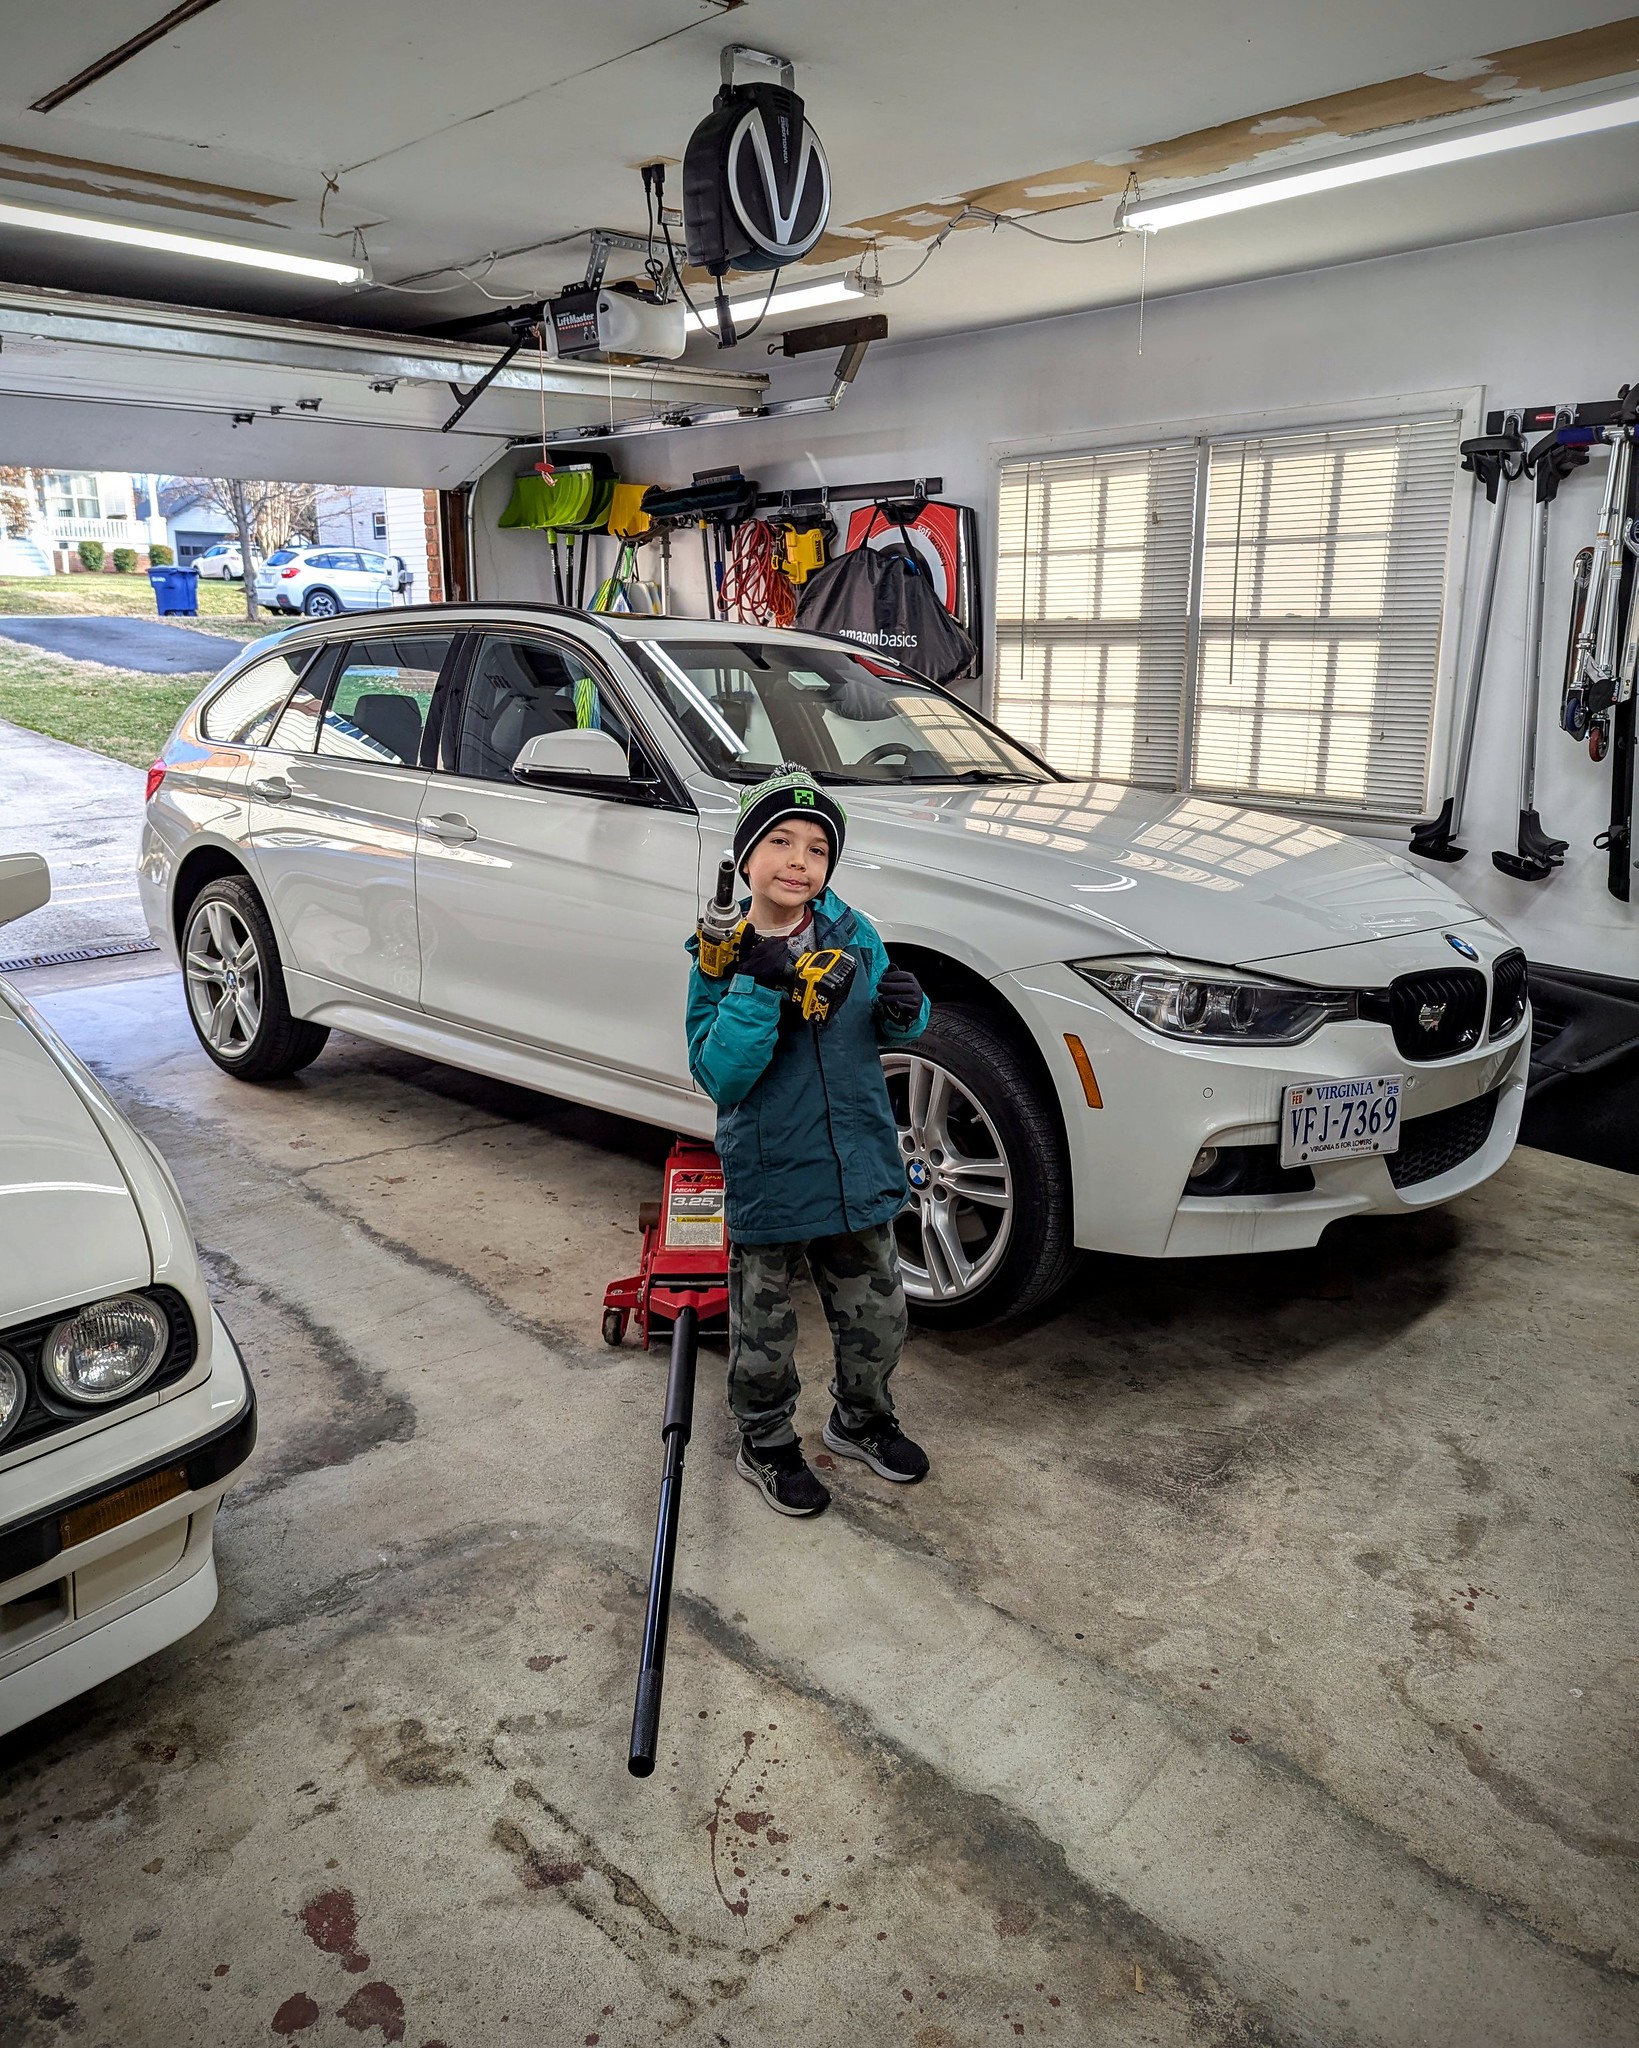
Since taking ownership, this F31 has really seen regular preventive maintenance and, thankfully, only minor repairs. A handful of under-warranty services—fixing a leaking oil cooler, replacing bad thrust-arm bushings, and a behind-the-dash HVAC fix—ensured the extended warranty paid for itself. In addition to helping work on our 1991 318iS and 1998 M3, my daughter Avery and son Carter have learned basic wrenching skills by assisting with F31 wheel and tire changes, oil changes, and loads of other maintenance. They even appeared, with tools in hand, in the photo chosen as the winner of BimmerLife’s weekly Garage Goals contest in 2020. At home, we’ve knocked out things like front and rear differential oil changes, brake fluid flushes, brake pad changes, oil changes, spark plug and coil pack replacements, and more. A local shop, RRT, handled the not-so-lifetime-fill ZF 8HP transmission flush and filter change. Overall, it has been a very reliable vehicle.
The BimmerLife Garage Goals contest, which seems like forever ago, based on how young Avery and Carter were at the time.
Our F31 has seen its fair share of automotive adventures over the past decade. We’ve taken it from our home in Northern Virginia on nearly yearly trips to the Outer Banks in North Carolina. We went on a long-haul road trip to Florida to experience the Harry Potter parks at Universal Studios and Kennedy Space Center. We’ve visited Jamestown and Williamsburg to learn about U.S. history. We’ve ventured deep into the mountains and stayed at a remote cabin. This wagon has even seen some track time at nearby Summit Motorsports Park in West Virginia. We’ve attended numerous National Capital Chapter events, including a couple of full-day driving tours.
A fall family trip to a remote cabin in the woods.

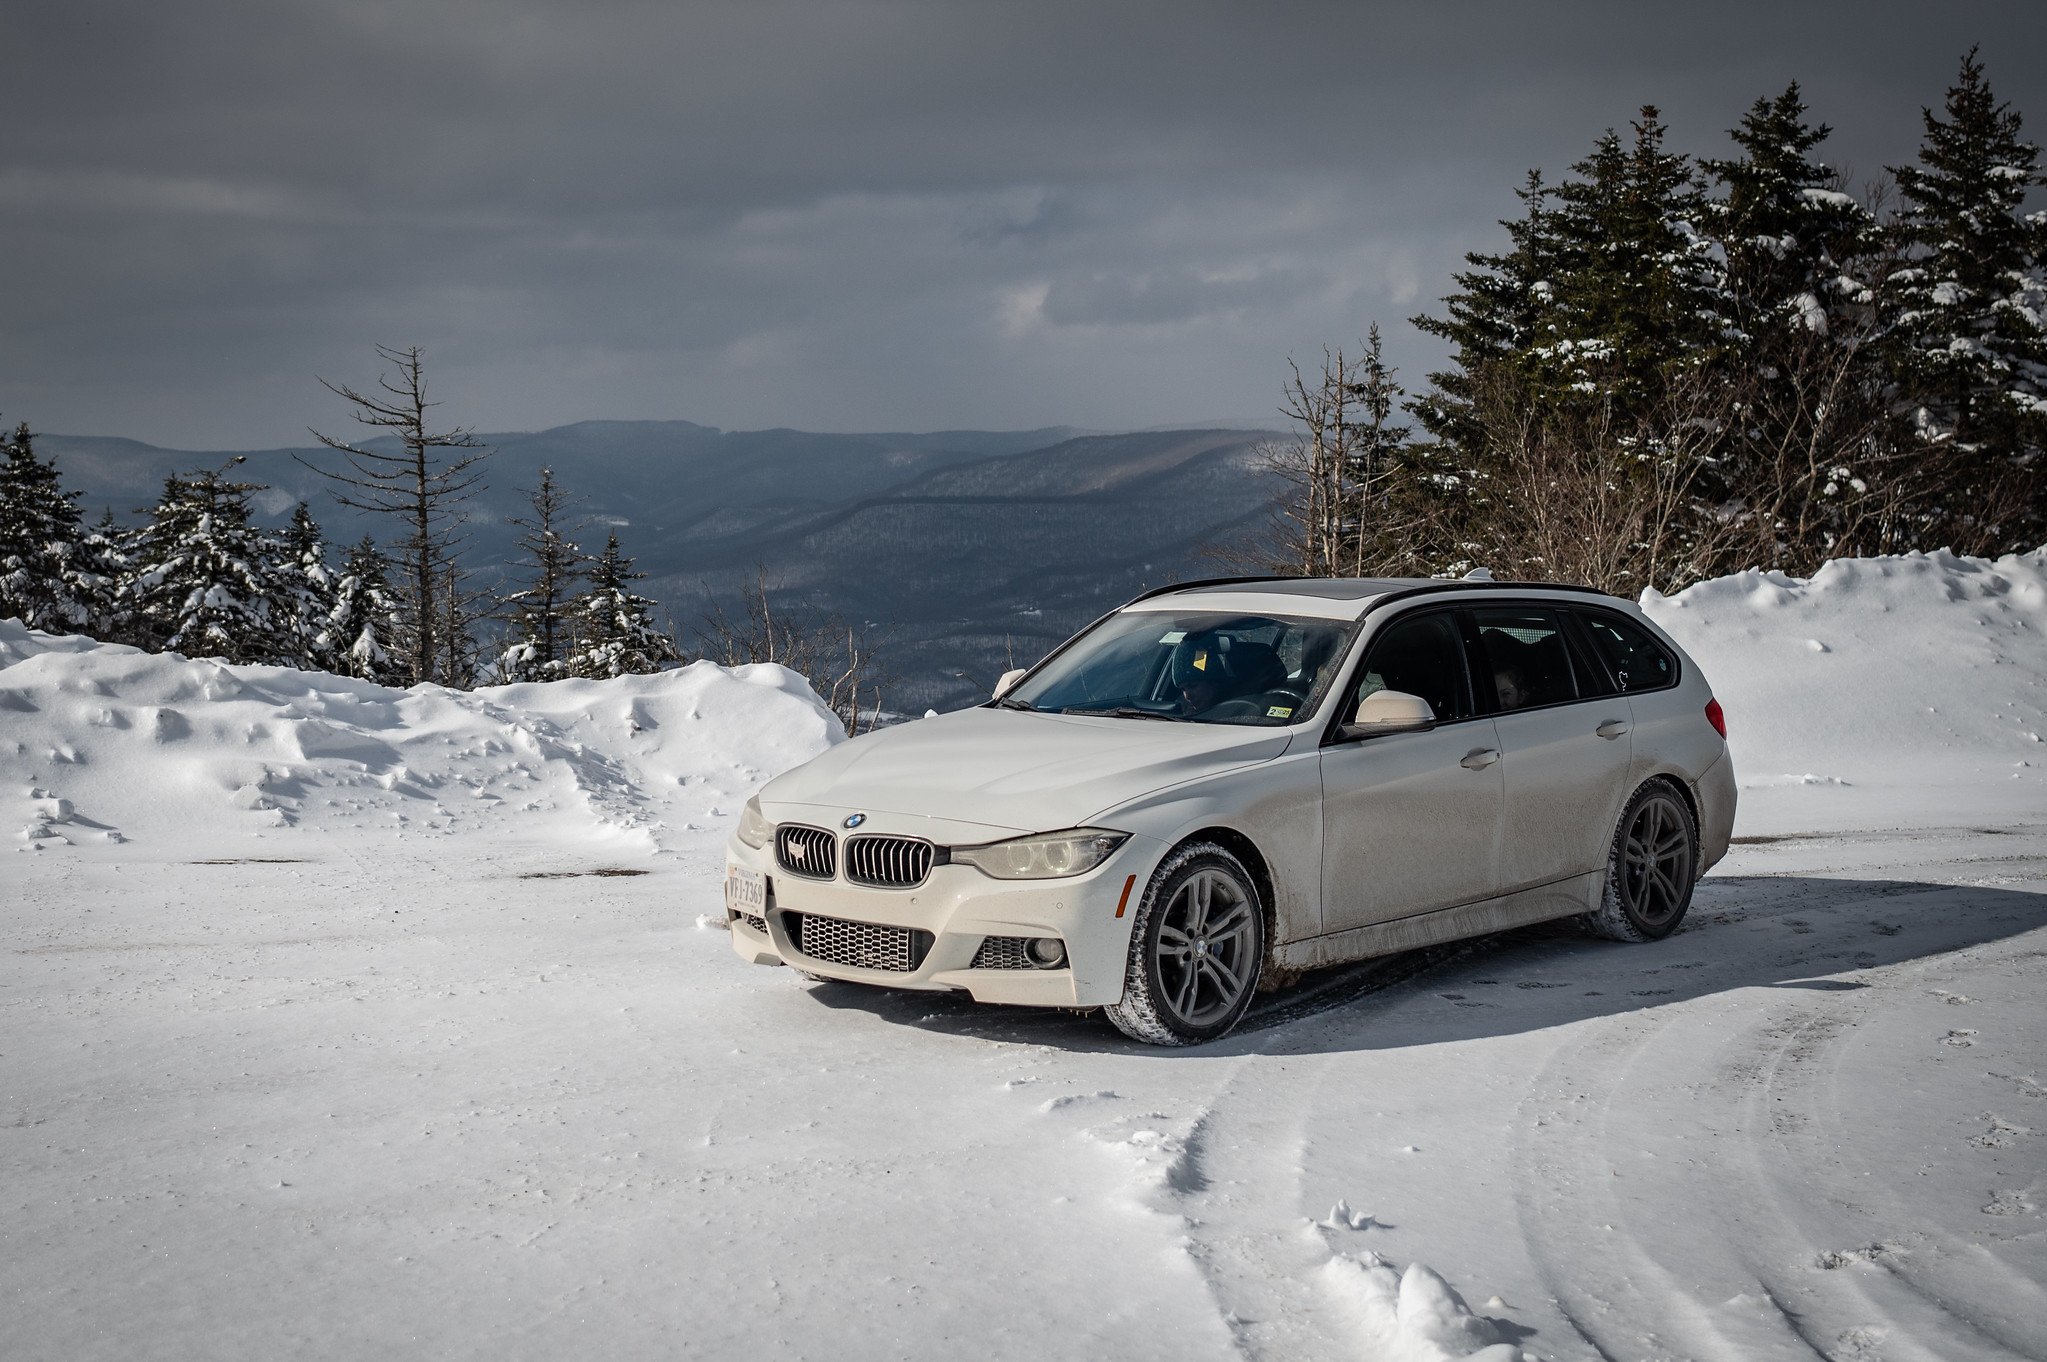
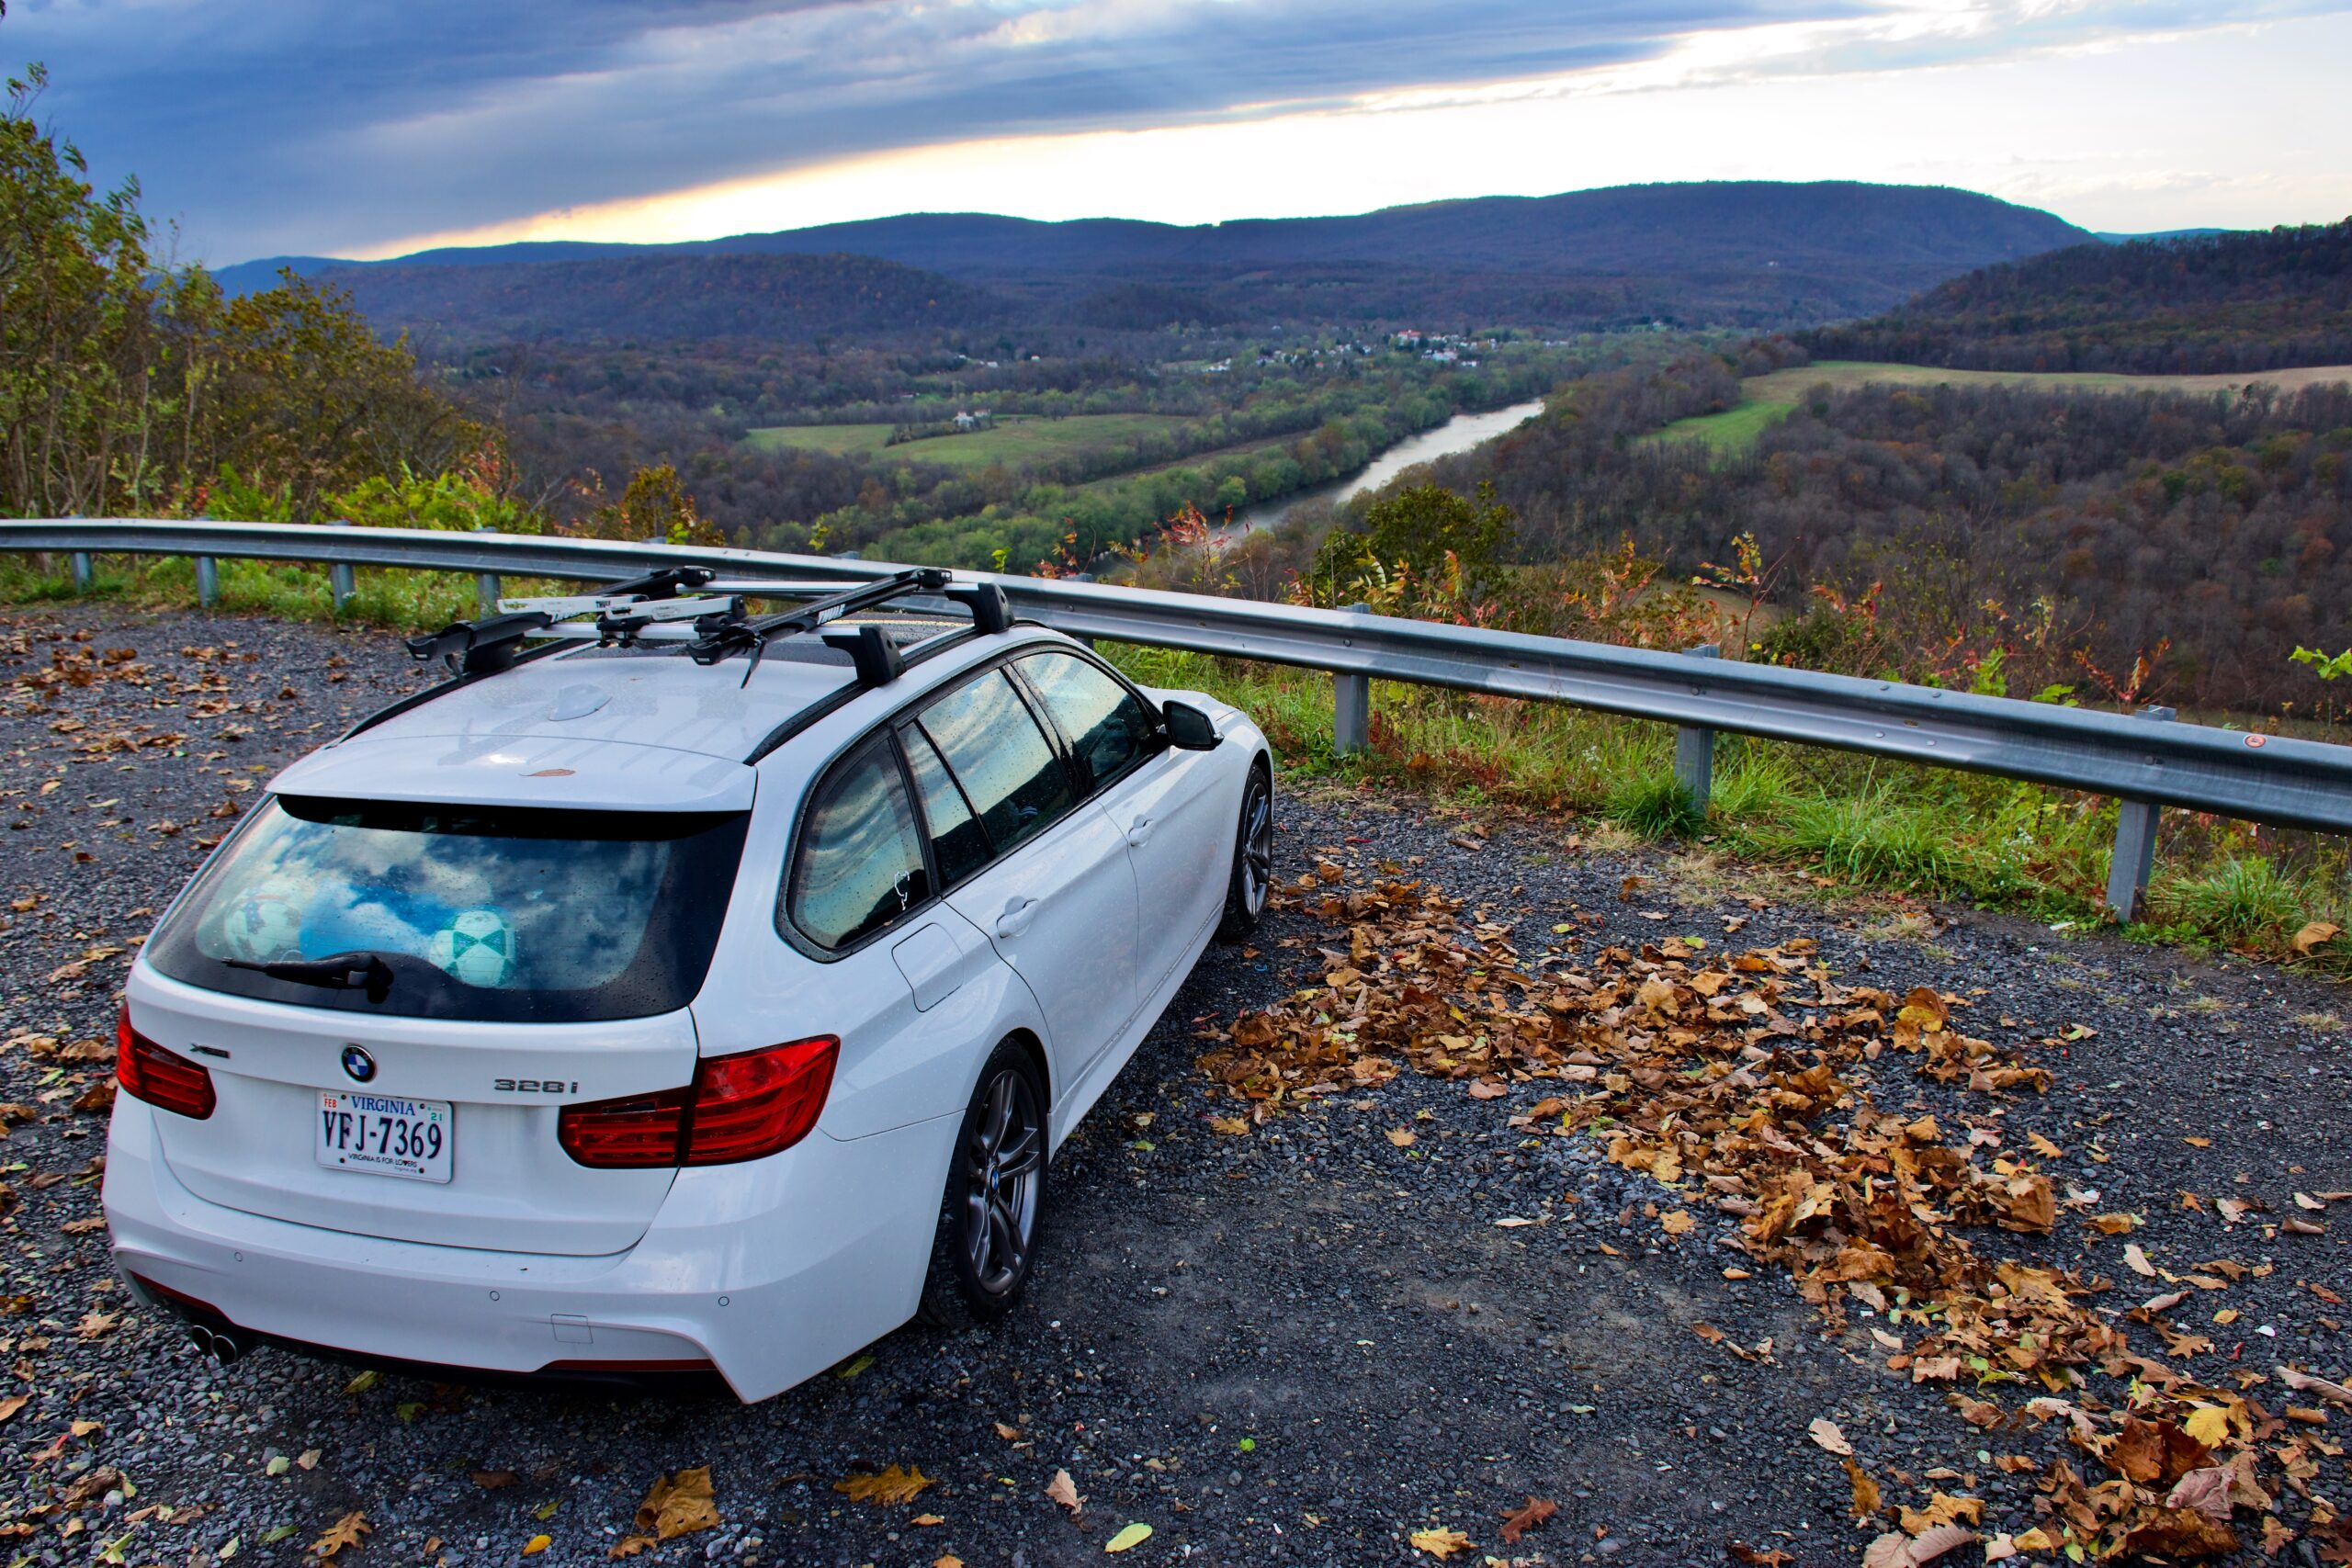
The Adaptive M Suspension works well and is exercised regularly, choosing the appropriate setting depending on whether we’re on the highway or on curvy back roads. The xDrive system does its job, and given this our go-to “snowmobile,” it has seen its fair share of snow. We exercised all of these features during a January 2025 road trip to Snowshoe, West Virginia, covering over one hundred miles on snow-covered mountain roads in sub-freezing temperatures. For Spring Break 2025, we’re heading up to Niagara Falls and Toronto. Which car are we taking? The F31, of course.
A family road trip to Snowshoe, West Virginia in our snowmobile, January 2025.
After ten years and only 66,000 miles, the F31 has treated us well. Things that I enjoy most about this long-roof 3 Series are the utility and practicality, and, in my eyes, it still exudes “cool car vibes”. I turn around to look back at it every time I park. If that isn’t a sign that you bought the right car, I don’t know what is.
In just four years, Avery will likely be driving our F31. She has already been bitten by the BMW bug.
What does the future hold for this proper-roof-length 3 Series? More trips to the hardware store, more family road trips, more pleasure drives, and perhaps it will serve as Avery’s first car when she gets her learner’s permit in four years. It’s amazing to think she was riding in this car as an infant and will be driving it herself in just a handful of years. Here’s to another ten years of F31 ownership! — Mike Bevels

The post Reflections—A Decade With a 2015 328i Sports Wagon appeared first on BimmerLife.
]]>The post Seat Time In A 1991 318iS appeared first on BimmerLife.
]]>
My 1991 318iS and the “other project.”
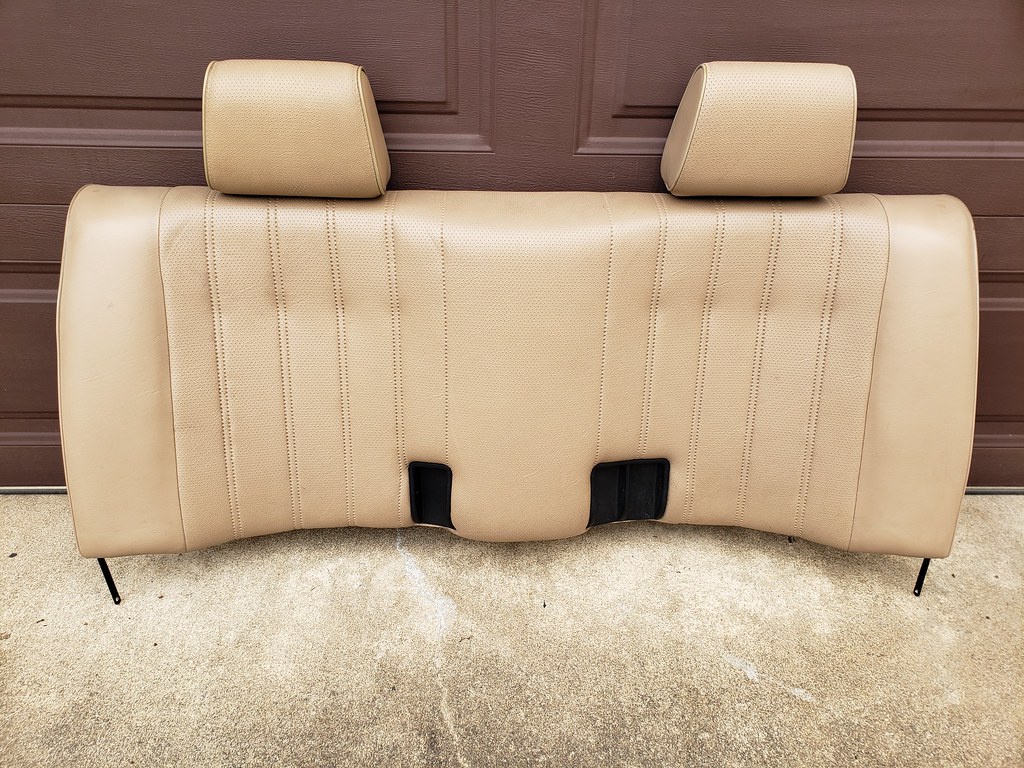
Being a more budget-friendly option than a 325i/iS of the same era, this 318iS is equipped with vinyl-covered sport seats instead of leather. The Natur vinyl has held up to 33 years and 164,000 miles of wear and tear extremely well, with the high-traffic driver’s seat the only upholstery showing the battle scars made from a love of driving.
This E30’s interior certainly hasn’t gone unloved as I’ve performed a number of cosmetic and functional updates during my ownership: I’ve sourced and replaced the original cracked dash (my fingers still hurt just thinking about this eight-hour job), I’ve taken the seats and carpet out for a deep cleansing, I’ve added rear headrests (a must-have safety item for my kids), I’ve installed a Momo Prototipo steering wheel, I’ve updated the sound system, and I’ve added a set of stylish black-and-tan Coco Mats. It’s a nice place to be for a spirited drive or a long road trip.
One day I woke up and said, ” I’m going to swap the dash today.” Whew!
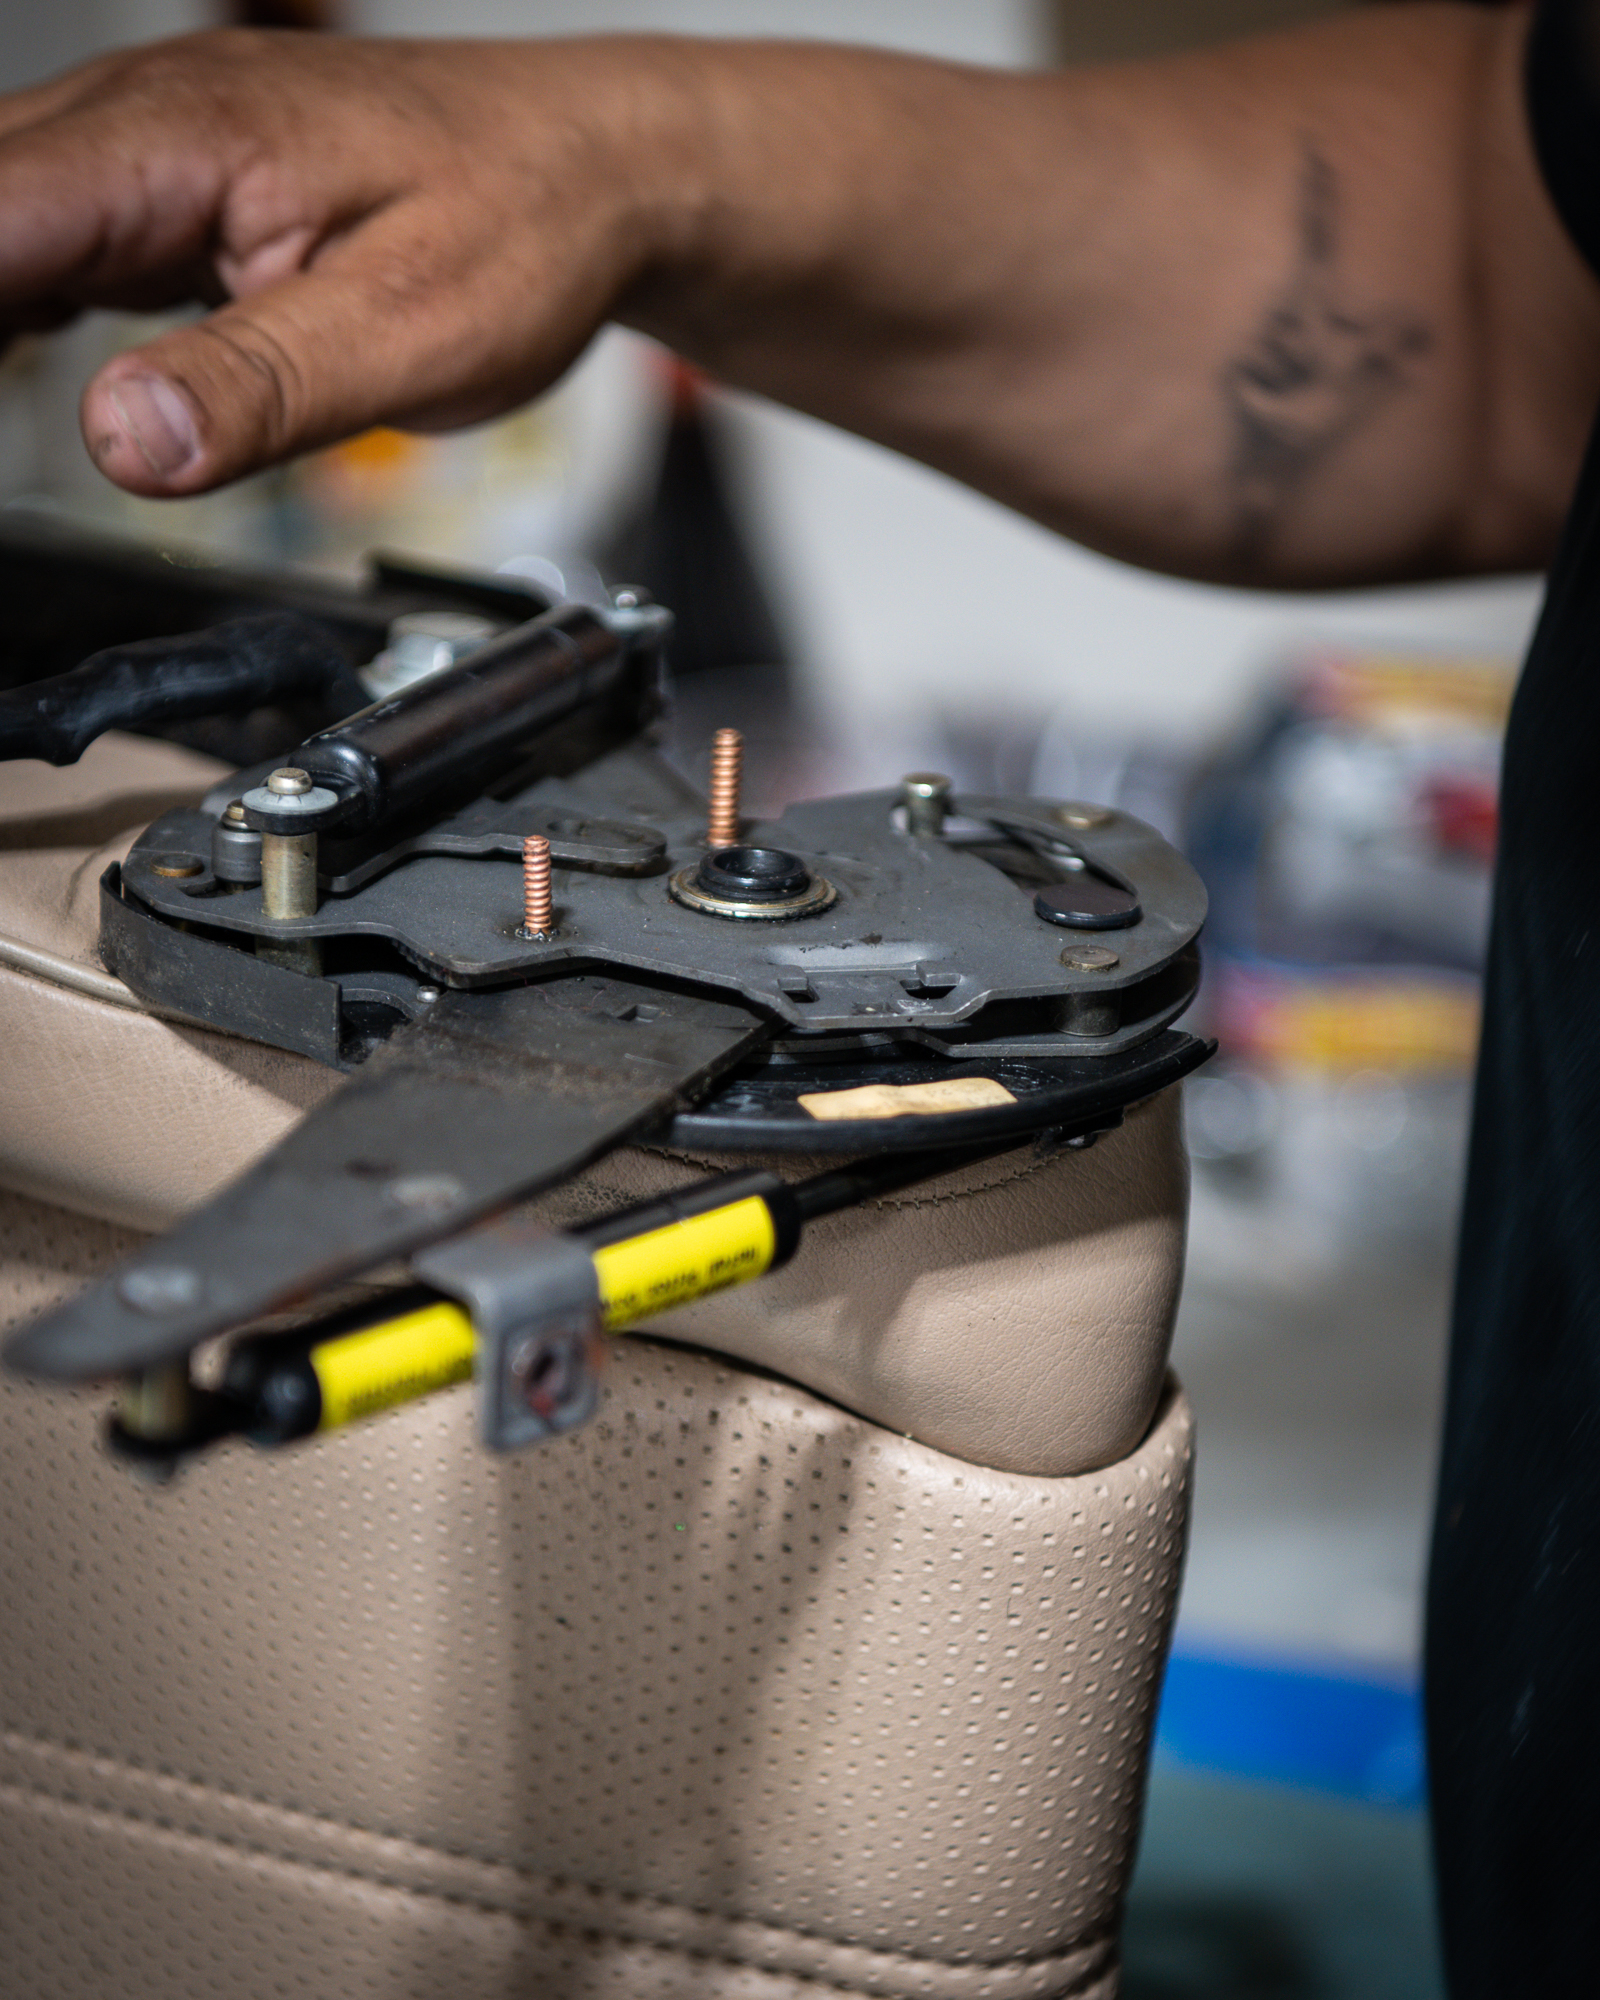
Having already addressed the front seats’ functional deficiencies by replacing blown seat shocks—small gas-filled tubes that are necessary for seat-back adjustment—it was finally time to give the driver’s seat a face lift, or a new face entirely.
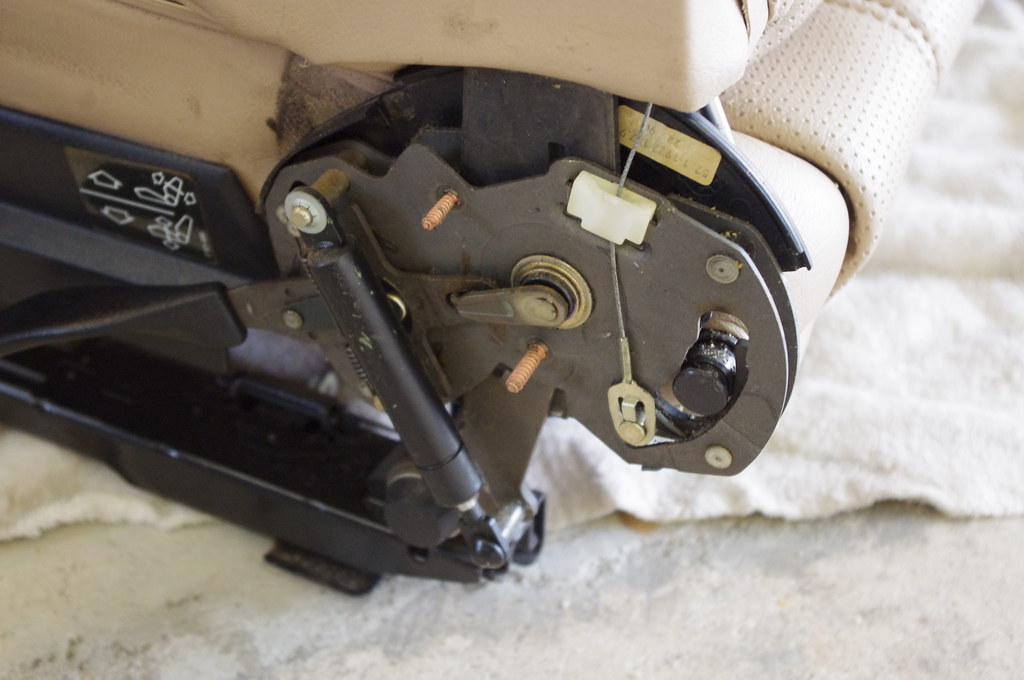
Depending on the condition and material of damaged upholstery, there are a couple of options for repair. Cracks or tears in leather or vinyl can be patched, filled, textured, and painted using either do-it-yourself kits or by contracting a professional—this is the face-lift option. There are also a number of companies that make complete seat upholstery kits, allowing you to give your interior a new face. With either option, skill and experience are key as both are art forms.
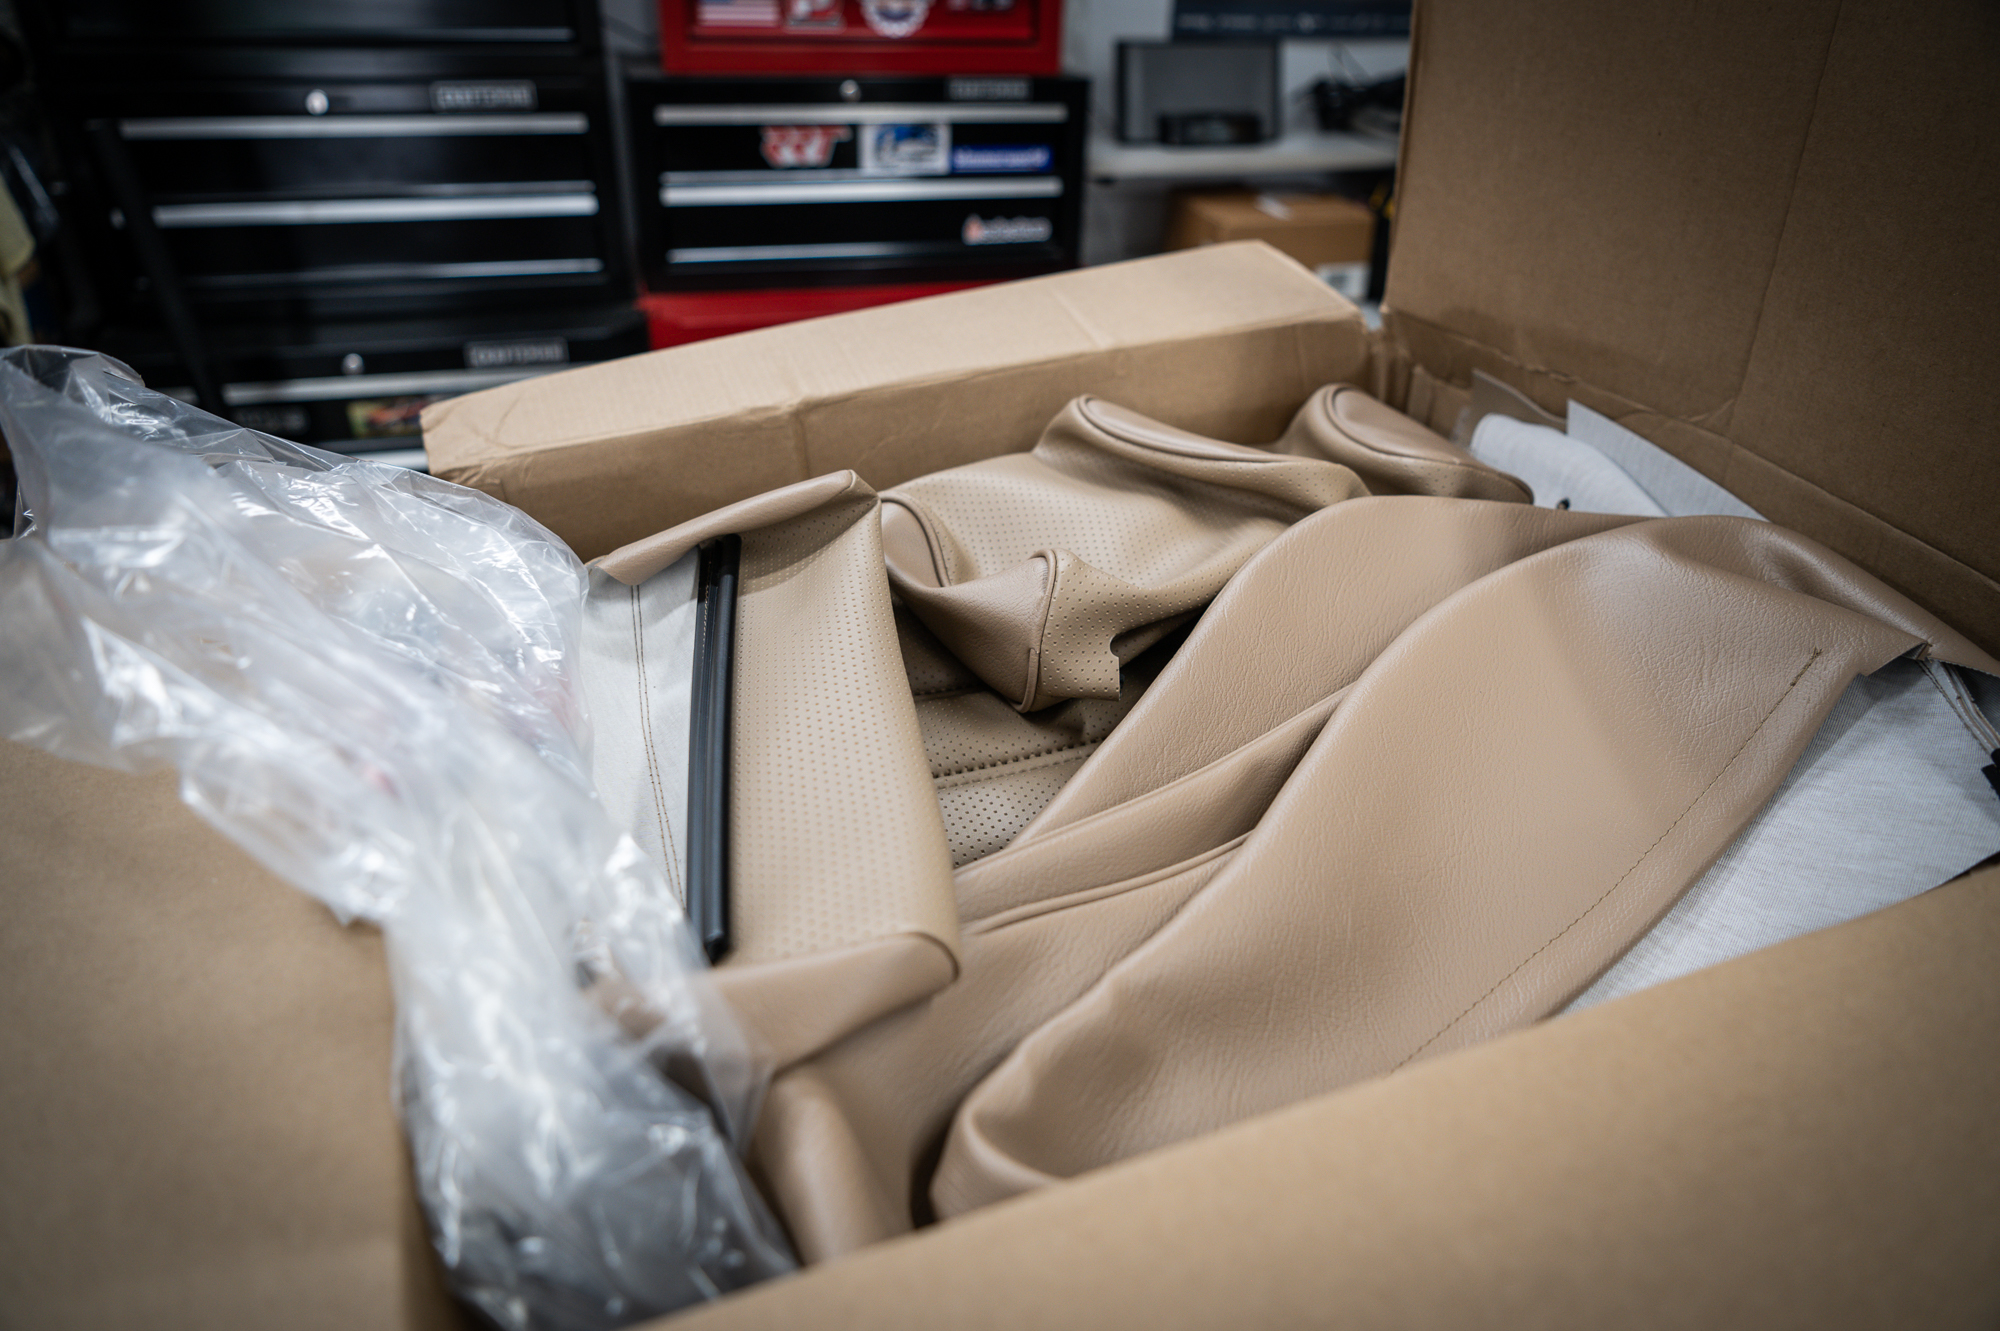
A box of fresh E30 upholstery, delivered right to my doorstep.
I opted for the “new face” route, and ordered a front-seat upholstery kit from a California-based mail-order upholstery shop. Given options of material, pattern, and color, I picked the same Natur vinyl with solid bolsters, perforated/dimpled center sections, and three longitudinal stripes as the existing seat. The company had me send them a number of photos of my existing seats for verification purposes, and a couple of weeks later a box of new made-to-order E30 sport seat upholstery arrived at my doorstep. The pattern matched, the color matched—even the piping matched. The upper and lower center sections included new foam padding and batting attached, as well as long plastic clips for sections that aren’t hog-ringed to the seat frame.
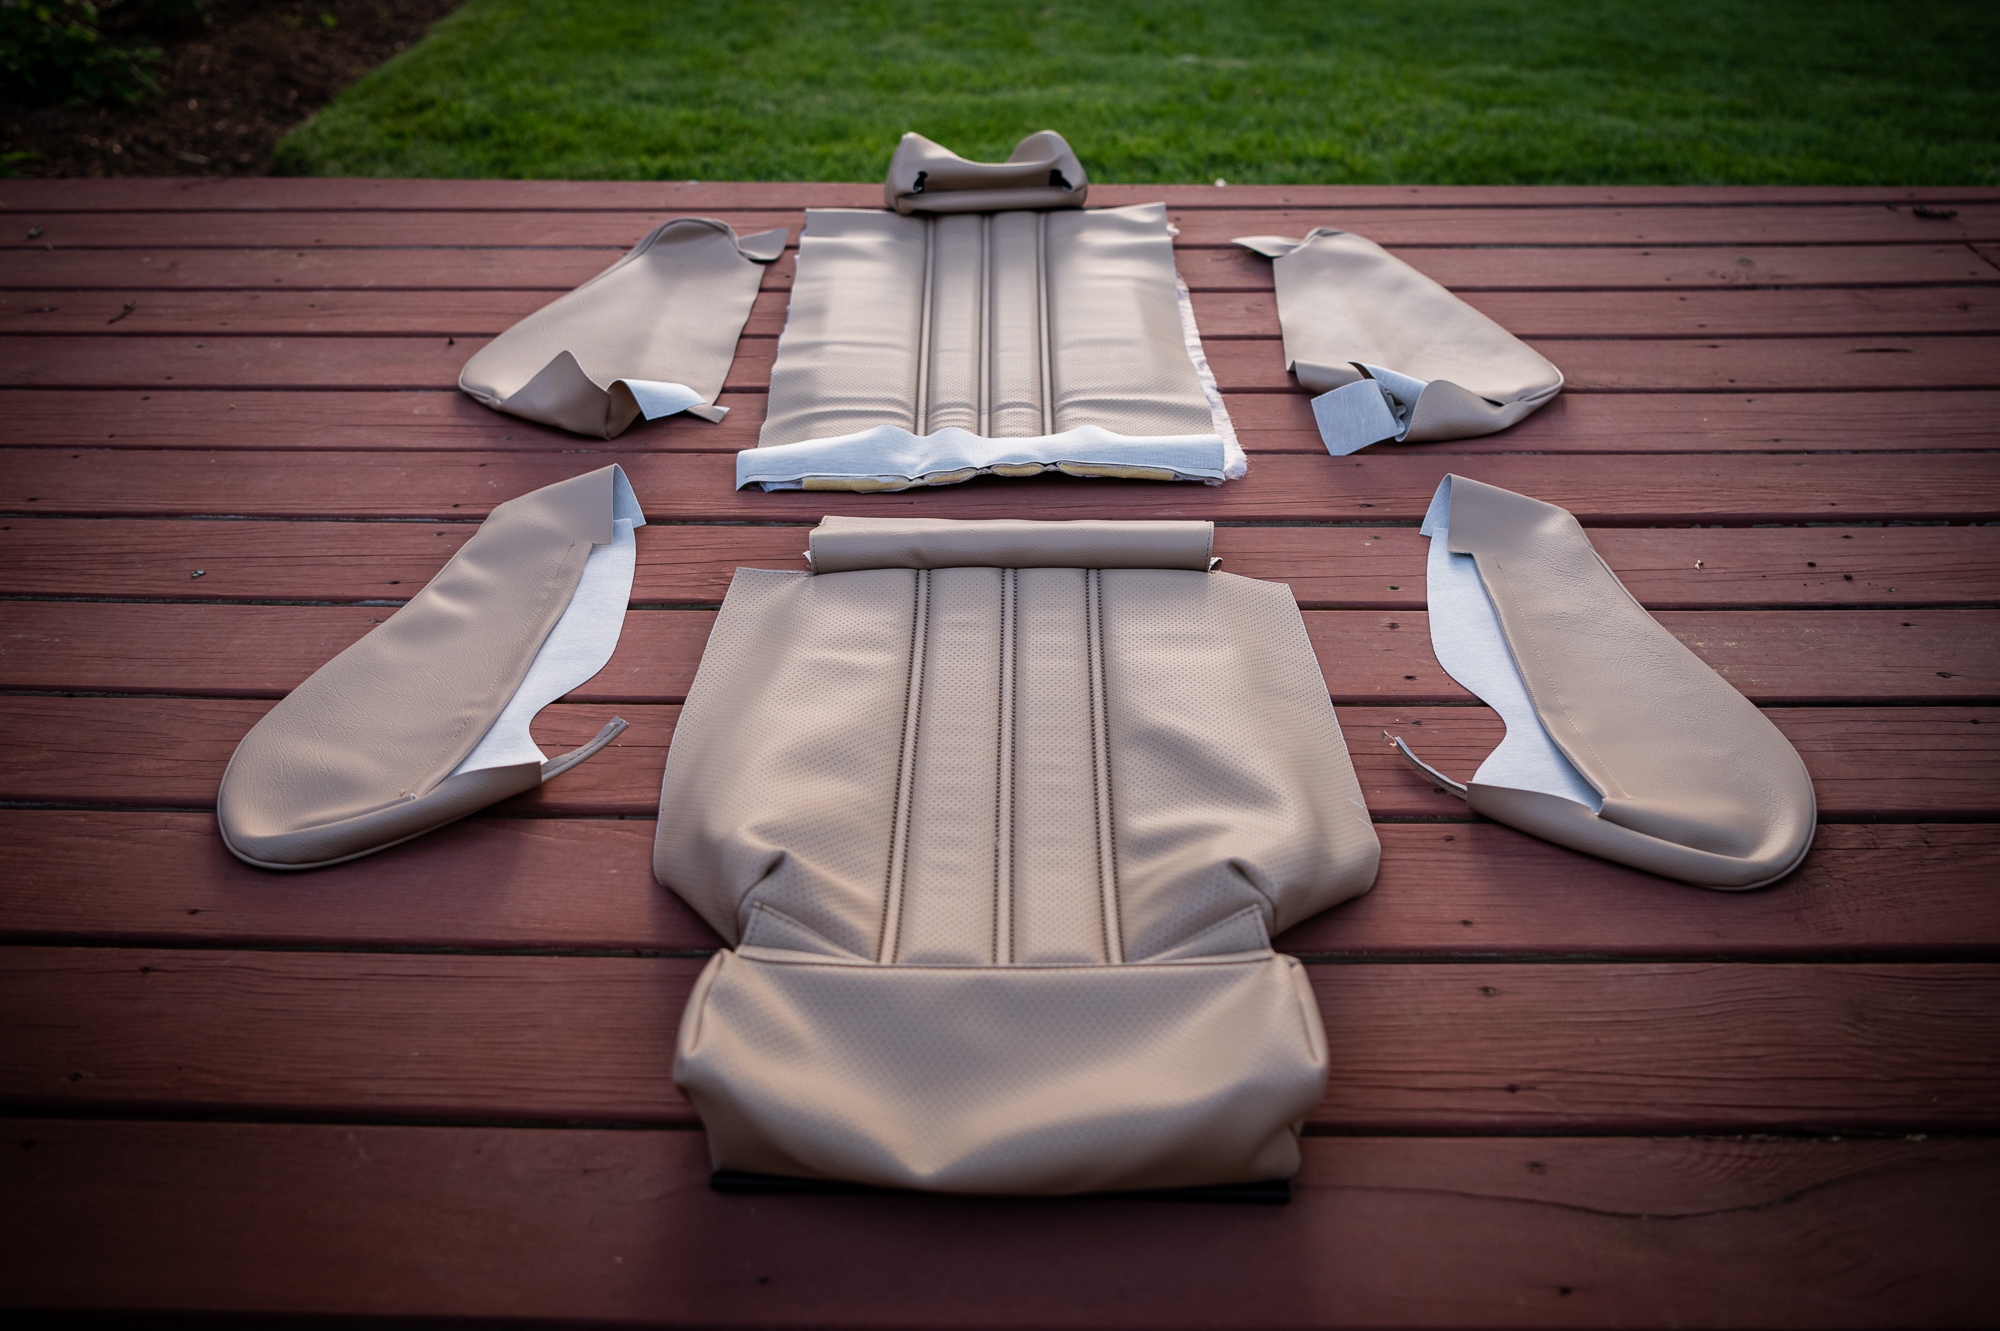
Panels, panels, and more panels of upholstery.
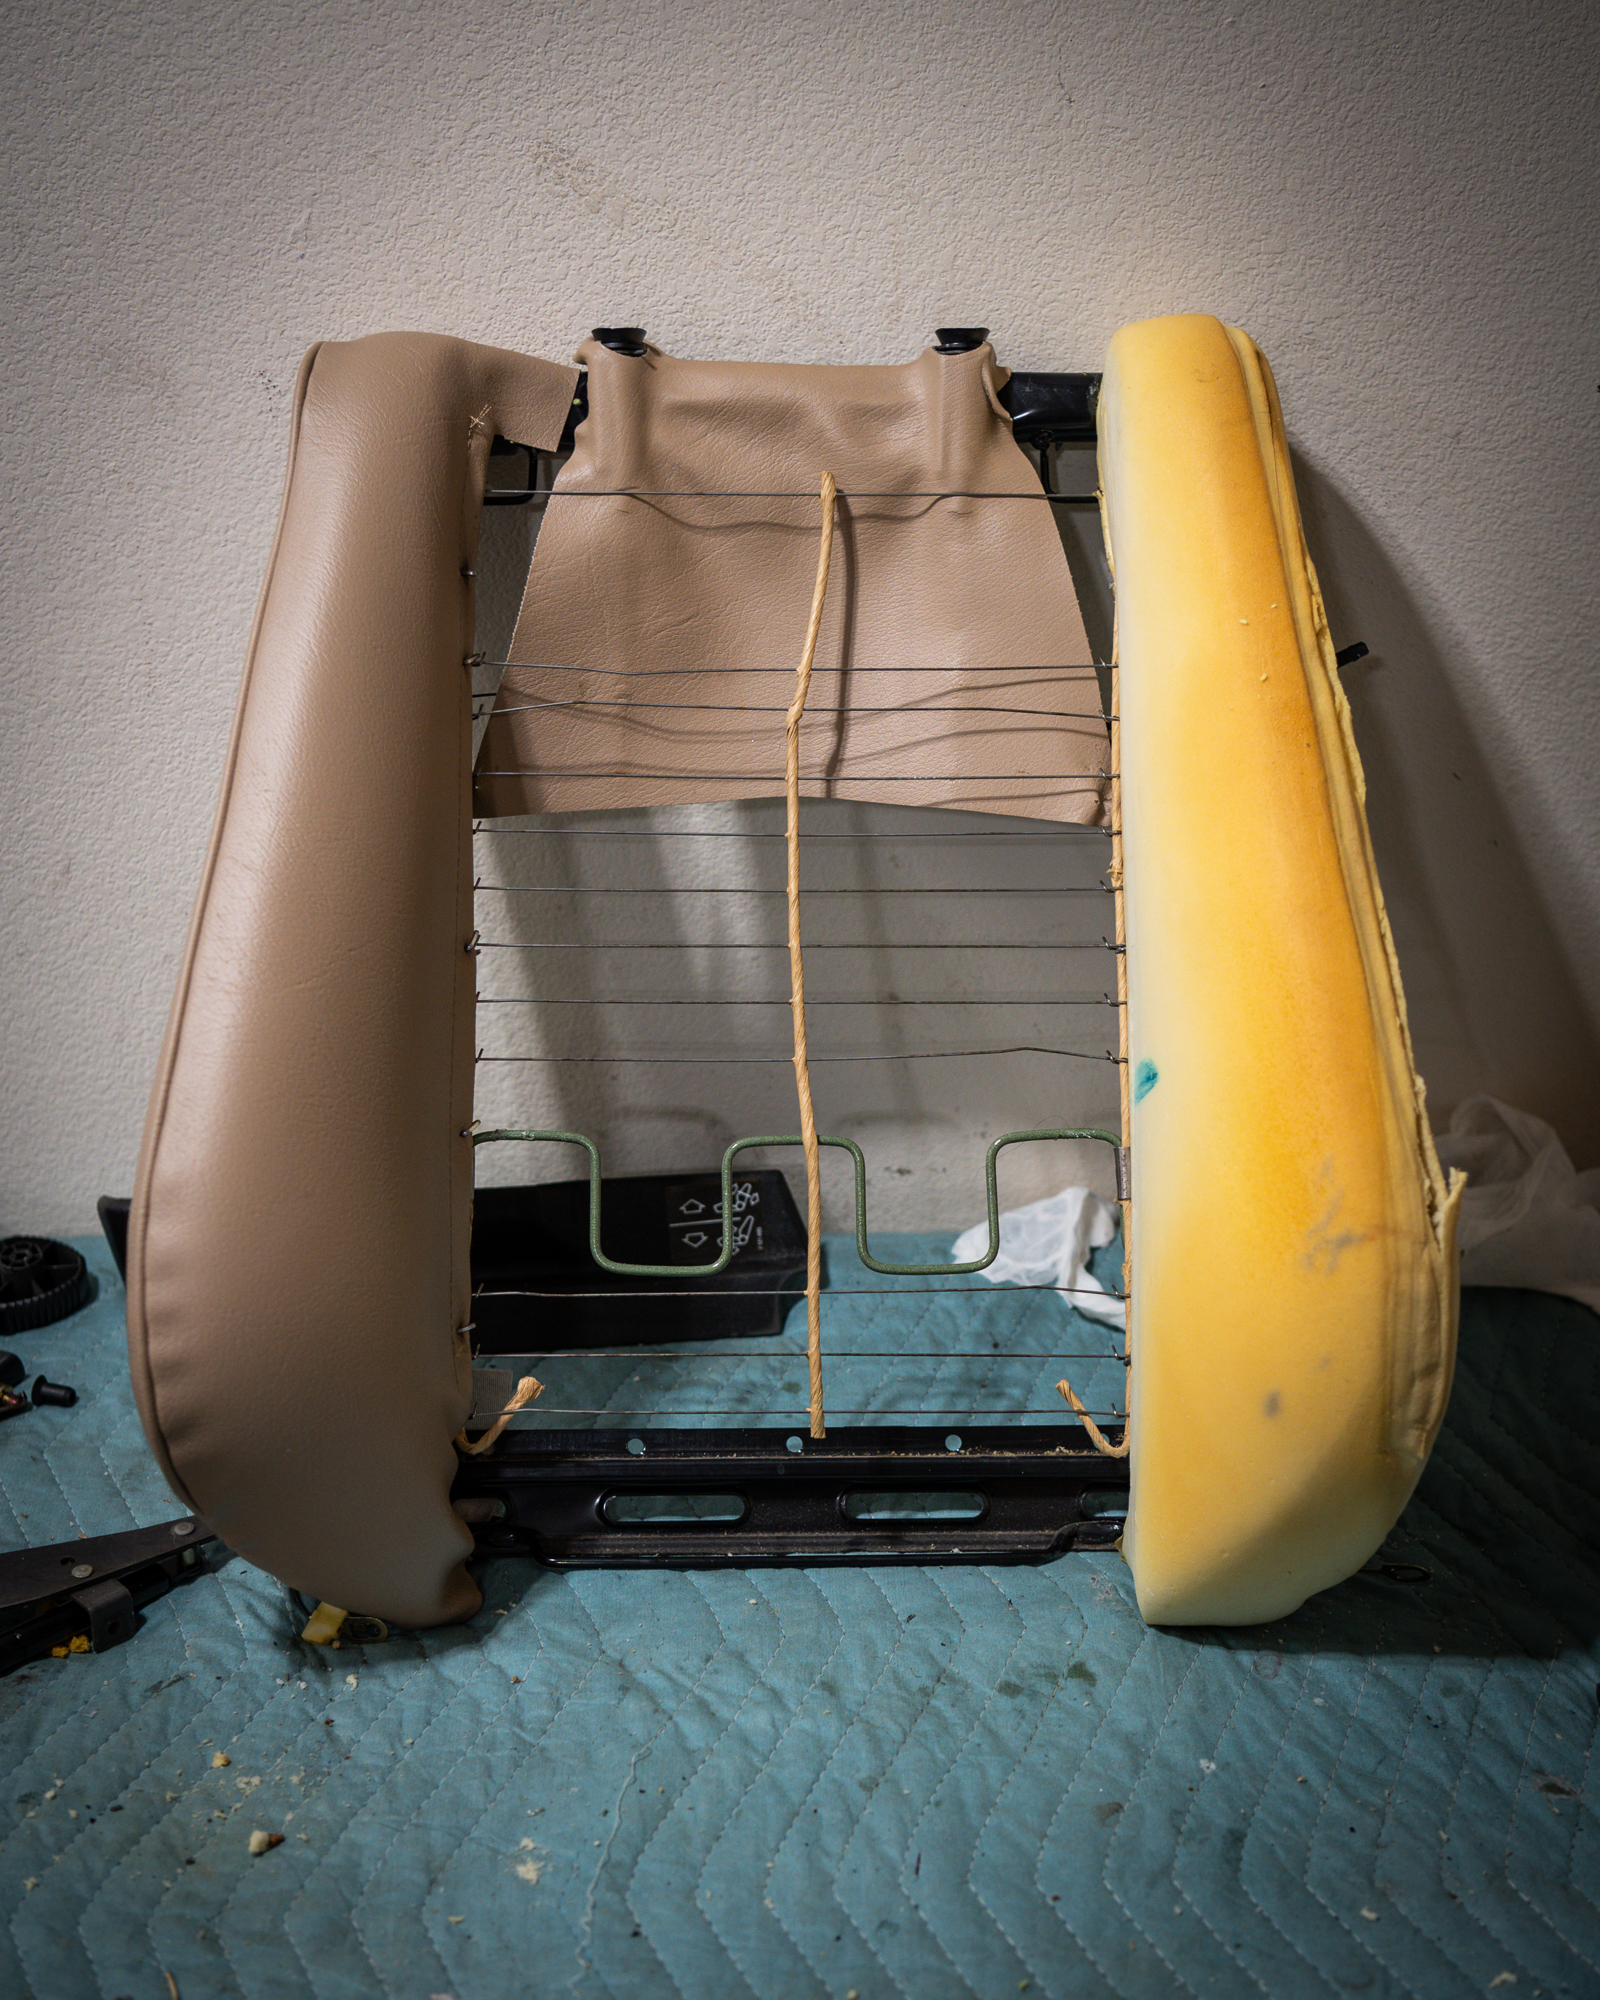
An E30 sport seat consists of eight separate panels: two lower bolsters, a lower center, two upper bolsters, an upper center, a head rest, and a seat back. The entire seat needs to be disassembled to replace each of these panels—something not for the faint of heart. In addition to keeping track of countless clips, nuts, bolts, and washers, the seat sliders, tilt, raise, and extend mechanisms need to be removed. To top it all off, the original upholstery needs to removed, piece by piece, the seat frame and seat pads (the foam below the upholstery) need to be checked for any damage, and then it all needs to go back together, with the new upholstery panels pulled, clipped, and hog-ringed into place for a smooth and clean appearance. Whew!
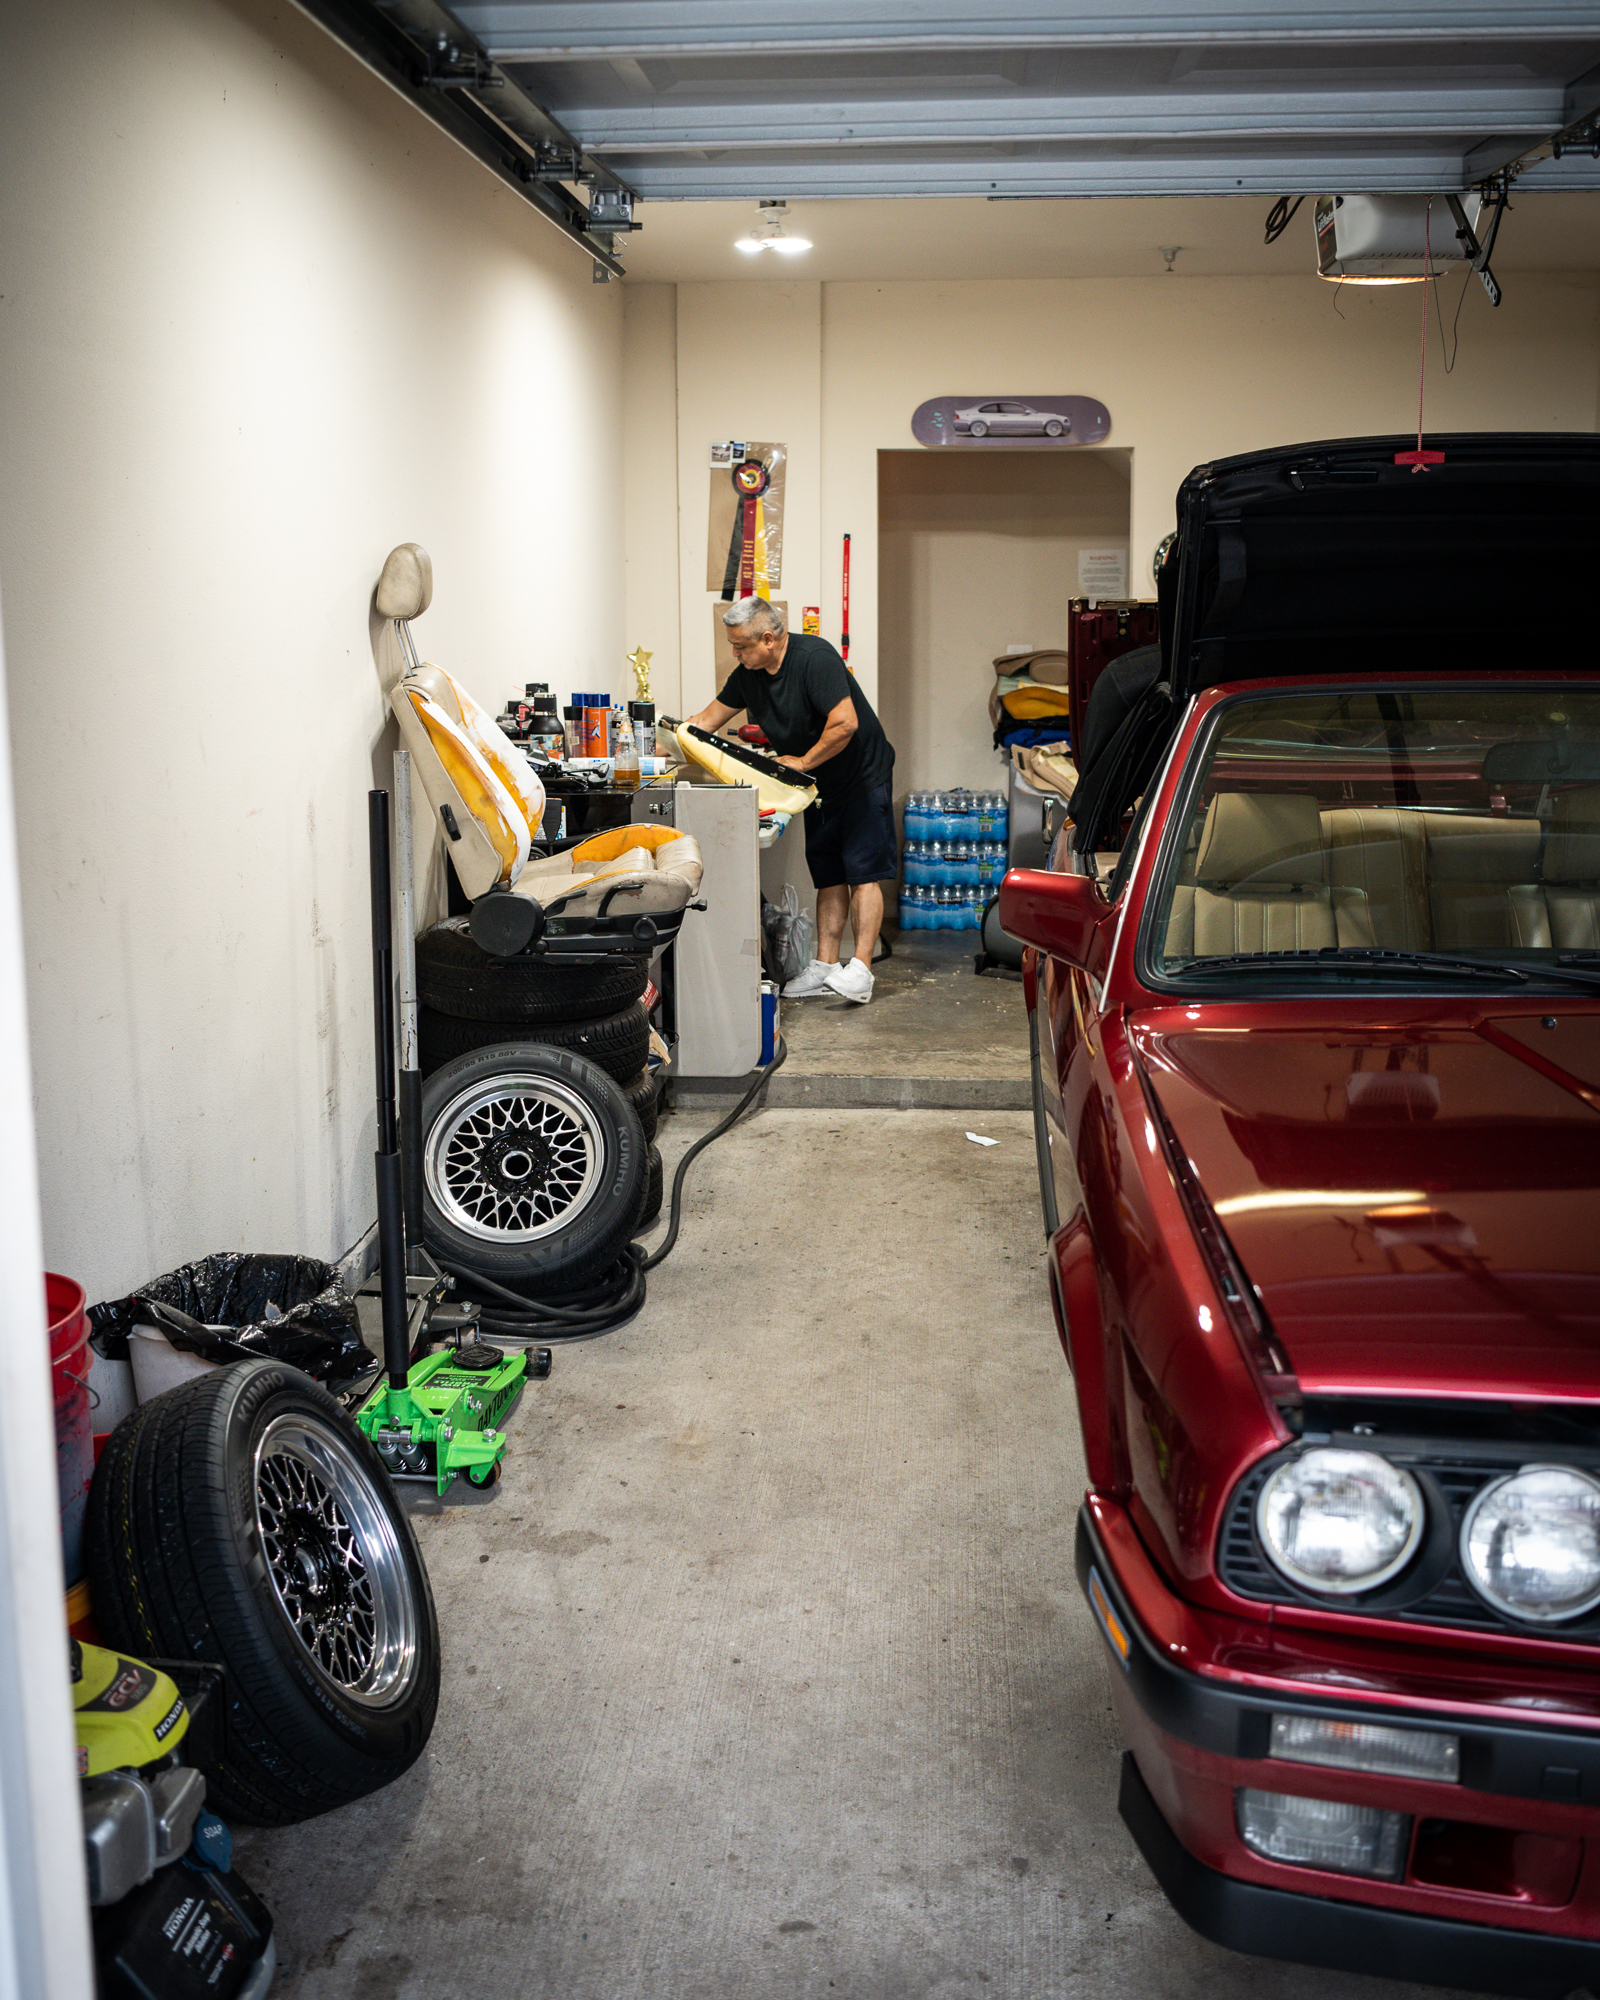
I typically don’t shy away from a challenge, but I had major reservations undertaking this project. Thankfully, my friend Jerry Valega, whose 1986 325e I wrote about earlier this year, offered to showcase his skills and restore my driver’s seat. Jerry has plenty of experience, having repaired at least twenty sets of BMW sport seats, with the results of his first BMW interior restoration still residing in his beloved 325e. He has specialized tools, spare parts, and strategies for handling what lies beneath the surface, making even the most horrendous seats look, feel, and operate like new.
Like a glove!
With the driver’s seat from my 318iS removed and loaded into my 2015 328i Sport Wagon, I headed over to Jerry’s garage to learn a thing or two. Jerry can easily disassemble an E30 sport seat from memory in less than 30 minutes—probably faster without me looking over his shoulder and peppering him with questions. With the seat in seemingly 100 pieces, it was time for an assessment.
Jerry reassured me that my seat was in good condition in comparison to some basket cases that he’s worked on. This frame was free of rust and corrosion and all metal tabs and mounting points were free of cracks and still present. The bolster pads were mostly in decent shape, though both the lower and upper left bolsters had tears and needed repair as these take a lot of abuse during entry and exit. The lower seat pad also had a tear that would need to be addressed. BMW does sell new upper and lower seat pads kits, but the pads from my seat could be saved (saving me around $400).
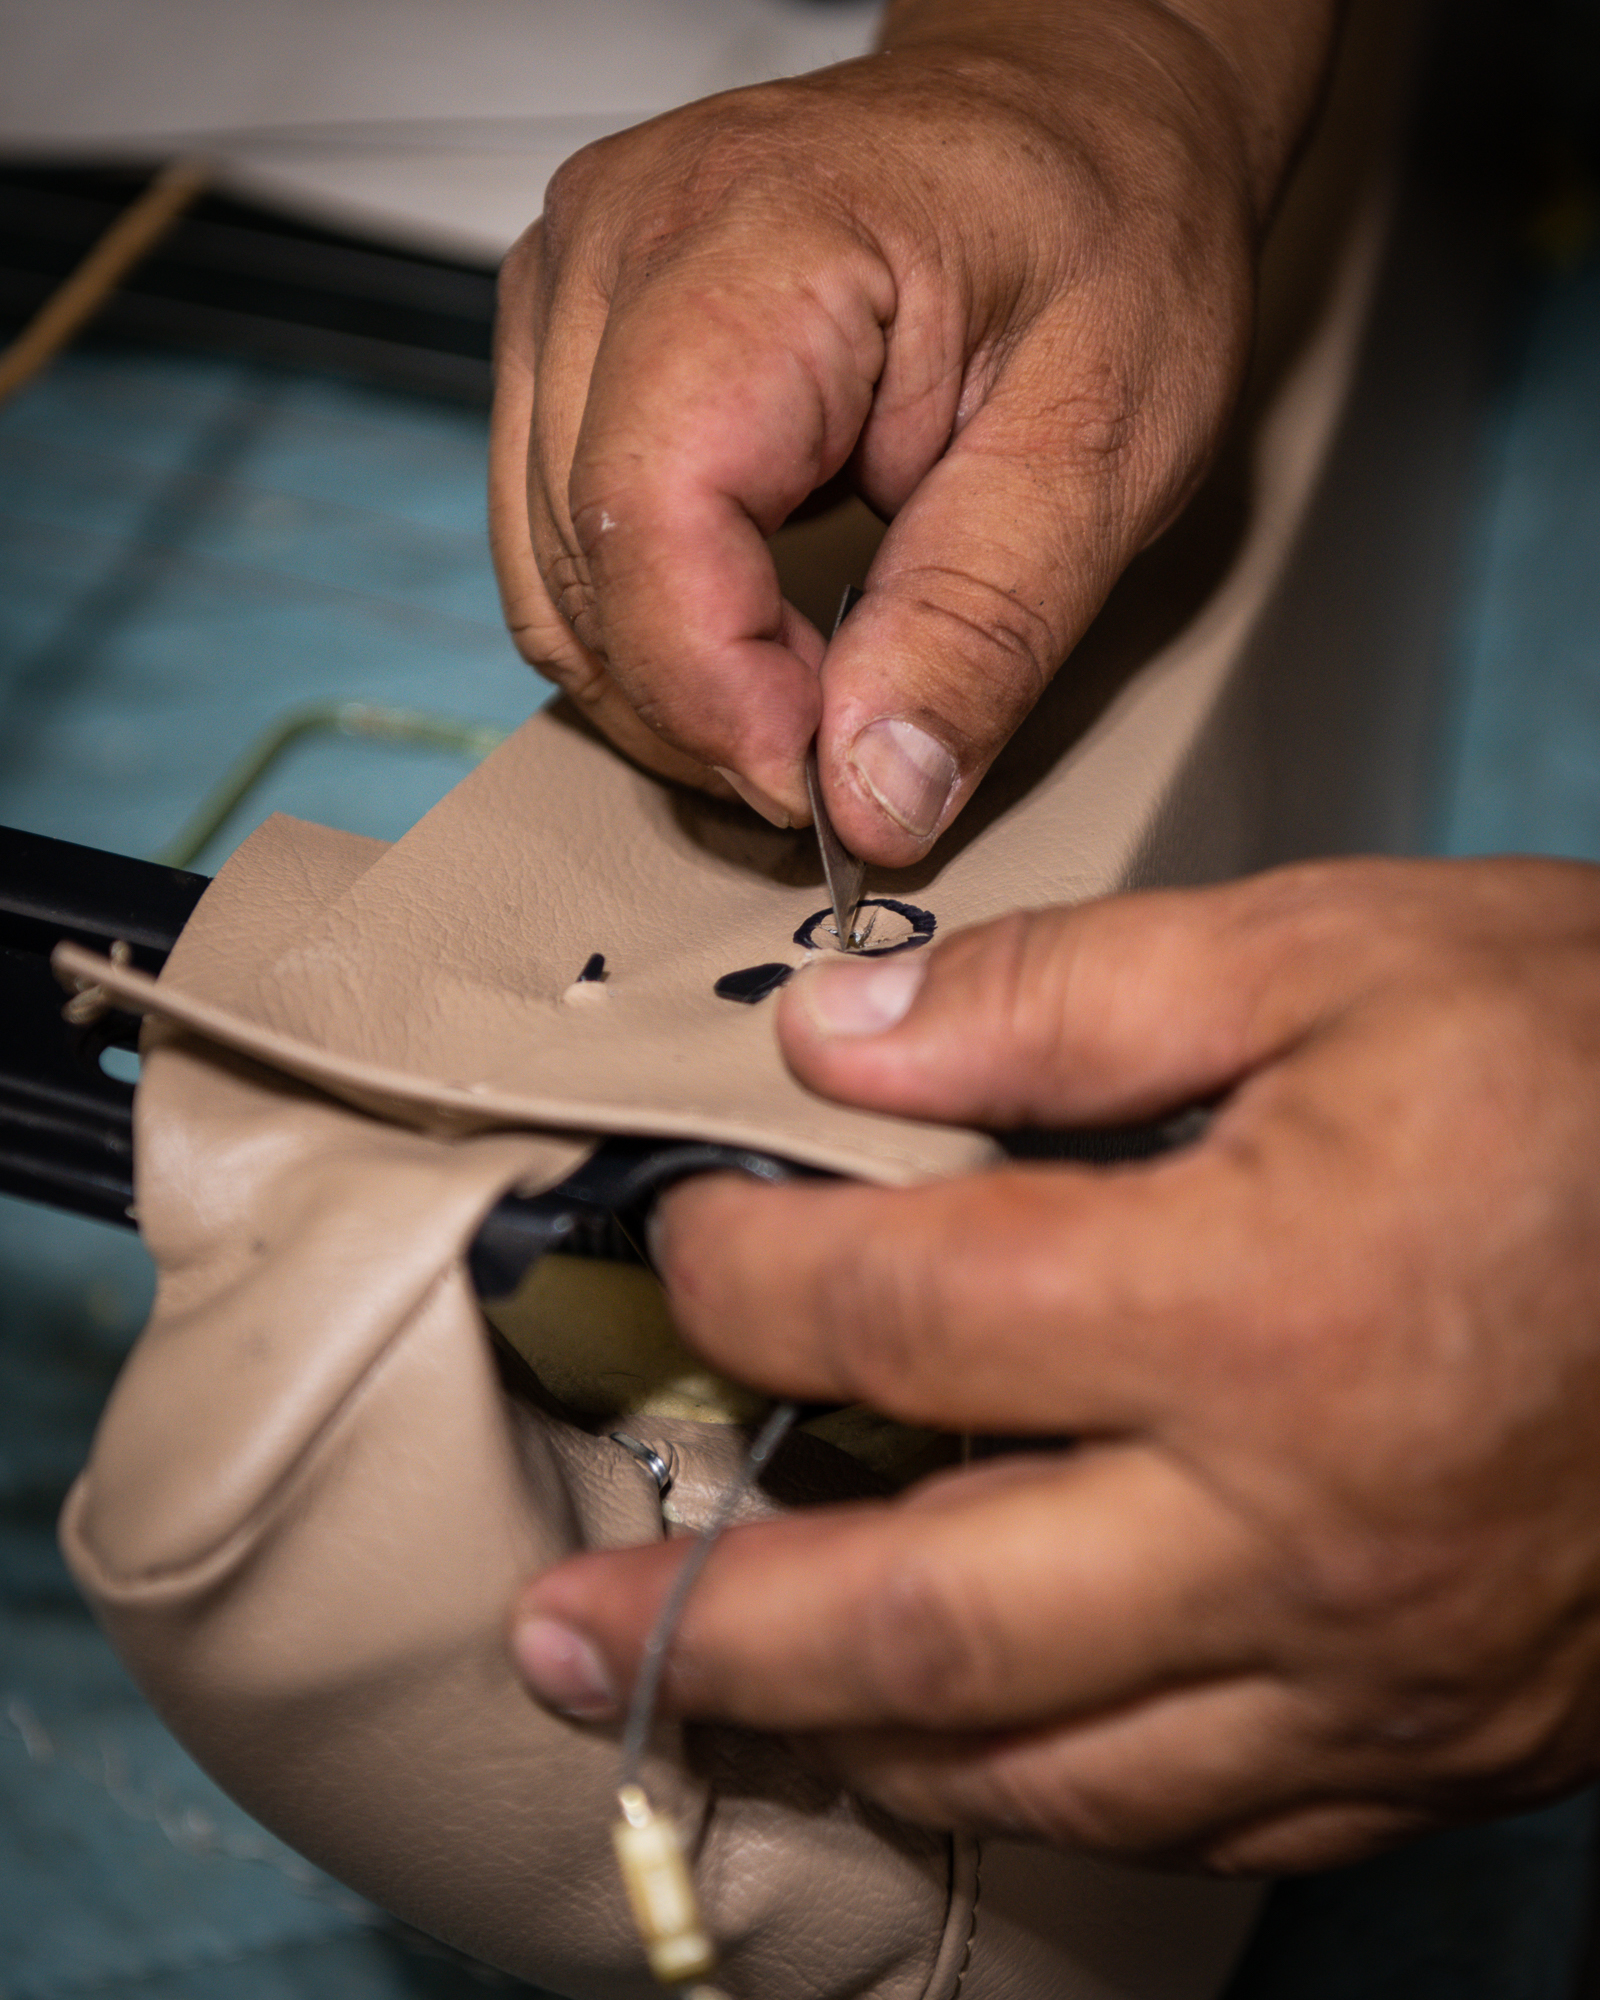
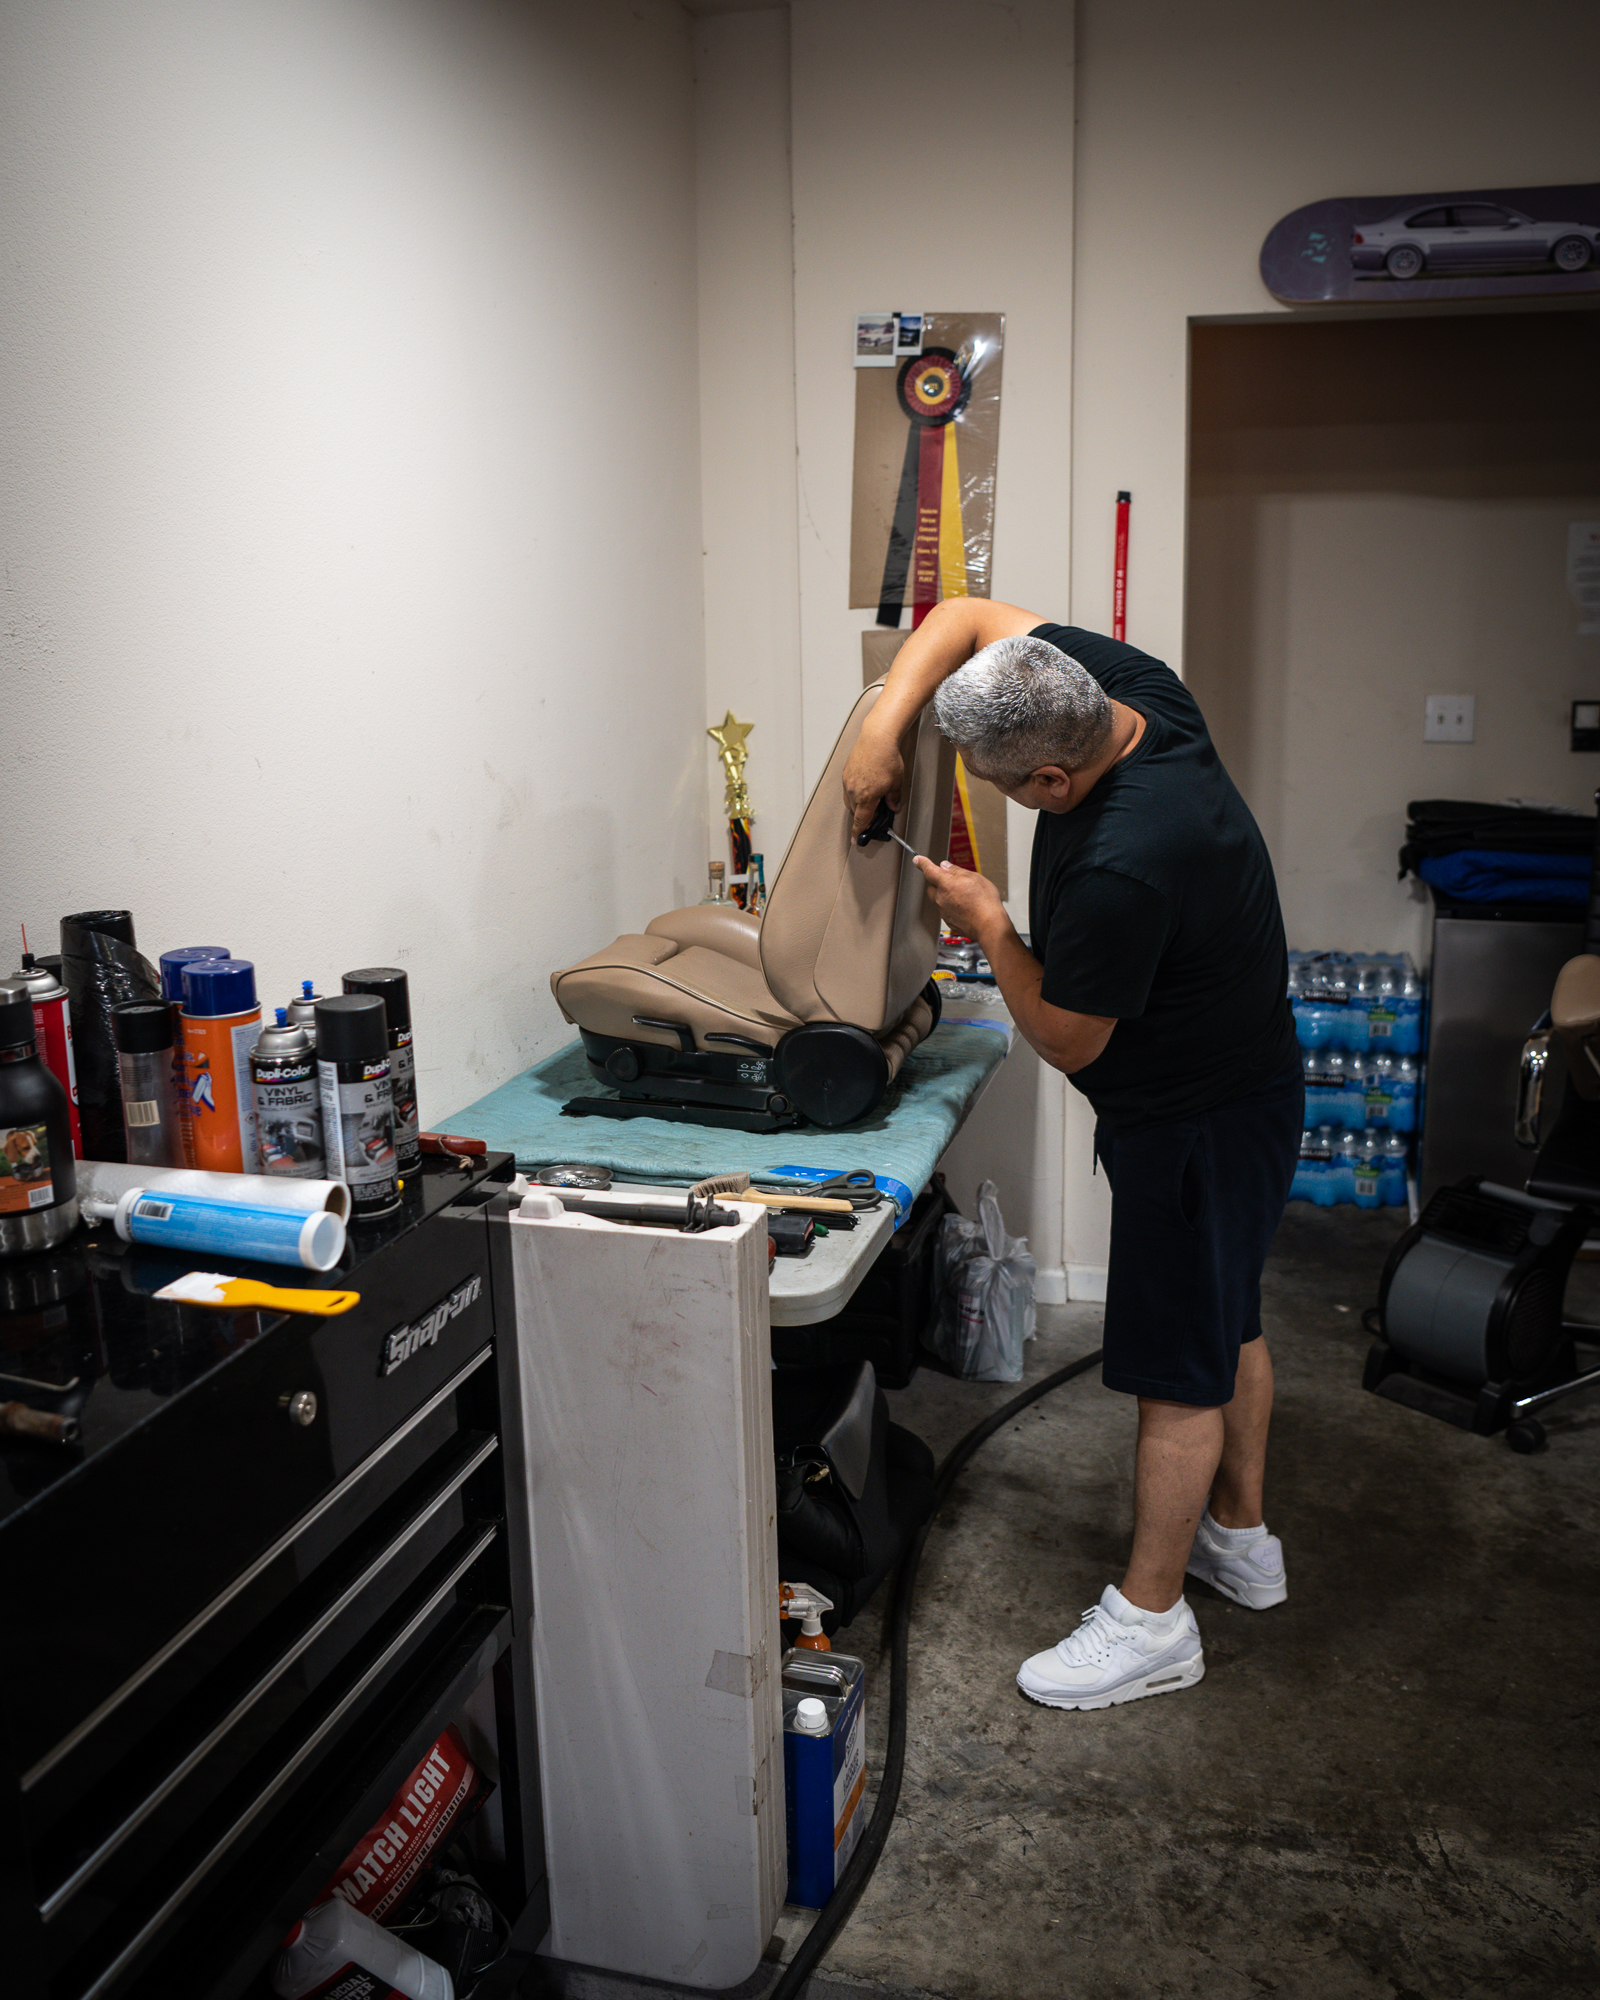
For the bolsters that could be immediately recovered, Jerry showed me how to place, pull, and secure the new upholstery. After massaging it into place, he’d take a step back, look at it, and say, “No, it has to be perfect,” and then he would start over and make fine adjustments. I left Jerry to his art and was pleasantly surprised the next evening with a text, “The seat is DONE.” While he had sent me photos of his progress along the way, I’d have to wait until pickup to see the final product. Suspense intensifies!
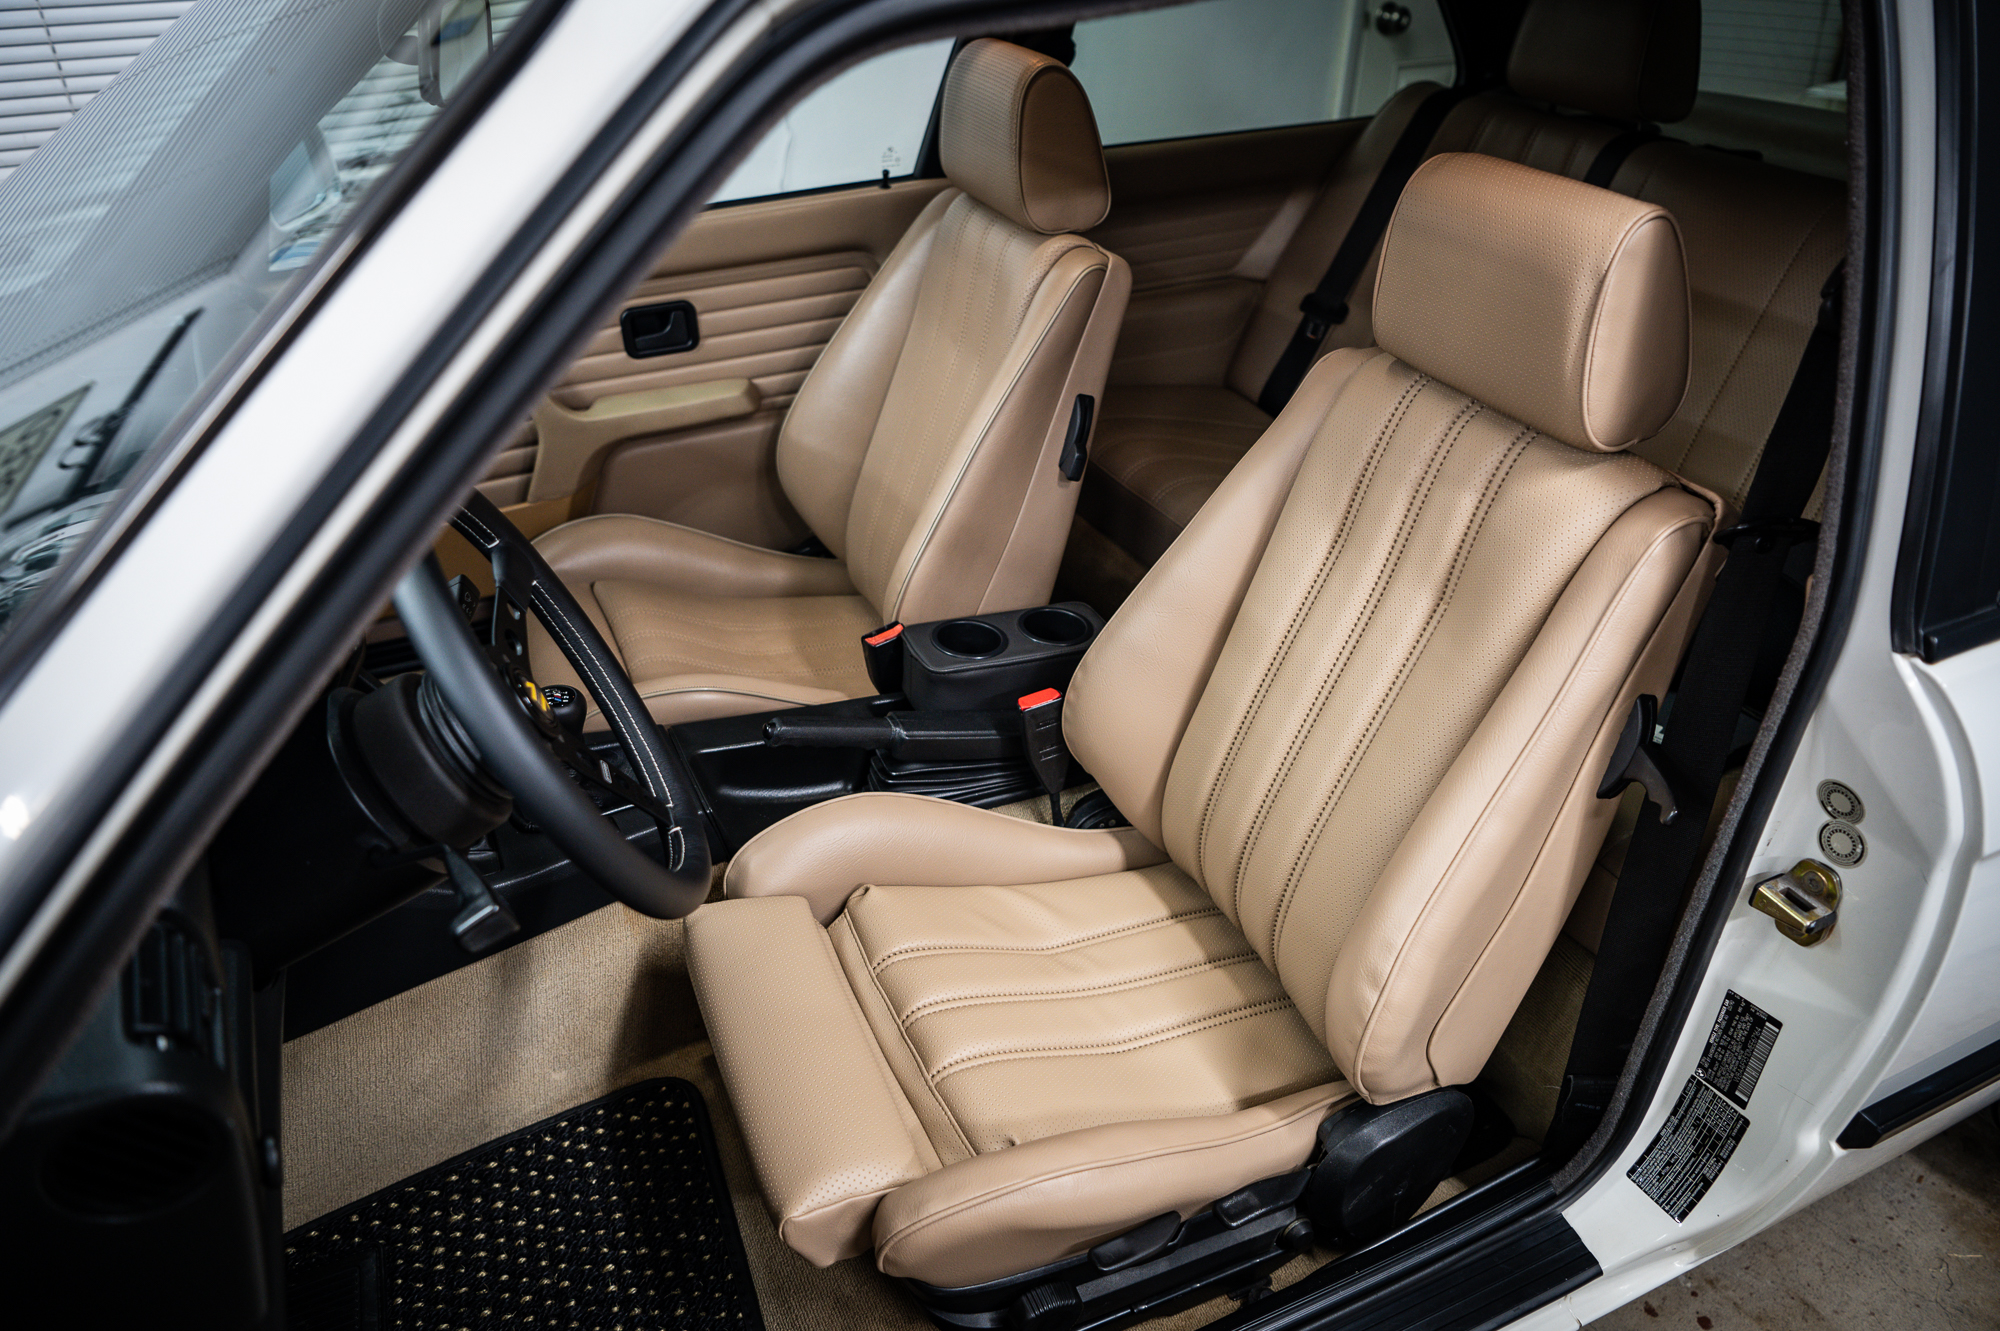
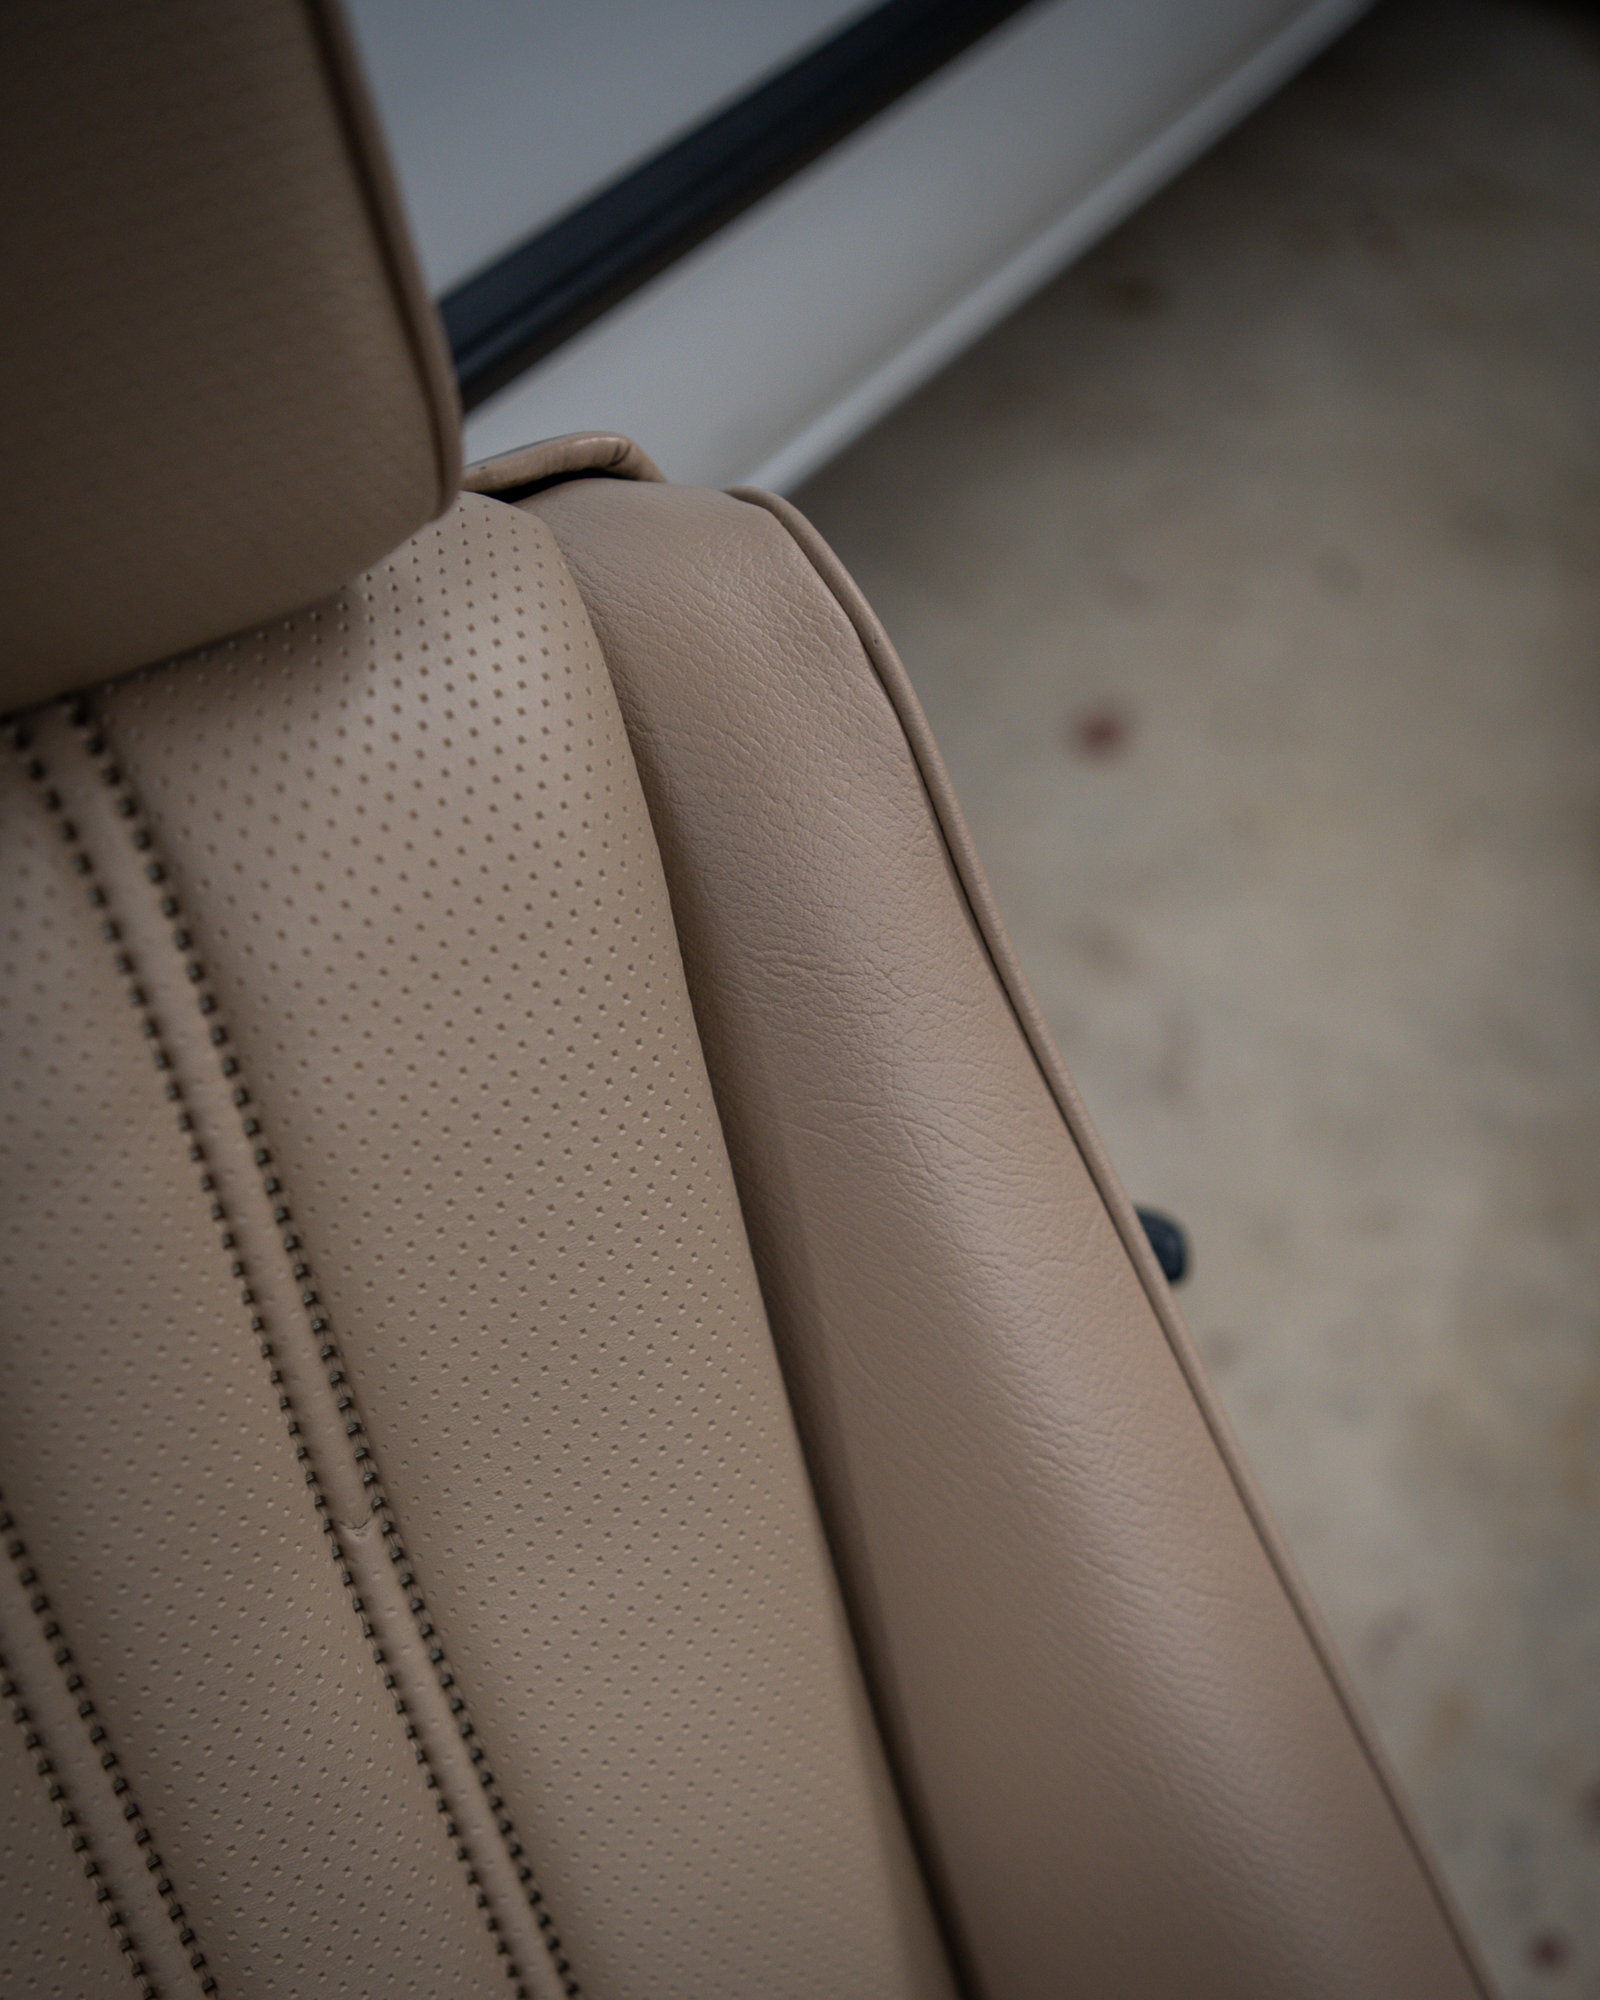
Not that there was ever any doubt, but after Jerry worked his magic, it looks and feels like a new seat. The lower center padding no longer sags and the seat adjustments are sharp and precise. The new vinyl presents nicely over the original repaired bolster pads. Jerry even went as far as repainting the tilt lever, which was previously chipped and showed exposed metal. The replacement upholstery’s color is almost a perfect match to the rest of the interior, allowing me to keep the original upholstery on the front passenger and rear seats. Now that this E30’s interior has been given a new lease on life, I think some seat time is in order. Road trip! —Mike Bevels
[Title Photo by Avery Bevels]
The post Seat Time In A 1991 318iS appeared first on BimmerLife.
]]>The post A Complete 180 With A US-Spec E36 M3 appeared first on BimmerLife.
]]>

It’s the trip that almost wasn’t, as the day prior to our mountain-carving adventure the M3 left me and my kids stranded for the first time in our eighteen months of ownership. Thankfully a set of jumper cables attached to a Suburban in a shaded gravel parking lot allowed the M3’s S52 engine to roar back to life and make the short drive home for diagnostics.
How could it not start?!? It’s an S52 engine that has received lots of love under my care, including a head gasket replacement performed in my garage under the tutelage of mobile mechanic and friend Alex Garcia, plus plenty of other deferred and preventive maintenance to keep this M car ticking—or should I say purring?—for years to come. After a brief diagnostic session with a multimeter, I determined the battery would no longer hold a charge and needed to be replaced. Easy peasy, lemon squeezy. A trip to Costco and 180 “dollar-bucks” later, I installed a new H6 AGM battery (and the missing battery vent tube) in the E36’s trunk and this automotive adventure was still on.
While temperatures were in the upper 90s in the Washington DC area, it was a solid twenty degrees cooler 70 miles west in the Appalachian Mountains, partly due to a storm system rolling in. We’ve done this trip a few times in my 1991 318iS, so to change things up a bit we decided to do a one-eighty and run our 180-mile route in reverse, entering Skyline Drive at the Thornton Gap entrance and exiting in Front Royal. This gave the trip an entirely new perspective of scenery—especially for me, the transporter of precious cargo, my son Carter, daughter Avery, and wife Sara.
On our way to Thornton Gap, Route 211 provided a fun run up the mountain, with a plethora of properly banked sweepers, and concluded the spirited driving of the day. The TC Kline single-adjustable coilover suspension that Avery helped me install over the winter—go Avery!—supplied a perfect blend of comfort and performance, magically soaking up bumps yet still inspiring plenty of confidence in the corners. A set of Michelin Pilot 4S tires ensured ample grip and audibly communicated those grip levels through the opened windows of our RADwood-era sports sedan. The Euro-spec Boa Boa interior added to the 1990s nostalgia, keeping all occupants comfortably in place.
A fourth-grade “Every Kid Outdoors” pass allowed us free access to Shenandoah National Park, courtesy of my fourth-grade daughter Avery. Skyline Drive has wonderfully paved and twisty roads, but also has a speed limit of 35 mph (or less in some areas), so the rest of the morning consisted of comfortable cruising and frequent stops at overlooks. With cooler temperatures and overcast skies, we took a 90-minute hike on Traces Trail to delve into nature a bit further and take a break from the S52’s exhaust burbles, exiting through the Active Autowerke cat-back. As someone who is quite picky about exhaust drone and obtrusiveness, this is one of the better systems I’ve experienced.


Views of the Shenandoah and the opportunity for overlooks dissipated as we descended the mountain, dropping us into Front Royal. Snacks and water had held us over until now, but we were hungry for lunch, so we stopped by a Front Royal staple, The Apple House. With BBQ in our stomachs and a dozen home-made apple cider donuts in the trunk, we made our way back home just as it began to drizzle, further cooling things off.
A straight shot home and a car full of napping passengers gave me some time to reflect on our (my) vehicle choice for this family outing. For a long time, I didn’t give the E36 M3 a second look. It was more of a “Meh 3” than an M3. From a visual perspective, aside from bumpers and side skirts, the E36 Ms didn’t stand out from the non Ms, unlike the M3 generation before it and generations after it. From a performance perspective, many complain that the US-spec M3 engine is a poor substitute for the Euro-spec version.
And then one morning a few years ago I woke up and none of that mattered anymore. Like this trip, I did a complete 180 on my thoughts on the US-spec E36 M3 with its lackluster styling and less-than-Euro-spec performance stats. Similar to Mike Myers’ character drooling over a Fender Stratocaster in Wayne’s World, I said, “It will be mine. Oh yes. It will be mine.” After a somewhat lengthy casual search for a clean E36 M3 sedan with a five-speed manual, I found “the one” and have been enjoying it ever since.
While magazine racers will point out the US-spec E36 M3 is a watered down version of the Euro-spec version, it still has many M-specific improvements over the standard E36, such as additional chassis reinforcements, upgraded brakes, upgraded suspension, M bumpers and sideskirts, interior updates, and an S-code engine. The places where the US-spec E36 M3 fell short of the Euro-spec version were strategic, significantly reducing cost and keeping the M3’s price tag around $35,000. That, along with a successful letter-writing campaign introduced by the BMW Car Club Of America to even bring an E36 M3 to our shores, are credited for saving the M brand in North America.
The biggest difference between the US and Euro-spec E36 M3s is what’s under the hood. Both variants received a 3.0-liter unit in their initial stages with a 3.2-liter following. The 1995 US-spec M3’s 3.0-liter six (S50) produced 240-horsepower while the ’96-’99 M3’s 3.2-liter six (S52) yielded the same horsepower, but added eleven pound feet of torque. In contrast, the European E36 M3 engines featured individual throttle bodies and a continuously variable VANOS, with early 3.0-liter units producing 286 horsepower and later 3.2-liter units boasting a staggering 321—quite the power bump compared to what traveled on roads from sea to shining sea. The post-1995 US-spec S52 M3s are often jokingly called “332i”s—back when model names reflected engine sizes—due to the engine being more similar to a typical M-code engine than a typical S-code engine.
Differences weren’t limited to the engine. The later Euro-spec M3s received a six-speed-manual transmission while the US was still stuck with a five speed, and the Euro-spec Ms had stronger rear differentials to handle the higher power output. US-spec M3s didn’t come with the floating brake rotors, glass headlights, or an oil temperature gauge that was seen in the Euro versions, just to name a few more shortcomings.
Having said all of that, does it really matter? The US-spec M3 is an excellent performer in its own right and it’s more motorsport-focused than a standard 3 Series. And, quite frankly, we didn’t have a choice in the matter—it’s what we got. The E36 3 Series combines a nice balance of classic rawness and modern comfort, which has been diluted with each generation M3 after it. Driving one is both an engaging and exhilarating experience. I’d venture to say the US-spec M3 is not only more dependable, but is cheaper to maintain than the Euro-spec version, and we see plenty of high-mileage examples still on the road today, with some cars seeing over 500,000 miles on their odometers.
As we pulled into our garage late that afternoon, our M3 cooled down from a full day of activities while we geared up for a fun evening of celebrating our nation’s Independence Day with friends. Our reverse-route 180-mile road trip to Shenandoah National Park further justified my previous change of heart about the US-spec E36 M3. It performs admirably with true M-car spirit, it wears high mileage like a badge of honor, and it puts a smile on your face. What more could you ask for in a car? Well, aside from individual throttle bodies, continuously variable VANOS, floating brake rotors, glass headlights, and an oil temperature gauge…
—Mike Bevels
The post A Complete 180 With A US-Spec E36 M3 appeared first on BimmerLife.
]]>The post Get Out And Drive—Greg Bare’s 1966 2000 Tilux appeared first on BimmerLife.
]]>What drew Greg to BMW? He laughs, “How much time do you have? I got into BMWs when my dad brought home a very, very sad 1973 2002.” Greg was in middle school at the time, but after he and his father went through the 2002, it became Greg’s first car. In fact, he was autocrossing the ‘73 alongside his father’s ‘75 2002 when he was only carrying a learner’s permit at the age of fifteen. “My dad had to sign a waiver for me,” he explains.
A love and familiarity of 2002s led to buying, fixing, selling, and parting out more of the iconic model than some have seen in an entire lifetime. Greg jokes, “I’ve owned over a hundred 2002s, and I’ve driven about seven of them.” When Greg was in high school, he and his friends would find cheap 2002s, fix them, have fun with them, and then move on to the next. Or if they were too far gone, he would part them out. “I would sell the parts to help fund fixing up my own BMWs. It was never a business, it’s just how we funded our projects—and our fun,” he says.
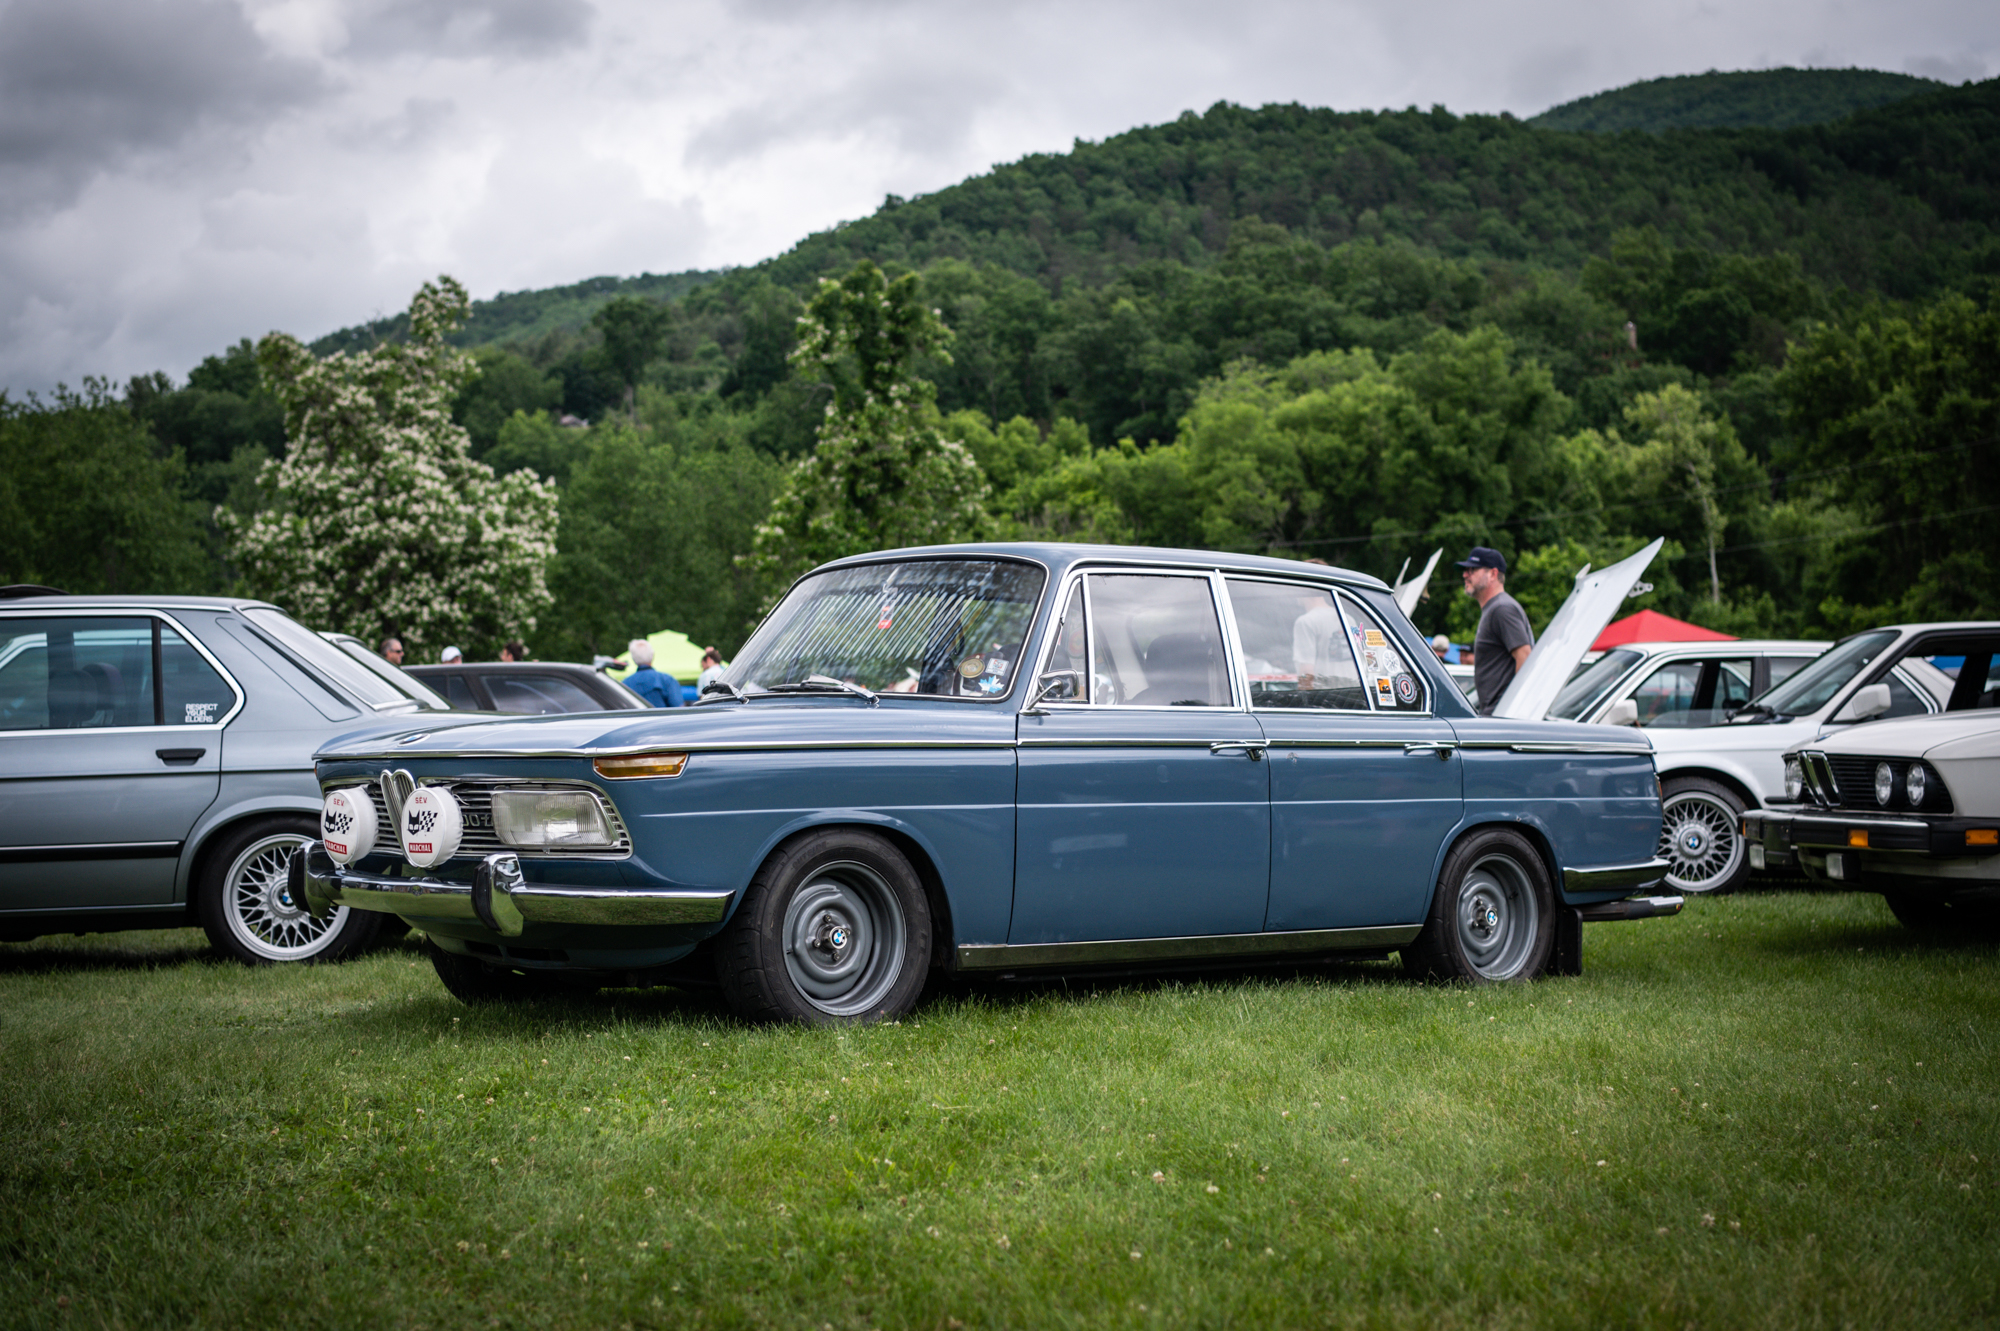
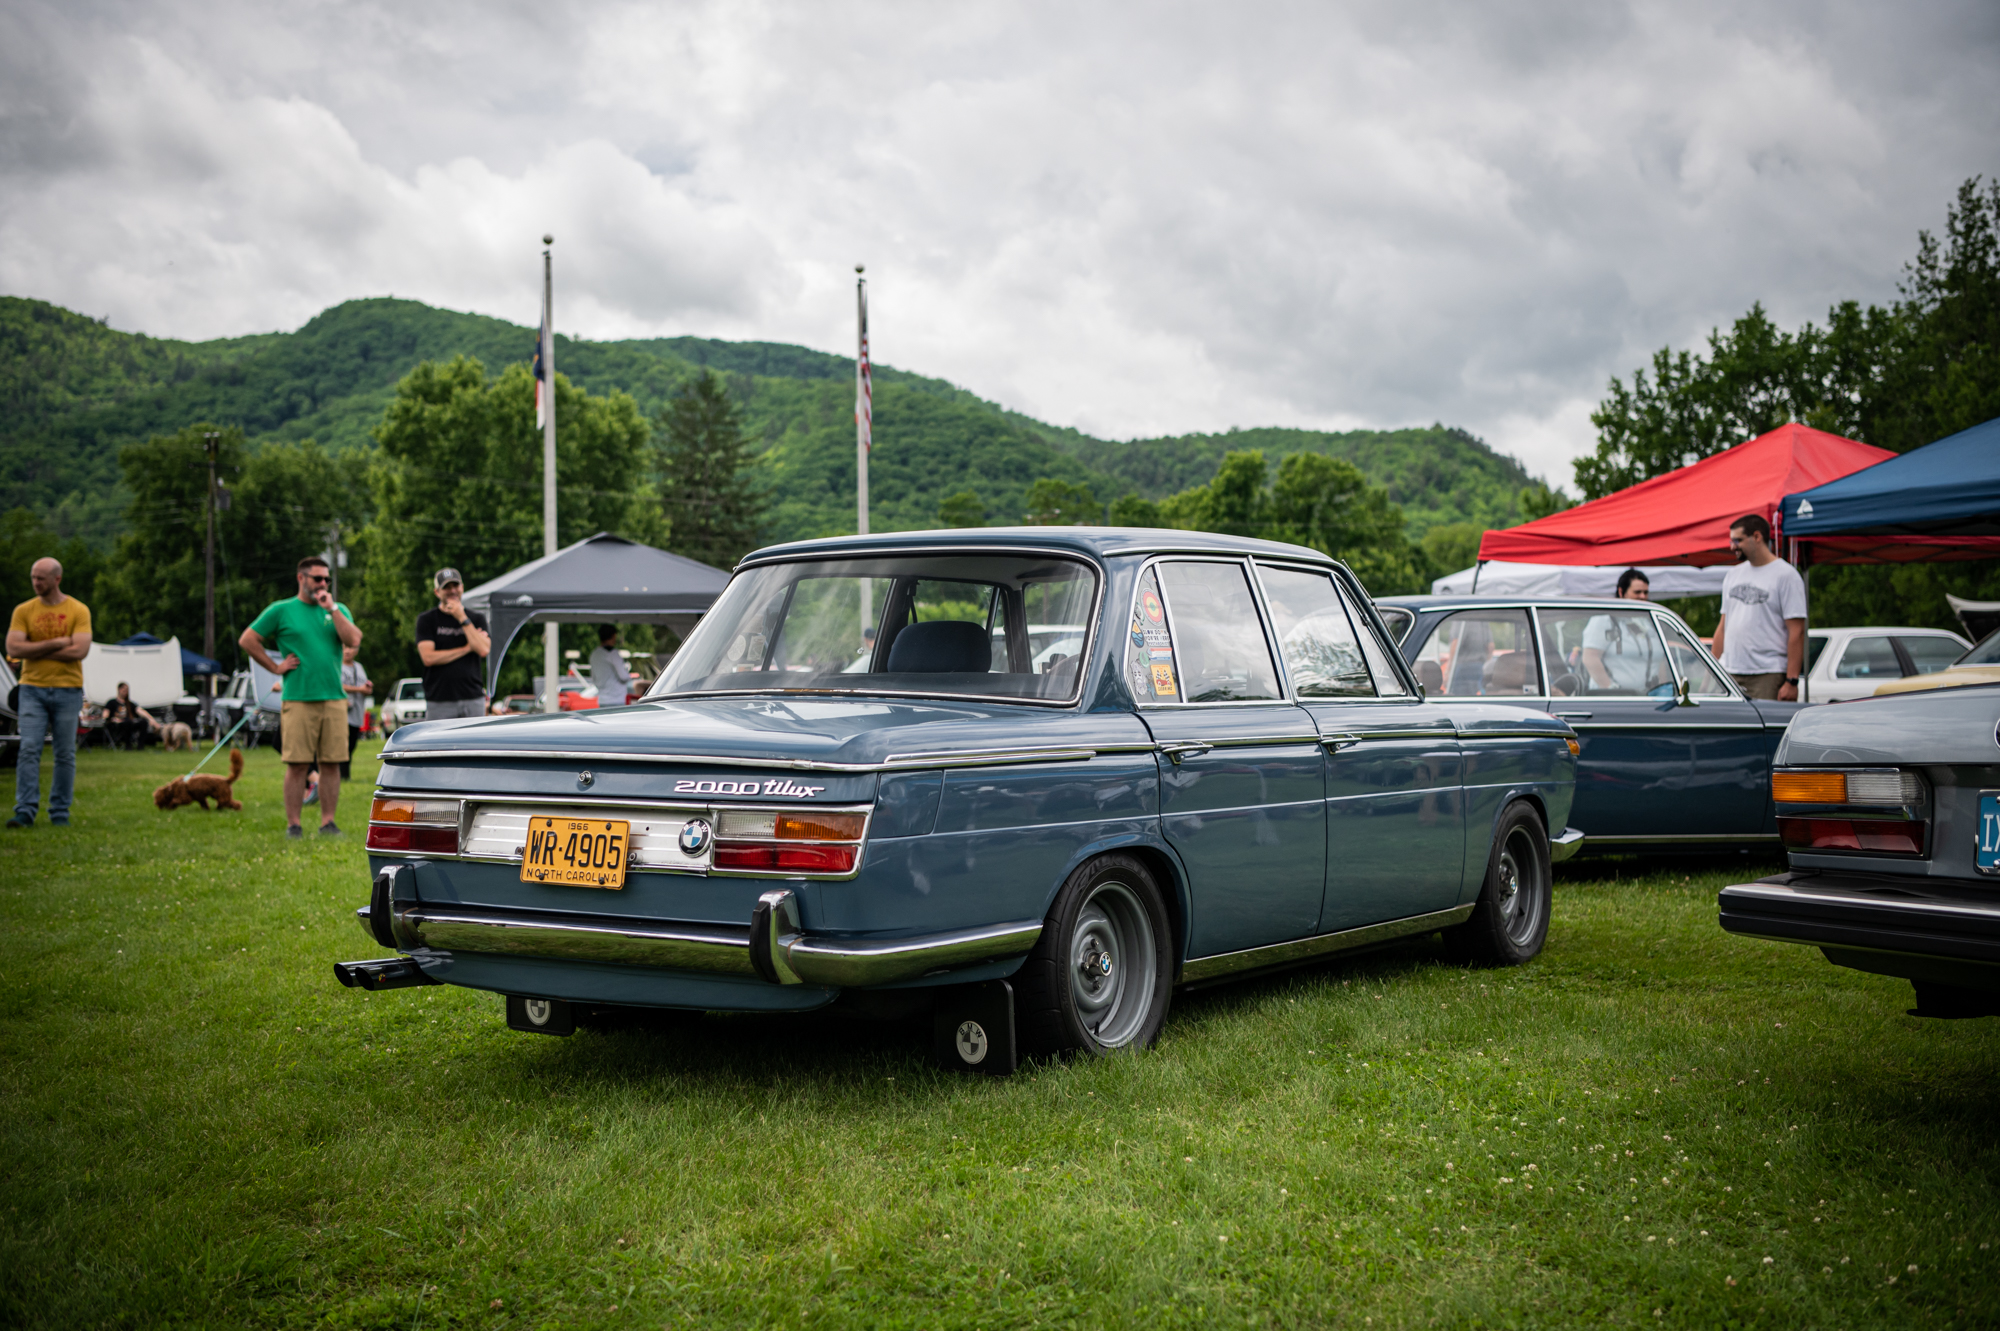
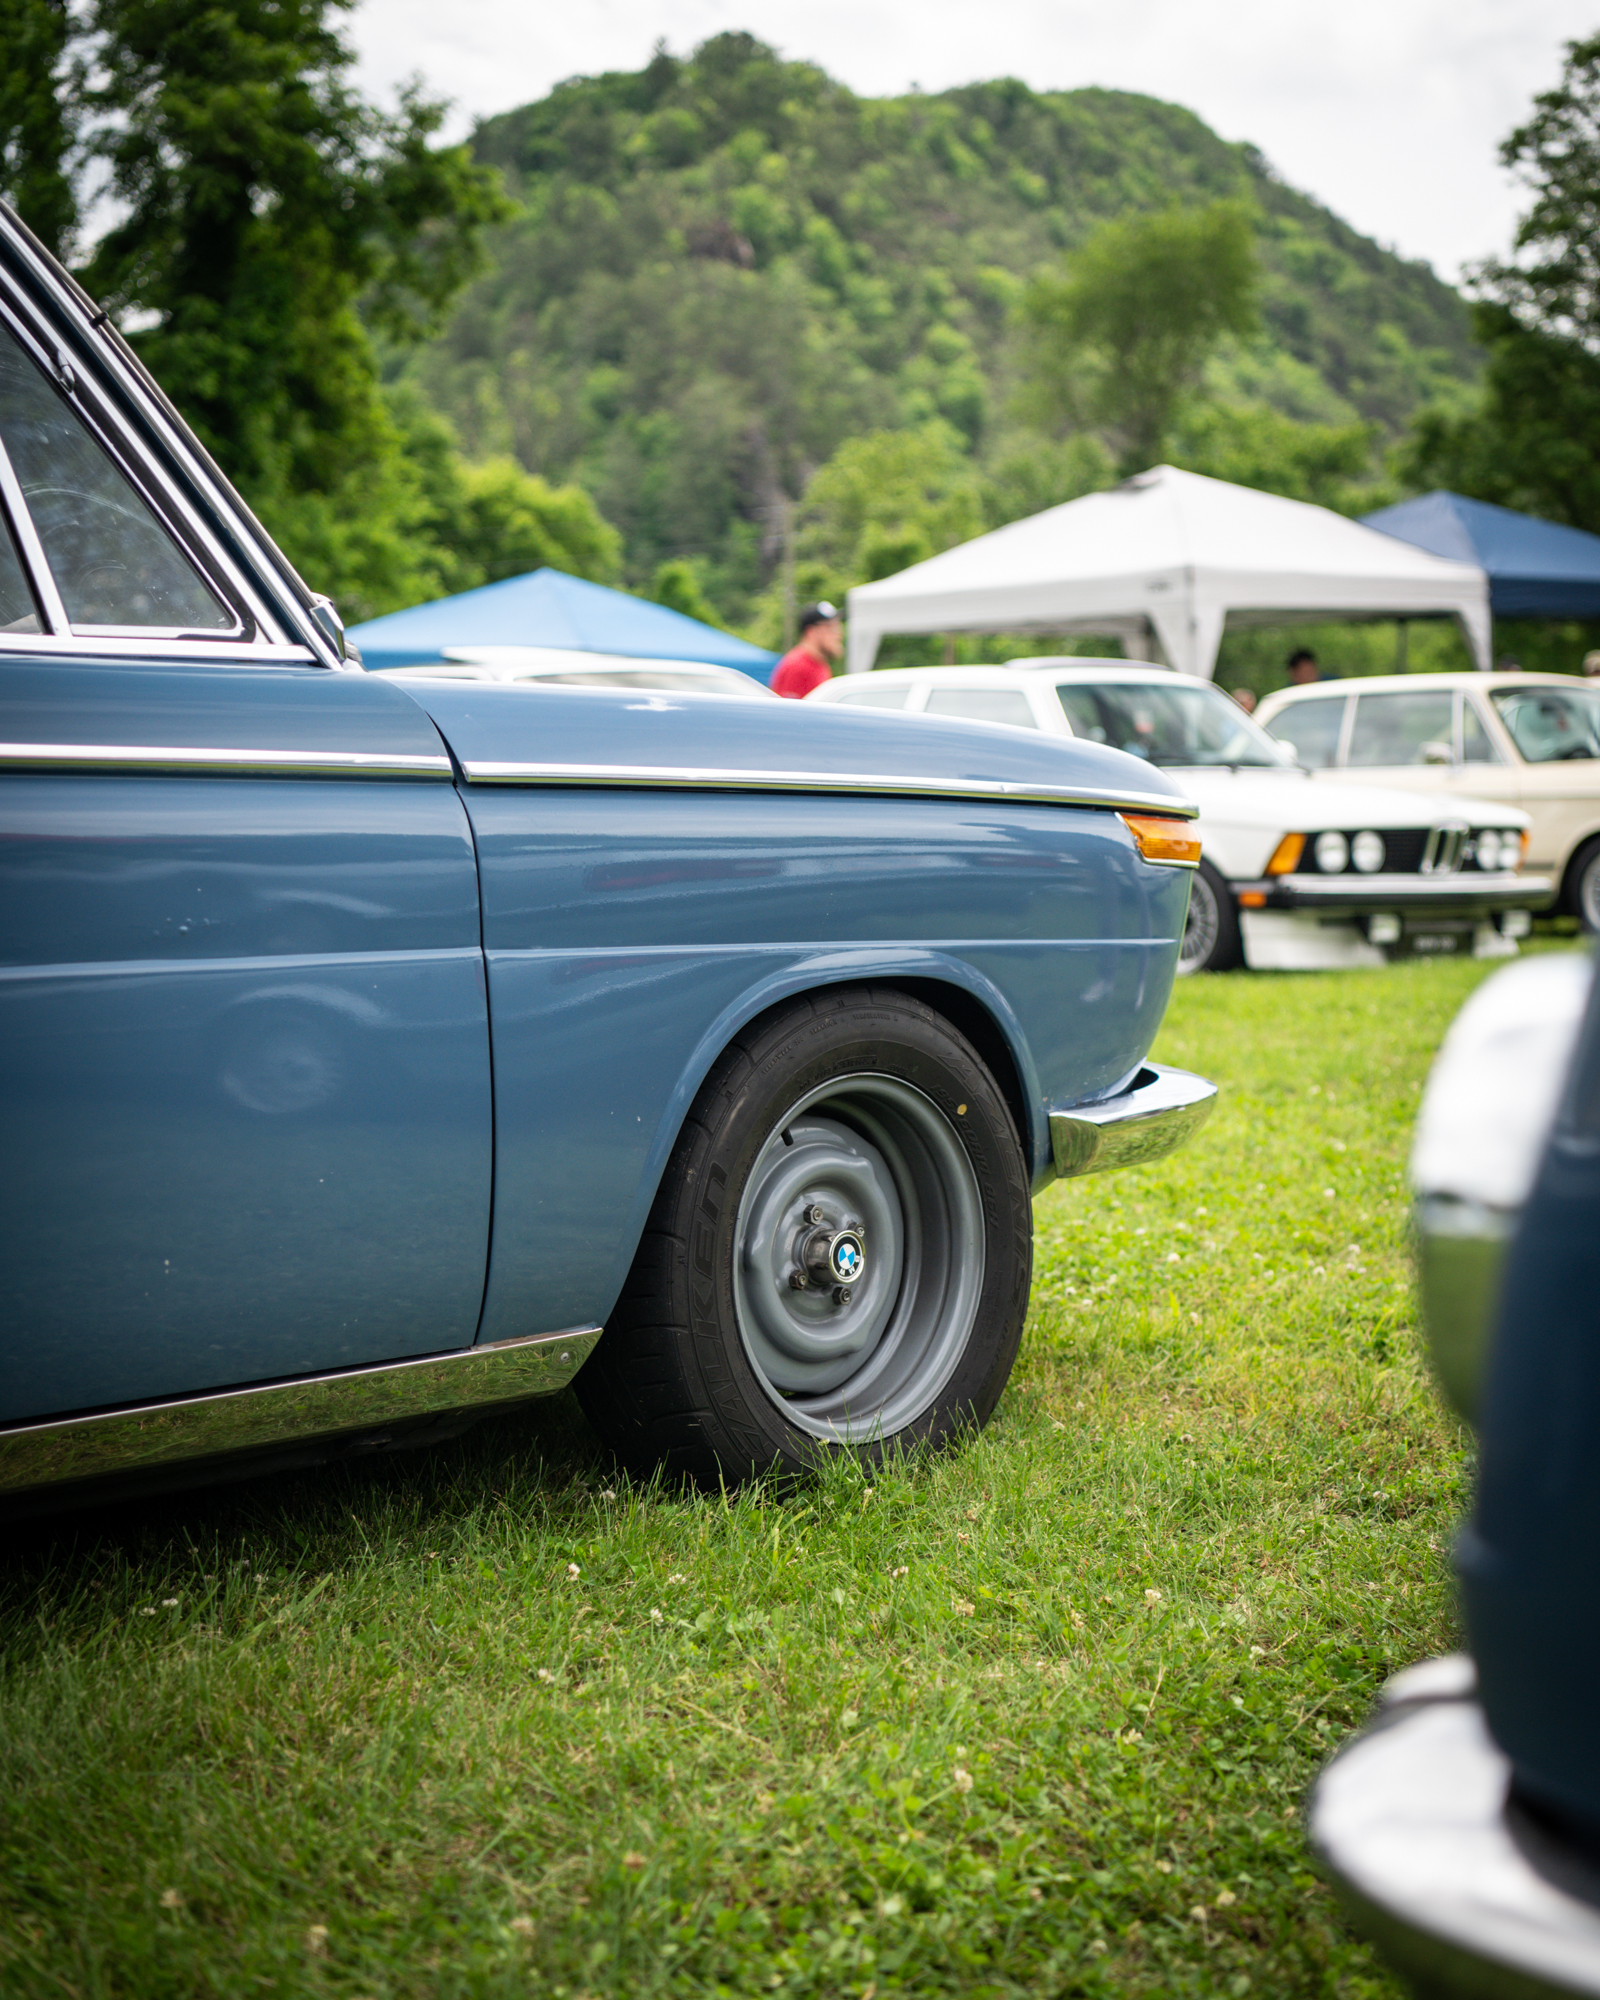
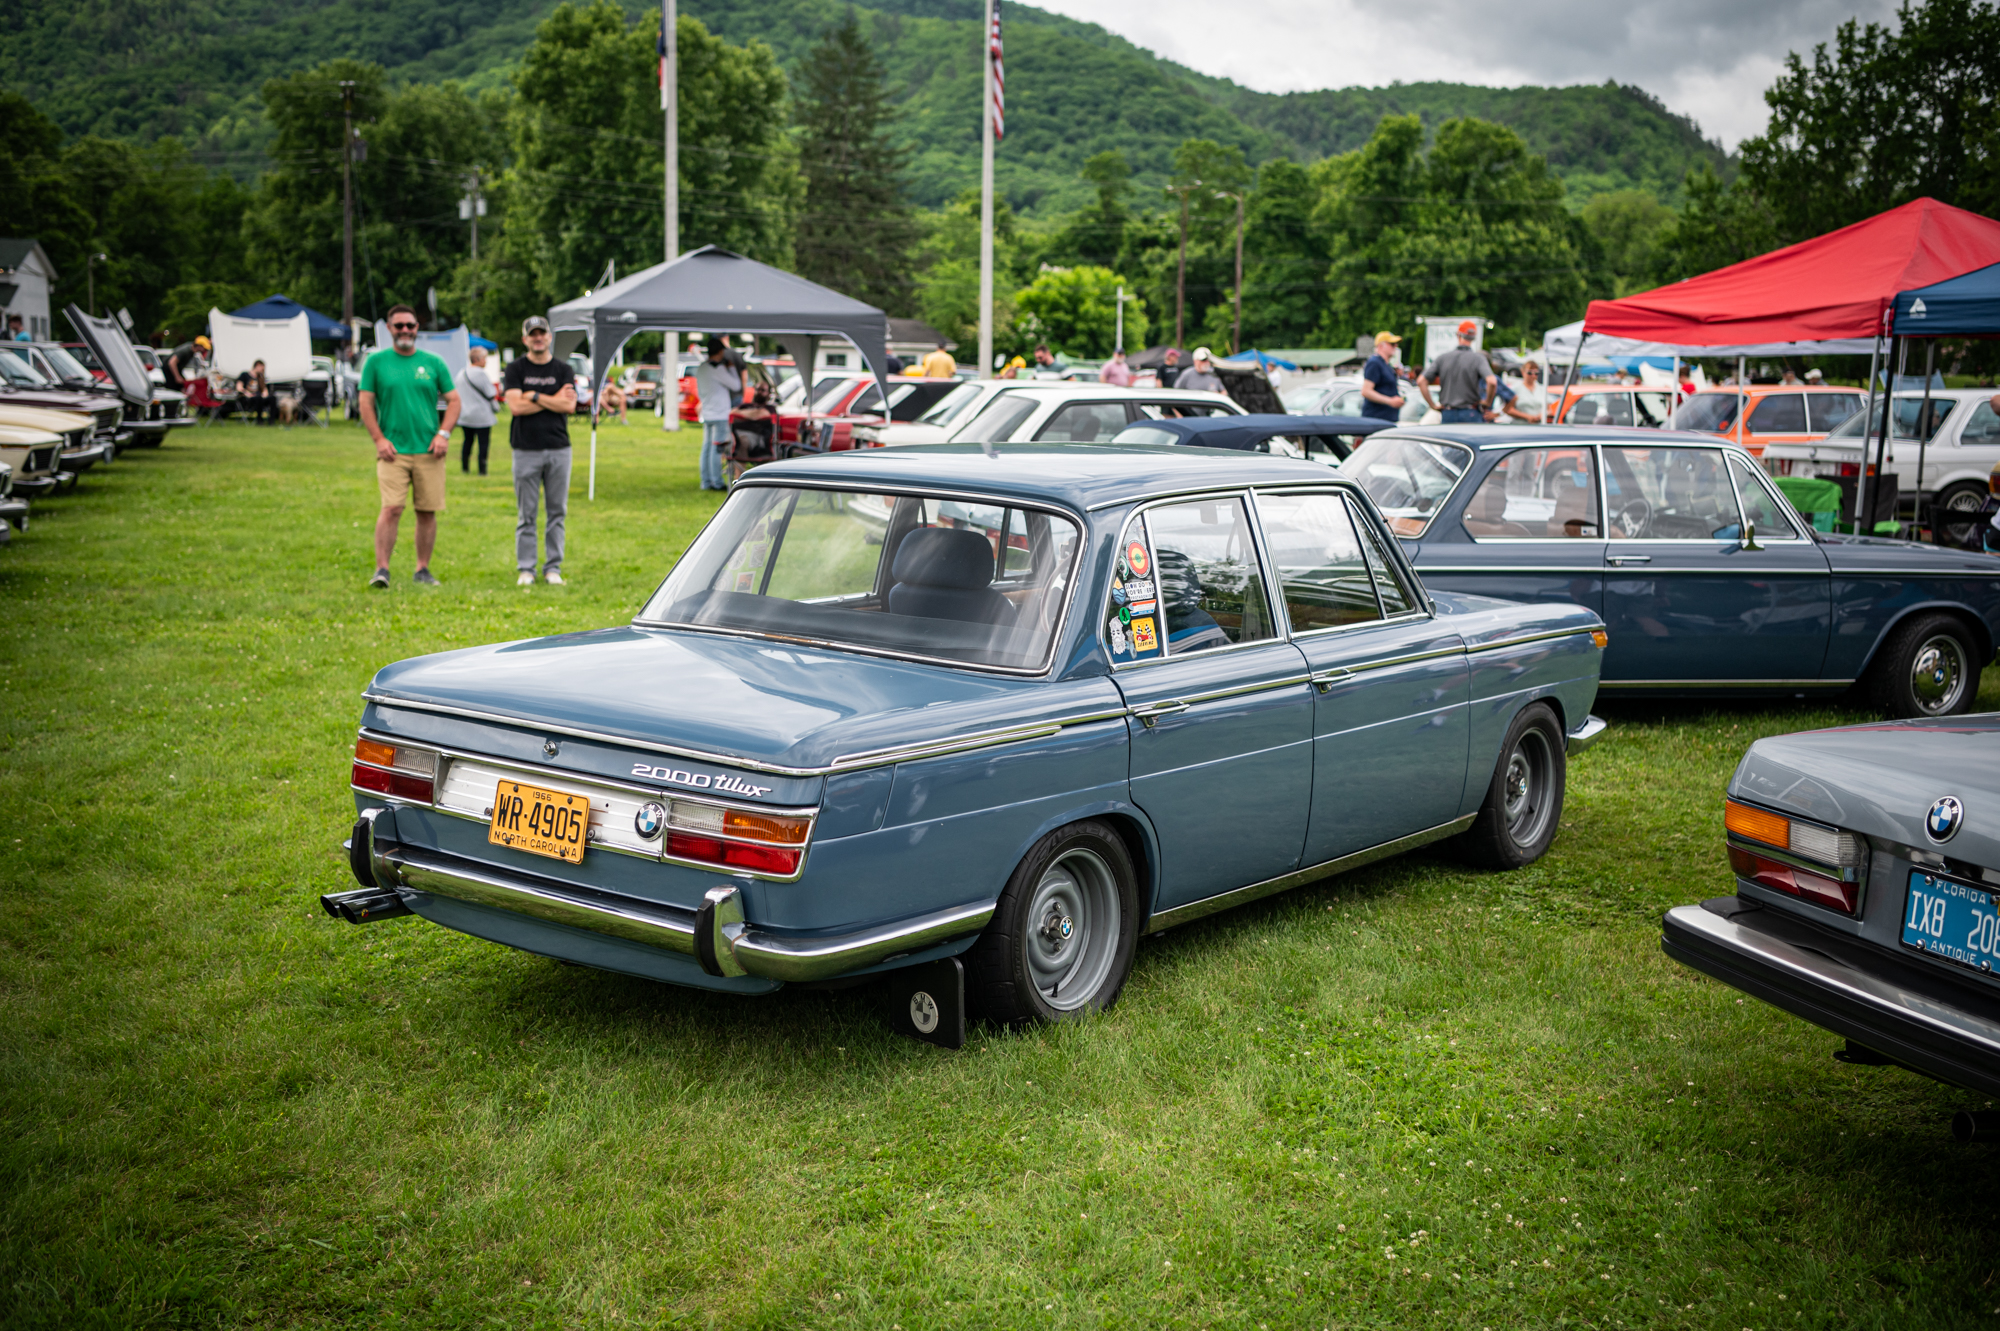
As Greg says, “The 2000 tilux is a rare bird.” The Neue Klasse 2000 sedan was released in 1965, with the 2000 TI following a year later. The TI boasted a 121 horsepower 2.0-liter four-cylinder M10 engine from the 2000 CS, 30 more horses than the non TI thanks to two-barrel side draft carbs and a higher compression ratio. The TI also had improved handling courtesy of front and rear anti-roll bars and wider wheels and tires than the base 2000. The 2000 tilux built on top of the TI, featuring upgraded interior accessories like a wood-trim dash and optional leather.
This particular ‘66 2000 tilux came onto Greg’s radar long before he took ownership. He recalls first seeing “the NK,” as it is called by the Bare family, when it popped up on Bring a Trailer in 2010. Greg says, “It was when [Bring a Trailer] was just posting ads of cars—before they actually did auctions. The NK was a Euro-spec car from Canada and was bought by the famous secret BMW collector, Rey Rivera from California.” Rivera eventually sold it to Greg’s friend and owner of Precision Sport Industries (PSI), Sean Myers in Winter Springs, Florida.
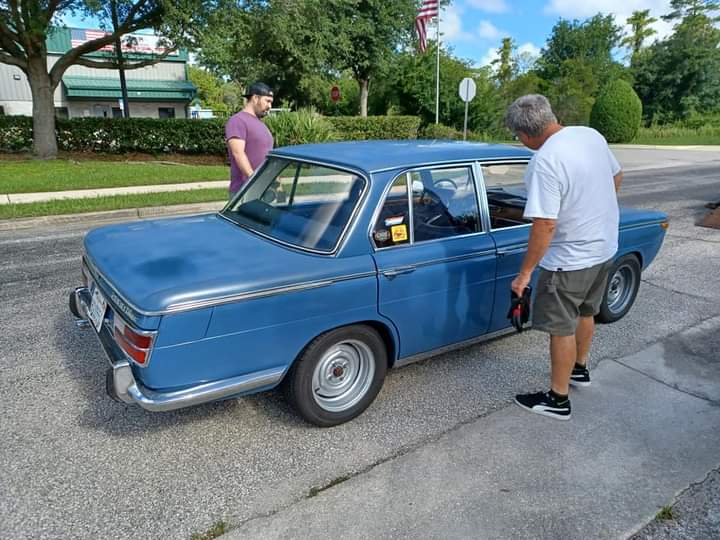
Picking up the 2000 tilux from Sean Myers. [Photo by Greg Bare.]
As it’s best to embark on automotive adventures with friends, Greg’s friend Boris picked him up from the Orlando airport with a truck and trailer. Greg says, “We threw the NK on the trailer and drove it to North Carolina. Boris picked up an E21 shell from a buddy of mine and towed that back to Orlando—he’s still building that car.”
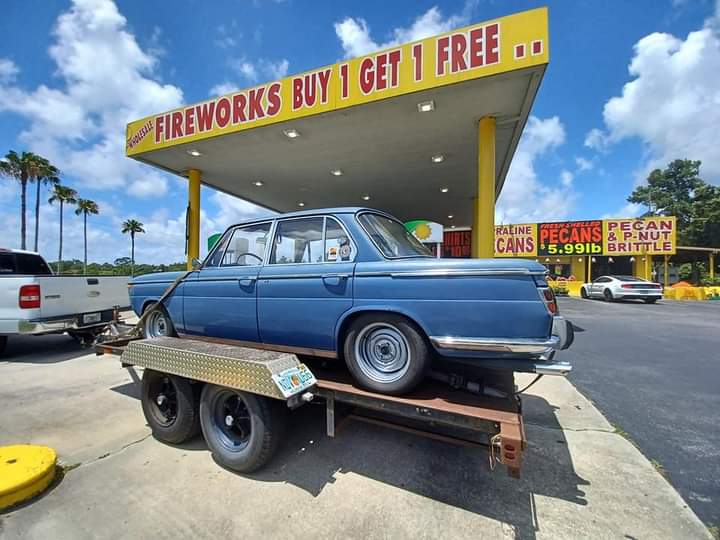
Trailering the 2000 tilux from Orlando to North Carolina. [Photo by Greg Bare.]
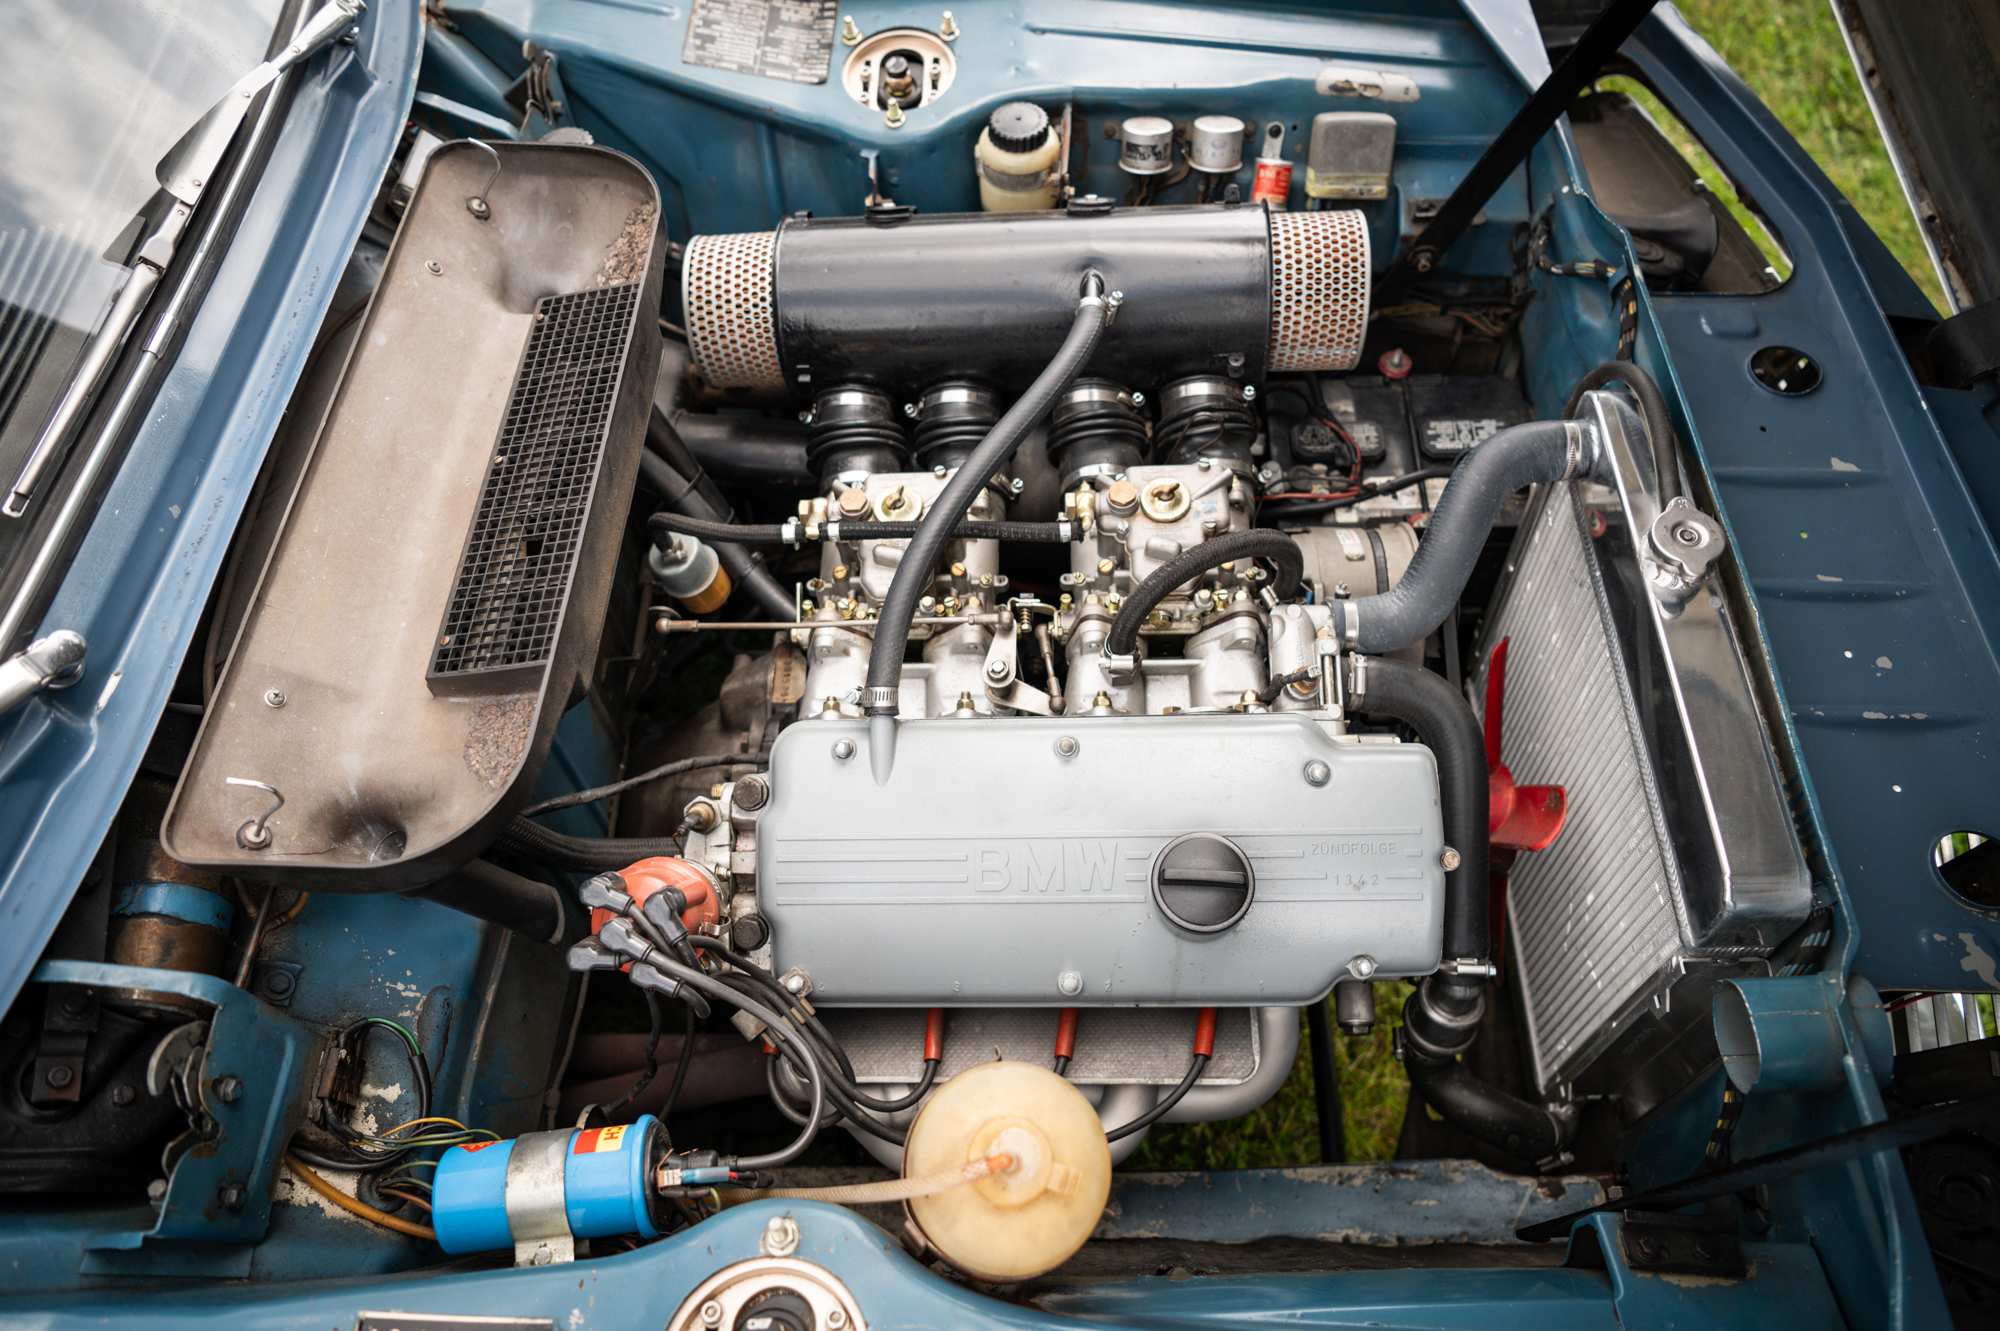
A beautiful M10 built by Jeff Chang.
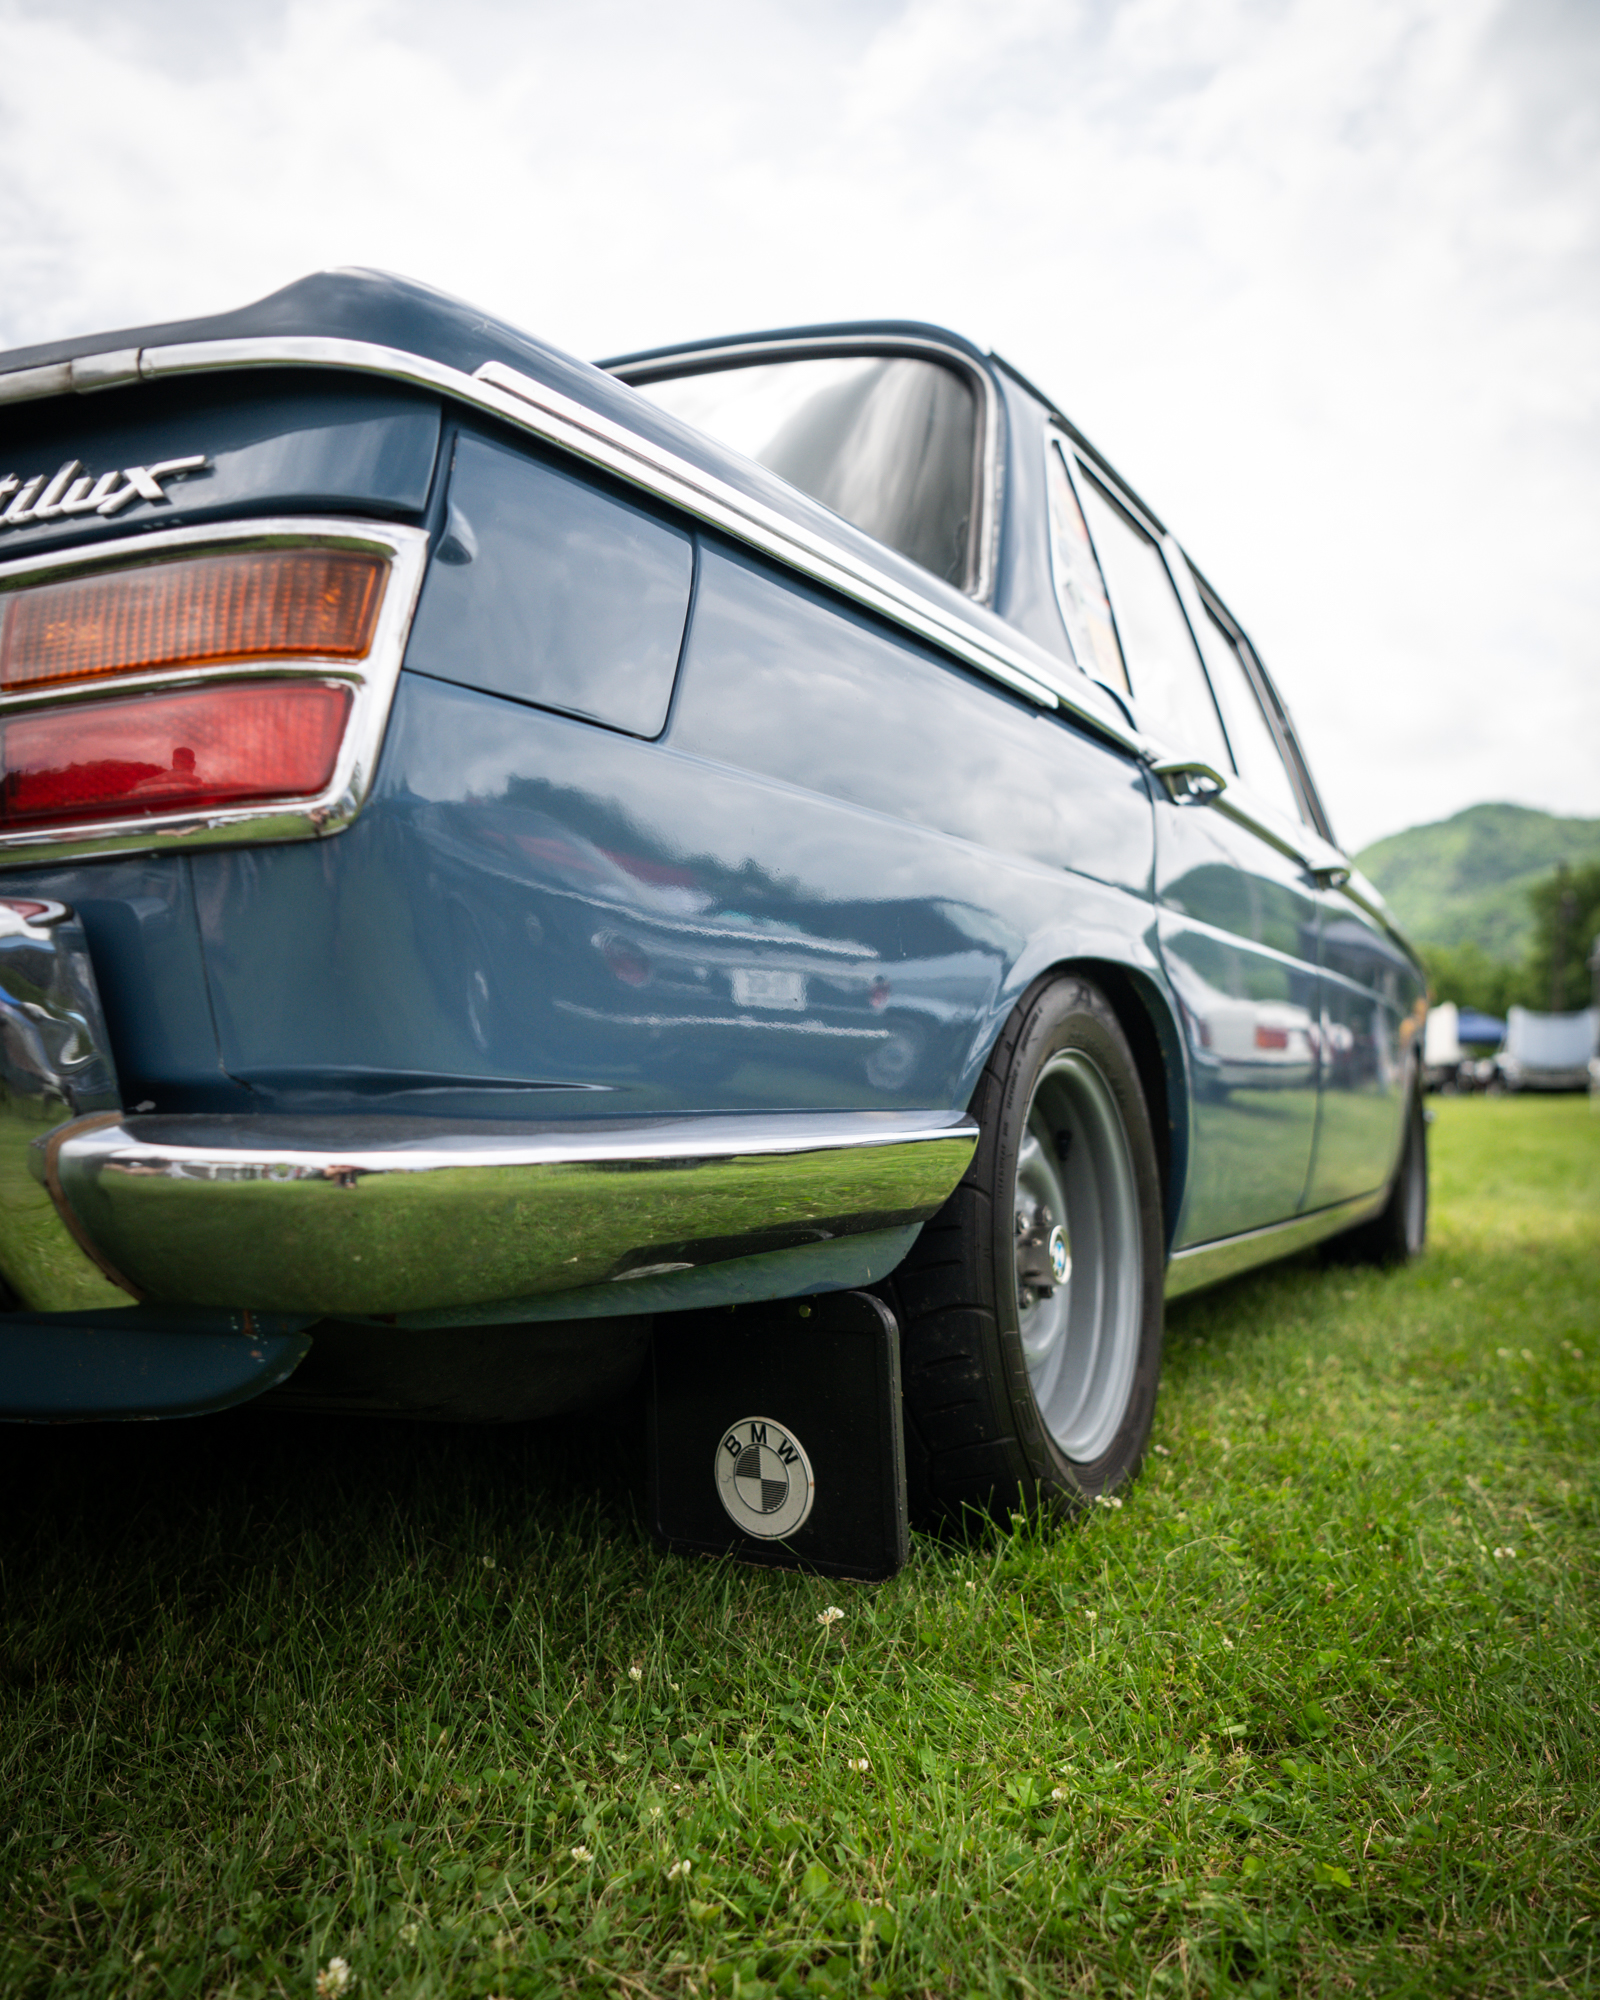
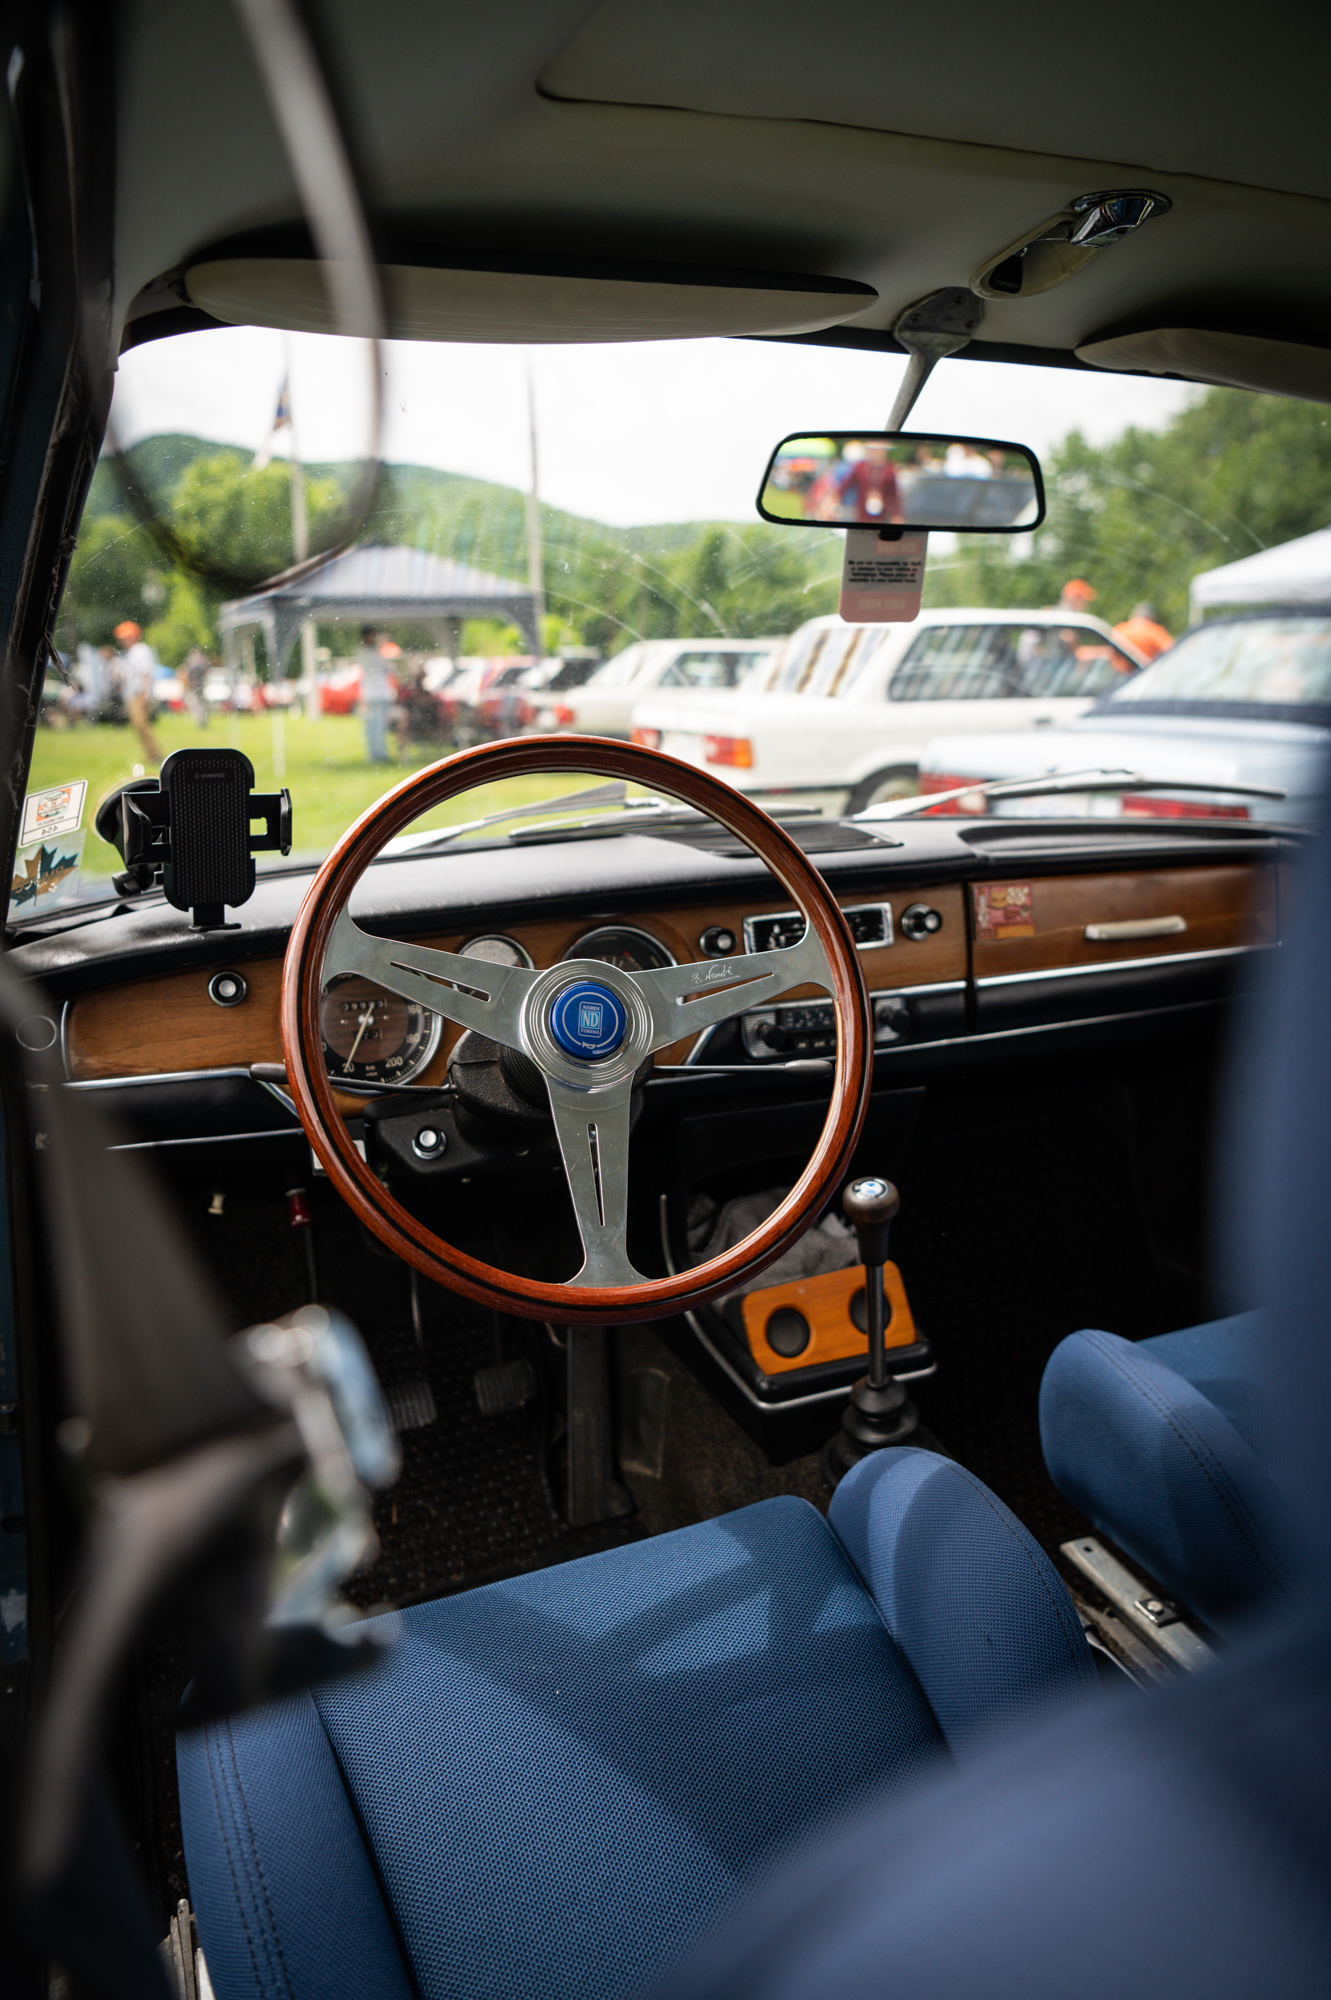
Greg had a vision for this ‘66 2000 tilux. “I wanted it to look period correct. I wanted more performance, without it looking like a resto mod,” he says. To go with the jewel of an M10 engine, other performance bits on this Neue Klasse sedan include a shorty header and Abarth exhaust. A set of fully adjustable coilover suspension for the 2000 tilux was designed and installed at BC Racing headquarters. The stock wheels were rebarreled, increasing their width from four to six-and-a-half inches. A set of NOS factory mud flaps, sourced from German eBay, protects the body from any rocks kicked up by wider and stickier tires. The interior received a set of Recaro seats, which match the stock blue cloth quite nicely, and a Nardi steering wheel.
Greg points out that the Recaro seats are a bit more 1980s than 1960s and admits, “The only place I’ve bent the rule was with the Recaro seats. The Recaros are just for driving the mountains—I had to have something to support me. The stock seats were like driving on a lazy boy.”
The 2000 tilux was originally a Polaris silver car, but was repainted to a non-BMW blue at some point in its life. The blue paint was a bit matte when Greg purchased the car, so he spent a week wet sanding and polishing to bring back its shine. When he later repainted the hood and went to match the color, he learned it’s actually Vespa Blue—yes, a color from an Italian scooter. As it sits now, it’s a super clean ‘60s BMW sedan, with loads of performance and just the right amount of patina.
Greg’s favorite thing about his 2000 tilux is the driving experience. He says, “I love the way it handles. It’s very unassuming. People don’t think it’s going to do what it does until you actually see it perform in the mountains—people get surprised by it and that’s fun.” He continues, “It’s so predictable. It starts and goes so well, it’s so balanced, and it just feels like I could drive it for hours. It just does everything I want it to do.”
The 2000 tilux keeps getting bigger in my side view mirror. What’s under the hood?!?
This 2000 tilux certainly has a sleeper/underdog vibe, which I have first-hand experience with. Even with Greg’s NK transporting his wife Mary, his son Chase, and a trunk full to the brim, I couldn’t seem to pull away from him on North Carolina’s famous Rattler, Route 209. The Rattler is a wonderful road, which has been compared to The Tail of the Dragon, and feeds right into Hot Springs. A must for those caravanning to the Vintage and a perfect medium for Greg to showcase the abilities of his driving skills and mountain-carving 2000 tilux.
With mountain driving being one of Greg’s goals for this NK, his favorite experience with the car was doing just that. Greg reflects and says, “The first time taking it in the mountains, having my wife and my son in the car, and all four windows down with the sunroof open. It was overcast and cool, and we were just cruising in the mountains and spending time together as a family. Being able to enjoy that was just really cool. Stopping at the overlooks, enjoying the car, and using the car as it was intended.”
Greg’s 2000 tilux is right at home alongside a household of BMWs, including his wife Mary’s nicely built 1974 2002, a 2018 X5 diesel, and F56-chassis MINI. For someone who is all about driving and enjoying cars, it’s no surprise that Greg offers the following advice for his classic BMW compatriots: “The thing that I try to preach to people is that if you have an old BMW, drive it. Stop leaving in the garage. I’m looking for an opportunity to drive mine every chance I get.” —Mike Bevels
The post Get Out And Drive—Greg Bare’s 1966 2000 Tilux appeared first on BimmerLife.
]]>