The post The E39 Alternator Surprise appeared first on BimmerLife.
]]>When the 2022 episode happened, it was dusk and rush hour was approaching. Although I’ve written that you may have just 45 minutes or less of battery capacity in a car like an E39 before it wigs out, in truth, I didn’t really know. I pulled into a rest area, thought about the situation, and elected to play it safe and have the car towed home.
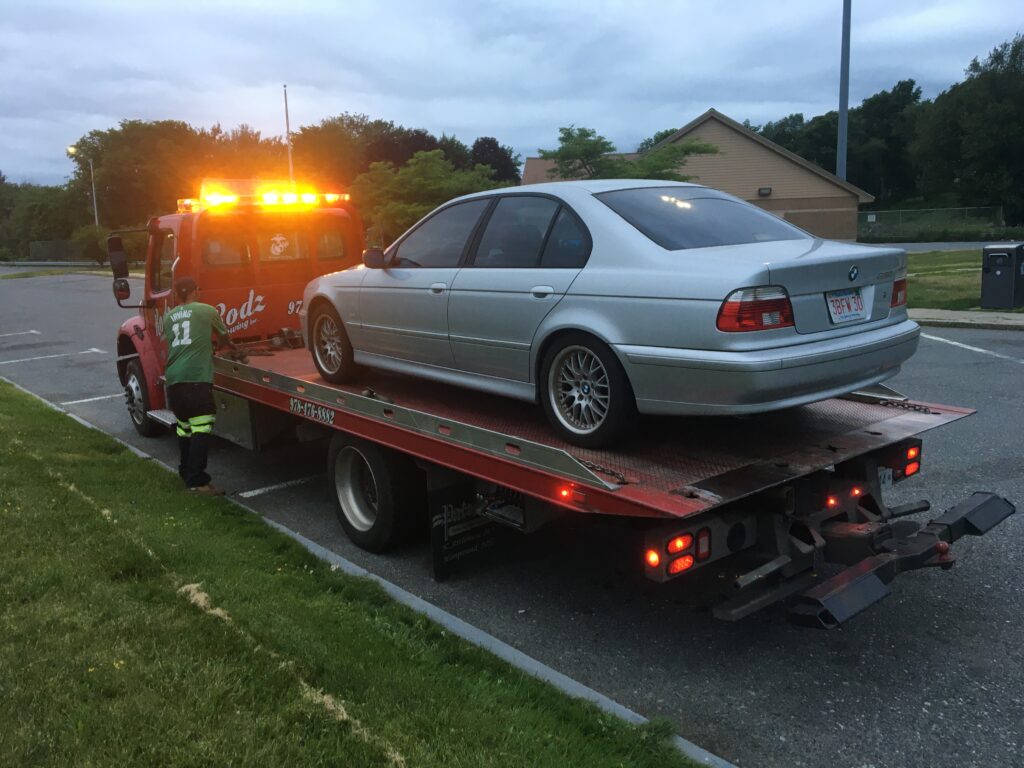
2022. Oh the indignity!
Once the car was in my garage, I elected to look at the brushes on the voltage regulator, as that’s what I was used to doing on E24/E28/E30-era cars where the regulator is held onto the back of the alternator with just two little screws and you can get it out in five minutes. In the E39, it’s quite a bit more involved to remove the regulator in situ, but I did, and found that the brushes were badly and unevenly worn, as were the slip rings. I replaced the regulator, and have been driving the car for the past 3.5 years.
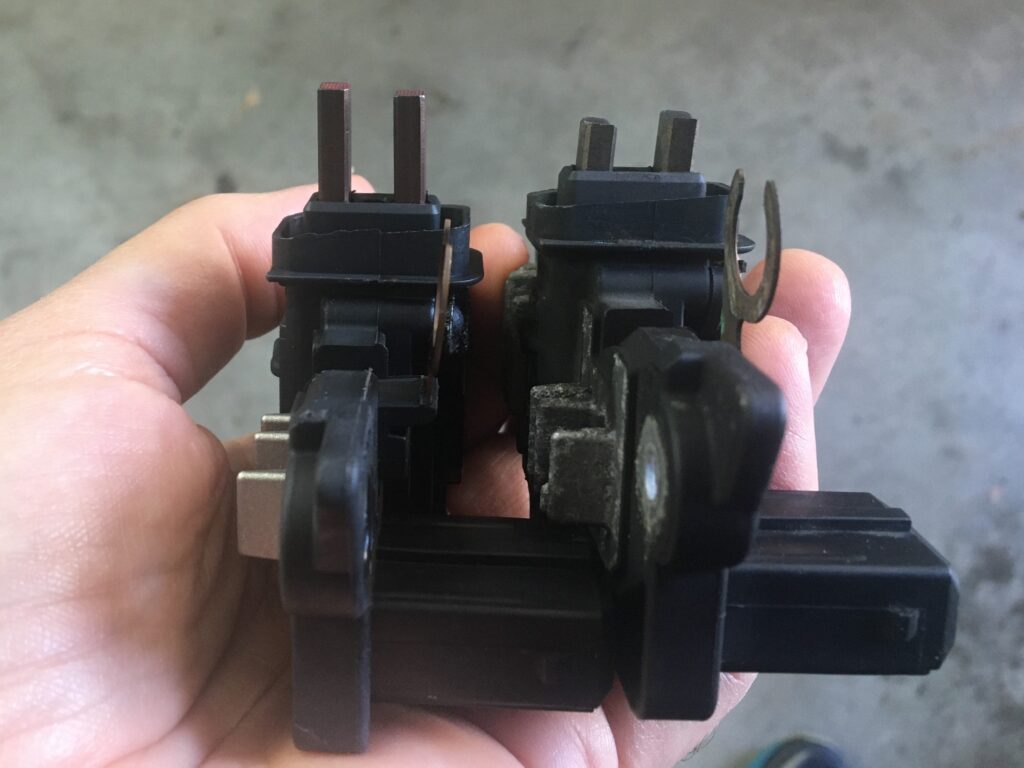
2022, new and old regulators and brushes.
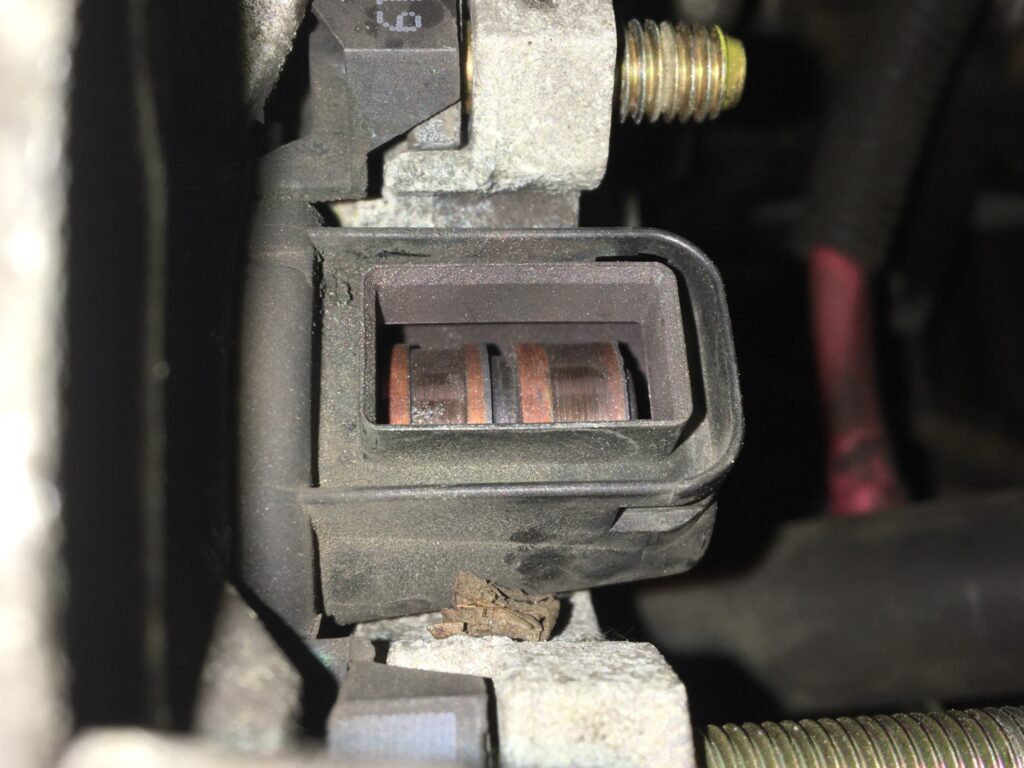
2022, grooved slip rings
Fast-forward to last week. Maire Anne and I drove up to Nashua NH to drop off her sewing machines for service. We took the E39, which was unusual because it’s kind of incumbent on me to provide “stories-free” transport when we’re both together, so we usually take either her Honda Fit or a very well-sorted vintage car, but for some reason I was feeling like the E39. The 40-minute drive up to Nashua was flawless, but as soon as we began heading back, the battery warning light came on. Maire Anne has been around me long enough to know exactly what that means and what the options are.
“What are you going to do?” she asked. “Call for a tow?”
(To state the obvious, an E39 isn’t a vintage car like a 2002 where, if you have a spare alternator (which I didn’t), you can probably swap it, even in winter, in like 10 minutes. It’s located lower in the engine compartment, there’s more stuff in the way, and you have to deal with releasing the tension on the serpentine belt. )
I thought about how my 45-minute battery life estimate stacked up against the 40-minute zero-traffic drive on the way up.
“We’re going for it,” I said.
We burned down Rt. 3 and I-95, watching the voltage on the cig lighter like a hawk. Down and down it went, falling below 12, 11, 10, into the unimaginable single numbers. I was amazed that the car was still running. When we got off I-95 at the exit for our home town of Newton, I felt home-free, as if the car died, our son Ethan could’ve grabbed the battery jump pack from the garage, driven it the two miles to us, and I could clip it onto the battery for an ounce of reserve capacity. But we made it. Incredibly, as I turned left to pull onto our street, the directional dash light stopped flashing and the audible clicking stopped, indicating that things were beginning to be affected by the low voltage. A few seconds later, most of the dashboard warning lights came on—things like brake and airbag warning lights that have nothing directly to do with voltage.
As I pulled in the driveway, the cigarette lighter voltmeter read an astonishingly low 6.5 volts.
And it had been 42 minutes since the battery light came on. I guess that 45-minute number I pulled out of my butt a decade ago is pretty accurate.
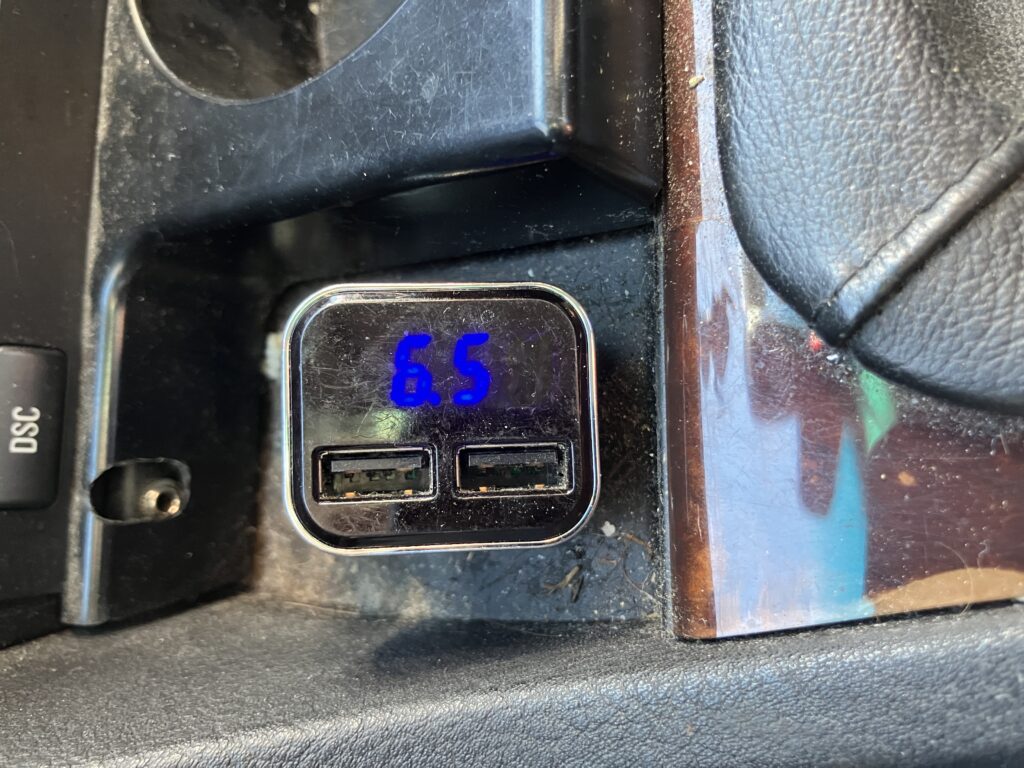
Totally not kidding about the 6.5 volts.
Interestingly, when I shut the car off and put a voltmeter directly across the battery terminals, it read 11.5 volts. I’m not sure exactly what mechanism was causing it to read so much lower at the cigarette lighter.
I pulled Bertha and the Lotus Elan +2 out of the garage, restarted the E39 with the jump pack, backed it into the garage, pulled the Lotus back in, and left Bertha to fend for herself in the driveway.
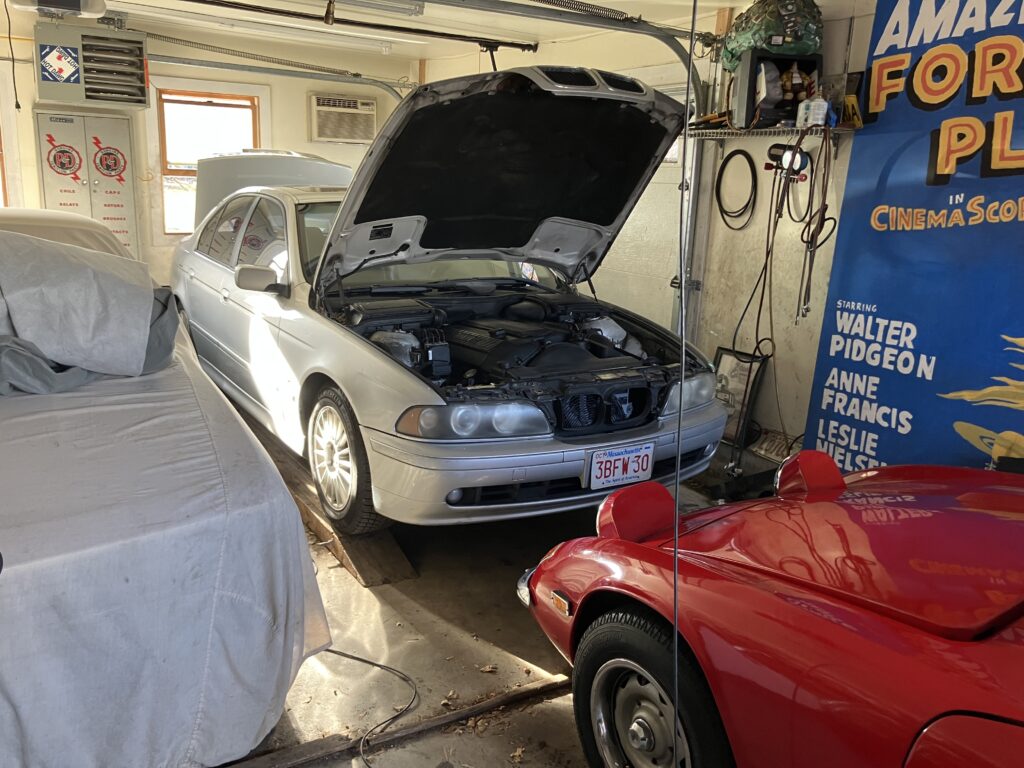
This is against the natural order of things.
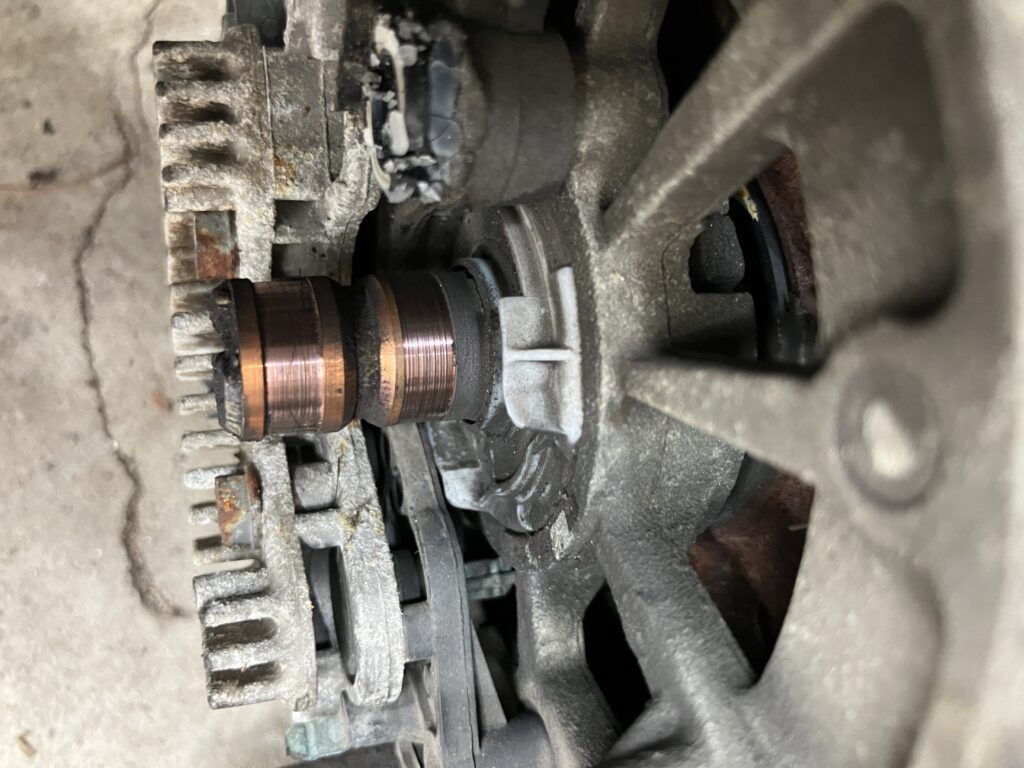
I yanked out the alternator to do a proper post-mortem. This is what I found—one of the brushes had broken clean off from the voltage regulator, and there was visible damage to the slip ring.
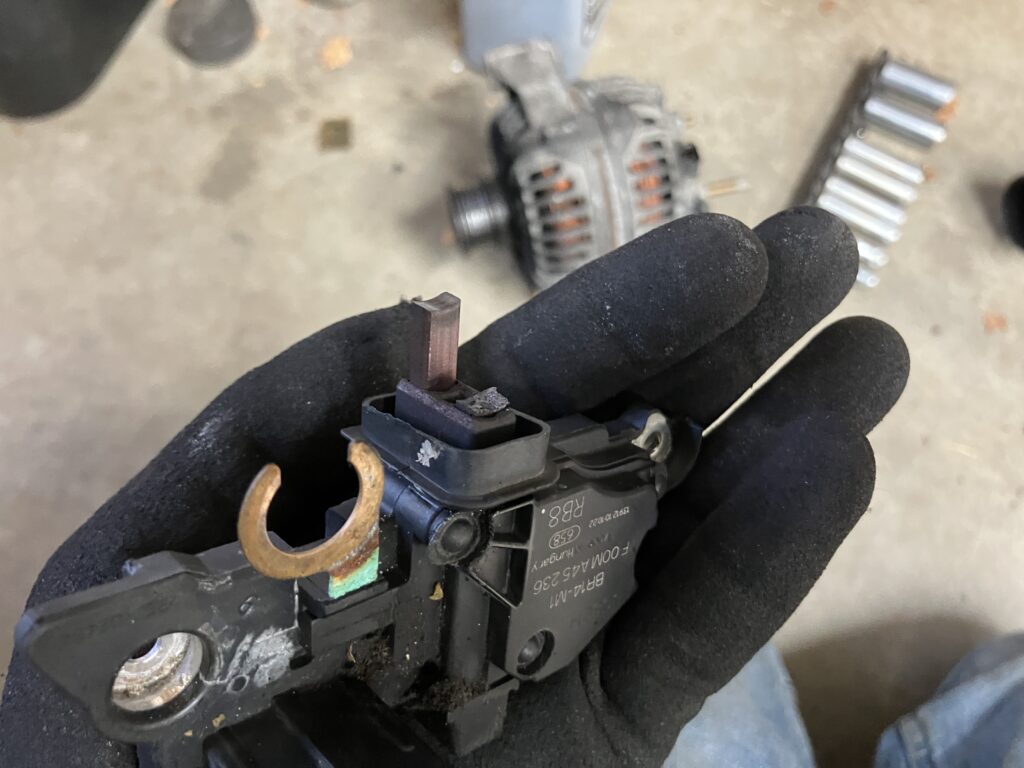
Way not good #1.

Way not good #2.
Whether the slip ring caused the brush to break, or the broken brush damaged the slip ring, it was clear that this time I needed to replace not just the regulator but the alternator as well.
But what to buy?
I and others often complain bitterly about the poor quality of replacement parts for older cars. The mechanism behind this is that when cars are still under warranty, the manufacturer is on the hook to replace broken parts for free, but as the cars age out of warranty, there is zero incentive for the manufacturer to actively police the quality control/assurance process of whoever they’re buying “genuine/OE” parts from. And it’s even worse with aftermarket parts, as the oft-touted phrase “OEM quality” means absolutely nothing. With alternators, you have the additional choice of buying not just new or used, but rebuilt. The OE alternators on E39s were Bosch and Valeo. The Bosch rebuilds have a reputation that’s, shall we say, spotty, and brand-X web-based click-and-buy rebuilds can be nothing more than a coat of paint. The preferred path is using a local rebuilder you have experience with, but I no longer have one. The cost of a new Bosch or Valeo ($389 and $317 respectively on FCPEuro) gave me pause, as those numbers represent 20 percent of what I could probably sell the E39 for, but I was very hesitant to buy something either used or rebuilt. Of course there are the new brand-X eBay and Amazon alternators in the $100 to $150 range, but looking at the Amazon ratings, I always see a tail of one-star reviews with comments like “worked for a month, then died.”
Then I saw that FCP had another new brand—SEG, who reportedly bought Bosch’s alternator and starter business in 2018. FCP listed a new SEG alternator with an overstock price of $240. That sounded good, and I dragged it into my FCP cart, but I was put off by the fact that I could find virtually no online reviews or ratings of SEG alternators. I decided to sleep on it.
In the morning (last Monday, three days before Christmas), I decided that I needed to get something on order and on the way to me. I called up my FCP cart on my laptop prepared to click and buy, and was stunned to see the “overstock” label gone and the price risen to $334.
No no no no no no no!
Desperate to get something in motion but not wanting to spend over three hundred bucks, I looked on eBay for used alternators within a small radius of me. I found a Valeo alternator reportedly from an 81,000-mile Z3 out in central Massachusetts at a salvage yard I’ve done business with before. I looked directly on their website, and saw that their no-eBay no-fees pick-it-up price was a shade under a hundred bucks. I called to make sure they had it, then shot out there (in the no-stories Honda Fit :^). In addition to the Valeo having low miles on it, the fact that it had been removed from a likely-not-driven-in-winter Z3 gave it a nice corrosion-free appearance.
When I got home, I was about to install the Valeo in the E39 when I thought that there would never be a better time than now to pull the back cover off it and check the regulator. It was a little different than the Bosch, but still easy to do. Unfortunately, the brushes on the regulator looked like this:
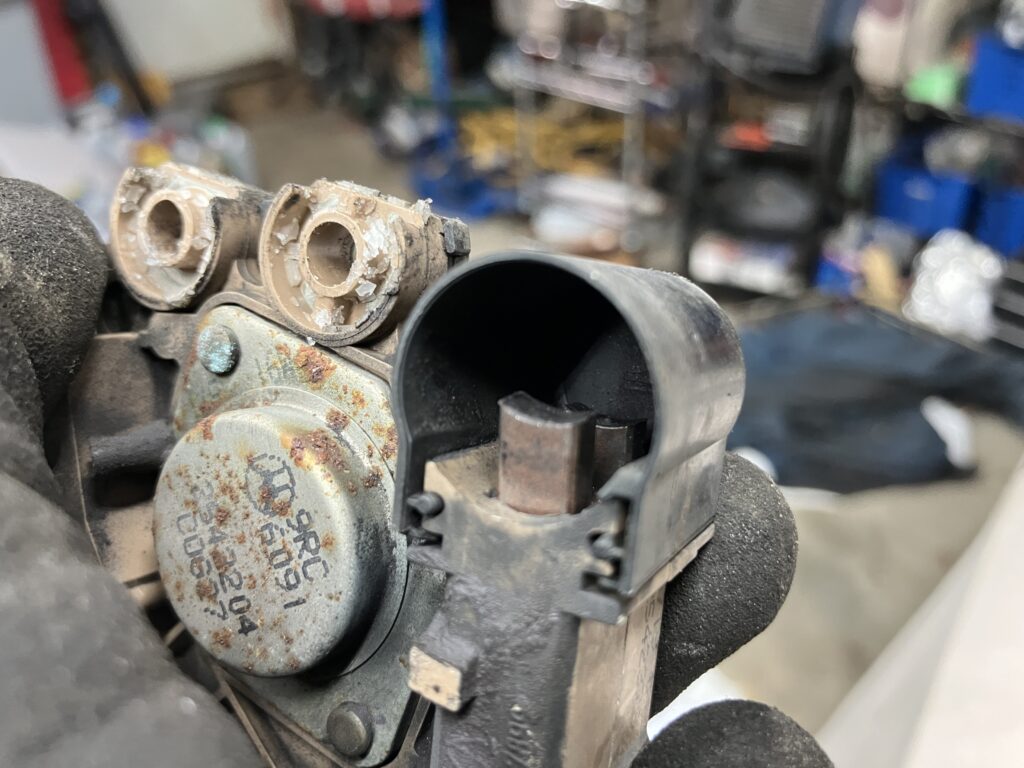
THAT’s concerning.
I slid the dust cover off the brushes so I could see them better. It made them look even worse.
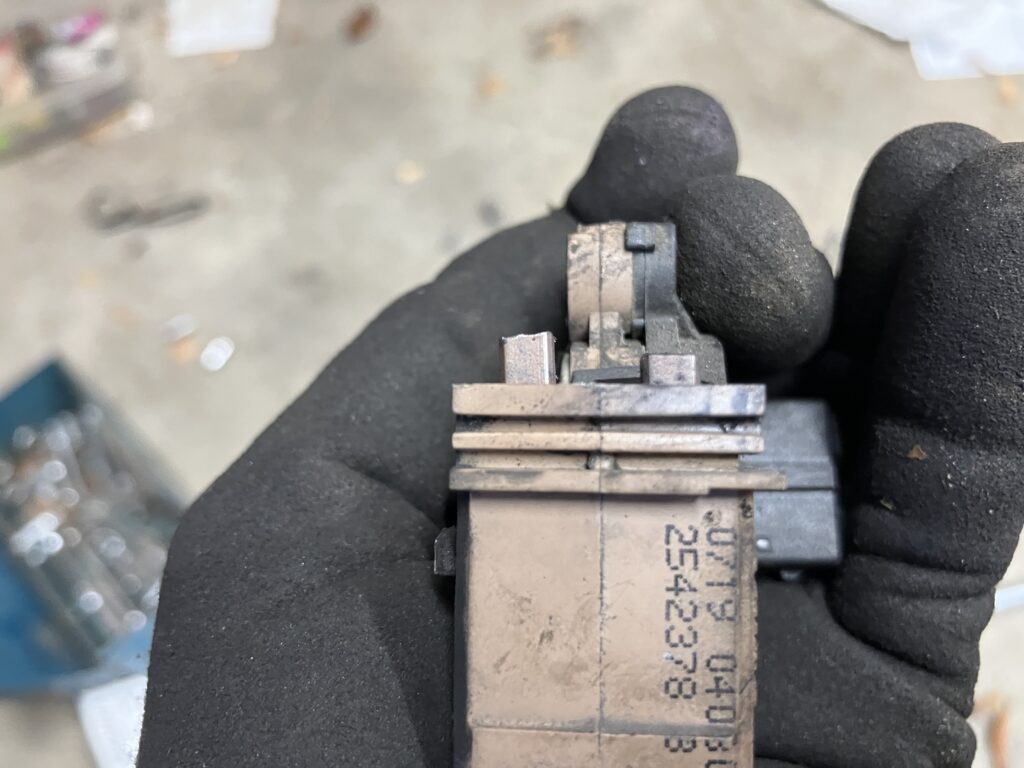
Do those look like they have 81,000 miles on them to you?
The slip rings didn’t exactly look 81k-fresh either.
I thought that clearly the thing to do was—as I did with the original alternator—just buy a new regulator / brush pack, install it, and be done with it. I went upstairs to the laptop, searched, and was stunned to find that while you can buy a new Bosch regulator for an E39 alternator for as low as $35, the going price for one for the Valeo (part number 12317551153) was closer to a hundred bucks.
Damn!
I thought about what to do, and decided that, in the short term, I just needed the car running again. I returned the regulator and brush pack to the Valeo (and when I did, carefully verified that the short brush was still being pushed backward into its housing, indicating that it wasn’t so worn that it was in imminent danger of not making contact), mounted the alternator in the car, buttoned everything back up, and tested that it worked (it did).
On the one hand, getting the car back up and running in an afternoon for a hundred bucks wasn’t a bad outcome. But having had the alternator die on me twice due to regulator problems, the Valeo’s worn brushes didn’t exactly instill confidence. I did a deeper search on the Valeo regulator, and found that RM European and AutohausAZ had them for under three figures. With a discount code, the AutohausAZ price came in at $79. I swallowed what was slightly bitter in the cup and clicked and bought. When it arrives, I’ll install it.
Out of curiosity, I looked again at the online trail of the alternator I bought. The VIN of the car it was from was listed, so I googled it. I found the bids.cars site where the salvage yard likely bought it. It was listed as having 81,000 miles there. So I don’t think that the salvage yard did anything deceptive in selling it to me.
But it goes to show: Whether new, rebuilt, or used, you pays your money, and you takes your chances.
—Rob Siegel
Rob’s new book, The Best of The Hack Mechanic, is available here on Amazon, as are his seven other books. Signed copies can be ordered directly from Rob here.
The post The E39 Alternator Surprise appeared first on BimmerLife.
]]>The post Re-Resurrecting Bertha (Part V: Heat) appeared first on BimmerLife.
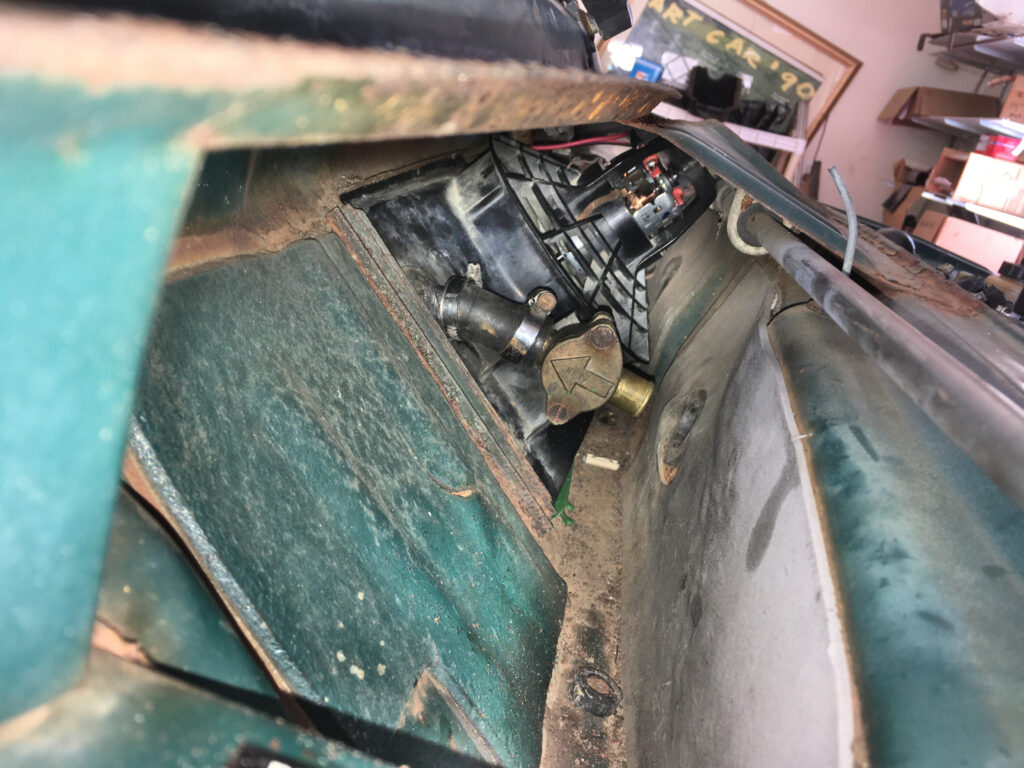
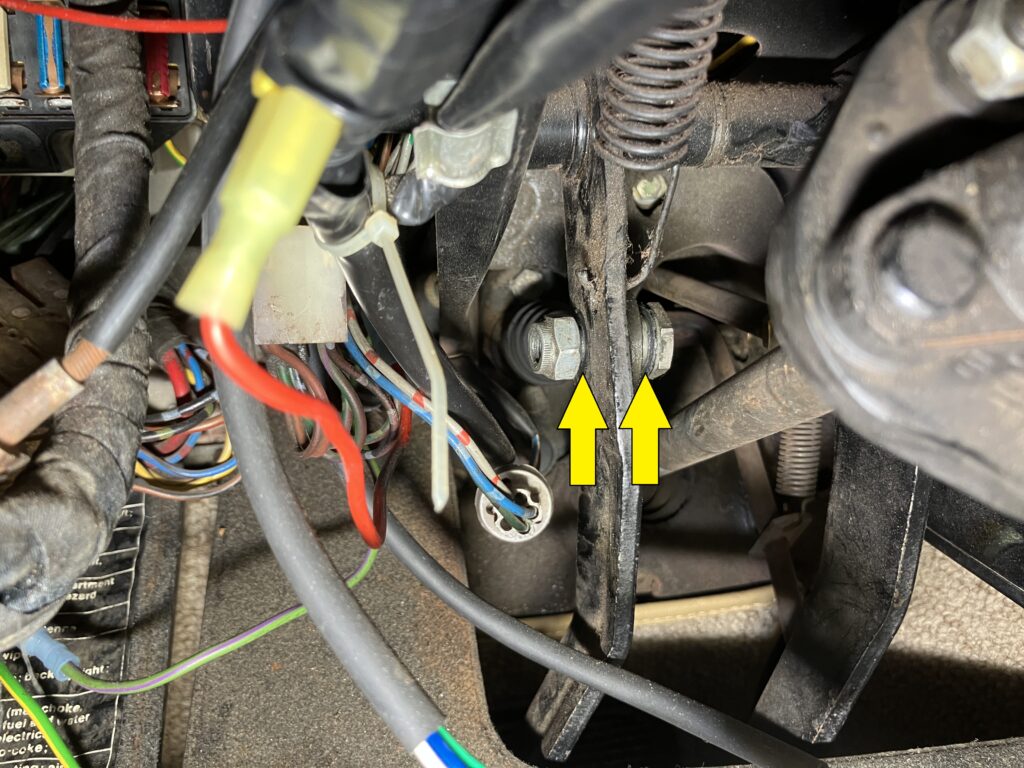
]]>As I mentioned a few weeks ago, the issue with the heater valve was that the Bowden cable controlling it had snapped. Peering into the under-cowl area from the side, I could see the valve, the lever on the back side, and both snapped-off ends of the cable.
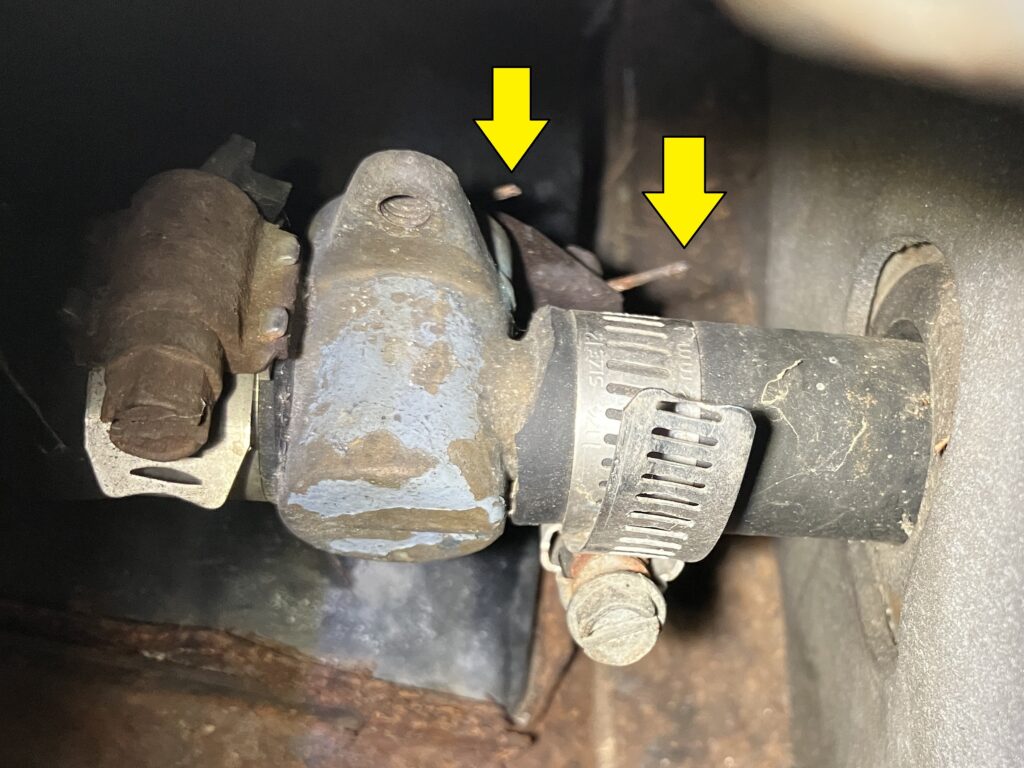
No mystery here.
The lever rotated freely between its off and on positions, so really all I needed to do to get heat was set it to the on position and leave it there for the duration of the winter, but we all know how heat in cars can go from “help me lord I’m freezing” to “Enough! I’m roasting! MAKE IT STOP!” Plus, having owned E9s, E3s, and E24s whose heater box is plumbed always-on, I know how heat continues to pour out of the box even when you have the flaps closed. So if there was an arthroscopic way to stitch the cable back together, I wanted to find it and employ it. I searched on Amazon and found these little barrel-shaped “wire rope clips” that had a hole in both ends and two little Allen screws to tighten down on the ends of the cable. Perfect, I thought—stick one of these between the broken ends, and Bob’s your uncle.
The right kluge for the right job?
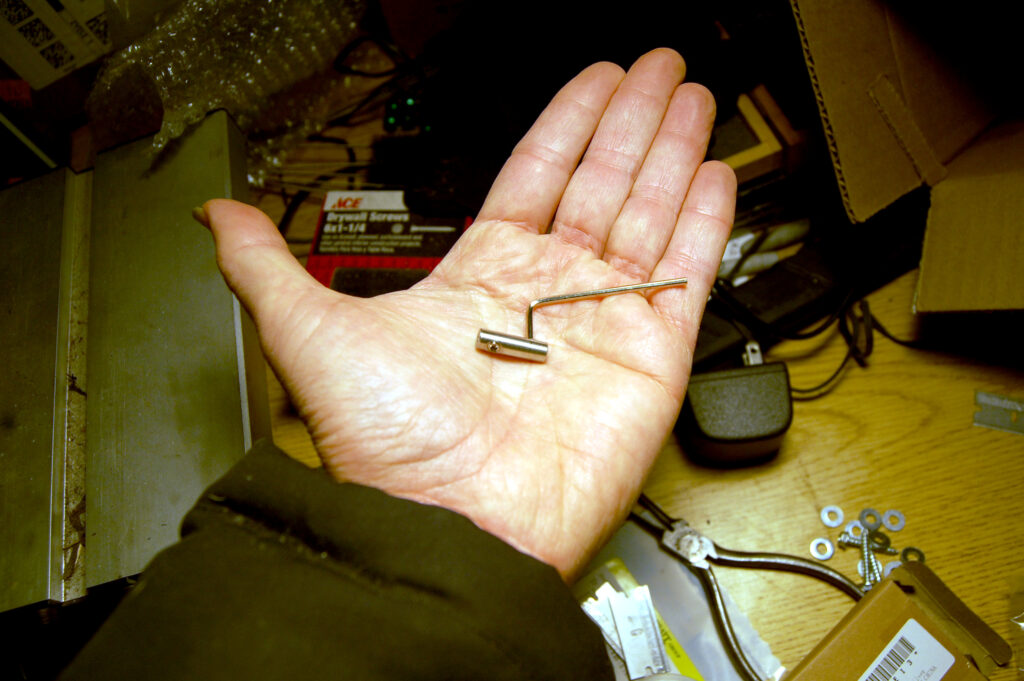
Although it seemed trivial, I couldn’t maneuver the barrel into position on both cable ends, so it made sense to me to undo the far end of the broken-off cable, take it out of the car, stick the barrel on it, slide it over the long end, then reassemble and snug everything down. Unfortunately, the little 7mm nut on the end of the lever wouldn’t surrender its 50-year-long death grip, and I could feel its corners beginning to round off it. No problem, I thought—I’ll just undo the little bolt holding the lever onto the valve instead.
I put some torque on the little 7mm wrench, and experienced that sickening feeling you get when a fastener suddenly gives way without going through the screeeee portion of the loosening process. The bolt and the little cylindrical end of the valve it screws into had snapped clean off. D’oh! In retrospect, I clearly should’ve soaked both 7mm fasteners in Silikroil before beginning this operation. Fortunately, the lever itself remained attached to the valve (it’s probably rusted onto it), so at least for now, it can still be used for winter-on / summer-off heater core operation.
What is snapped can’t be un-snapped.
Next was the issue of the blower fan. I wanted it operational not only to keep my feet warm, but also to keep the windshield defrosted. Unfortunately, to replace the blower fan on a 2002, the heater box has to come out, which is a substantial operation. Further, this car has dealer-installed Behr air conditioning, so that would have to come out in order to pull the heater box. When I revived the car six years ago, I made the rash decision to rebuild the a/c but leave the heater box alone, essentially sticking a thumb in my own eye regarding the whole “while you’re in there you’d be an idiot not to do both” thing. So, yeah, I’m an idiot.
The first thing to do when faced with a non-functional 2002 blower fan is to make sure it’s, to quote The Wizard of Oz, not only merely dead, but really most sincerely dead. It can stick from lack of use, and sometimes, surgically-sprayed Silikroil and a nudge can free it. You can reach under the cowl and poke something like a popsicle stick through the plastic lattice and try to turn the fan blades to judge if it’s seized. I found that Bertha’s fan was completely free. So maybe there was hope.
A good view under the cowl of the fan and the plastic heater box lattice it sits behind, this one from Louie my ’72 2002tii. You can see the shiny new fan motor in it, installed when the heater box was removed and rebuilt—work I’d only do on Bertha if it was absolutely necessary.
The next step was to see if the fan is getting voltage. I connected the battery, clicked the key to the ignition position, moved the blower fan slider on the dashboard to high, and carefully positioned my two multimeter probes through the hole in the middle of the cowl cover and on the terminals. I was surprised to find there was no voltage at the motor. This usually isn’t what happens. As I described here, when I was readying the Bavaria for sale this summer and wanted to address its dead blower fan, I found that the fan turned freely and there was voltage to it, but it was still clearly dead. I removed it and found that the brushes had seized up in the rectangular channels they slide in, so they weren’t making contact with the rotating armature. I was able to free them and resurrect the fan. (So it wasn’t most sincerely dead :^) Unfortunately that trick wouldn’t help me here, because the Bavaria, like the E9, E30, E24, and most other cars, has the huge advantage that the blower motor can be withdrawn from under the hood.
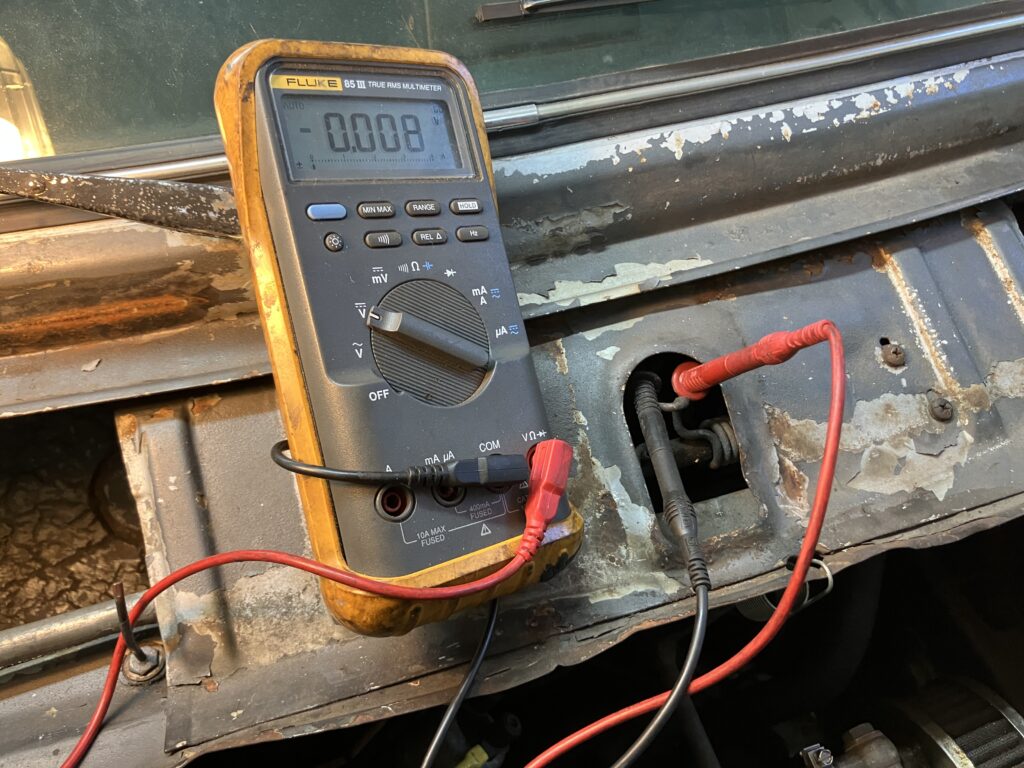
As the husband said in the old Kellogg’s cereal commercial, nuttin’ honey.
When the fan isn’t seized and there’s no voltage to it, there are two paths to take. One is to see if there’s an easy answer to why there’s no voltage. The other is to temporarily hot-wire the fan directly to the battery and see if it springs to life. Normally I would do the second one first (I always want to jump to the end of the mystery and know if I need to put a replacement component on order), but the lack of voltage surprised me, and would need to be fixed anyway to have a working fan.
I thought the most likely culprit would be the contacts on the slider switch on the dash, which would be a bit of a pain to deal with. I mean, there was effectively zero chance it could be something as simple as a popped or non-contacting fuse. I would’ve seen that six years ago.
Wait, I WOULD’VE seen that six years ago, right?
One of the many odd things about Bertha is that, at some point before I bought it in Austin the spring of 1984, someone had rewired the fuse box and paid little attention to the original numbering, so what circuit is on what fuse is always a mystery. I squeezed each fuse from the contacts at the ends while rotating them around to make sure that the contacts weren’t either loose or dirty. While I was doing this, I inspected each fuse. A break in the middle of the little gold-colored metal strips is usually really easy to see against the plastic of the fuses. I didn’t see anything, and mentally replayed the “You didn’t think it was gonna be that easy, did you? / You know, for a moment there, yeah, I did” scene from Kill Bill. (I guess I’m in movie mode today.)
I was about to move on when I thought “Let’s be certain.” I set the multimeter to measure resistance and to beep when there’s continuity (meaning very low resistance), and one at a time, put the probes on the ends of each fuse. Beep… beep… beep. I got to fuse #11 and… silence.
Gotcha.
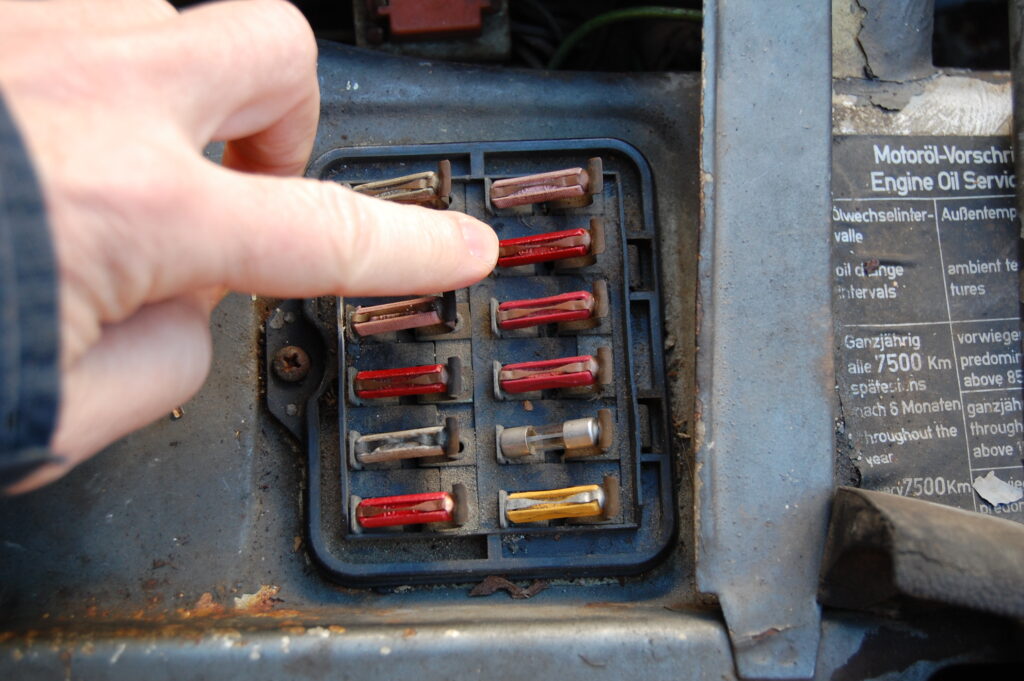
You!
I looked carefully at the red 16amp fuse, and saw what looked more like a crack than the characteristic melt-through of a blown fuse.

See it? No? Neither did I.
I replaced it with a new 16amp fuse, and the blower fan squeaked somewhat reluctantly back to life. I was stunned.
Now, let’s be clear. There are usually multiple reasons to rebuild a heater box. The most acute is when the heater core is leaking, as was the case with Louie (the Ran When Parked car). Actually, I take that back—the most acute is when there’s rodent contamination, and any air flow through the box, including fresh air flow, is gag-worthy. But on a 50-year-old car, it’s certain that the foam has long since worn off the flaps, so even when the flaps are closed, gobs of air are getting past them. This means that, in the summer, hot humid outside air streams in and fights your hard-won working air conditioning, and in the winter, cold air fights the heat. So, when you remove the heater box for any reason, you clean it, re-line the flaps with new foam, and make bloody sure the fan works without squealing. So, in finding that my fan actually worked, and without any rodent stink or heater core leakage, I’d taken heater box removal and rebuilding off the table.
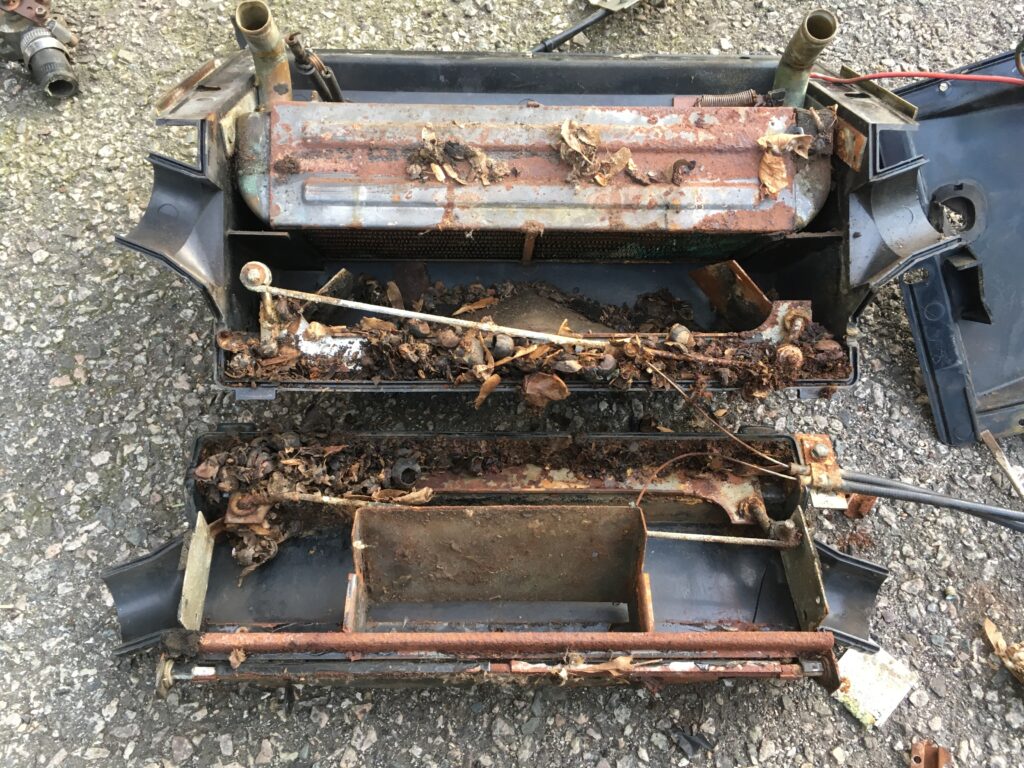
Louie’s heater box when I rebuilt it in 2017 due to a leaking heater core. Remarkably, it didn’t smell like rodent. I wouldn’t be in the least surprised if the inside of Bertha’s looked similar. And I’m glad that, for the moment, I don’t need to find out.
So. Bertha now has binary-under-the-hood-switched-on-and-off heat fighting for dominance against a fair amount of cold air coming through the degraded foam on the flaps, and a working though squeaky blower fan. Given where we are at the end of 2025, I’m calling it success and taking the win.
—Rob Siegel
____________________________________
Rob’s newest book, The Best of The Hack Mechanic, is available here on Amazon, as are his seven other books. Signed copies can be ordered directly from Rob here.
The post Re-Resurrecting Bertha (Part V: Heat) appeared first on BimmerLife.
]]>The post Re-Resurrecting Bertha (Part IV: Brake Master Cylinder Replacement) appeared first on BimmerLife.
]]>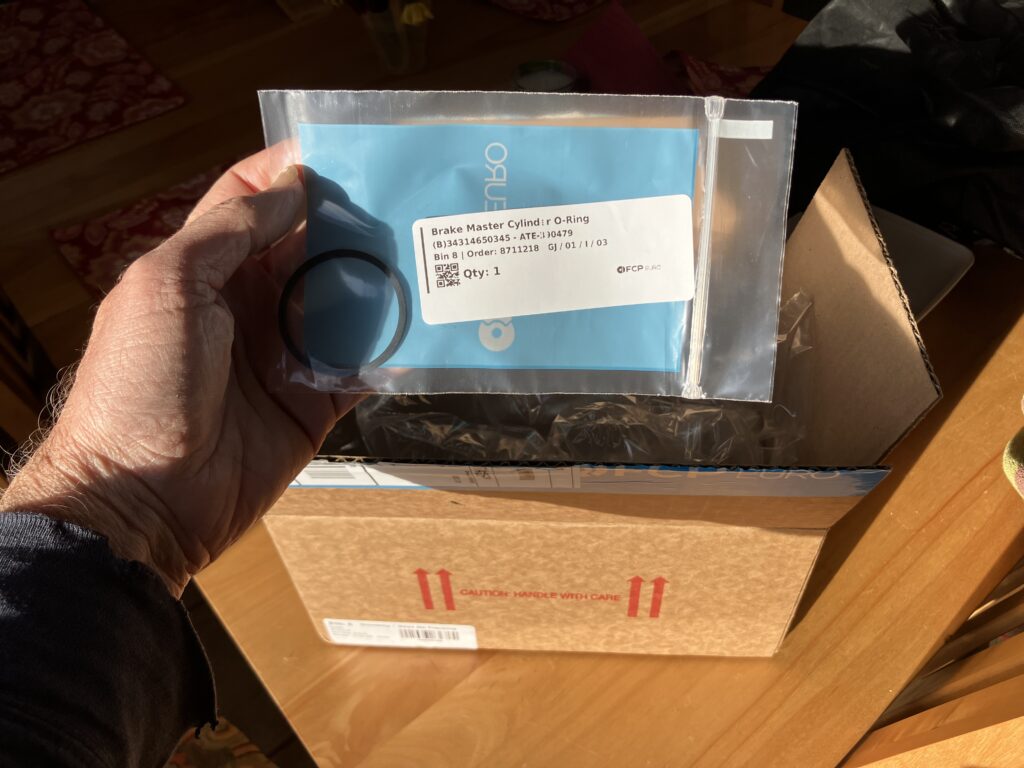
FCP, I love you folks, but you don’t need to compete with Amazon for maximum ratio of box size to purchased goods.
I placed the o-ring in position, slid the brake master cylinder onto its studs on the booster, tightened the nuts, and one at a time, removed the plastic plugs and carefully threaded the brake line fittings into their holes in the master. Then I very carefully snugged them all down (you don’t want to go through all this work only to feel a 50-year-old brake fitting strip or snap).

Hard part’s over. Whew!
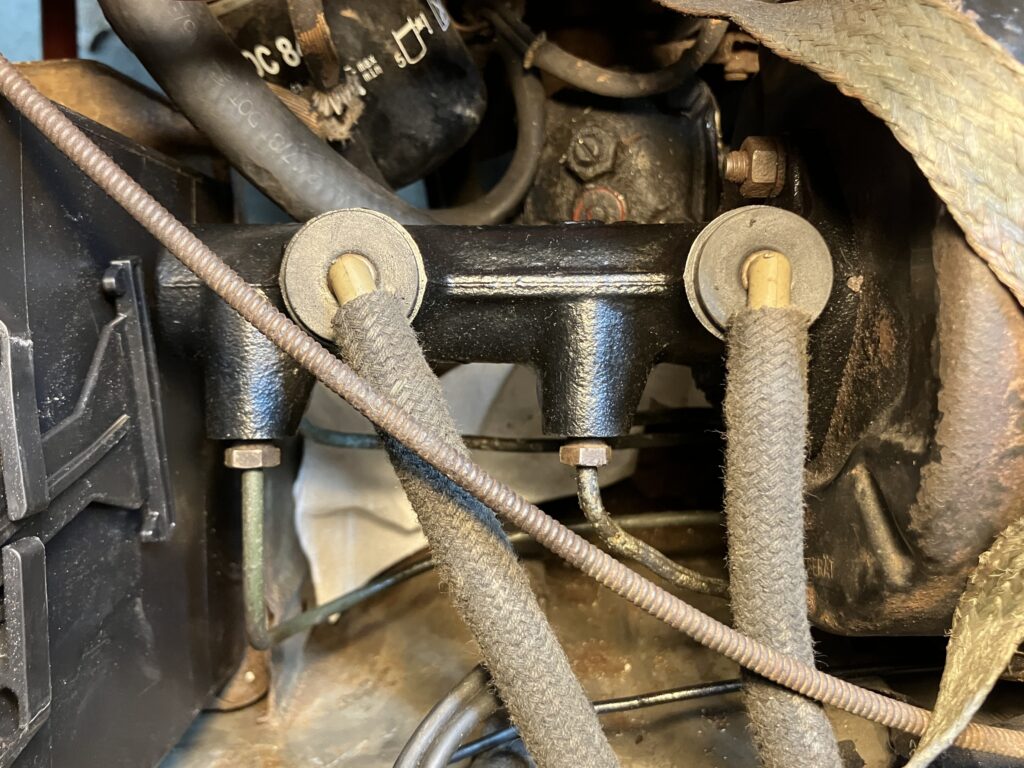
Although neither of the braided cloth hoses were leaking, they were different colors (one blue, the other black), so it’s possible that I’d replaced one of them when I resurrected the car six years ago. I had a piece of the correct hose in the garage, so I cut two pieces to length, carefully extracted the plastic elbows from the old hoses, and pressed them into the new hoses.
The only pre-brake-fluid part of the job remaining was to insert the elbows into the rubber grommets in the top of the master. So I pulled the plastic plugs out of the grommets, and immediately saw that the holes in them were waaaaay too big to received the elbows. I would’ve sworn I took a photo of it in situ, but maybe not. Here’s a comparison between the grommet that was in the master cylinder I removed versus the ones in the just-installed one.
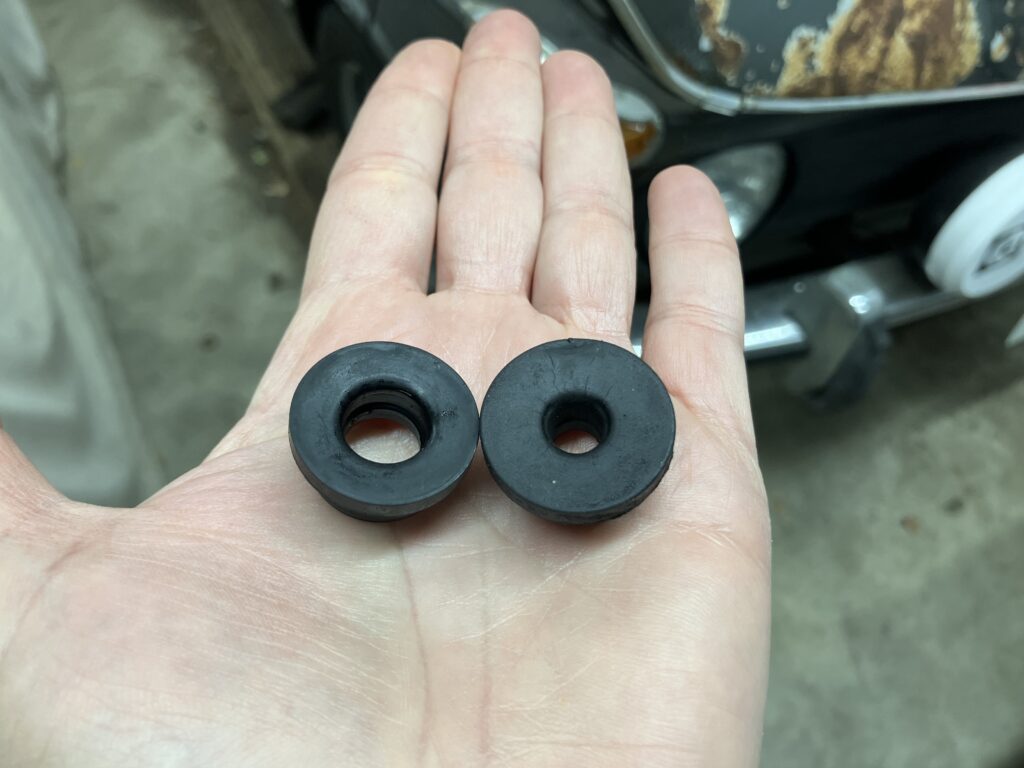
Old and correct right, new and useless, left.
Back I went onto the FCPEuro website. They had the grommets in stock, they were less than $4 each, and for another $6.99, another oversized box could be shipped and be at my door in two or three days. I felt like an idiot for not having checked this when I ordered the o-ring, but I was intentionally leaving all those plastic plugs in place until the last moment to keep dirt out of the new unused master cylinder. I entertained simply re-using the old grommets, but when I examined them closely, I could see small cracks in the rubber.
Then the grommets being too big rang a bell. I remembered that I encountered the same thing when I replaced the brake master in Louie (the Ran When Parked 2002tii). Sometimes in these situations I order extras. The garage is, in general, not a terribly well-organized place, but every once in in a while, I’ll play the came of Concentration with like parts and consolidate them in the same container, so I did in fact have a tray-o-grommets and related rubber parts. Sure enough, in it was an apparently new and unused pair of brake master cylinder grommets. Sometimes we get an outsized amount of joy from not having to spend another $6.99 in shipping and wait another two to three days, even though neither the cost nor the waiting time will make any difference in our lives whatsoever. This was one of those times.

Praise be to The Great Automotive Creator! It’s a holiday miracle!
Saved by being a pack rat.
That left only filling and bleeding. I’ve never found bench-bleeding necessary; master cylinders usually bleed fine as long as you don’t completely drain the fluid out of both it and the brake lines, and do the bleeding thoroughly and systematically. Besides, as I said last week, I hate dealing with brake fluid, and I’d rather get a colonoscopy than fill a container with brake fluid and submerge a master cylinder in it and pump it until the air bubbles stop as if I’m drowning a demonic cat. I’ve used a Motive power bleeder for years, and wonder how I ever survived without it.
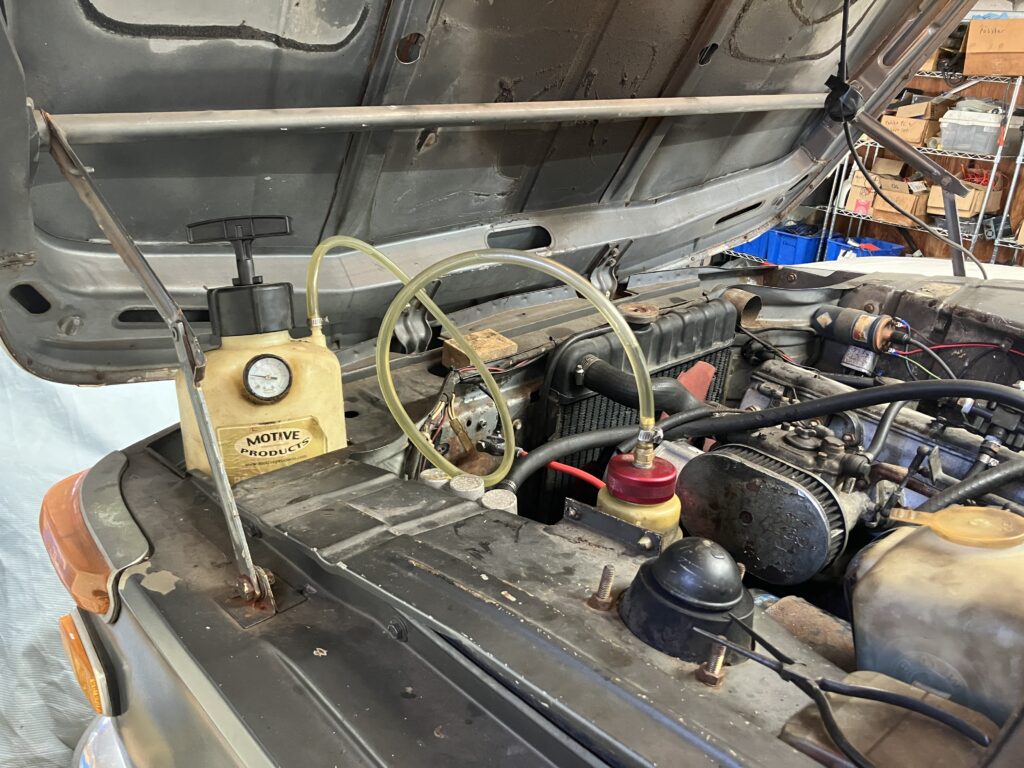
The Motive gets pressed into service.
After one round of bleeding, the brake pedal came up nice and firm. I thought I’d beat the imminent snow and take the car for a test drive, but then realized that with it still up on the mid-rise lift, I can see if I can loosen the splines on the steering column and replace the balky steering box (one of the things on my list). So I think I’ll let it hang out in the Garage Space of Honor for a bit longer.
Don’t get used to it.
—Rob Siegel
____________________________________
Rob’s newest book, The Best of The Hack Mechanic, is available here on Amazon, as are his seven other books. Signed copies can be ordered directly from Rob here.
The post Re-Resurrecting Bertha (Part IV: Brake Master Cylinder Replacement) appeared first on BimmerLife.
]]>The post Re-Resurrecting Bertha (Part III: Where the Brake Fluid Went) appeared first on BimmerLife.
]]>I put the car back up on the mid-rise lift again and gave the undercarriage another look. There was no wetness around the clutch slave cylinder, the hose between it and the clutch master, or any of the metal or rubber brake lines, so I pulled the rear drums off to check if the rear wheel cylinders were leaking. They were bone-dry. This was as expected, as I was pretty sure I’d replaced these when I resurrected the car in 2018–2019, but with the low quality of parts these days, anything can happen.

Good…
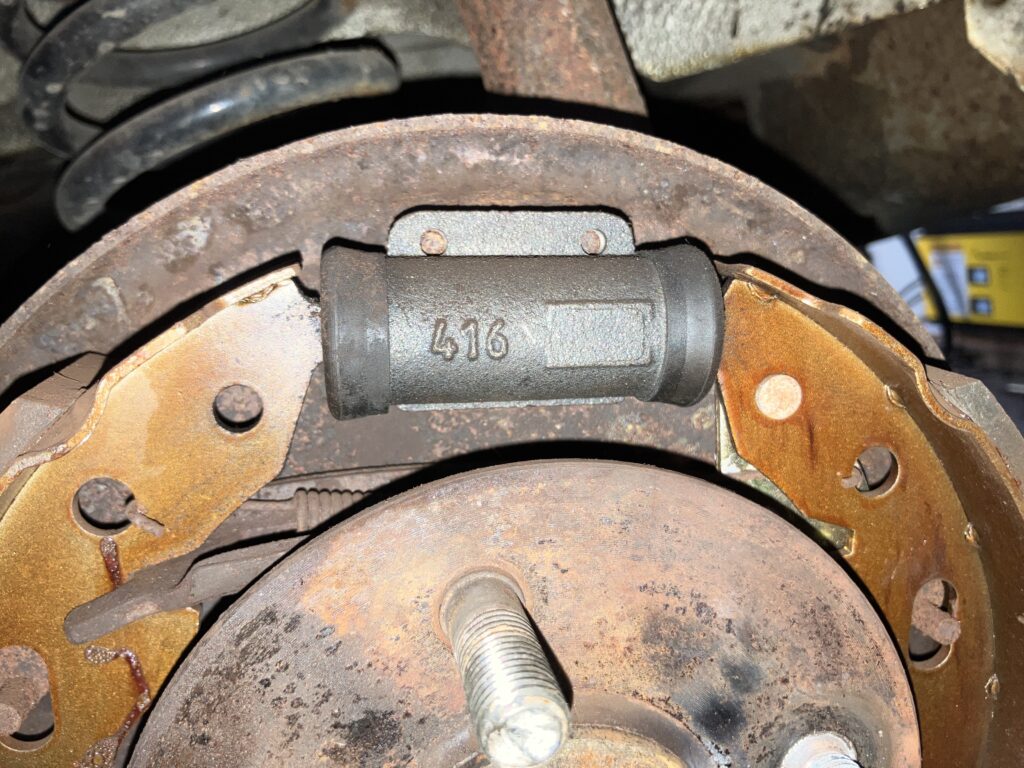
..and good.
Last week I said that one of the things that’s a pain about square taillight 2002s is that they have a molded one-piece carpet that goes underneath the console, so if you need to do something like replace the clutch slave, it’s a pain because the floor carpet piece isn’t separate like it is on a round taillight car. So instead, I looked at the bottom of the pedal bucket. If the clutch master leaks, you can often see the bucket’s stupid outer foam cover sopping wet. As is the case on many 2002s, this one is missing the foam cover (did I mention that it’s stupid?), but I’d apparently jammed a piece of foam inside the rectangular hole to plug it up, so I couldn’t look inside it from underneath, and as I didn’t see anything dripping from it, I thought it was best not to disturb it.
It looks like I gagged it.
From the photo above, you can see that the clutch slave looks recent. I vividly remember when it failed coming home from a cars and coffee in Rhode Island on Bertha’s first real post-resurrection drive. So, as with the wheel cylinders, I wouldn’t have expected it to be the cause of the leak, but as I said, parts quality, blah blah blah. So I took a flashlight, shoved aside the other foam piece that’s under the rug and on the top of the pedal bucket, looked inside, and was surprised to see some amount of dampness. It wasn’t the sodden stinky pool of a fully-failing clutch master cylinder, but it shouldn’t be there at all. Oh well, I thought; maybe the thing does need a clutch master cylinder.
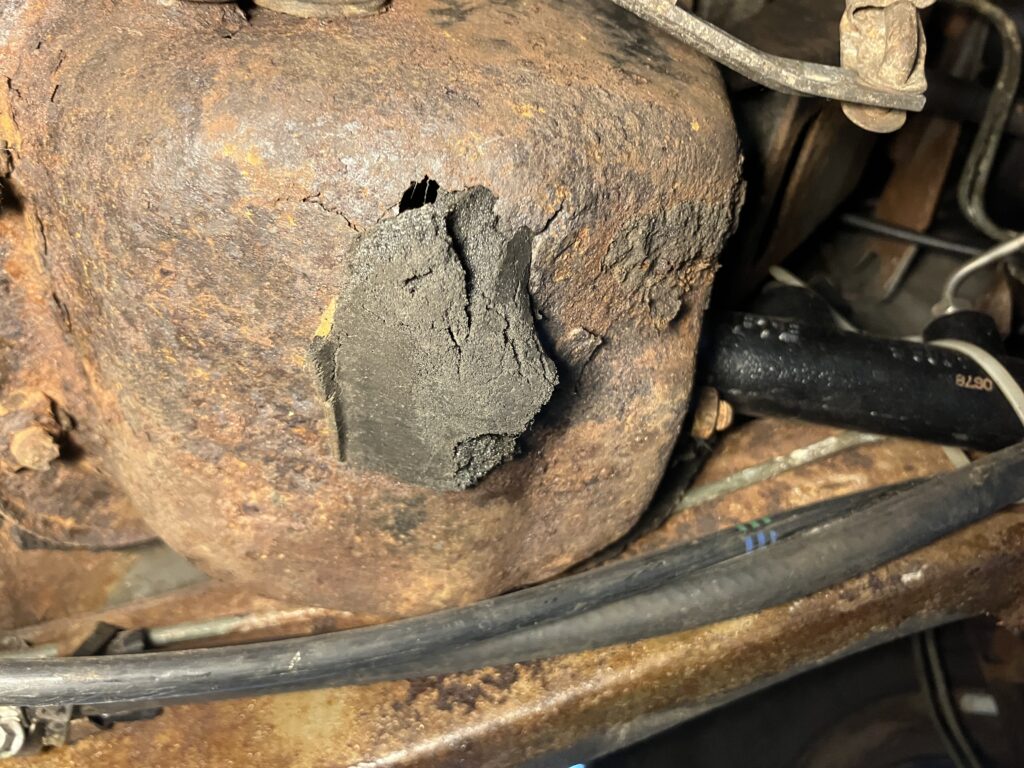
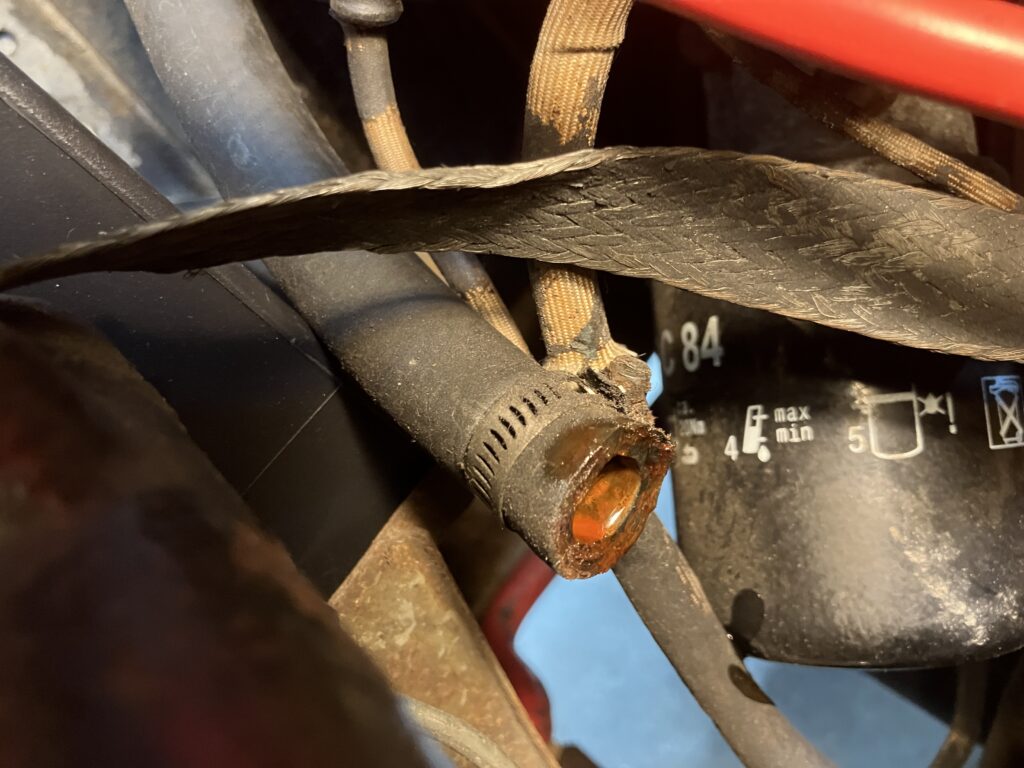
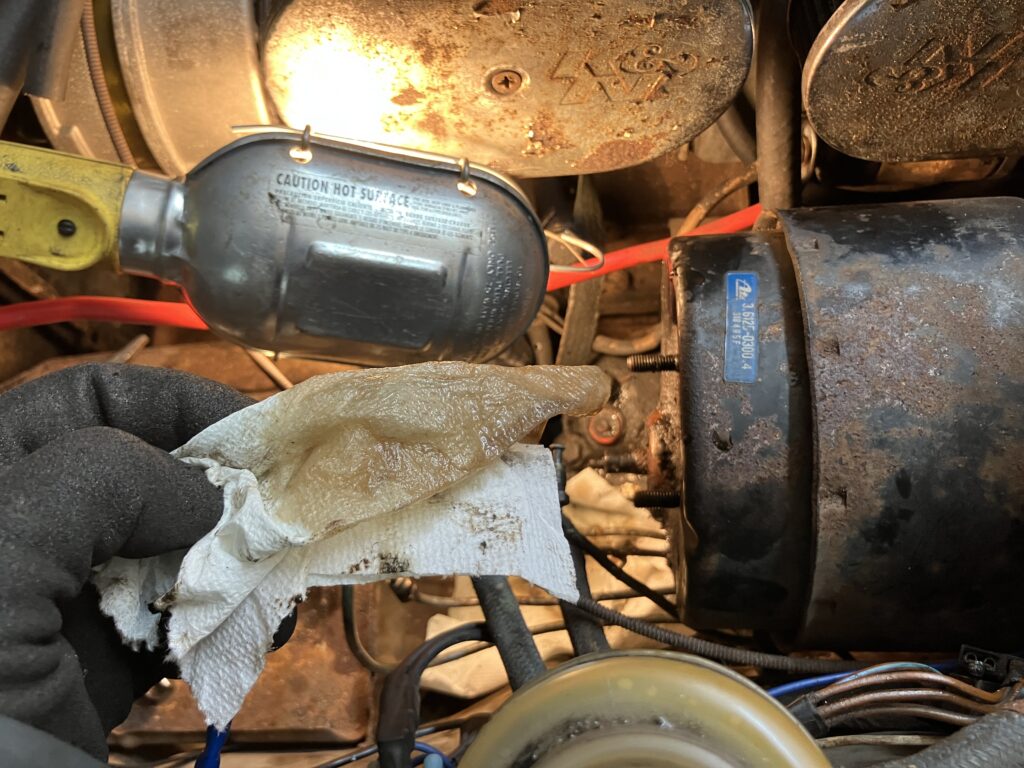
I went upstairs to the laptop, found that the part is available for about a hundred bucks, and was about to click and buy when I thought “No, before you do this, check out the other thing it could be—brake fluid winding up inside the brake booster due to a bad rear seal on the brake master cylinder.” You’ll recall that I went through this same thing on my E9 last month, and pulled the hose off it, snaked a zip tie down into the booster like a dipstick, and it came up dry. On Bertha, the port is a little harder to access, as the hose goes into the bottom of the booster, not the top, but when I pulled it off, I didn’t even need to grab a zip tie—fluid was dripping out of the end of the hose.
Ruh roh.
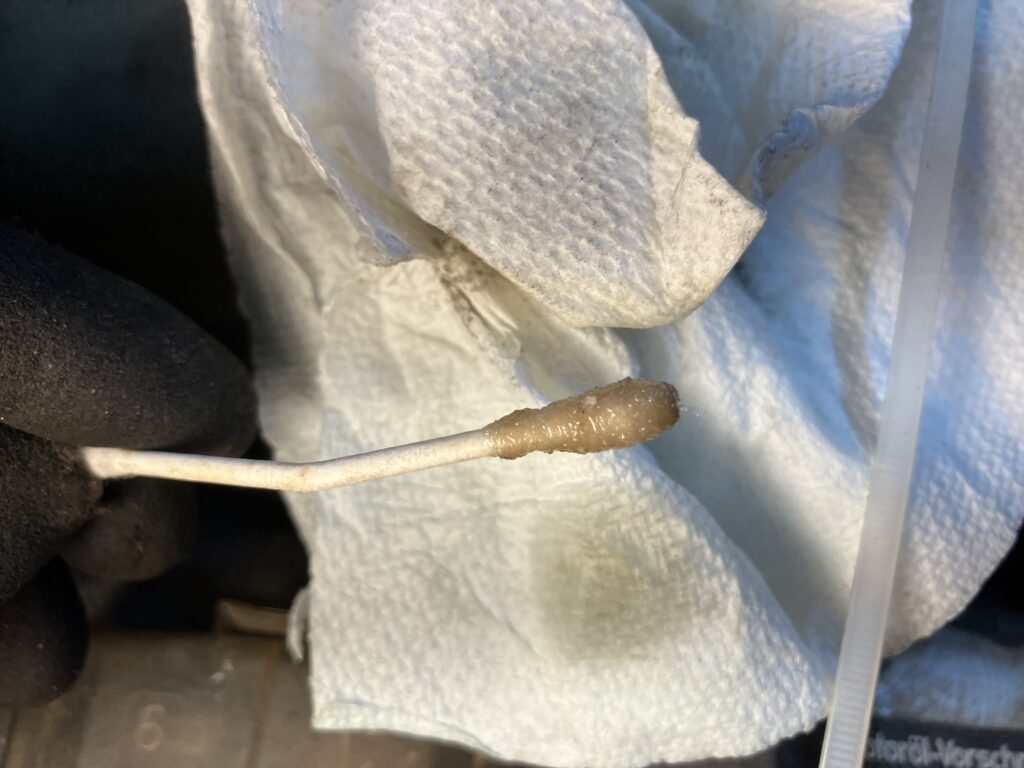
I touched a finger to it, sniffed it, and got that unforgettable cat-piss-like whiff of brake fluid. Those who have been reading me for decades know that I hate the smell and feel of brake fluid, and that opening up brake and clutch hydraulic systems is one of my least favorite things to do. So wanting to be certain, I bent a Q-tip and slid into the port on the booster.
It came up sopping. This was definitive, and meant that the brake master cylinder was bad and needed to be replaced—a job I was not looking forward to. Further, as Bertha has a braking system that came out of a 2002ti, it has the ti/tii 23mm brake master cylinder, not the standard 20mm one for a 2002.
Ick.
The next day, I began attacking the problem. It’s winter, it’s cold in the garage, and I hate to turn on the heat unless I’m out there for a good duration, so I thought I’d do the 15-minutes-at-a-time thing. I went out and used the turkey baster (well, not the good turkey baster) to suck the brake fluid out of the reservoir. I was about to go back inside when I thought “Why don’t I give each of the brake lines a goose of Silikroil to loosen ’em up?” So I did, then came back inside and had another cup of coffee.
I was going to let the Silikroil sit for a few hours, but curiosity got the better of me, and I thought “Why don’t I just use the 11mm flare-nut wrench on all the fittings and see if they crack loose easily?” Four did, two didn’t. In a situation like this, where you’re in a world of hurt if a fitting doesn’t loosen up or snaps off, I head straight for the heat, but I found that my MAPP gas torch was empty. I was about to run to the hardware store when I thought “Let me just try again, this time with more torque.” I did, one of the two recalcitrant fittings cracked loose, and the other one, of course, began to round the corners off the nut. I thought “Idiot! Idiot!” But I had good clearance to get a Vise Grip on it, and off it came.
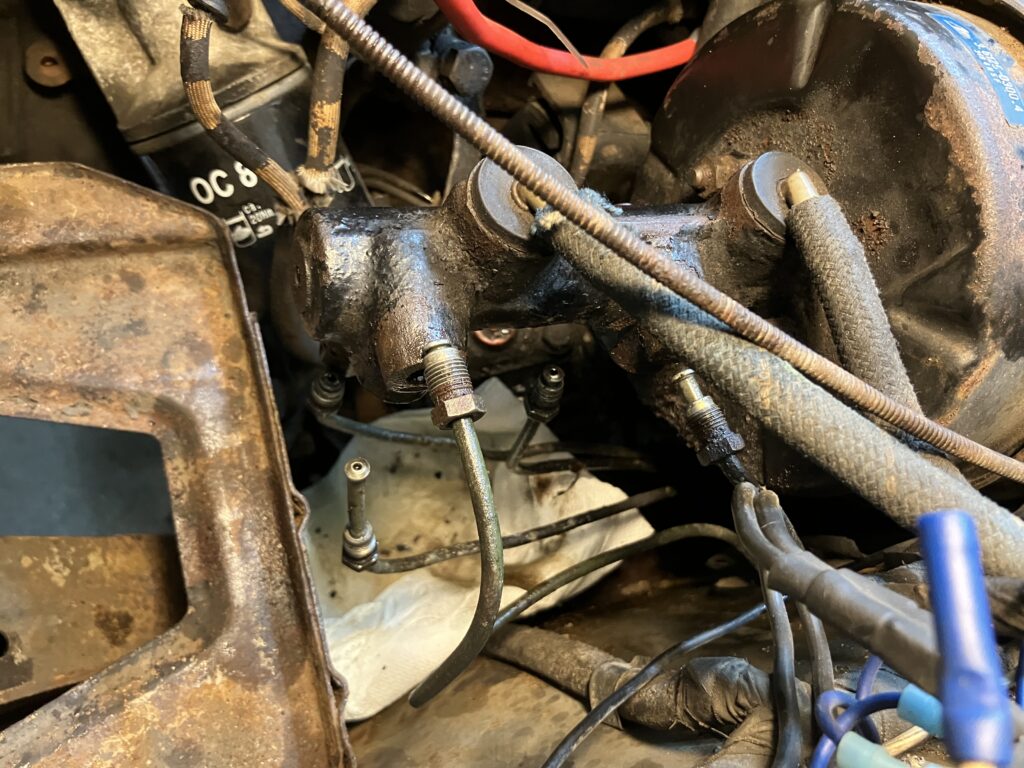
THAT’s a good master cylinder. Well, it’s a bad one, but you know what I mean.
At this point, pull the plastic nipples out of the rubber grommets, undo the two 13mm nuts holding the thing to the booster, and out it comes, so why not just have at it?
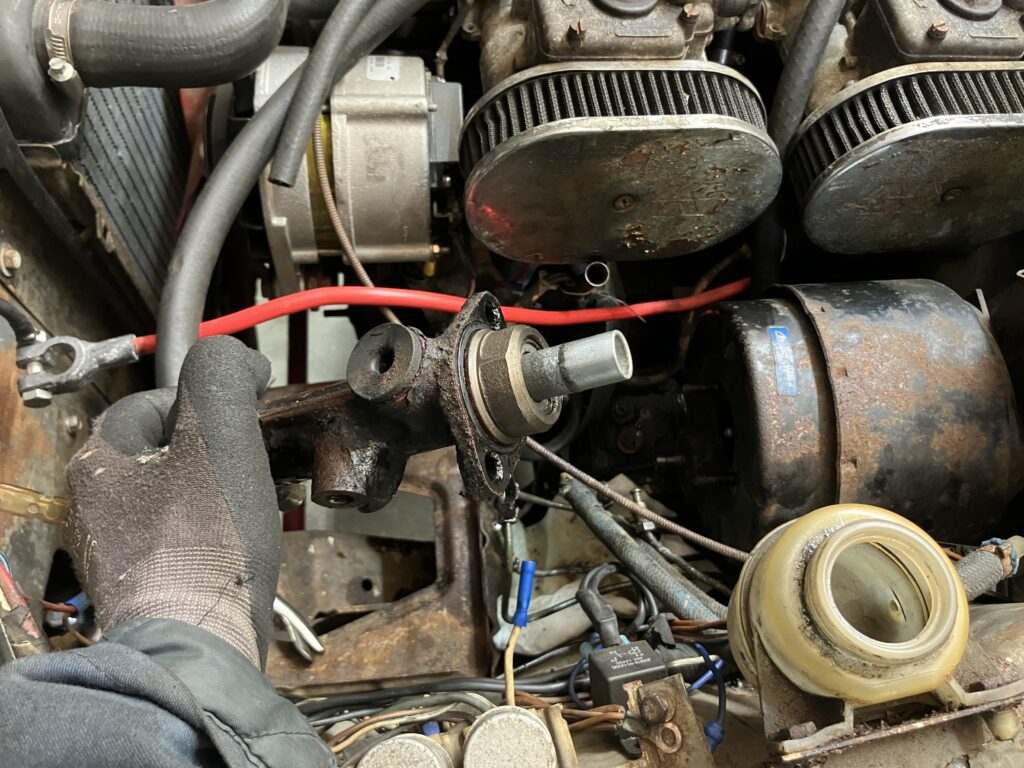
Yeah baby.
Obviously, the thing to do was to get a new one on order ASAP. I sat down at the laptop and learned that the original 23.81mm tii master cylinder appears to be unobtanium these days, with the closest match being the 22mm 2800CS unit that Ireland Engineering sells for $295. I rolled my eyes at the expense, but philosophized that I’d pulled this braking system out of a rotted 2002ti I bought and parted out on the streets of Brighton 40 years ago, so it had a good run.
And then I remembered something. In the summer of 2022, by utter coincidence, I was contacted by two women, both of whose husbands had passed away, and both of whom needed help dealing with their 2002s and their leftover parts. One of the cars was an original-owner Fjord blue ’72 2002tii, and I wrote a seven-part series about sorting it out and selling it for her on BaT. But the other car was a beautifully-restored Malaga ’76 2002 with a some go-fast modifications. For that one, I just floated it on my Facebook page, and connected the owner with an interested party. Months later, she gifted me all the parts that were in the basement. I’ve written multiple pieces about how these parts hoards are a mixed blessing. On the one hand, what 2002 owner wouldn’t say “yes” to new unused 2002 parts? But on the other hand, it’s rare that a parts stash is all wheat and no chaff, and no fair taking only new parts in boxes and leaving all the old stuff for a widow to deal with. My garage and basement still haven’t recovered from several of these events.
But a neuron fired and told me that the parts stash from the Malaga ’76 included a brand-new brake master cylinder. What’s more, I thought I recalled that it had “23” stamped in the side.
I found it. I was right.
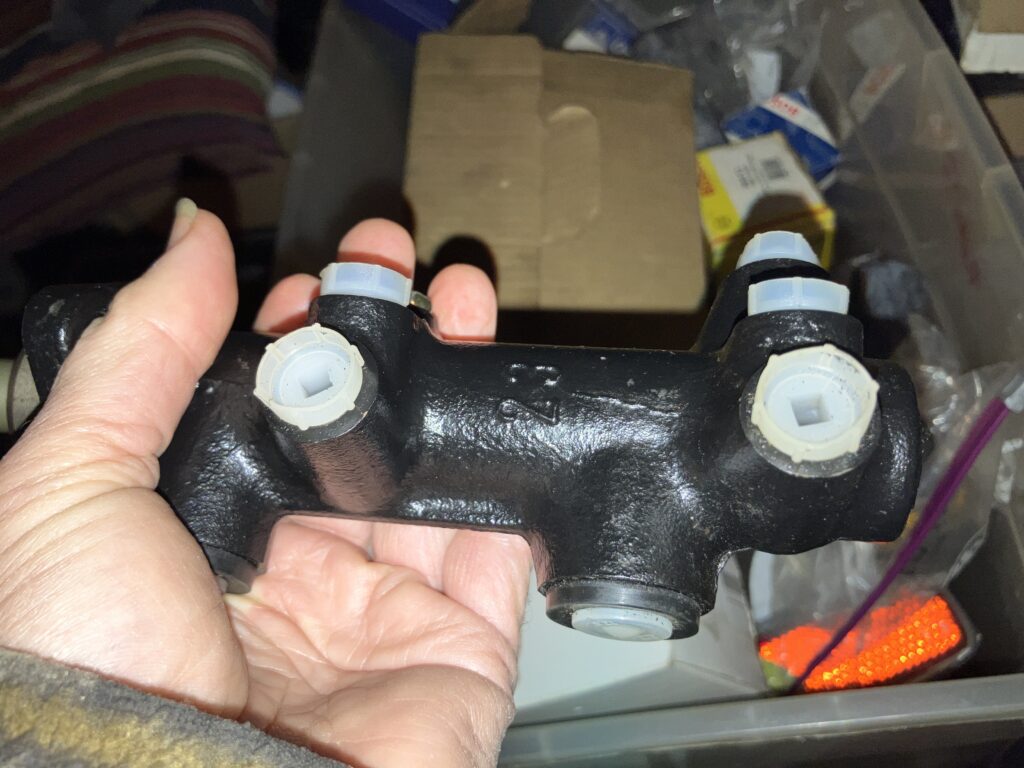
BOOYA!
Suddenly, “Oh crap this is going to cost me three hundred bucks” became “I got yer tii master cylinder right here FER FREE, pal! Mwahahahaha!” and “Do 15 minutes at a time” became “Holy hell, I could get this thing back together right freaking now.” I slid the thing onto the booster studs and began threading the nuts onto them, and then I realized that I hadn’t cleaned the brake fluid out of the booster. Damn.
But that was for the best, because when I slid it back off, I looked at the end of the new master cylinder, and realized that it was missing the rubber O-ring (part number 34314650345) that keeps the booster’s vacuum from leaking. It would’ve been a real drag had I installed it, threaded the fittings back on, filled and bled the system, only to find that that it didn’t work because it wouldn’t hold vacuum, and I needed to pull it back off all for the want of an O-ring.
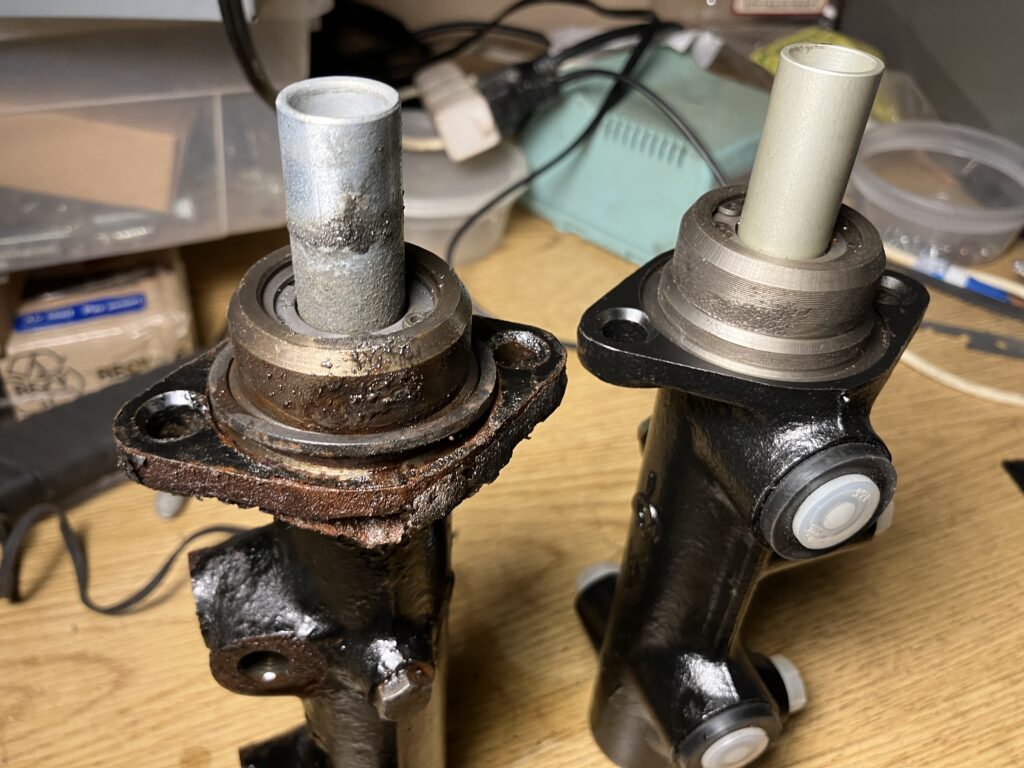
Note the O-ring on the old master cylinder (left), missing on the new one (right).
I came very close to simply swapping the O-ring off the old master cylinder onto the new one, but decided that, for the $10.51 that FCPEuro charged for the in-stock part, I’d be an idiot not to wait the few days for it to be shipped to me. Besides, there was nothing pressing me to rush the repair. It’s not like the car had a scheduled freeze-my-ass-off-and-listen-to-it-rust road trip or anything. Its main reason for being in the garage over the winter is to give me things to do. I didn’t even have an urgent need to get the car off the place of honor over the mid-rise lift. Just wait for the O-ring, Rob (sometimes I need to remind myself to slow down).
As much as I didn’t want to, I did need to clean the brake booster. I stuck in a paper towel, and it came out sopping wet. Yuck. There was so much brake fluid in it that initially I thought I’d need to remove it and wash it out with brake cleaner, but using paper towels to sop up the bulk, followed by a rag twisted around a coat hanger, was very effective. When they came out clean, I called it done.

It’s hard to tell because the camera wouldn’t focus on it, but that shine at the bottom is a big puddle of brake fluid.
Honestly, I’d rather wipe up cat piss.
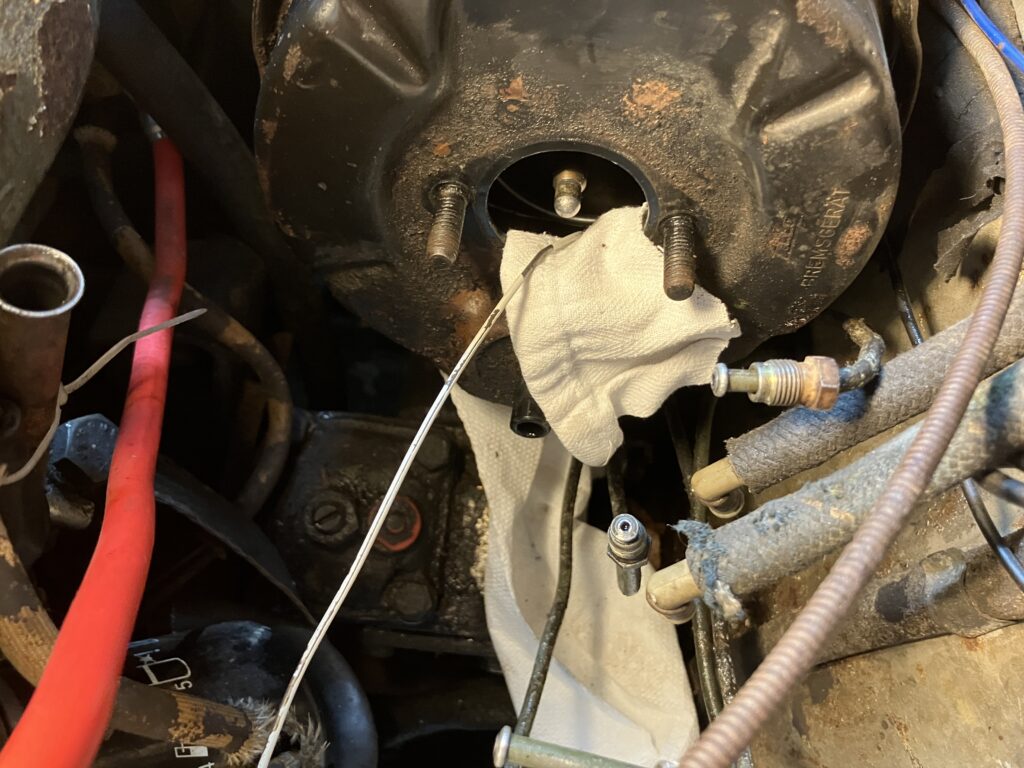
The tried-and-true coat-hanger-and-rag method.
The booster is now nice and clean, and as soon as the new O-ring arrives, I’ll throw it all back together.
And then I’ll be able to drive it and try out that cool new steering wheel.
—Rob Siegel
____________________________________
Rob’s newest book, The Best of The Hack Mechanic, is available here on Amazon, as are his seven other books. Signed copies can be ordered directly from Rob here.
The post Re-Resurrecting Bertha (Part III: Where the Brake Fluid Went) appeared first on BimmerLife.
]]>The post Re-Resurrecting Bertha (Part II: Taking Stock) appeared first on BimmerLife.
]]>I examined all the brake and clutch hydraulics and found no signs of leakage. This means I need to do a more detailed pass, including examining the clutch master cylinder (which is a pain, since on a 2002 the clutch slave is down inside the pedal bucket, and since a square taillight 2002 has a one-piece carpet that covers it), looking for leakage inside the brake booster, and pulling off the rear wheels to look at the wheel cylinders. I’ll do all that, but hoping to score a quick win, I instead examined the exhaust to find the source of the rumble. Fortunately, it was just a loose exhaust—the rear rubber muffler hanger was badly deteriorated, and the front one was missing. With it secured, a quick test-drive was blissfully quiet.
Next, I wanted to know the cause of the lack of heat. I mean, really, all it can be is the heater valve not opening. As I said last week, part of the reason for bringing the car home was to have a knock-around vintage car at the house that I wasn’t afraid to drive during the winter if the roads were clear. The heat slider control moved fine, and reaching into the cowl to lay a hand on the heater control valve, I could move its lever, so it took me a moment to figure out what the problem was: The Bowden cable connecting the two is broken next to the valve. I can probably kluge this by tying the two sections together with a barrel connector, but in the short term, I simply moved the valve’s lever into the on position. We’ll see if there’s now so much heat inside the cabin that I roast.

Hmmmn.
That brings us to related issue #1. While driving the car home from Monson, I found that the heater box fan didn’t work. Not that I needed it, because a) there was no heat, and b) the influx of cold air through the footwell and defroster flaps was barely slowed by the sliders being slid to their off positions. And then I remembered: When I began resurrecting the car in 2018, I was aware of all of these things, and had purchased a Bosch heater fan motor and planned to remove the heater box, re-line the flaps with new foam to get them to close, install the new fan motor, and deal with the broken Bowen cable to the heater valve, but as the clock ticked down to driving the car to The Vintage in 2019, I instead put my efforts into rebuilding the car’s original dealer-installed Behr air conditioning. This meant that I pulled out the a/c evaporator assembly to flush it and replace the expansion valve. In an air-conditioned 2002, pulling the evap assembly is a necessary step to getting the heater box out, so if both of them need work, you address them together, but due to time constraints and the fact that, driving to North Carolina in May, I wanted air conditioning, not heat, I simply reinstalled the evaporator box in front of the knowingly-compromised heater box. I can’t say that I regret the choice, but now it’s six years later, and pulling apart a working a/c system to get at the heater box is a tough sell.
Which brings us to related issue #2: Is it a working a/c system? My recollection was that the a/c system had stopped working at some point after the 2019 drive to The Vinage. I hooked up a manifold gauge set to see if there was any refrigerant pressure at all in it. Surprisingly there was, though the resting pressure was low. This means I have a choice. I can do the, ahem, Just Needs a Recharge thing (if you don’t know, the title of my air conditioning book is a joke, because a/c systems almost never “just need a recharge”; they almost always have a leak that needs to be fixed). Or I can find the leak now, and then pull the evap box out to get at the heater box. Or I can do those things in the reverse order. It would give me a good winter project, but for the moment, I’m going to kick that can down the road as well.
So instead of doing necessary work to find the brake fluid leak or delving into a heater box removal, I focused on something utterly trivial—the steering wheel. This car has had a Momo Jackie Stewart wheel in it which was in harmony with all the other go-fast drivers school parts I’d installed, but both the small 13.75-inch diameter and the chunky 1.38-inch grip thickness are no longer to my liking.
Am I a bad person if I don’t like this anymore?
I began looking at the clearly-counterfeit Momo wheels that are readily available for short money on both Amazon and eBay, and found one on Amazon for $54 that looked the same as the Momo I installed a few years ago into my E9 for similar reasons. It was advertised as 14.1 inches in diameter, with a dish of 1.5 inches, and a standard bolt pattern that I assumed would fit the Momo hub. The grip thickness wasn’t listed, but it looked thinner than the wheel in Bertha. I had concerns about the non-zero dish, as the Momo is dead flat and it and the hub seem to stick out quite a bit from the column, but I bought it anyway. You can see the comparison below.
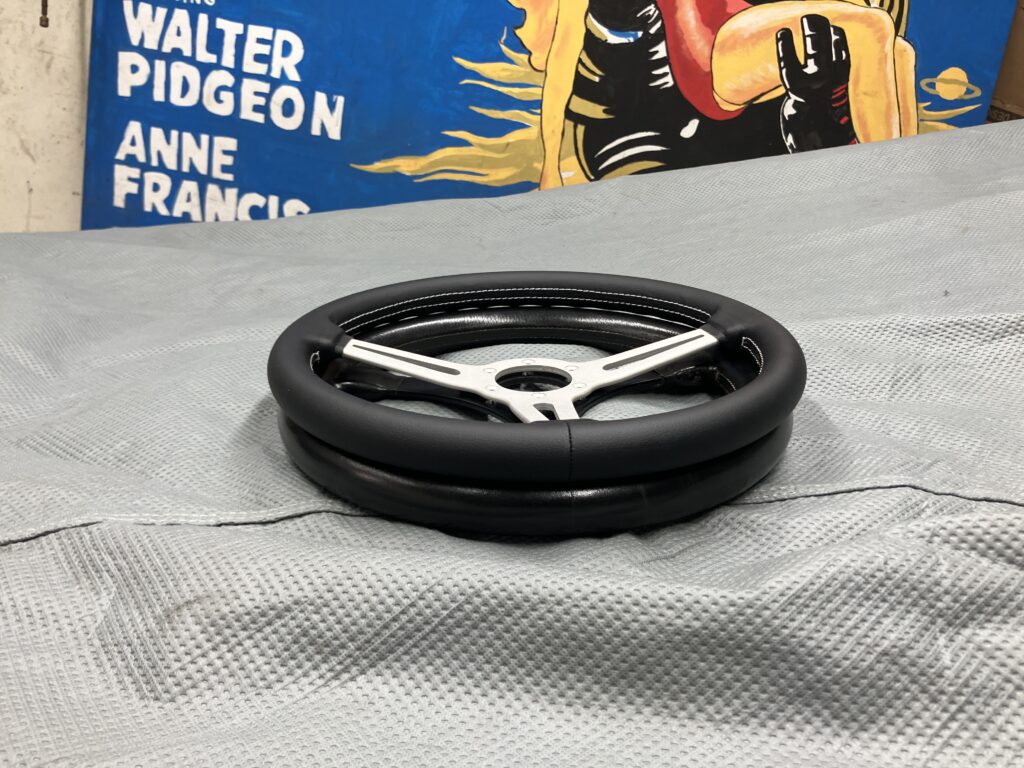
Slightly bigger…
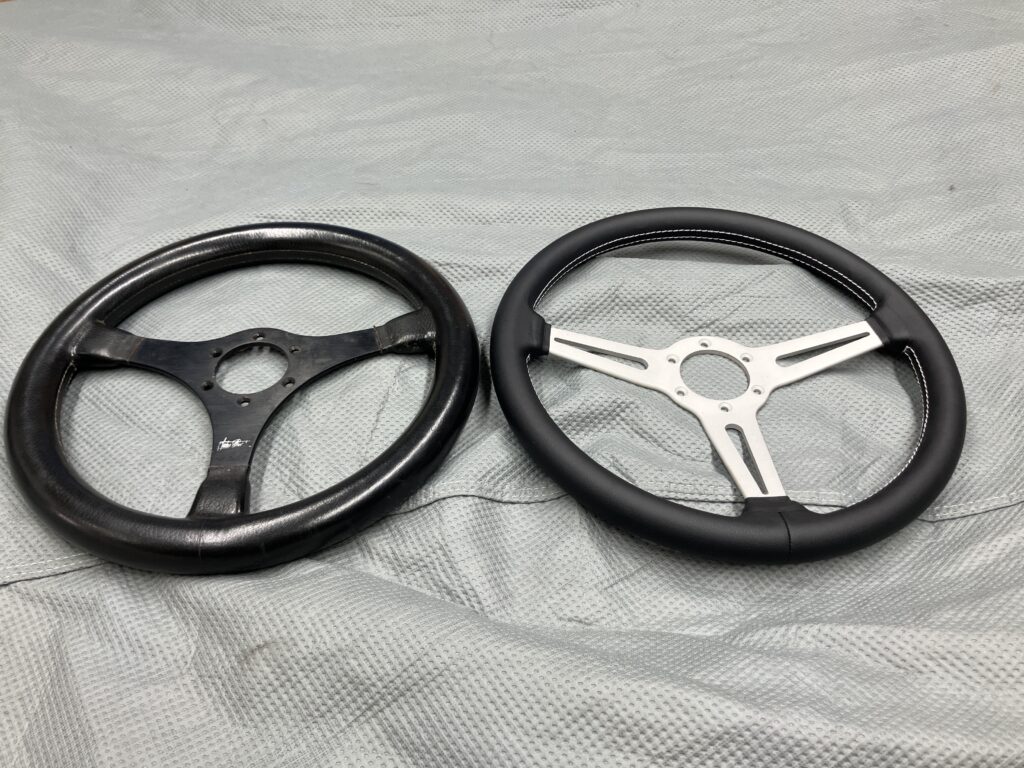
…slightly thinner…

…but, unfortunately, slightly dished.
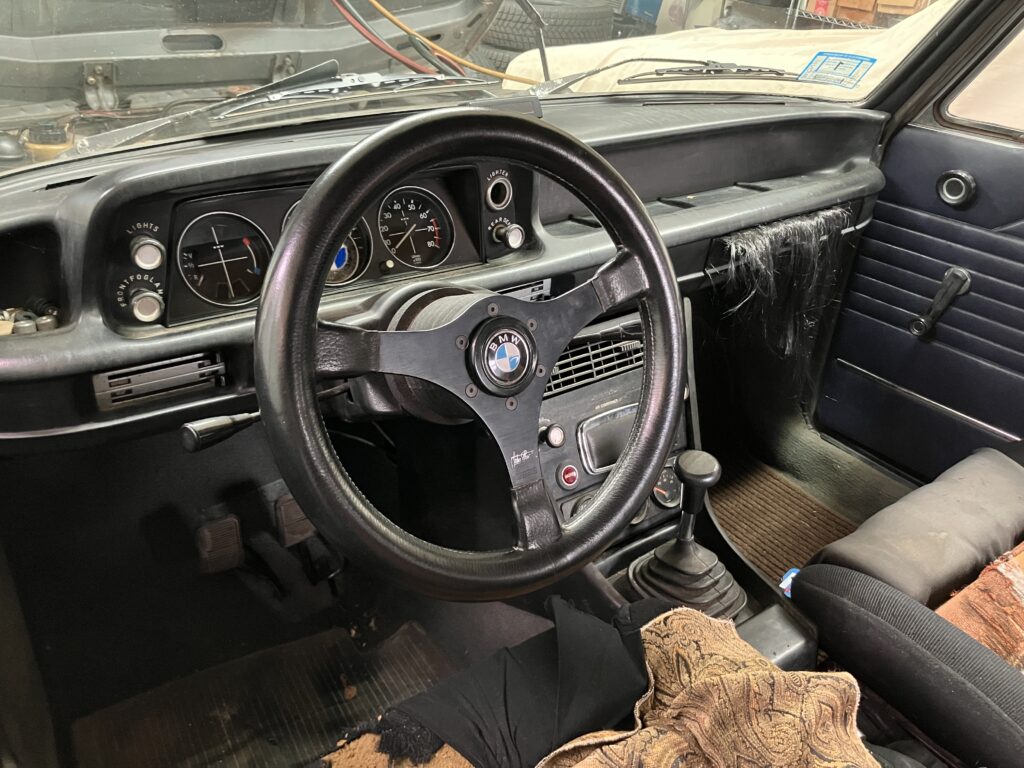
Fortunately, the tiny 3mm recessed Allen-head bolts holding the old wheel to the hub gave up without even a hint of a fight, the new wheel bolted right on, and the hole for the horn button was exactly the same size (unlike a recent incident installing what I thought was the correct original steering wheel in my Lotus Elan +2). You wouldn’t think something slightly larger and slightly thinner would make such a big difference, but I far prefer it over the Momo.
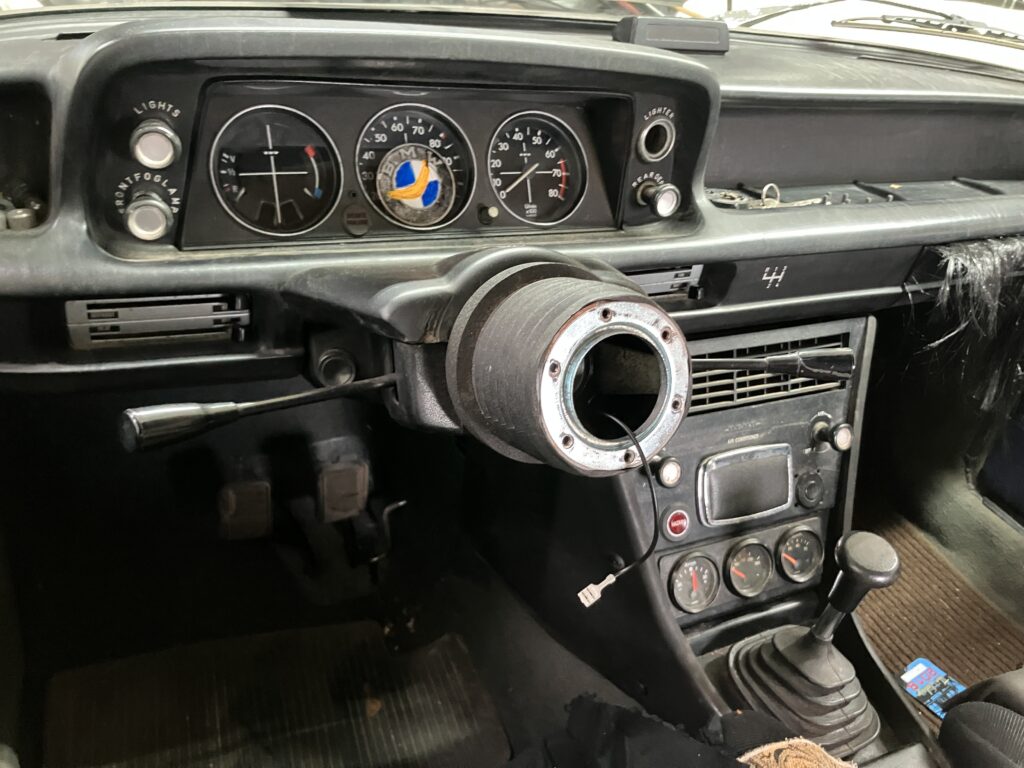
This may have been the only time I’ve ever swapped a steering wheel onto an existing aftermarket hub.
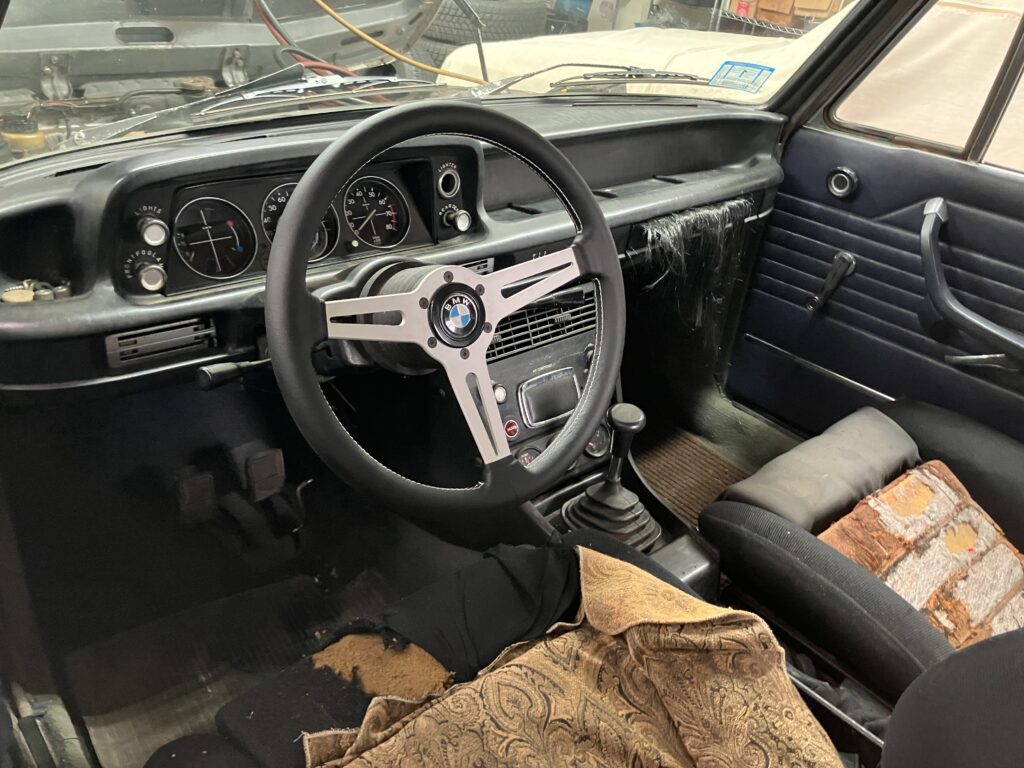
Ta-da!
Because of the new wheel’s 1.5-inch dish, it does stick out a little further than the flat Momo, but I discovered that, when I’d installed the Momo and its hub back when Reagan was telling Gorbachev to tear down that wall, the hub rubbed against the steering column padding until I installed a 0.4-inch spacer behind it, and it’s still there. The spacer doesn’t need to be that thick. I’ll see if a trip to the hardware store can net me a thinner spacer.
So, yes, I still have the important issue of the loss of brake fluid to resolve. But at least I can smile at the dashboard whenever I look in the window.
—Rob Siegel
____________________________________
Rob’s newest book, The Best of The Hack Mechanic, is available here on Amazon, as are his seven other books. Signed copies can be ordered directly from Rob here.
The post Re-Resurrecting Bertha (Part II: Taking Stock) appeared first on BimmerLife.
]]>The post Re-Resurrecting Bertha appeared first on BimmerLife.
]]>
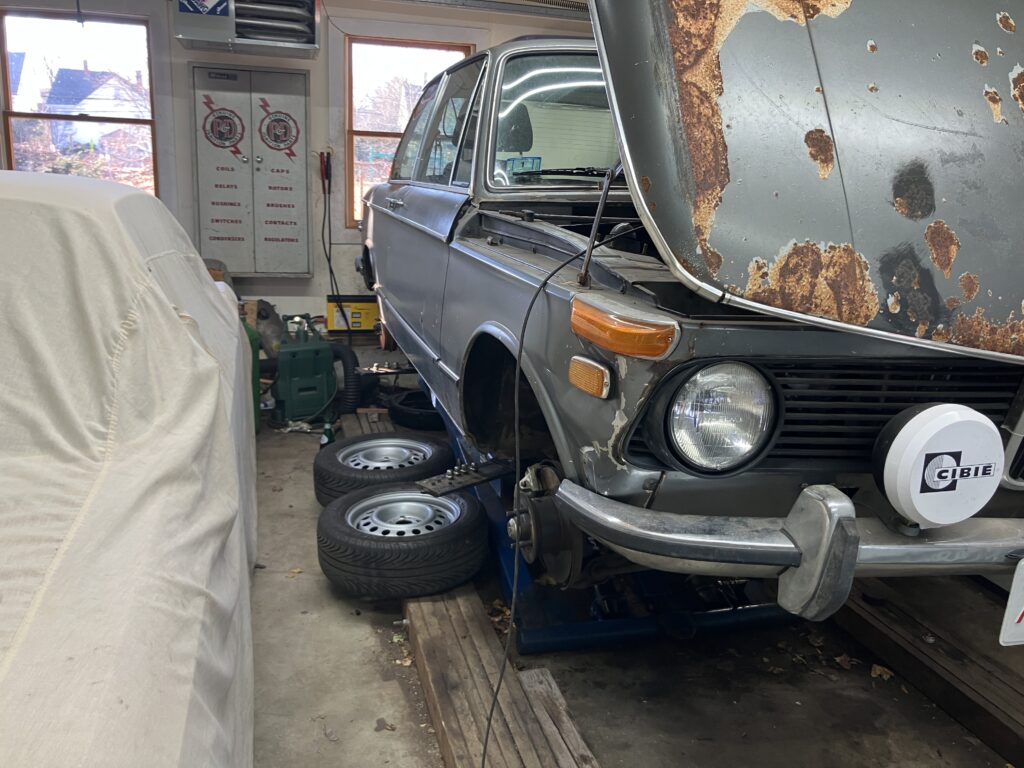
Bertha in her nuptial duds.
Bertha was my daily driver for my first few years back in Boston, but I gradually transformed it into a drivers-school-capable vehicle with just about every go-fast part that was sold new through Roundel magazine and available used through the local publication The WantADvertiser. I found a rotted ’71 dual-Weber-equipped 2002ti parts car, rebuilt its engine with 10:1 pistons and an Iskendarian 300-degree cam, and swapped it into Bertha, along with the ti struts, big calipers, and brake booster (the same as in the tii). A Koni suspension went in, as did a Getrag 245 5-speed, an ultra-rare Metric Mechanic bracket to hold it in place, Recaro front and rear seats in that “orange Spectrum” fabric, an Alpine/ADS sound system, Cibie Oscar driving lights, even a Wink mirror. In addition to the car doing track duty, Maire Anne and I took it on a last pre-children road trip up to Nova Scotia in the fall of 1987. I have great memories of driving it on the twisty roller-coaster road that runs along Cape Breton.

Bertha on the Digby ferry.

“I’m lookin’ at the world through a windshield.” (actually out the side window)
In 1988, my good friend Alex was getting married, and was readying his 2002 so he and his soon-to-be-bride could take a big western road trip in it to national parks. When his car didn’t look like it would be ready in time, I offered to loan them Bertha as a wedding present. Alex didn’t think it was necessary, but Heidi gently prodded him to take the car, as it had air conditioning. They did, and loved using it so much that they joked about not wanting to give it back.
The combination of my starting a family, wanting to keep Bertha off the road in the winter, and also owning my ’73 E9 3.0CSi made me make the difficult decision to offer the car to Alex. It took a while, but the loan evolved into a purchase. Unfortunately, it proved to be a dark turn in the car’s fortunes. Due to construction on Alex’s house, he needed to park the car on Boston streets. It got stolen, recovered, and stolen again. When it was recovered a second time, it ran horribly, with Alex suspecting engine damage. He rolled it into his neighbor’s garage. Time did what time does, and the car sat there for 26 years.
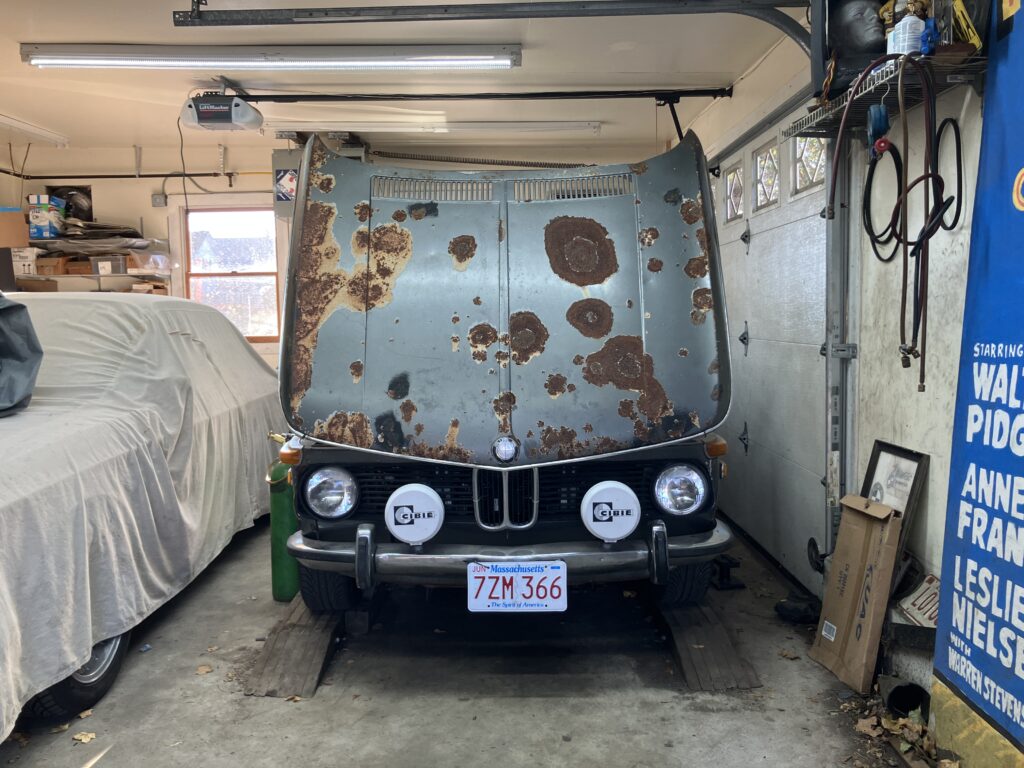
I’d regularly ask Alex if he’d sell it back to me, but unfinished projects can be painful for people, and whenever I’d raise the issue, it seemed like I was stabbing him. But in 2018, he decided that it was time. Foolishly on my part, we came to an agreement without me looking at it. When I opened up his neighbor’s garage door, I came face-to-face with this:
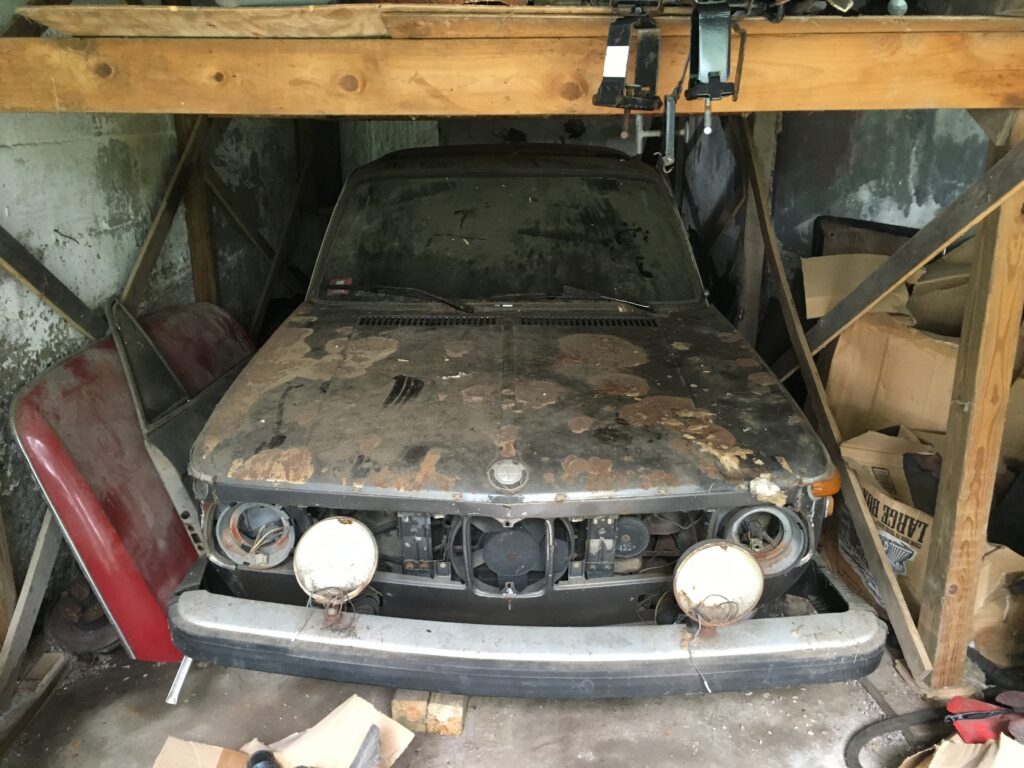
Yikes! (The unusual patina on the hood turned out to be due to batts of insulation that had fallen onto it and were a vector for humidity coming off a nearby pond.)
Undeterred, I began extracting the car from its tomb. An extra-degree-of-difficulty factor was that the garage was an unusual rear-facing door in the basement of his neighbor’s house, the driveway access to which had been cut off in the intervening 26 years by a fence. So the only way to get the car out was to get it running and drive it into the backyard and then up the narrow gap between it and Alex’s house. I spent a week going over there every day, cleaning the fuel system, getting the damaged engine to run on three cylinders, and making the clutch hydraulics functional. The video of me driving the car out can be seen here.
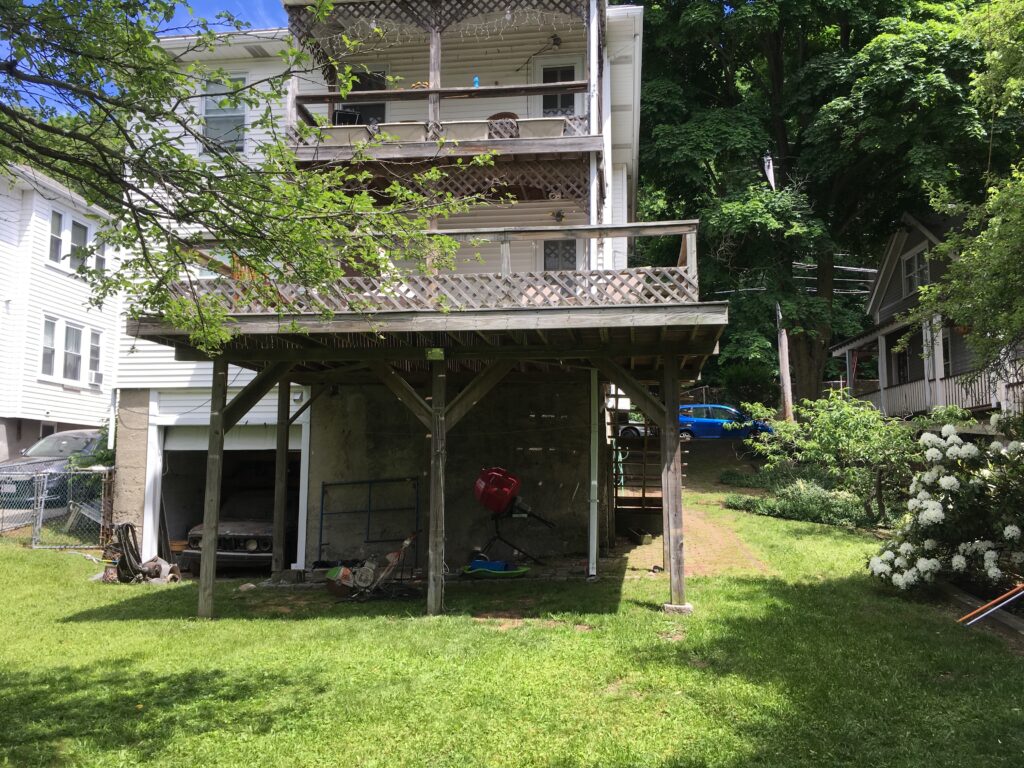
You see the problem.
But just because I got the car running well enough to drag its sorry ass out of the yard doesn’t mean that it didn’t still need everything. I pulled the head off and replaced the damaged valve, refreshed the brakes and cooling system, and gave the driveshaft a new giubo and center support bearing. A noisy differential was swapped out for one of unknown provenance that had been sitting in my backyard for 30 years. As the car no longer needed to do commuting-traffic duties, I even gave it a facelift in the form of a small-bumper conversion. And with an eye to driving the car down to The Vintage in Asheville in 2019, I revived the long-dead air conditioning (I’d already installed a Sanden rotary-style compressor back in 1985, but for the R134a retrofit, it still needed the big parallel-flow condenser and hard-blowing Spal fan).
In May 2019, the car made it down to The Vintage and back. What’s more, it received the full-gonzo-Paul-Wegweiser treatment, adorned with bananas, Mardi Gras beads, window decals, and a gorilla mask staring up at me from the console.

What? If someone leaves a gorilla mask in your ratty 2002, you’re NOT going to wear it when you drive onto The Vintage event field in Hot Sprints? (photo by Brad Day)
I wrote about all this—the car’s history, its long dormancy, its resurrection, the trip to and from The Vintage—in a series of BimmerLife pieces, and then in my book Resurrecting Bertha. At the end of the book, I cheerfully concluded “I then drove Bertha out to Fitchburg [where I used to store cars], and was instantly reminded how dangerously fun the car is when she’s not hauling 500 pounds of tools and books. Part of Bertha’s ethos and my emotional bond with the car is that she can’t be Jessie from Toy Story—abandoned, locked away for decades, then rescued but still terrified of being put back into storage. As I parked Bertha in one of the garage spaces in Fitchburg and rolled the door down, I decided to quit worrying about it. She’ll never be abandoned again. I know that now. She’s just too much fun. This is not a car that made it home from The Vintage by the skin of its teeth. This is a car that’s at the beginning of her new adventures.”
So… about that.
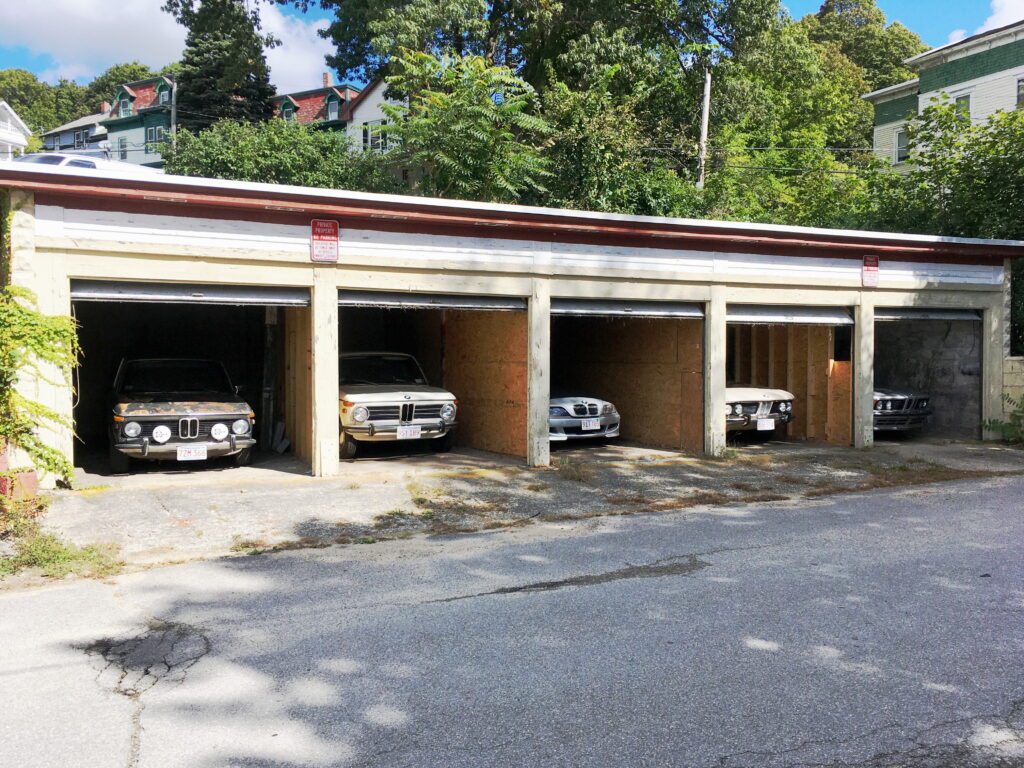
Bertha (left, obviously) post-Vintage in storage in Fitchburg.
There’s a wonderful scene in Field of Dreams where Kevin Costner is talking with Burt Lancaster (“Moonlight Graham”). Reflecting on his only inning as a professional ball player, Graham says “Back then I thought, ‘Well, there’ll be other days.’ I didn’t realize that that was the only day.” The “new adventures” in Bertha never materialized. Maire Anne and I talked about recreating our trip to Cape Breton, but we never did. I drove the car back and forth to Fitchburg a few times as part of the regular exercise/swap routine, but on one of the trips, it died due to a fuel delivery issue. I wrote about it in the December 2019 Roundel column “Bertha Throws a Hissy Fit.” Having owned over 40 2002s, it was the only time I’ve ever had one die and had to have it towed home (I’ll freely admit that the combination of falling dark and cold, not having a spare electric fuel pump with me, and dwindling charge on my cell phone tipped the decision toward making the call while it still had the juice). Replacing the pump seemed to fix it, but when I exercised the car while it was out at Fitchburg, it happened again. I replaced the pressure regulator that sits between the Weber 40DCOEs, and that seemed to sate it. I lost the Fitchburg spaces and the car came back to Newton in late 2021 while I scrambled to find other storage. It went out to the new storage in Monson MA in early 2022.

Left to right: Me, Alex briefly with Bertha, and my Vintage and MidAmerica 02Fest road trip companion Bob Sawtelle as we prepare to float the armada out to Monson. Photo by Maire Anne Diamond, who drove the clownshoe.

I think Alex was enjoying himself.
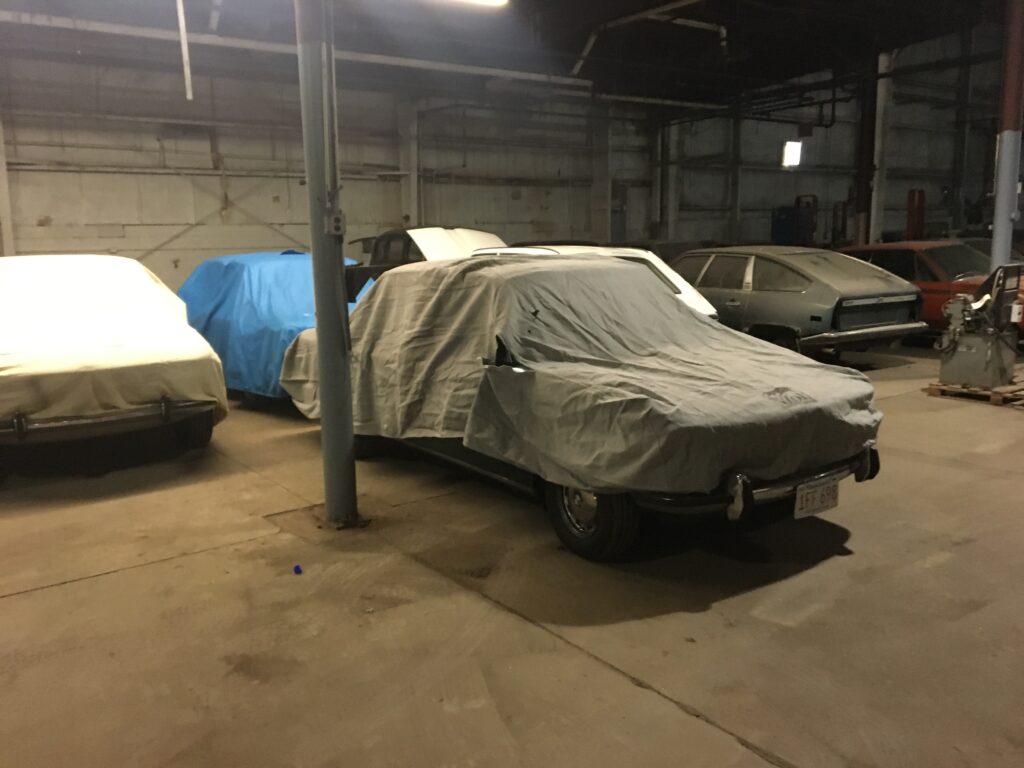
Bertha settles in for the nap in her new digs.
To be clear, I didn’t abandon Bertha in the Monson warehouse. The car was always registered, insured, and inspected, and I exercised it regularly, as I did with all the cars there when I went out there to swap one. But once it was out there, it never came back home. She had become Jessie in Toy Story. And during one of those 20-minute keep-it-exercised runs down to the Connecticut border and back last year, the car ran poorly, feeling like it either still had a fuel restriction issue or was running on less than four cylinders. And then, when I was out there last spring, I noticed that the brake fluid level was down to the take-off point for the clutch master, indicating that there was a leak in the clutch hydraulics.
Sigh.
On the one hand, I tell people not to read too much into my selling the Bavaria, selling the Euro 635CSi, and winding down my Roundel column. I’m fine. I’m not sick or dying and looking to “simplify my estate” for my “heirs” (which I put in imaged air quotes because I think of “estates” and “heirs” as things that rich people have). But as I’m entering my Wheatina-and-prune-eating years, I am more cognizant of limits, be they time, space, money, or physical activity. If I’m not driving cars, maybe it’s time to sell them. That’s what happened with the Bavaria and Sharkie, and I don’t regret moving them on. Perhaps it’s time to do that with Bertha.
So, last week, I ran the Lotus Europa out to Monson, and in a replay of what I did with the 3.0CSi before abandoning a road trip in it, filled up Bertha’s brake fluid reservoir, stomped on the pedal hard a dozen times, didn’t see any fluid loss in the reservoir or any on the ground, jump-started the car (its battery was completely flatlined from sitting), took it for a short drive while pounding on the pedal, still didn’t see any fluid loss, and elected to go for it. Well, sort of—I elected to drive to the nearest Walmart to replace the battery (the 2002ti braking system means that it takes one of those tiny group 26R batteries, which Walmart mercifully sells for $78). The brakes and clutch felt fine, and once the car was warmed up, I felt none of the ignition or fuel restriction issues that concerned me during a recent exercise drive. So then I went for it. And the car seemed quite happy doing so. Well, other than no heat, no blower fan, the heater box leaking cold air past the flaps, a loud rumble on both turning and slowing down that could just be the exhaust but could also be a bad rear end, and really disconcerting detent-like feeling in the steering on taking tight left turns. But still very much Bertha—fast, loud, snotty, and proud.
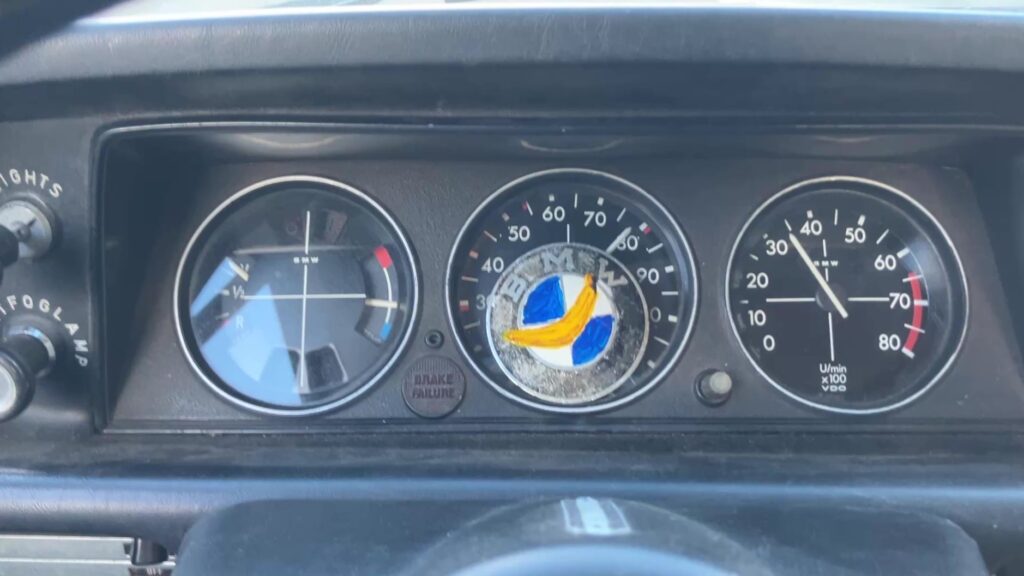
Yup. Happy. Hand-painted roundel/banana courtesy of Paul Wegweiser. Why? Because insanity, creativity, and friendship are beautiful things.
So she’s back, offsetting the presence of the shiny red E9 and Lotus Elan +2 in the garage and bringing down the property values. I have more history with this car than any other I own, and I owe it some attention. We’ll see whether that manifests itself as repairs and deep-into-winter unsalted-road driving, or I decide that finding another owner is a better destiny for the car. But Bertha-whose-middle-name-must-be-Jessie will be happy that I’m playing with her again.
Like Jessie, Bertha sure looks happy to be out of the attic.
—Rob Siegel
____________________________________
Rob’s newest book, The Best of The Hack Mechanic, is available here on Amazon, as are his seven other books. Signed copies can be ordered directly from Rob here.
The post Re-Resurrecting Bertha appeared first on BimmerLife.
]]>The post My Final Roundel Magazine Column appeared first on BimmerLife.
]]>I’ve been writing for Roundel magazine since March 1986, making this my 40th year. I began by writing longer-form pieces, but after a few years, editor Yale Rachlin asked me to become a regular columnist. This crystalized out in my thousand-word Hack Mechanic columns that began in 1990. Writing them has been a joy.
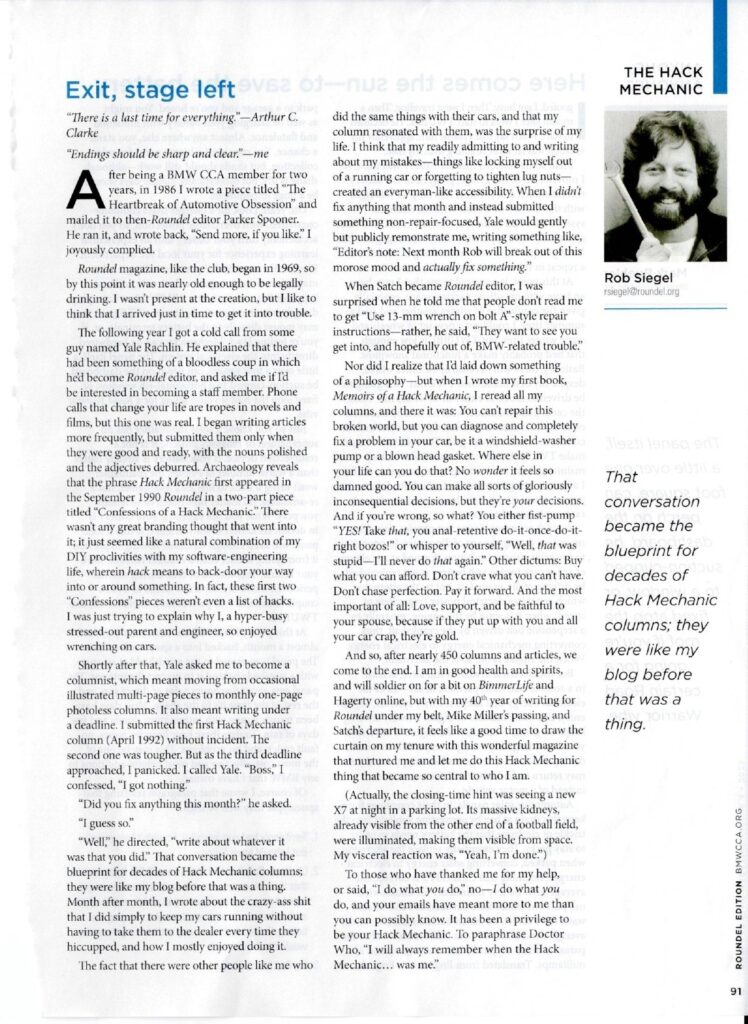
My very first Roundel piece.
Fast-forward 27 years. I wrote my first book in 2013, left my long-standing engineering job in 2015, began working full-time for Bentley Publishers, and wrote two books for them. That ended abruptly in 2016. I briefly went back to my “real job,” but that ended abruptly just before New Years, and I began 2017 unemployed for the first time since 1984. Both BMW CCA and Hagerty came to my rescue by offering me weekly online writing assignments, for which I was and still am grateful (to make the obvious pun) beyond words. I also began writing the “Wrenching Thoughts” column in the back of Hagerty Drivers Club magazine, and wrote and self-published five more books.
I mention all this because it shows how my Roundel magazine columns went from being my only writing outlet to being one of several. In addition, over the years, the number of annual issues of Roundel magazine dropped from 12 a year to ten, and in 2025, went down to four (alternating with BimmerLife magazine). Although the thousand-word columns are precious to me, everything ends, and the question becomes whether to end it on your own terms or have it slip away in the night when no one cares.
Those of us on the Roundel staff were aware that editor Satch Carlson was leaving at the end of 2025. I thought he made it pretty clear to the general readership in his regular column in 2025 Roundel issue #1 that this year was his last. With Satch leaving after 29 years, and with the magazine down to just four issues a year, I honestly didn’t know whether Roundel magazine would continue into 2026. But personally, with Mike Miller’s sad passing, and with this being my 40th year, it felt like it was time. If you read my columns, my subtle tip-off was that I asked Satch to change my column heading picture back to the original column photo that Yale Rachlin took 35 years ago. As the deadline for submission for my final column approached, I began writing a farewell piece.
Then, something surprising happened. In late August, those of us who are Facebook friends with Jackie Jouret saw her announcement that she was stepping away from both her editorship of the front section of BimmerLife magazine and her submission of historical pieces in the back of Roundel. I called Jackie to ask her if she knew something I didn’t. She DID, but not in any negative sense—she knew that Travis Okulski had been appointed to succeed Satch. I don’t know Travis, but Jackie referenced his qualifications for the job (time at R&T, Jalopnik, and Motorsport Network), and said that it had absolutely nothing to do with her decision. Instead, we talked about knowing when it was time to go. Coincidentally, later that evening, Satch sent an email to the Roundel staff announcing Travis’ appointment.
So there I was with a farewell piece already written, but one of its underpinnings—the uncertainty of whether Roundel magazine would even be around in 2026—having been removed. I gave myself the evening to think it over. I include the farewell column below. At the end, you can see that there was “a sign” that tipped the balance to calling it a night after 40 years.
As far as Satch and Jackie and me and Brian Morgan leaving, one of the quirks and charms of Roundel is that I use the word “staff,” but people write and send pieces in to the editor, and the magazine is laid out and printed, without the magazine having a central office. There’s no “water cooler” for us to congregate around and trade the inside skinny. Just like mine and Jackie’s, Brian’s reasons are for leaving are his own. So there’s no coordinated exodus. No rats from a sinking ship or anything like that. Well, I THOUGHT that the ship was sinking, but I elected to ride it all the way down with the captain. So the joke was on me :^)
About a month later, Travis’ appointment was announced publicly. He emailed the Roundel staff, and sent me a nice personal note saying that he’s a fan, would love to change my mind, and that the door is certainly open to any Roundel magazine contributions I’d like to make. I can easily see me returning to my origins of sending in occasional longer-form pieces instead of the thousand-word columns.
So. This is one of those things that is both exactly what it appears as well as less than it appears. We’re only talking about the cessation of four columns a year. I’ll still be writing weekly here for BimmerLife online, Hagerty online, and Hagerty’s magazine for as long as my arthritic back will allow.
But it all began in Roundel, and it all crystalized in those columns. They will always be precious to me.
Especially when I still look like a kid.
—Rob Siegel
____________________________________
Rob’s newest book, The Best of The Hack Mechanic, is available here on Amazon, as are his seven other books. Signed copies can be ordered directly from Rob here.
The post My Final Roundel Magazine Column appeared first on BimmerLife.
]]>The post The BMW Road Trip That Wasn’t (Part II) appeared first on BimmerLife.
]]>So I put it up on the mid-rise lift and had a thorough look. I expected to see a wet clutch slave cylinder, as I did with the Bavaria when I was readying it for sale, but it looked fine. I traced the hard and flexible brake lines from the reservoir to the master cylinder to the calipers, and the only thing I found was a dab of wetness on the fitting to the left rear caliper. It certainly didn’t look like enough to drop the fluid level by as much as it did.
Was THIS the cause of low fluid in the reservoir? I was doubtful.
I was about to drop the car back down and check the engine compartment further when I decided to take advantage of having it in the air to, as Austin Powers said, “Give the undercarriage a bit of a how’s your father” (those wacky Brits). Seriously, I’ve long said that one of the reasons to do mundane greasy things on your own car like change the oil is that it’s an opportunity to give the car a well-check. In addition to the usual coating of grime, oil, and power steering fluid, I saw a shiny linear streak on the lower radiator port. On closer examination, it was clearly coolant.
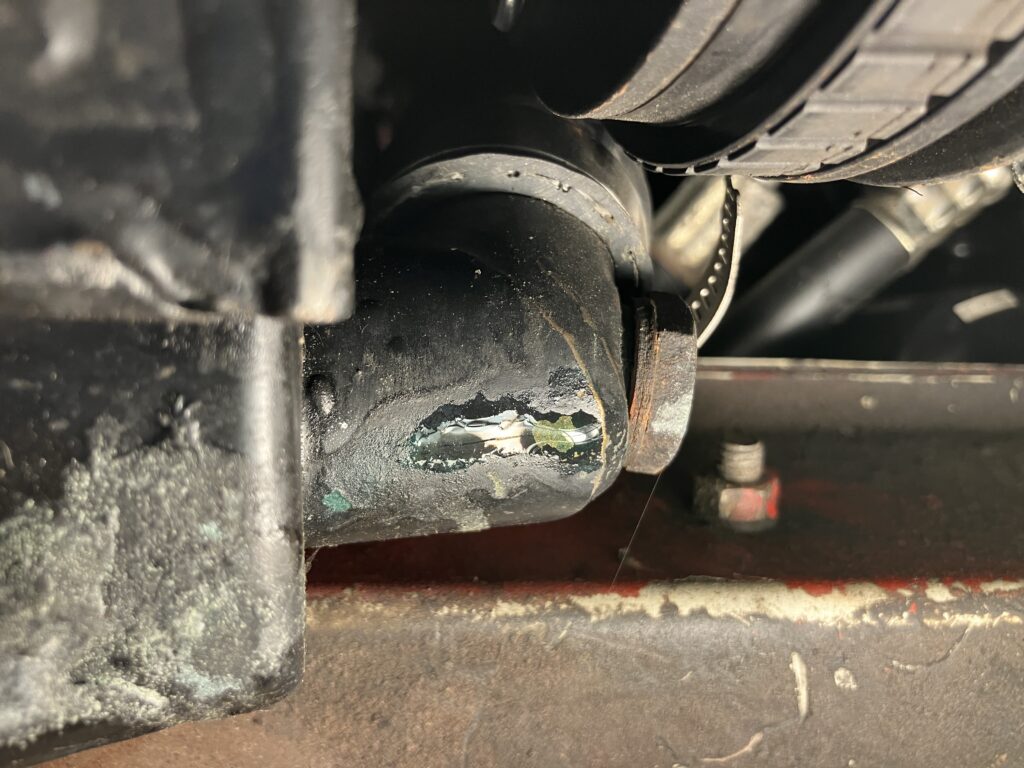
An unwelcome surprise.
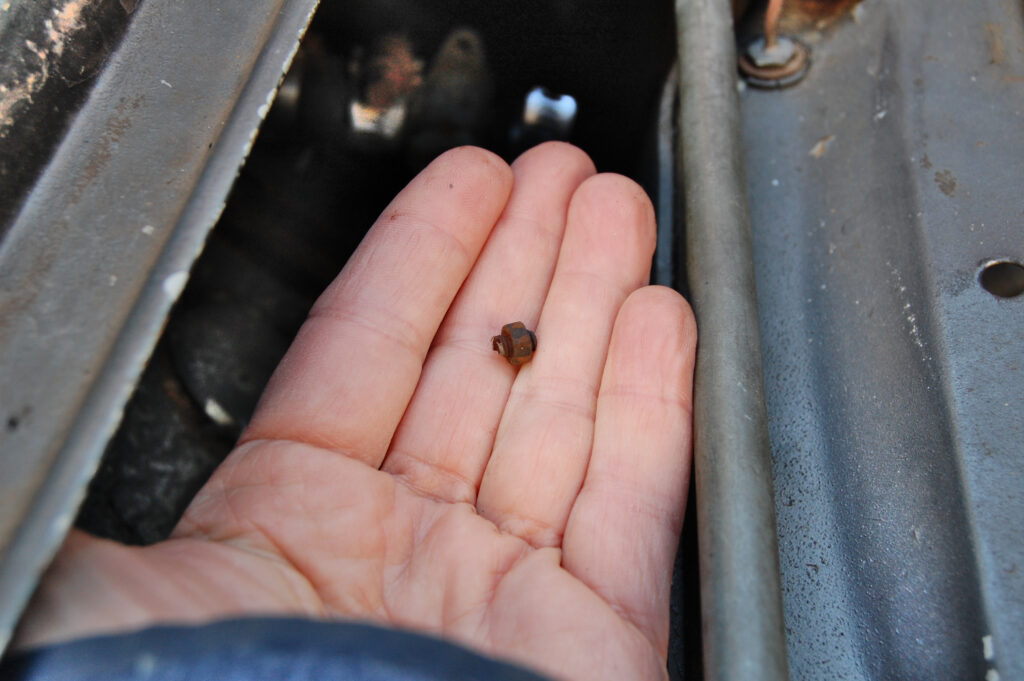
When you find coolant down low, you need to see where it dripped from. My assumption was that it traveled from the thermostat or water pump down the lower radiator hose, but they were all dry. That left the lower hose connection itself. I put a screwdriver on the hose clamp, but it was already pretty tight. That left the lower port itself. If it was cracked, I was going to be right bummed out.
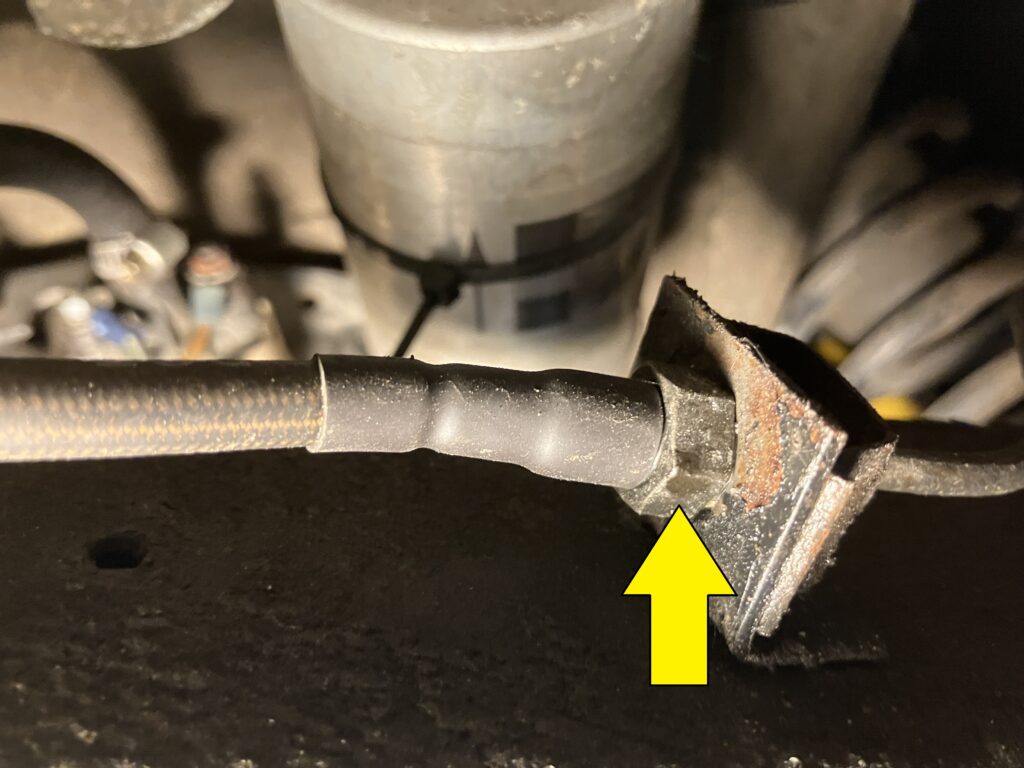
Then I saw the 22mm screw-in plug that’s there to close a threaded fitting for a temperature sensor that isn’t used on this car. Just to check off the unlikely possibility that this was the source of the leak, I grabbed a 22mm wrench to tighten it, and was stunned to find that the plug was completely loose. We’re talking not even finger-tight. We’re talking zero tension on the threads, zero pressure against the sealing ring. Holy smokes. It could’ve easily unthreaded in the next hundred miles and caused sudden catastrophic loss of coolant. I tightened it down, and vowed never to take the “it’s a well-sorted car” thing as gospel again.
Having missed this bullet, I continued looking at the undercarriage. The only other thing of consequence I found was that the giubo was cracked.

This one I’ll just watch.
However, unlike the negligence I felt at finding the loose radiator plug, the cracked giubo made me smile, as it had been in the car since I installed the five-speed Getrag 265, and that dated back to replacing the engine, which I did on the streets of Boston in front of my mother’s house. I remember that the car had recently been painted (not the smartest order of operations), and I was desperately trying to swap engines without scratching the new Signal Red paint. All this was done in 1988. Owing to the poor quality of new parts, you certainly wouldn’t get 37 years out of a new giubo now.
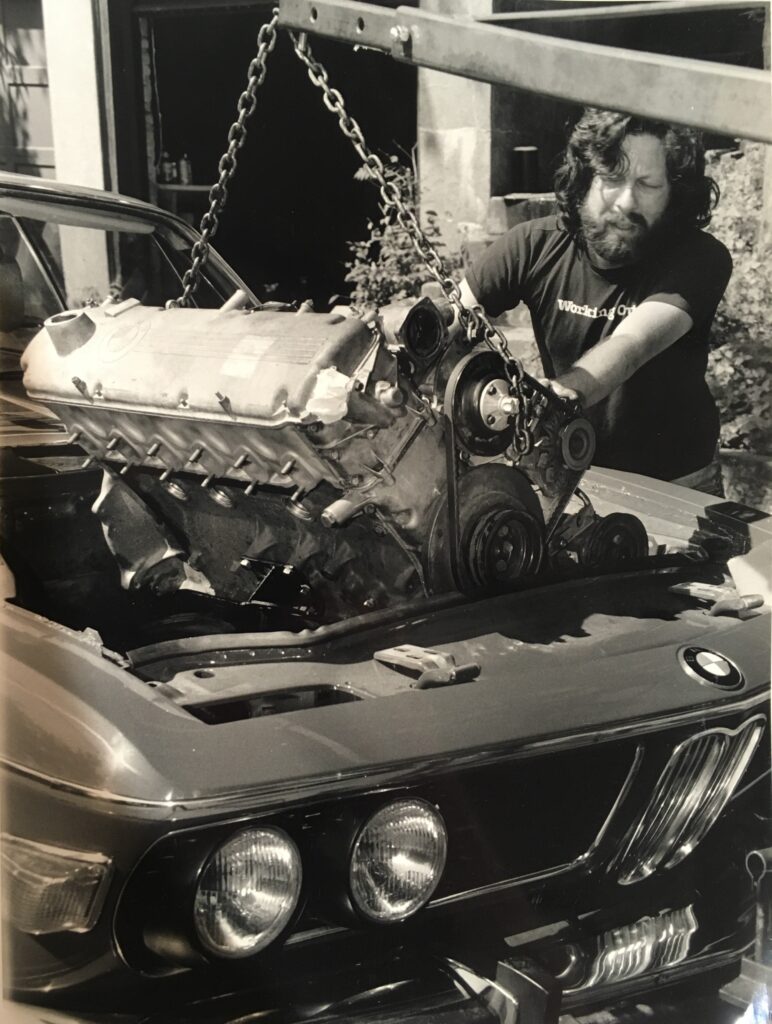
Curbside in Boston, 1988. Photo by Yale Rachlin
I also had to smile that the car is still wearing the HeaderCraft headers and PrimaFlow exhaust that I bought while Ronald Reagan was in office from Performance Automotive Parts in Glastonbury, Connecticut. The headers are still fine, but the muffler blew a hole a while back for which I wrapped it in chimney pipe, and the center resonator will soon need the same treatment, as it now has rust pinholes.
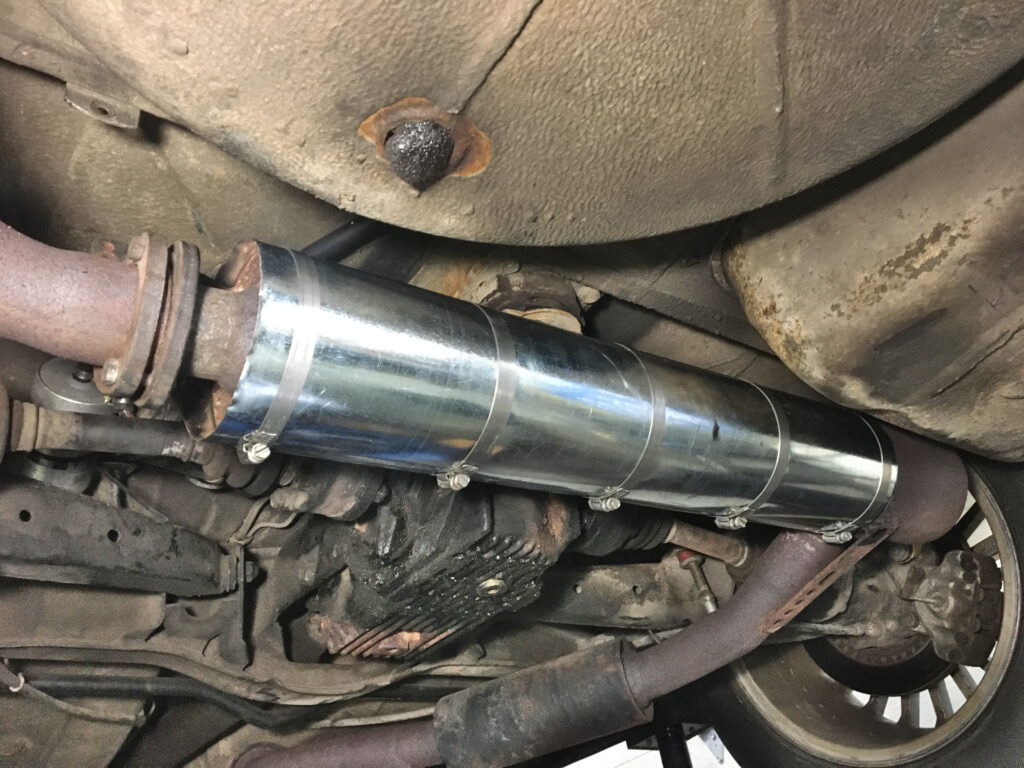
I’d certainly get called out for THAT if I ever put the car on Bring a Trailer.
I still have the receipt for these exhaust parts, and as it’s dated 1986, it means that I installed them when I was in just-get-it-running-even-though-it-looks-like-crap mode. Again, a remarkable lifetime.

Wonder if the warranty’s still good?
With the undercarriage inspection completed, I returned topside. If you have brake fluid loss and can’t find where it’s going, there’s the possibility it’s leaking from the rear seal of the master cylinder into the brake booster housing. The booster in the CSi is huge. I undid the hose and carefully twisted the plastic fitting off the booster.

I said “carefully.” You never know when a plastic piece like this is unobtanium.
This allowed me to carefully slide a long zip die down to the bottom of the booster housing. Fortunately, it came up dry.
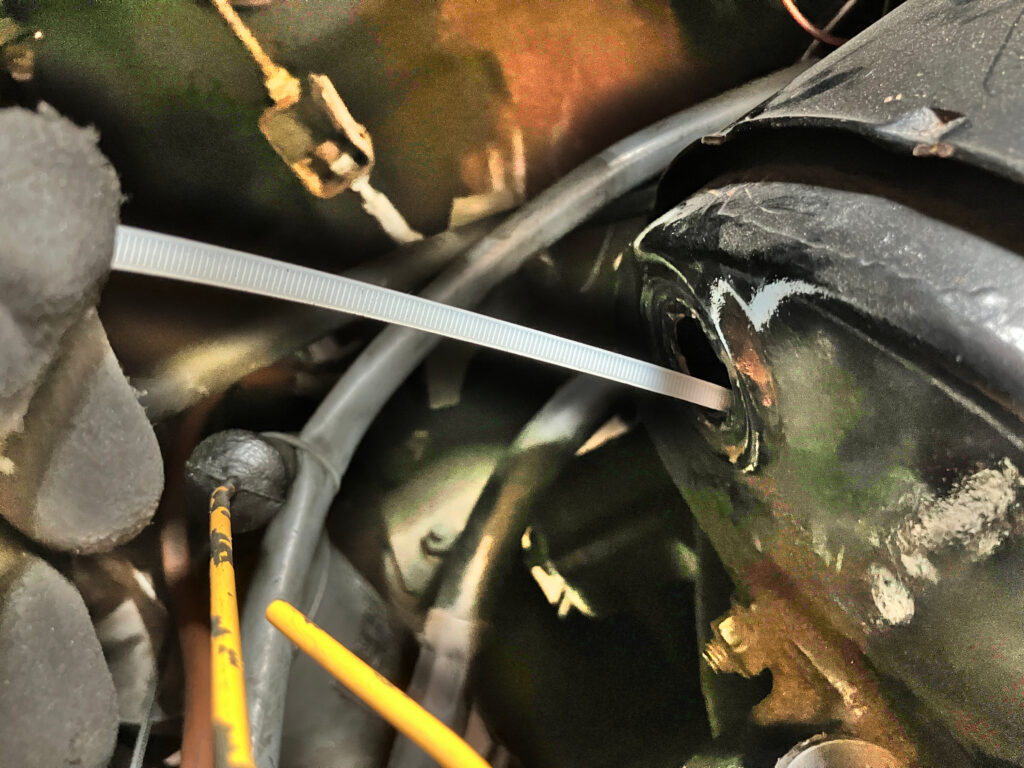
A clean zip tie is a happy zip tie.
So where was the brake fluid going?
The only other thing I could think of was the clutch master cylinder. On a 2002, this is down inside the pedal bucket where the problem can fester unnoticed. It’s not uncommon to lift up the rug and the foam covering and find that the master is leaking from the rubber bellows and the bucket is full of brake fluid. On the E9, though, the pedals come down from the top, so the clutch master is up high under the dash. I thought that, if it was leaking, I’d have noticed fluid dripping down, but to be certain, I undid the kick panel below the steering column and looked upward. Even with a flashlight, the master is difficult to see. It looked dry, but I ran my ungloved hands all over the master, the bellows, and the push rod to be certain. This was an act of love for my E9, as I hate the feel of brake fluid. Fortunately, my hands came up dry.
But while I was looking, I noticed that the nut and bolt connecting the lever from the clutch pedal to the pushrod were at an odd angle. I worked the clutch pedal up and dawn, and saw that the bolt was just flopping around. Not unlike the plug on the radiator, the nut and bolt were so loose they were about to fall out. Obviously I tightened them down.
Both the nut and the bolt should be flush with the sides of the lever arm.
I long ago added clutch hydraulics to my list of things likely to strand a vintage car on a road trip (the others are ignition, fuel delivery, cooling, charging, and belts). In fact, the clutch master cylinder in this very car died with zero warning fairly close to home about fifteen years ago. Who knows? Maybe I never tightened the pedal bolt down in 2010 and have been living on borrowed time ever since.
I’m still not sure what caused the brake fluid loss, so I guess I’ll have to give it some time, drive the car more, and keep inspecting it. But the larger view of things is that I’m going to begin regarding “well-sorted vintage car” the same way I regard “known-good component.” That is, maybe it is, maybe it ain’t, but making assumptions is likely to get you into trouble.
—Rob Siegel
____________________________________
Rob’s newest book, The Best of The Hack Mechanic, is available here on Amazon, as are his seven other books. Signed copies can be ordered directly from Rob here.
The post The BMW Road Trip That Wasn’t (Part II) appeared first on BimmerLife.
]]>The post The BMW Road Trip That Wasn’t appeared first on BimmerLife.
]]>But although I kept in touch with Linda and sent her links to articles about the car, I’d never met her. I resolved that, on or near the anniversary of the sale, I’d drive up there in the Elan +2 and close that circle.
A lot of time and energy went into preparing the car for the trip. The last thing I did with the car’s electric air conditioning before I put the project down for the season was to install a timing-belt-like toothed “Gilmer drive” pulley set to allow the crank pulley to drive the high-output alternator without a tourniquet-tight belt, as such a thing dramatically shortens the life of the bearing in the Elan’s fragile water pump.
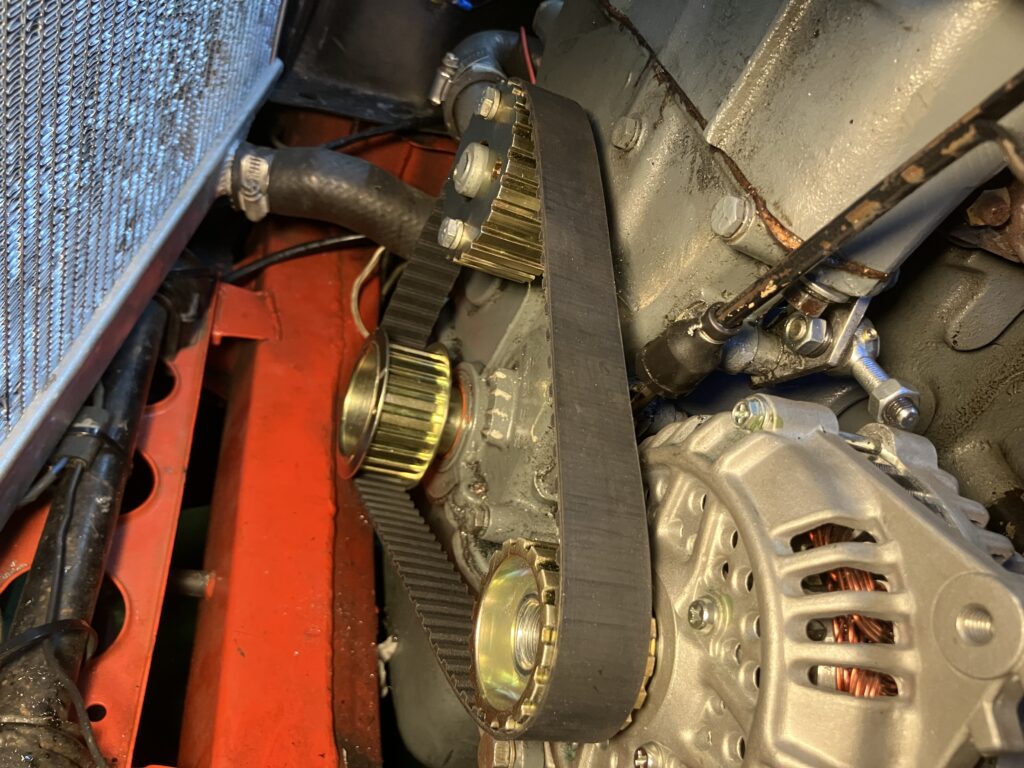
The almost-functional toothed Gilmer drive pulley set.
It took me weeks of careful tweaking to get the pulleys aligned so they ran without shredding the belt and generated as little noise as possible. Big rainy weather was forecast to move in on all three anniversary dates, so I hastily arranged with Linda to come up on Tuesday October 28th. The trip was a success. I put 200 miles on the Elan +2—three times the distance I’d previously driven it. The weather was picture-perfect late fall; the colors may have been past peak, but the car’s eye-popping red paint (which is actually BMW-MINI Chili Red) against the background of russet late-autumn brown generated its own color show. I tell people that while I buy cars that are well-priced because they need work, really what resonates with me are cars whose life intersects with mine in such a way that I think I can help them be the best version of what they are. This Elan +2 is the best example of that, and it was great to take this road trip, meet Linda, and thank her (and the guy who restored it, and the estate sale broker who sold it to me) for enabling me to have this jewel that I never thought I’d owned.
But what this all meant was that the weekend following Halloween arrived without a lot of planning or attention on my part, and that weekend held another road trip.
My wife and I have dear friends who live in Manchester, VT. For years, we’ve gone up to see them either on Columbus Day Weekend or shortly after. In addition to hiking, grilling fish, playing guitars around a bonfire in their backyard, drinking scotch (well, that’s me and Jon; Maire Anne and Eileen stick with wine), it’s been an excuse for me to press one of the fun cars into service for the drive. I’ve written about taking Sharkie, giving Hampton the ’73 2002 its very first road trip, and driving the jewel in the crown, my ’73 E9 3.0CSi. Under normal circumstances, I would’ve taken the FrankenThirty, as it’s only had one road trip (to The Vintage this past year), but I drove it out to the Monson warehouse a few weeks ago in order to swap it for Sharkie, which I needed to bring home to sell. All three of the 2002s are also out in Monson (very rare; I almost always have one of them here at the house), as is the clown shoe.
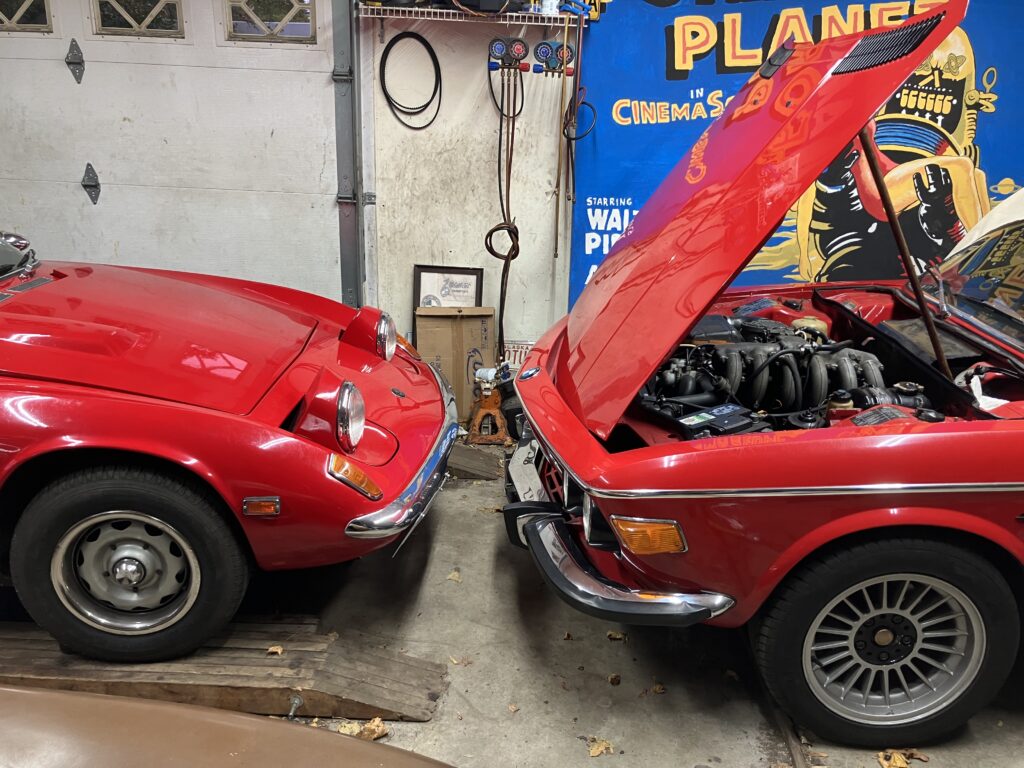
My at-home options for “fun cars” were both Lotuses, the Z3, and the gorgeous red E9, of which only the E9 was a real possibility. I absolutely adore the car and love driving it, but E9s are notoriously rust-prone creatures, and I really try not to road-trip the car if I can’t see a clear rain-free forecast from departure through return. It looked like clear sailing on Saturday and Sunday, but rain was predicted for the return on Monday. Sigh, I thought; I guess it’ll be the E39. Or Maire Anne’s Honda Fit.
But on Saturday morning, when I re-checked the weather, I saw that the forecast had changed in my favor, with only light rain predicted for end of day on Monday. I’ve owned the E9 for 40 years, and generally consider it to be my best-sorted vintage car, needing only a cursory fluid and belt check and an airing-up of the tires. I joyfully went out to the garage and checked the oil and coolant levels. Unfortunately, when I peered through the translucent brake/clutch fluid reservoir, I saw that it was quite low. It wasn’t all the way down to the level where it feeds the clutch master cylinder (if it’s all the way down there, you know that the leak is in the clutch hydraulics). This meant that the leak could be in the brakes, not the clutch, which is certainly something you don’t want to be wrong about.
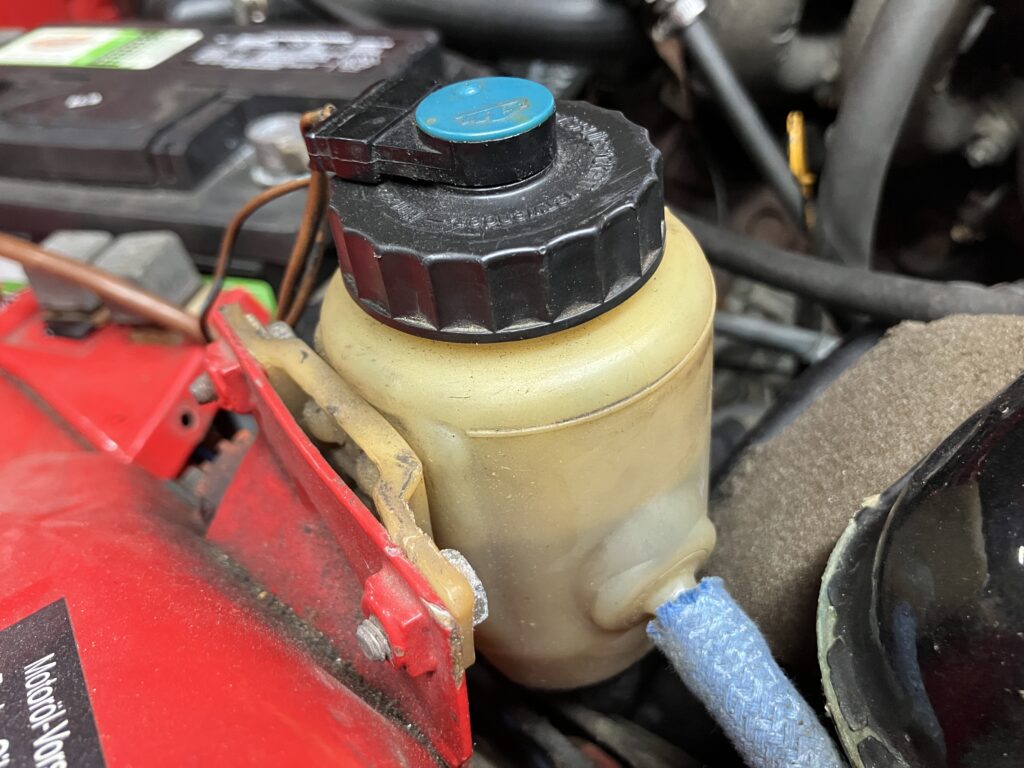
Bummer.
I had this happen last year to Louie the ’73 2002tii, and the problem turned out to be a leak from one of the braided cloth hoses going from the reservoir into the top of the brake master cylinder, and dripping from there down into the frame rail where it was difficult to detect. I looked down at these same hoses on the E9, and saw that they were not braided cloth but rubber, something I must’ve done decades ago. They weren’t obviously leaking, but I wasn’t about to embark on 350 miles of driving without knowing what the cause was and fixing it.
Sorry honey. As Bobby D. sang, “You ain’t goin’ nowhere.”
The obvious move was to take my 2003 E39 530i. I’ve owned this car almost ten years now, which is like four lifetimes in daily driver years. It does anything and everything I ask of it. With its taut handling, just-right power, sport seats, and excellent sound system, it’s a great car for road trips, but I wind up using it very little for that, because, well, it is a 22-year-old 220,000-mile car. If I’m going somewhere with Maire Anne, and it’s not officially a vintage-car-driving exercise, we’ll usually err on the side of taking her 70,000-mile 2013 Honda Fit, as it’s almost guaranteed to get us somewhere and back with “no stories.” Plus, I remembered that, when I was replacing the power steering pump in the E39 a few months back, and had the serpentine belt slack so I could check the alternator and the idler pulley, I didn’t like the feel of the alternator. I made a mental note to find a decent used one, something that’s not Bosch rebuild crap, but forgot about it.
So, the Honda Fit it was.
I should point out that this isn’t really hardship. It’s a Fit Sport with a stick. The only things I can complain about are that the 117 hp from its 1.5-liter i-VTEC engine aren’t exactly tire-smoking, and how the bottom-of-the-Honda-product-line construction makes the car a bit noisy at highway speeds, but it’s a hoot to drive on tight curvy roads. And the drive up from suburban Boston to Manchester VT has its share of those. As it happened, there were more of those than normal this trip. Maire Anne wanted to stop at a quilt store in Londonderry VT on the drive up, and the route there kept us off the interstate for the entire drive. Plus, when we drove from Londonderry to Manchester, Waze sent us on the delightfully twisty Winhall Hollow Rd, and the tight nimble little Fit didn’t leave me wanting for something badged from Munich (or Hethel for that matter).
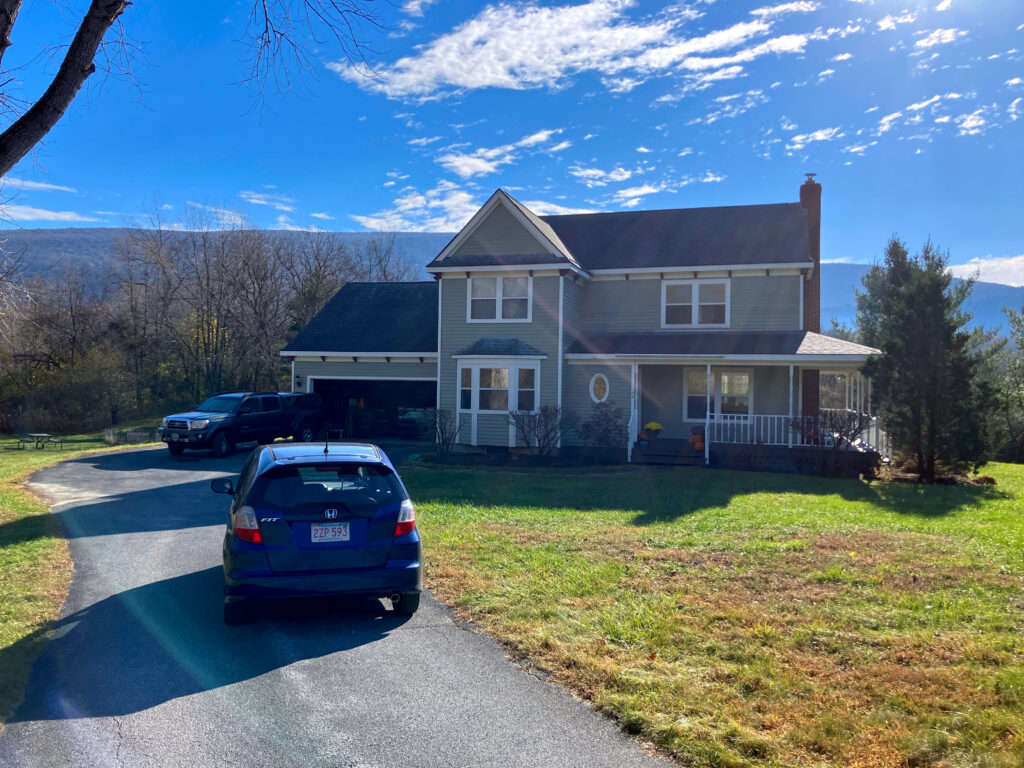
The 2013 Honda Fit Sport in the shadow of the Green Mountains and our friends’ house.
The only rain we saw the entire drive was less than a sneeze-worth on the windshield as we approached home on Monday afternoon. If it weren’t for the brake fluid mystery, I would’ve said “Should’ve taken the E9,” but no regrets.
Between now and my next piece, I hope to put the E9 up on the mid-rise lift, give its clutch and brake hydraulics a thorough going-over, and find out what’s causing the brake fluid loss. It’s doubtful the car will have any other road trip opportunities before spring, but I hate to leave mysteries like this unsolved.
—Rob Siegel
____________________________________
Rob’s newest book, The Best of The Hack Mechanic, is available here on Amazon, as are his seven other books. Signed copies can be ordered directly from Rob here.
The post The BMW Road Trip That Wasn’t appeared first on BimmerLife.
]]>The post The Annual Used Wheel and Snow Tire Search appeared first on BimmerLife.
]]>Actually, what it feels like is somewhere between having a colonoscopy and wearing a hair shirt.
My 2003 E39 530i has been my daily for nearly ten years. I love it. But like most rear-wheel drive BMWs, there’s no deluding one’s self about its winter prowess—it can be nearly immobile in a flat parking lot with two inches of snow if it doesn’t have snow tires with decent tread on it. Owning 12 cars (hey, it’s down from 14) and no longer having a job I need to commute to means that my tires typically get too old before they get too worn. That’s particularly true for snow tires, as part of their magic comes from their soft rubber compound.
I try and economize with most things automotive so I can spend money on things that are completely indefensible (like installing air conditioning in the Lotus Elan +2), so I keep my eyes open for good used snow tires. You’d think it would be straightforward—just look for the correct size, with adequate tread, not too old, within an acceptable radius of your home, advertised at a good price, right? Or, better still, find a set of already mounted and balanced tires on wheels that fit your car. That way, you don’t need to pay for mounting and balancing, which is important because I find that more and more chain tire stores are refusing to mount and balance any used tires.
Adding wheels into the mix, though, is challenging. For the record, in order for a wheel to fit a car, it has to meet three criteria:
- It has to have the correct bolt pattern. Most BMWs are 5×120 except for old 3 Series and 2002s which are 4×100. As they say in math and logic, that’s a necessary but not a sufficient condition. Facebook Marketplace is full of ads that say “5×120 winter wheels. Fit any car.” And that’s simply not true.
- It has to have the correct offset (the distance of the edge to the center line, often stamped as “ETxx” on the inside of the wheel or inside the bolt circle). If the offset is too far inboard (the ET number is too large), the wheel can rub against the brake calipers or the tire can rub against the strut. Spacers can be used (within reason) to correct too-far inboard offset. If it’s too far outboard, the tires can rub against the fenders when you turn.
- It has to have the correct center bore to fit over the hub. If the bore is too small, they simply won’t fit. If it’s too big, hub-centric rings can be employed to properly center them. But really, it’s best to use wheels that fit without spacers and rings.
If the ad says “These were from a 2006 BMW 335Xi” or whatever the car was, then you can look up the specs and see if they’ll fit your car. But it’s absolutely astonishing to me how many sets of wheels and tires are out there with absolutely no information on what they’re from. Are there really that many people who abandon them in the basement of rented apartments?
When you see a set of wheels and tires for sale, if you don’t recognize the wheels as the original ones for your car, you can check them out and measure the center bore, and you can try to accurately measure the bolt circle, but really the only way to be certain they’ll fit is to bring a breaker bar and a floor jack and show up in the car you want to put them on, crack the lug nuts on one of the front wheels as they have the biggest calipers, jack it up, pull yours off, and mount one of the candidate wheels. It’s a pain.
And don’t get me started on tire condition and age. I realize that not everyone has a tread-depth gauge (though they should if they’re selling used tires), but geez, how hard is it to take a Lincoln penny, stick Abe’s head into the tread, and photograph it on all four tires? (FYI 9/32 of tread comes about to Lincoln’s nose.)
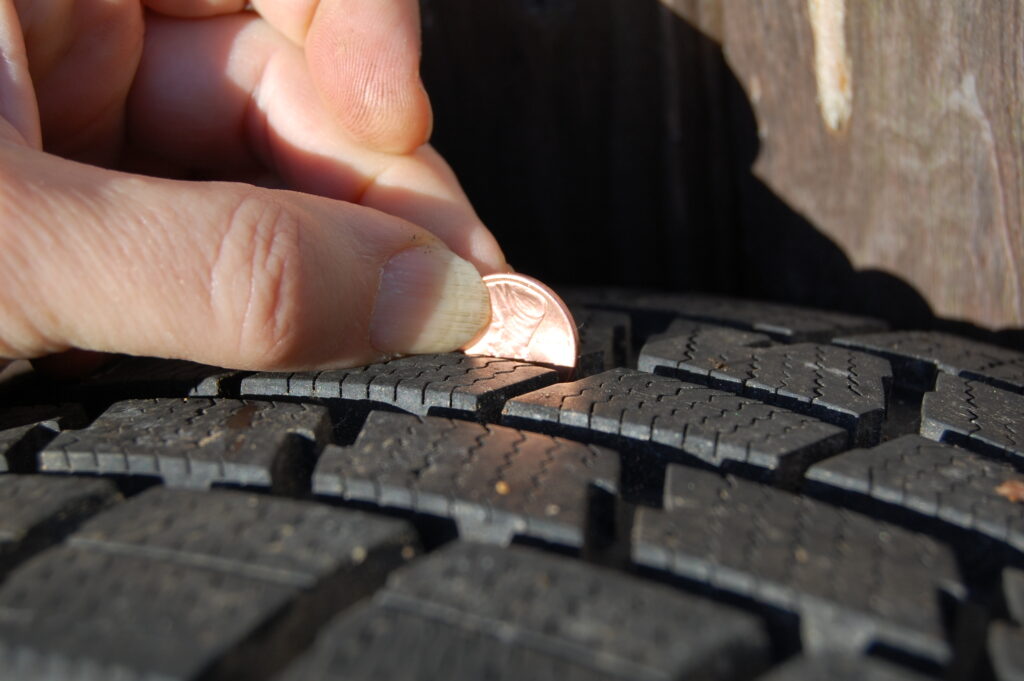
Is this REALLY that hard to do? Come on, people.
As far as age, every tire made since 2000 has a standard four digit WWYY date code on the sidewall (e.g., “4712” means the 47th week of 2012). There are typically a bunch of other numbers on the sidewall as well, but the date code is typically at the end of a string of numbers and letters beginning with “DOT.” Instead of looking for it and actually listing in the ad how old the tires really are, people say things like “Used for a couple of seasons” or “great condition.” Maybe that’s true, or maybe it’s like me who thinks “What do you mean the water heater died? We just replaced it,” then looks at the date on it and sees that it was done in 2015.
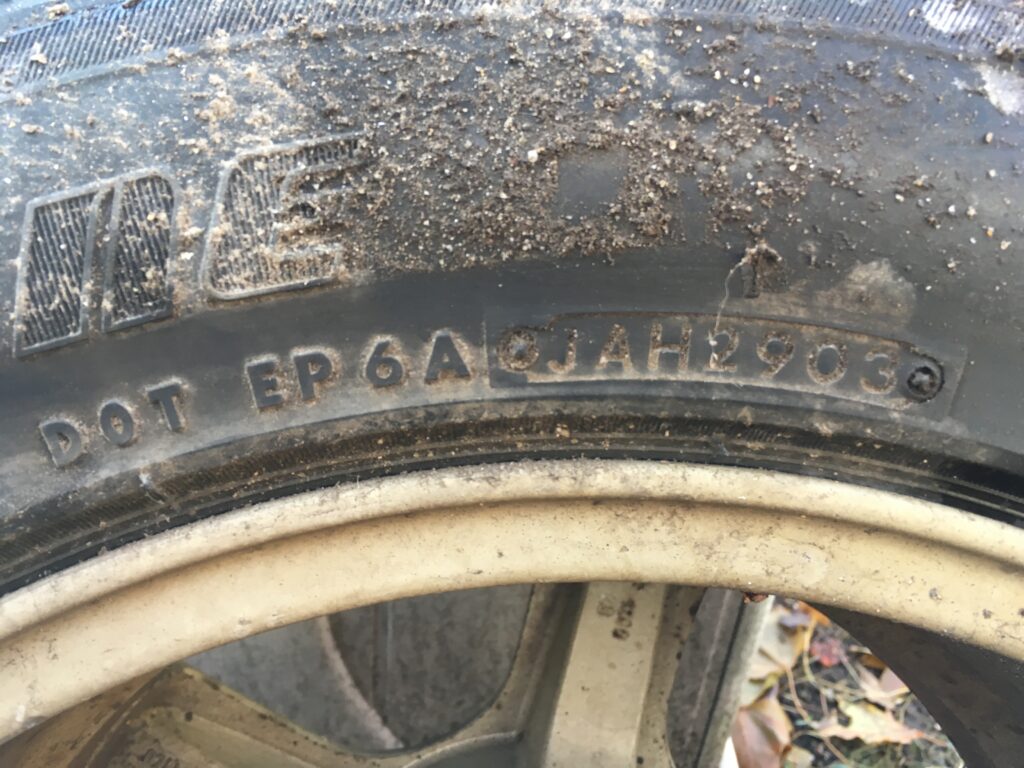
This tire was manufactured the 29th week of 2003. No matter how much tread it has, you don’t want it on your car.
People talk about finding the online ad for their dream romantic partner. You know, candle-lit dinners, long walks on the beach, must love dogs and all that. To me, my dream tire ad would read something like:
“Set of four Style 32 wheels from 1999 BMW E39 528i with 225/55R16 Bridgestone Blizzak WS90 tires. Tires have between 8/32 and 10/32 of tread. Date codes read 3823.” Succinct. Accurate. The information you need to know. IS THIS REALLY TOO MUCH TO ASK? Apparently, because I almost never see it. Except when I’m the one selling them.
Without this, you have to pull the information out of people like you’re extracting a splinter. I’ll see an ad for wheels and tires near me with an attractive price but zero information, download a photo, blow it up so I can read the tire size off the sidewall, and if they’re the right size, send a message asking what car they’re from. If they fit, I’ll send another message explaining that I’m very interested, but don’t want to waste their time or mine if the tires aren’t any good. I honestly don’t think that people are actively trying to withhold information. I think that most of them just don’t have a clue about fitment and the importance of tread depth and tire age, so when you ask for them to look for the date code and to photograph the head of a penny in the tread of all four tires, it’s either processed as “What a know-it-all jerk” or “Geez, guy must be on the spectrum” or “Why does this guy think I’m going to through this work for him?”
Nonetheless, I persist. I was late beginning the snow-tire-hunt this year (you want to be searching in July, not when it’s almost November), but the thought of putting the horrible set of mismatched aftermarket alloys and the soft-as-mush Toyo snows whose sidewalls have so much flex that I feel like I’m driving on burritos on the otherwise lovely-handling E39 for yet another winter drove me crazy.
These really are a crime against man and god.
I found two sets of interest. The first was a good-looking set of Borbet alloys advertised on Facebook Marketplace with the minimal description of “225/55/R16 Bridgestone Blizzaks” down near the MA/RI line for $200. I messaged the seller to ask what they were off, and he said a 2000 540i. Perfect. Unfortunately, when I asked for the date code, I was told it read “3005.” They were 20 years old. Hey, at least he found it and told me. I politely declined.

Looked good, but WAAAAAY too old.
I had high hopes for the next set. The Craigslist ad read “This posting is for BMW wheels 5X120 with Michelin X-ice winter tires. Tires have minimal wear and are in great condition.” These clearly were genuine BMW wheels, though not ones I was familiar with. One of the tricks I use is to look on the website bmwstylewheels.com and visually match up the wheel I see in an ad. I found that these were Style 82s from an E39 with an ET20 offset, so there was no doubt they would fit—no need for me to show up with a floor jack to test-fit them. And by downloading one of the photos and zooming in, I could make out the tire size, and it was correct for an E39 with 16-inch wheels—225/55R16. The asking price was $300. This was a bit more than I wanted to pay, but they were only up in Marblehead (about 45 minutes from me), and I had energy behind checking it off the fall to-do list.
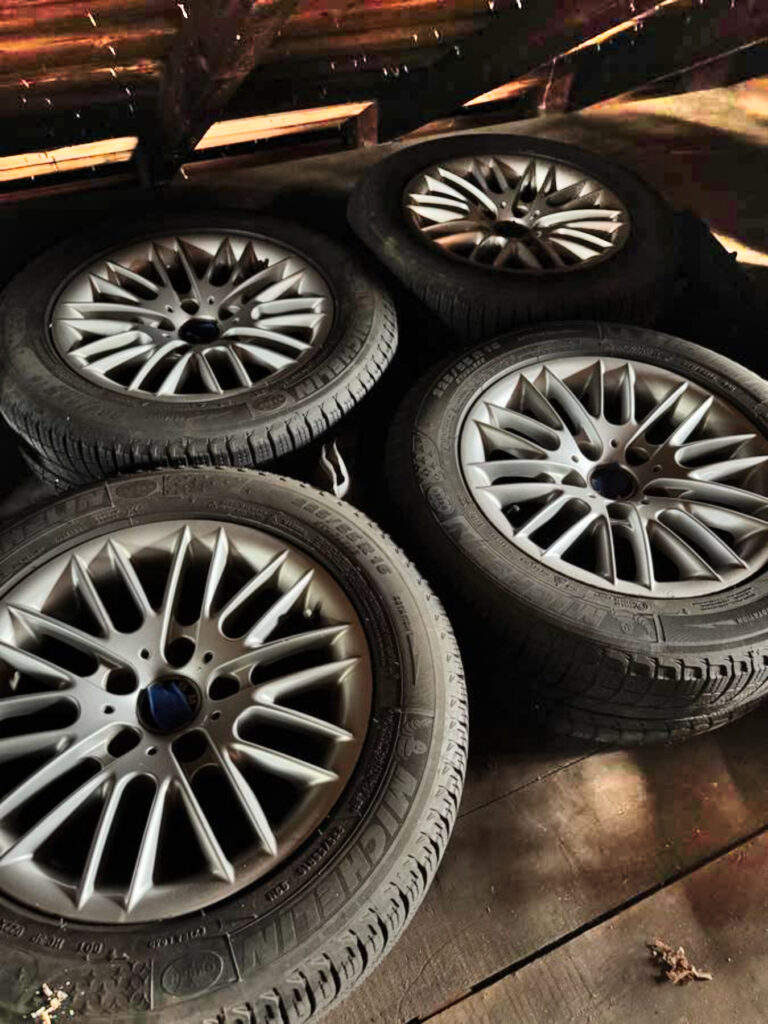
Nice looking wheels.
There wasn’t a tread depth measurement or a coin-in-the-tread pic, but the photo showing the tread certainly looked promising.

For $300, you’d go see these, right?
Once again, it came down to date codes. I swapped several messages with the seller. It turns out that it’s a small BMW world, and his father-in-law has a lovely Golf roundie 2002tii and owns my first book. The seller was representing the wheels for his brother, and they were located in the attic of their parents’ garage, so getting addition information required him to go back over there. I said that as long as the tires weren’t too old, I was quite interested. He said that they were probably a little more than five years old. I said that I didn’t have a hard and fast line on the age (it’s not that five years old was good but six wasn’t), but that if he could find the date code, that would definitively answer the question.
Later that evening, he sent me this:
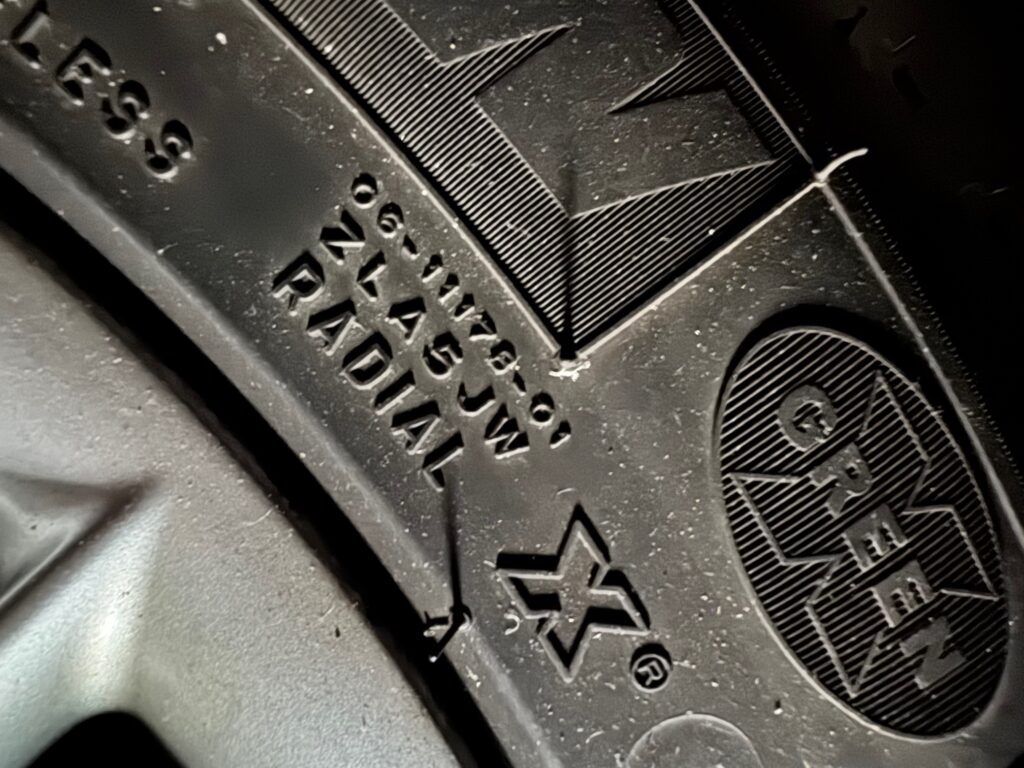
Nope.
And this:

Nope.
And this:
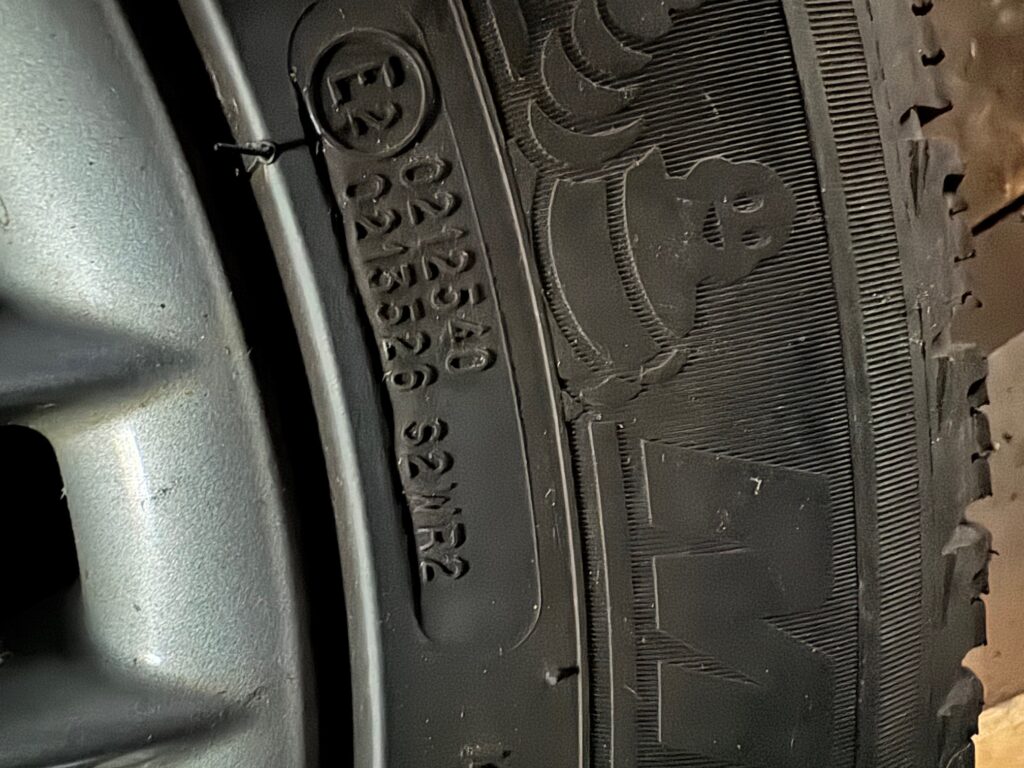
Nope.
I thought “yeah, none of these are date codes, but at least the sidewalls don’t show any dry rot.”
I looked on Michelin’s website, confirmed that the date code was of the four-digit “WWYY” variety, at the end of a string of letters and numbers that began with “DOT,” and sent that information to the seller. He said he’d try again to find it the following day.
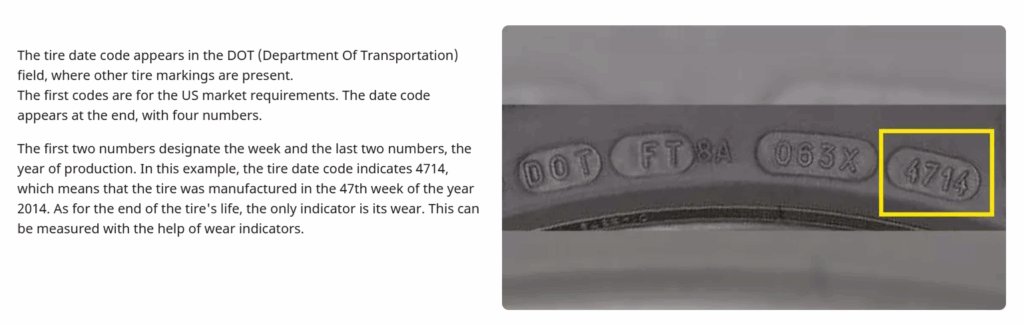
Right from the tire guy’s mouth. The Michelin Man has a mouth, right?
The next morning, the seller sent me this:
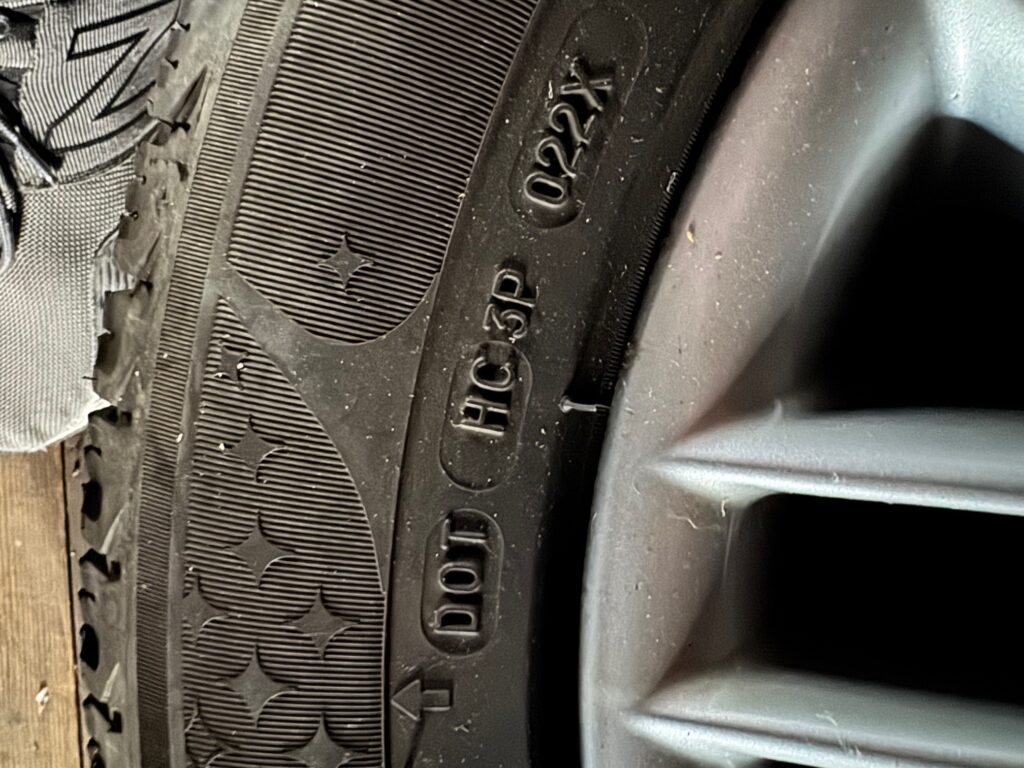
D’oh!
I saw that he was certainly trying. This wasn’t a lack of effort on his part. I replied “Yeah, this can be maddening, and I have no idea why there’s that DOT line without a real date code on the end, but there absolutely has to be a valid WWYY date code on the tire.”
Finally I said “Why don’t I just come over and have a look?” So on Saturday morning, I had a lovely drive in the E39 up to Marblehead. I met the seller, and we climbed the steep stairs up to the attic above the garage. The tires really did look good. I poked my tread depth gauge into all four. They all read between 8/32 and 9/32. As long as they weren’t too old, I was prepared to come home with them.
It took me a little while to find the date code, but when I did, my heart sank. It read 3214. These nice-looking tires were eleven years old.
The wheels were really nice, and part of me thought about making a low offer and being done with the hunt, but I wasn’t there for nice-looking wheels. I was there for a set of snow tires that was better than the ones I had. These weren’t them. The seller was a nice guy, but it still was a complete waste of time that should’ve been avoided.
My wife and I joke about how, when she goes to the supermarket and gets sliced meat or cheese, she asks the person behind the counter to hold up the first slice so she can inspect it, and how that means she’s turned into her parents. It’s not that my parents were difficult people regarding date codes on used tires, but I’ve now turned into the hard-ass car guy who is going to go full Rain Man on people and tell them “I’m not going to come look at your tires unless you can find the date code and tell me what it says.”
—Rob Siegel
____________________________________
Rob’s latest book, The Best of The Hack Mechanic, is available here on Amazon, as are his seven other books, including Just Needs a Recharge: The Hack Mechanic Guide to Vintage Air Conditioning. Signed copies can be ordered directly from Rob here.
The post The Annual Used Wheel and Snow Tire Search appeared first on BimmerLife.
]]>